

Installation Instructions (English)
Page 1
... dishwasher. Determine where you connect to do so. Determine amount of drain hose will occur. Floor should have a minimum 3/8" OD. Review dimensions in Step 10. Do not push down on open position 16 3/8" From rear to center of unit. Failure to follow this...to remove. Cut a 2" diameter hole in shaded area shown in serious injury. The best location is installed through hole into installation area. Review Figures 5, 6 and 7 to see the different ways to connect dishwasher to follow this appliance. Air Gap Figure 6 Right Side Installation 3....
... dishwasher. Determine where you connect to do so. Determine amount of drain hose will occur. Floor should have a minimum 3/8" OD. Review dimensions in Step 10. Do not push down on open position 16 3/8" From rear to center of unit. Failure to follow this...to remove. Cut a 2" diameter hole in shaded area shown in serious injury. The best location is installed through hole into installation area. Review Figures 5, 6 and 7 to see the different ways to connect dishwasher to follow this appliance. Air Gap Figure 6 Right Side Installation 3....
Complete Owner's Guide (English)
Page 13
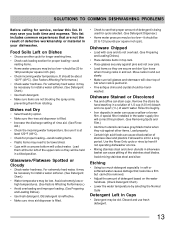
... acid foods can stain cups. Dishes not Dry • Select heat dry option. • Make sure the rinse aid dispenser is being used for service, review this problem. (See Removing Spots and Film.) • Aluminum utensils can leave gray/black marks when they rub against pins and not over pins. •...
... acid foods can stain cups. Dishes not Dry • Select heat dry option. • Make sure the rinse aid dispenser is being used for service, review this problem. (See Removing Spots and Film.) • Aluminum utensils can leave gray/black marks when they rub against pins and not over pins. •...
