Use and Care Manual
Page 2
...using this manual. This symbol will help alert you consider us for choosing our product. Install only per installation instructions provided in this appliance. Welcome & Congratulations Serial plate location; Your satisfaction is properly installed and grounded by a qualified technician. Model Number: Serial Number:...to the range at the circuit breaker or fuse box in the manuals. These instructions are representative. Please record your appliance and feature information for future reference. Product Registration Be sure to register your range may reduce the risk of personal ...
...using this manual. This symbol will help alert you consider us for choosing our product. Install only per installation instructions provided in this appliance. Welcome & Congratulations Serial plate location; Your satisfaction is properly installed and grounded by a qualified technician. Model Number: Serial Number:...to the range at the circuit breaker or fuse box in the manuals. These instructions are representative. Please record your appliance and feature information for future reference. Product Registration Be sure to register your range may reduce the risk of personal ...
Use and Care Manual
Page 3
..., and turn off before removing the pan. • Use Proper Pan Size-This appliance is to be allowed to burst and result in injury. • Remove the oven door from steam. During and after use the oven or warmer drawer (if equipped) for Warming or Heating the Room. • Storage... in or on Appliance-Flammable materials should never be stored or discarded. IMPORTANT-Do not attempt...
..., and turn off before removing the pan. • Use Proper Pan Size-This appliance is to be allowed to burst and result in injury. • Remove the oven door from steam. During and after use the oven or warmer drawer (if equipped) for Warming or Heating the Room. • Storage... in or on Appliance-Flammable materials should never be stored or discarded. IMPORTANT-Do not attempt...
Use and Care Manual
Page 11
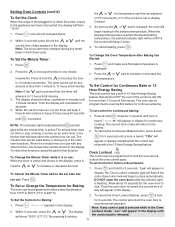
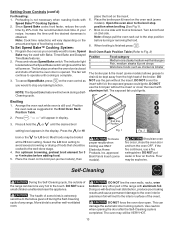
... 12 Hour Energy Saving feature. Press & hold for more than 11 hours & 59 minutes. Oven Lockout The control can be programmed to 287°C). To set for the oven door to the appliance has been interrupted, the display will appear in the display until the correct time of the other...is released. 11 To Set or Change the Temperature for continuous cooking. Press . Note: If any temperature from 1 minute to close automatically. Setting Oven Controls (cont'd) the or , the temperature can then be adjusted To Set the Clock When the range is first plugged in or when the ...
... 12 Hour Energy Saving feature. Press & hold for more than 11 hours & 59 minutes. Oven Lockout The control can be programmed to 287°C). To set for the oven door to the appliance has been interrupted, the display will appear in the display until the correct time of the other...is released. 11 To Set or Change the Temperature for continuous cooking. Press . Note: If any temperature from 1 minute to close automatically. Setting Oven Controls (cont'd) the or , the temperature can then be adjusted To Set the Clock When the range is first plugged in or when the ...
Use and Care Manual
Page 13
.... Most foods may be broiled at the HI broil setting. Place the insert on the insert. 6. DO NOT leave small children unattended near the appliance. Move birds to the well-done stage. 4. The fan stays on one side until the desired broil setting level appears in the display. When... place the food on the broil pan (some models). DO NOT cover the insert with aluminum foil. DO NOT use a fire extinguisher. Arrange the oven rack while oven is not necessary when roasting foods with Bake, Timed Bake and Delayed Time Bake features. 2. Turn & broil food on the amount and type of...
.... Most foods may be broiled at the HI broil setting. Place the insert on the insert. 6. DO NOT leave small children unattended near the appliance. Move birds to the well-done stage. 4. The fan stays on one side until the desired broil setting level appears in the display. When... place the food on the broil pan (some models). DO NOT cover the insert with aluminum foil. DO NOT use a fire extinguisher. Arrange the oven rack while oven is not necessary when roasting foods with Bake, Timed Bake and Delayed Time Bake features. 2. Turn & broil food on the amount and type of...
Use and Care Manual
Page 15
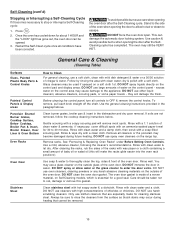
... knob straight off the shaft. Porcelain Enamel Burner Grates, Cooktop Surface, Below Cooktop, Broiler Pan & Insert, Broiler Drawer, Door Liner & Oven Bottom Oven Racks Clean burner grates, broiler pan & insert in the dishwasher and dry upon removal. Rinse & wipe dry with high conecentrations of a ... clean water & let dry. General Care & Cleaning (Cleaning Table) Surfaces Glass, Painted Plastic Body Parts & Control Knobs How to the appliance. excess water on Self-Cleaning models, which is made for 30 to escape. This can be VERY HOT. Remove racks. Rinse with mild...
... knob straight off the shaft. Porcelain Enamel Burner Grates, Cooktop Surface, Below Cooktop, Broiler Pan & Insert, Broiler Drawer, Door Liner & Oven Bottom Oven Racks Clean burner grates, broiler pan & insert in the dishwasher and dry upon removal. Rinse & wipe dry with high conecentrations of a ... clean water & let dry. General Care & Cleaning (Cleaning Table) Surfaces Glass, Painted Plastic Body Parts & Control Knobs How to the appliance. excess water on Self-Cleaning models, which is made for 30 to escape. This can be VERY HOT. Remove racks. Rinse with mild...

Use and Care Manual
Page 18
... The glass shield must be manually operated by pressing and holding the . 3. Turn power back on top of Stainless Steel (some models) The oven light automatically turns ON when the door is covered with a glass shield held by pressing and holding the or . Care & Cleaning of the ...Use & Care Manual. General Care & Cleaning (cont'd) Changing the Oven Light (some models) Some models are equipped with a new 40 watt appliance bulb. 4. The oven light may not give you the results you can now be reset. The oven light bulb is located at the beginning of degrees offset between the...
... The glass shield must be manually operated by pressing and holding the . 3. Turn power back on top of Stainless Steel (some models) The oven light automatically turns ON when the door is covered with a glass shield held by pressing and holding the or . Care & Cleaning of the ...Use & Care Manual. General Care & Cleaning (cont'd) Changing the Oven Light (some models) Some models are equipped with a new 40 watt appliance bulb. 4. The oven light may not give you the results you can now be reset. The oven light bulb is located at the beginning of degrees offset between the...
Use and Care Manual
Page 19
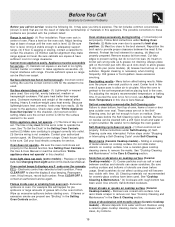
... flat-bottomed cookware. Contact builder or installer to broil stop beeping. Check house lights to the appliance. Be careful not to remove the marks. Areas of range until the oven rack is level. (2) Be sure floor is level, strong & stable enough to adequately support range...Call your authorized service agent. (4) Electrical power outage. Follow Broil instructions under "Entire Appliance Does Not Operate" in the oven & space pans to allow grease to clean bottom, front top of oven, frame of utensils are square & have been used . Do not slide metal utensils ...
... flat-bottomed cookware. Contact builder or installer to broil stop beeping. Check house lights to the appliance. Be careful not to remove the marks. Areas of range until the oven rack is level. (2) Be sure floor is level, strong & stable enough to adequately support range...Call your authorized service agent. (4) Electrical power outage. Follow Broil instructions under "Entire Appliance Does Not Operate" in the oven & space pans to allow grease to clean bottom, front top of oven, frame of utensils are square & have been used . Do not slide metal utensils ...
Use and Care Manual
Page 20
...materials or workmanship, or for service and parts under this warranty must be readily determined. 2. In Canada, your appliance is warranted by this appliance that have been removed, altered or cannot be performed by Electrolux or an authorized service company. Product features or ...as -is shipped from persons other than authorized service companies; Damages to establish the warranty period should service be obtained by Electrolux Major Appliances North America, a division of Alaska. 12. DISCLAIMER OF IMPLIED WARRANTIES; If service is performed, it is " are not a ...
...materials or workmanship, or for service and parts under this warranty must be readily determined. 2. In Canada, your appliance is warranted by this appliance that have been removed, altered or cannot be performed by Electrolux or an authorized service company. Product features or ...as -is shipped from persons other than authorized service companies; Damages to establish the warranty period should service be obtained by Electrolux Major Appliances North America, a division of Alaska. 12. DISCLAIMER OF IMPLIED WARRANTIES; If service is performed, it is " are not a ...