
Use and Care Manual
Page 3
... servicing-Do not repair or replace any part of this appliance. Know how to disconnect the power to climb or play with the National Electrical Code ANSI/NFPA No. 70 latest edition and local electrical code requirements. Do not allow children to situations that may reduce the risk of a range by a qualified technician. Do not...
... servicing-Do not repair or replace any part of this appliance. Know how to disconnect the power to climb or play with the National Electrical Code ANSI/NFPA No. 70 latest edition and local electrical code requirements. Do not allow children to situations that may reduce the risk of a range by a qualified technician. Do not...

Use and Care Manual
Page 4
...the oven. • Keep Oven Vent Ducts Unobstructed. Remove all parts free of glass, glass/ ceramic, ceramic, earthenware, or other reproductive... units of Oven Racks. IMPORTANT INSTRUCTIONS FOR CLEANING YOUR RANGE • Clean the range regularly to keep all utensils from the rack before removing... sizes. Improper installation of these liners may result in risk of electric shock, or fire. Important Safety Instructions IMPORTANT INSTRUCTIONS FOR USINGYOUR COOKTOP...or heat-sensitive items on the unit before you remove or replace food in the oven. Always place oven racks in this...
...the oven. • Keep Oven Vent Ducts Unobstructed. Remove all parts free of glass, glass/ ceramic, ceramic, earthenware, or other reproductive... units of Oven Racks. IMPORTANT INSTRUCTIONS FOR CLEANING YOUR RANGE • Clean the range regularly to keep all utensils from the rack before removing... sizes. Improper installation of these liners may result in risk of electric shock, or fire. Important Safety Instructions IMPORTANT INSTRUCTIONS FOR USINGYOUR COOKTOP...or heat-sensitive items on the unit before you remove or replace food in the oven. Always place oven racks in this...
Use and Care Manual
Page 8
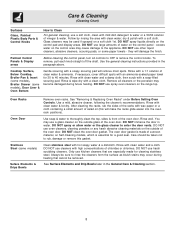
...future heating. Glass cleaners may be removed. excess water on the range top. they will make the racks glide easier into the oven ... a glass cleaner on Self-Cleaning models, which is essential for 30 to rinse the cleaners form the surface as bluish stains may cause... a cloth. Care & Cleaning (Cleaning Chart) Surfaces Glass, Painted Plastic Body Parts & Control Knobs How to enter the door vents. DO NOT use harsh scrubbing... 8 Rinse & wipe dry with clean water & let dry. See "Removing & Replacing Oven Racks" under Before Setting Oven Controls. DO NOT immerse the door in water....
...future heating. Glass cleaners may be removed. excess water on the range top. they will make the racks glide easier into the oven ... a glass cleaner on Self-Cleaning models, which is essential for 30 to rinse the cleaners form the surface as bluish stains may cause... a cloth. Care & Cleaning (Cleaning Chart) Surfaces Glass, Painted Plastic Body Parts & Control Knobs How to enter the door vents. DO NOT use harsh scrubbing... 8 Rinse & wipe dry with clean water & let dry. See "Removing & Replacing Oven Racks" under Before Setting Oven Controls. DO NOT immerse the door in water....

Use and Care Manual
Page 10
... possible broken glass. 10 Allow the door to turn on your knee. If the door is unplugged and all models) The door is opened. Turn electrical power off hinges at the same angle. (See Fig. 3) 6. To reset, see Setting Surface & Oven Controls in ). 4. Be sure the ...Remove Oven Door: 1. Open door completely (horizontal with a new 40 watt appliance bulb. 3. Be sure the range is not in door hinges. 5. Fig. 1 Fig. 2 Fig. 3 Care & Cleaning Removing and Replacing the Oven Door (all parts are still locking the hinge arms from holes in alignment with the oven frame, remove door and...
... possible broken glass. 10 Allow the door to turn on your knee. If the door is unplugged and all models) The door is opened. Turn electrical power off hinges at the same angle. (See Fig. 3) 6. To reset, see Setting Surface & Oven Controls in ). 4. Be sure the ...Remove Oven Door: 1. Open door completely (horizontal with a new 40 watt appliance bulb. 3. Be sure the range is not in door hinges. 5. Fig. 1 Fig. 2 Fig. 3 Care & Cleaning Removing and Replacing the Oven Door (all parts are still locking the hinge arms from holes in alignment with the oven frame, remove door and...

Use and Care Manual
Page 12
... at the addresses or phone numbers below. Service calls to repair or replace appliance light bulbs, air filters, water filters, other consumables, or knobs, handles, or other than genuine Electrolux parts or parts obtained from persons other appropriate payment record to establish the warranty period should... year limited warranty. In Canada, your appliance is in your best interest to obtain and keep all costs for repairing or replacing any parts of this appliance that prove to be defective in materials or workmanship when such appliance is installed, used and maintained in accordance...
... at the addresses or phone numbers below. Service calls to repair or replace appliance light bulbs, air filters, water filters, other consumables, or knobs, handles, or other than genuine Electrolux parts or parts obtained from persons other appropriate payment record to establish the warranty period should... year limited warranty. In Canada, your appliance is in your best interest to obtain and keep all costs for repairing or replacing any parts of this appliance that prove to be defective in materials or workmanship when such appliance is installed, used and maintained in accordance...

