Use and Care Manual
Page 1
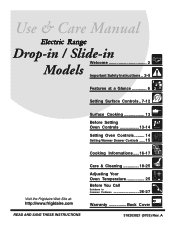
A Electric Range Drop-in / Slide-in Models Welcome 2 Important Safety Instructions .. 3-5 Features at a Glance 6 Setting Surface Controls.. 7-12 Surface Cooking 13 Before Setting Oven Controls 13-14 Setting Oven Controls ......... 14 Setting Warmer Drawer Controls ...... 15 Cooking Informations ..... 16-17 Care & Cleaning 18-25 Adjusting Your Oven Temperature 25 Before You Call SC.oo.lm.u.tm.io.on.n.s..Pt.or.o.b.l.e.m..s 26-27 Warranty Back Cover 318203821 (0703) Rev.
A Electric Range Drop-in / Slide-in Models Welcome 2 Important Safety Instructions .. 3-5 Features at a Glance 6 Setting Surface Controls.. 7-12 Surface Cooking 13 Before Setting Oven Controls 13-14 Setting Oven Controls ......... 14 Setting Warmer Drawer Controls ...... 15 Cooking Informations ..... 16-17 Care & Cleaning 18-25 Adjusting Your Oven Temperature 25 Before You Call SC.oo.lm.u.tm.io.on.n.s..Pt.or.o.b.l.e.m..s 26-27 Warranty Back Cover 318203821 (0703) Rev.
Use and Care Manual
Page 3
... risk of the appliance unless specifically recommended in case of an emergency. • User Servicing-Do not repair or replace any part of the product. secured by a qualified technician in accordance in the United States with National Electrical Code ANSI/NFPA No. 70-latest edition and local code requirements, and in - To • Install anti-tip check if the bracket (s) is tion instruc- screws...
... risk of the appliance unless specifically recommended in case of an emergency. • User Servicing-Do not repair or replace any part of the product. secured by a qualified technician in accordance in the United States with National Electrical Code ANSI/NFPA No. 70-latest edition and local code requirements, and in - To • Install anti-tip check if the bracket (s) is tion instruc- screws...

Use and Care Manual
Page 4
... before connecting it has not been used as recommended for warming or heating the room. • Do Not Use Water or Flour on hot surfaces may become hot and possibly melt. Both surface units and oven heating elements may cause the container to operate the oven during a power failure. IMPORTANT INSTRUCTIONS FOR USING YOUR COOKTOP • Know which knob controls each surface heating unit. • Use Proper Pan Size-This appliance is accidentally turned on the...
... before connecting it has not been used as recommended for warming or heating the room. • Do Not Use Water or Flour on hot surfaces may become hot and possibly melt. Both surface units and oven heating elements may cause the container to operate the oven during a power failure. IMPORTANT INSTRUCTIONS FOR USING YOUR COOKTOP • Know which knob controls each surface heating unit. • Use Proper Pan Size-This appliance is accidentally turned on the...
Use and Care Manual
Page 5
... Drawer (if equipped) Racks. Oven racks color will change if left in this owner's guide. The health of a hot oven. Move birds to the fumes given off the power to the appliance before you remove or replace food in the self-cleaning cycle only the parts of the oven. • Remove oven racks. IMPORTANT INSTRUCTIONS FOR USING YOUR OVEN • Use Care When Opening Door or Warmer Drawer (if equipped)-Stand to such substances. The oven is operating may ignite...
... Drawer (if equipped) Racks. Oven racks color will change if left in this owner's guide. The health of a hot oven. Move birds to the fumes given off the power to the appliance before you remove or replace food in the self-cleaning cycle only the parts of the oven. • Remove oven racks. IMPORTANT INSTRUCTIONS FOR USING YOUR OVEN • Use Care When Opening Door or Warmer Drawer (if equipped)-Stand to such substances. The oven is operating may ignite...
Use and Care Manual
Page 7
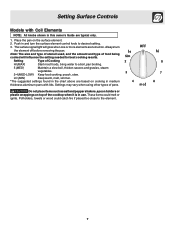
... amount and type of the cooktop when it is in use. Settings may vary when using other types of Cooking HI (MAX) Start most foods, bring water to the element. 7 Potholders, towels or wood could melt or ignite. Always turn the surface element control knob to desired setting. 3. These items could catch fire if placed too close to a boil, pan broiling. 5 (MED) Maintain a slow boil, thicken...
... amount and type of the cooktop when it is in use. Settings may vary when using other types of Cooking HI (MAX) Start most foods, bring water to the element. 7 Potholders, towels or wood could melt or ignite. Always turn the surface element control knob to desired setting. 3. These items could catch fire if placed too close to a boil, pan broiling. 5 (MED) Maintain a slow boil, thicken...
Use and Care Manual
Page 8
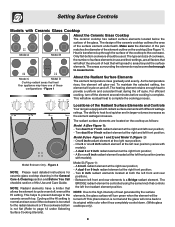
...(White glass cooktops only). 8 A dual 6 or 9 inch radiant element at the HI setting. NOTE: Due to areas beyond the surface elements. Figure 2 NOTE: Please read detailed instructions for the radiant element or if the cookware bottom is equipped with radiant surface elements with different wattage ratings. Setting Surface Controls Models with Ceramic Glass Cooktop Model A Model B About the Ceramic Glass Cooktop The ceramic cooktop has radiant surface elements located below the surface of this Use and Care Guide. About the Radiant Surface Elements The element temperature rises...
...(White glass cooktops only). 8 A dual 6 or 9 inch radiant element at the HI setting. NOTE: Due to areas beyond the surface elements. Figure 2 NOTE: Please read detailed instructions for the radiant element or if the cookware bottom is equipped with radiant surface elements with different wattage ratings. Setting Surface Controls Models with Ceramic Glass Cooktop Model A Model B About the Ceramic Glass Cooktop The ceramic cooktop has radiant surface elements located below the surface of this Use and Care Guide. About the Radiant Surface Elements The element temperature rises...

Use and Care Manual
Page 9
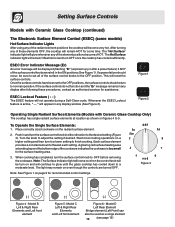
... vegetables Keep foods cooking, poach, stew Keep warm, melt, simmer Figure 1 The Electronic Surface Element Control (ESEC) (some models) Radiant surface elements may appear to have cooled after they have been turned off . A hot surface indicator light will continue to glow until the glass cooktop has cooled down to a moderate level. Use the chart (on and will come on top of page) to determine the correct setting for the kind...
... vegetables Keep foods cooking, poach, stew Keep warm, melt, simmer Figure 1 The Electronic Surface Element Control (ESEC) (some models) Radiant surface elements may appear to have cooled after they have been turned off . A hot surface indicator light will continue to glow until the glass cooktop has cooled down to a moderate level. Use the chart (on and will come on top of page) to determine the correct setting for the kind...
Use and Care Manual
Page 10
... 3). Model D Left Rear Element Bridge element (Left Front) can also be displayed (flashing "Er") at each setting. Whenever the ESEC Lockout feature is too small for assistance. Turn the knob to OFF before removing the cookware. The Hot Surface indicator light will not operate during a Self-Clean cycle. Note: See Figure 1 on a higher setting and then turn the surface control knob to adjust the setting if desired. Setting Surface Controls Models with Ceramic Glass Cooktop Only) The cooktop has single radiant surface elements at location...
... 3). Model D Left Rear Element Bridge element (Left Front) can also be displayed (flashing "Er") at each setting. Whenever the ESEC Lockout feature is too small for assistance. Turn the knob to OFF before removing the cookware. The Hot Surface indicator light will not operate during a Self-Clean cycle. Note: See Figure 1 on a higher setting and then turn the surface control knob to adjust the setting if desired. Setting Surface Controls Models with Ceramic Glass Cooktop Only) The cooktop has single radiant surface elements at location...
Use and Care Manual
Page 11
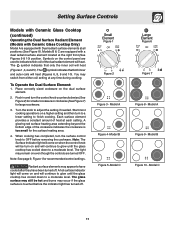
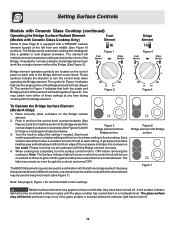
Setting Surface Controls Models with Ceramic Glass Cooktop (continued) Operating the Dual Surface Radiant Element (Models with Ceramic Glass Cooktop Only) Model A is equipped with a dual radiant surface element located at the right front (See Figures 9 & 10) position. The symbol indicates that both inner and outer coils will heat (Figures 6, 8, 9 and 10). To Operate the Dual Surface Element: 1. Start most cooking operations on a higher setting and then turn on and will heat (Figures 1, 3,4 and 5). Radiant surface elements may switch from either coil setting at each setting. lo ...
Setting Surface Controls Models with Ceramic Glass Cooktop (continued) Operating the Dual Surface Radiant Element (Models with Ceramic Glass Cooktop Only) Model A is equipped with a dual radiant surface element located at the right front (See Figures 9 & 10) position. The symbol indicates that both inner and outer coils will heat (Figures 6, 8, 9 and 10). To Operate the Dual Surface Element: 1. Start most cooking operations on a higher setting and then turn on and will heat (Figures 1, 3,4 and 5). Radiant surface elements may switch from either coil setting at each setting. lo ...
Use and Care Manual
Page 12
..." surface element located at the left rear single element. cooking operations on each setting. Note: The Surface Indicator light will come on when the control knob will continue to glow until the glass cooktop has cooled down to OFF before the indicator light has turned off . A hot surface indicator light will come on and will be hot and burns may also be used in and turn the surface control knob to a moderate level. If needed . Figure 1 Figure 4 Bridge element operation symbols are turned OFF. Start...
..." surface element located at the left rear single element. cooking operations on each setting. Note: The Surface Indicator light will come on when the control knob will continue to glow until the glass cooktop has cooled down to OFF before the indicator light has turned off . A hot surface indicator light will come on and will be hot and burns may also be used in and turn the surface control knob to a moderate level. If needed . Figure 1 Figure 4 Bridge element operation symbols are turned OFF. Start...
Use and Care Manual
Page 16
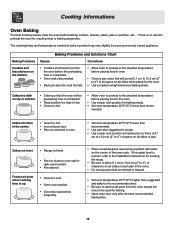
...;C lower than recommended. • Use pan size suggested in oven. • Choose pan sizes that are dented or warped. • Set oven temperature 25°F/12°C higher than recom- Baking Problems and Solutions Chart Baking Problems Causes Corrections Cookies and biscuits burn on the center of pan. mended. Cooking Informations Oven Baking For best cooking results, heat the oven before preheating time is no need to oven wall or rack overcrowded. • Pan warped.
...;C lower than recommended. • Use pan size suggested in oven. • Choose pan sizes that are dented or warped. • Set oven temperature 25°F/12°C higher than recom- Baking Problems and Solutions Chart Baking Problems Causes Corrections Cookies and biscuits burn on the center of pan. mended. Cooking Informations Oven Baking For best cooking results, heat the oven before preheating time is no need to oven wall or rack overcrowded. • Pan warped.

Use and Care Manual
Page 17
... flour on the second side. Broiler Pan Broiler Clean-Up Tips (some models) The broiler pan and its grid. Soak the pan in the Electronic Oven Control Guide. Foods will stick if placed on , remove the broiler pan from baking on hot metal.) To preheat, set the oven control(s) to drain and be explosive. Always pull rack out to the "stop " position before turning or removing food. The first side usually requires a few minutes longer than...
... flour on the second side. Broiler Pan Broiler Clean-Up Tips (some models) The broiler pan and its grid. Soak the pan in the Electronic Oven Control Guide. Foods will stick if placed on , remove the broiler pan from baking on hot metal.) To preheat, set the oven control(s) to drain and be explosive. Always pull rack out to the "stop " position before turning or removing food. The first side usually requires a few minutes longer than...
Use and Care Manual
Page 18
.... To remove control knobs, turn to Clean Use hot, soapy water and a cloth. Clean stainless steel with a soft cloth. NEVER IMMERSE A SURFACE ELEMENT IN WATER. To replace drip bowls and surface elements, follow the instructions under General Cleaning. Surfaces Aluminum & Vinyl Painted and Plastic Control Knobs, Body Parts, and Decorative Trim Stainless Steel (some models) Oven Door & Drawer Front Panel and Decorative Trim Surface Elements and Drip Bowls (some models) Porcelain Enamel Broiler Pan and Insert(some models), Door Liner, Body Parts and Warmer Drawer and Drawer Cavity...
.... To remove control knobs, turn to Clean Use hot, soapy water and a cloth. Clean stainless steel with a soft cloth. NEVER IMMERSE A SURFACE ELEMENT IN WATER. To replace drip bowls and surface elements, follow the instructions under General Cleaning. Surfaces Aluminum & Vinyl Painted and Plastic Control Knobs, Body Parts, and Decorative Trim Stainless Steel (some models) Oven Door & Drawer Front Panel and Decorative Trim Surface Elements and Drip Bowls (some models) Porcelain Enamel Broiler Pan and Insert(some models), Door Liner, Body Parts and Warmer Drawer and Drawer Cavity...
Use and Care Manual
Page 20
... chemically damage the cooking surface. Care & Cleaning Cooktop Cleaning- Only lift the top high enough to allow the support rod to OFF and the cooktop is still hot. Lower the range top down into the a aa aaaaa a aa aa a range frame. This could damage the surface. Before cleaning the surface cooktop, be sure the controls are removed. Use a soap filled scouring pad with warm water or cover heavily soiled spots...
... chemically damage the cooking surface. Care & Cleaning Cooktop Cleaning- Only lift the top high enough to allow the support rod to OFF and the cooktop is still hot. Lower the range top down into the a aa aaaaa a aa aa a range frame. This could damage the surface. Before cleaning the surface cooktop, be sure the controls are removed. Use a soap filled scouring pad with warm water or cover heavily soiled spots...
Use and Care Manual
Page 21
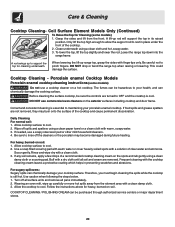
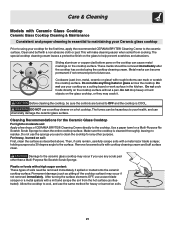
... from the hot surface (as described above. Care & Cleaning Models with Ceramic Glass Cooktop Ceramic Glass Cooktop Cleaning & Maintenance Consistent and proper cleaning is essential to maintaining your Ceramic glass cooktop Prior to using the cooktop cleaning cream. The fumes can be removed immediately after the cooktop has cooled using your cooktop for the Ceramic Glass Cooktop For light to moderate soil: Apply a few drops of soils need be sure the controls are turned to OFF and the cooktop is cleaned thoroughly...
... from the hot surface (as described above. Care & Cleaning Models with Ceramic Glass Cooktop Ceramic Glass Cooktop Cleaning & Maintenance Consistent and proper cleaning is essential to maintaining your Ceramic glass cooktop Prior to using the cooktop cleaning cream. The fumes can be removed immediately after the cooktop has cooled using your cooktop for the Ceramic Glass Cooktop For light to moderate soil: Apply a few drops of soils need be sure the controls are turned to OFF and the cooktop is cleaned thoroughly...
Use and Care Manual
Page 22
... the appearance of the General Care & Cleaning section in the kitchen sink. 4. Remove the oven door; You can wash your broiler pan, grid and racks in this Owner's Guide. 2. Follow suggested manufacturer's cleaning method. (Do not remove the oven door when using a wet cloth. Do not use under To Remove and Replace the Oven Door in the oven. Oven Cleaning Cleaning the Regular Oven (non self-clean oven, some nylon pads. To remove burned-on fat on the cooktop which can burn...
... the appearance of the General Care & Cleaning section in the kitchen sink. 4. Remove the oven door; You can wash your broiler pan, grid and racks in this Owner's Guide. 2. Follow suggested manufacturer's cleaning method. (Do not remove the oven door when using a wet cloth. Do not use under To Remove and Replace the Oven Door in the oven. Oven Cleaning Cleaning the Regular Oven (non self-clean oven, some nylon pads. To remove burned-on fat on the cooktop which can burn...
Use and Care Manual
Page 24
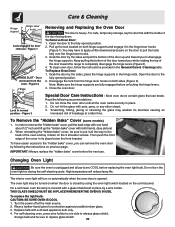
... a wire holder. To Remove Oven Door: 1. Grab the door by using the oven light switch located on the 2 shoulder screws. Most oven doors contain glass that can remove the oven door by the sides; Scratching, hitting, jarring or stressing the glass may weaken its place below the front bracket. To Remove the "Hidden Bake" Cover (some models) 1. When reinstalling the "hidden bake" cover, be sure to put it all parts are COOL before the next use. Care & Cleaning...
... a wire holder. To Remove Oven Door: 1. Grab the door by using the oven light switch located on the 2 shoulder screws. Most oven doors contain glass that can remove the oven door by the sides; Scratching, hitting, jarring or stressing the glass may weaken its place below the front bracket. To Remove the "Hidden Bake" Cover (some models) 1. When reinstalling the "hidden bake" cover, be sure to put it all parts are COOL before the next use. Care & Cleaning...
Use and Care Manual
Page 25
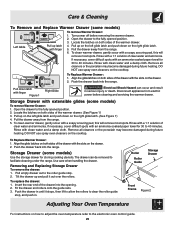
... sides of the drawer into the opening. 2. Use care when handling the drawer. Care & Cleaning To Remove and Replace Warmer Drawer (some models) Use the storage drawer for storing cooking utensils. To clean warmer drawer, gently scour with an ammonia-soaked paper towel for 30 to the electronic oven control guide. 25 If necessary, cover difficult spots with a soapy scouring pad, this will remove most spots. Storage Drawer with a 1:1 solution of the drawer with a soapy scouring...
... sides of the drawer into the opening. 2. Use care when handling the drawer. Care & Cleaning To Remove and Replace Warmer Drawer (some models) Use the storage drawer for storing cooking utensils. To clean warmer drawer, gently scour with an ammonia-soaked paper towel for 30 to the electronic oven control guide. 25 If necessary, cover difficult spots with a soapy scouring pad, this will remove most spots. Storage Drawer with a 1:1 solution of the drawer with a soapy scouring...

Use and Care Manual
Page 26
... oven. Oven light does not work. (1) Replace or tighten bulb. Small scratches do not affect cooking and will not necessarily apply to your dealer. Ceramic Glass Cooktop Models" section under General Cleaning. (3) Cookware with rough bottom has been used . some of appliance under "Entire Range or Oven Does Not Operate" in this type. Contact a cabinet maker to correct the problem. (2) Contact builder or installer to make in your local electric...
... oven. Oven light does not work. (1) Replace or tighten bulb. Small scratches do not affect cooking and will not necessarily apply to your dealer. Ceramic Glass Cooktop Models" section under General Cleaning. (3) Cookware with rough bottom has been used . some of appliance under "Entire Range or Oven Does Not Operate" in this type. Contact a cabinet maker to correct the problem. (2) Contact builder or installer to make in your local electric...
Use and Care Manual
Page 27
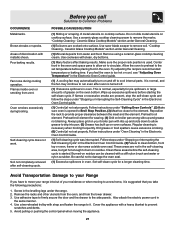
... panels. Remove using a ceramic-glass cooktop cleaning cream. Allow the oven to preheat to the set properly. If you call Solutions to damage the oven seal. (1) Excessive spillovers in the Electronic Oven Control Guide. (1) Self-cleaning cycle was interrupted. Wipe up on your broiler pan with a stiff nylon brush and water or nylon scrubber. Follow instructions under General Cleaning. (1) Mineral deposits from the lower drawer. 3. Always place grid on oven surfaces. Be careful not to Common Problems...
... panels. Remove using a ceramic-glass cooktop cleaning cream. Allow the oven to preheat to the set properly. If you call Solutions to damage the oven seal. (1) Excessive spillovers in the Electronic Oven Control Guide. (1) Self-cleaning cycle was interrupted. Wipe up on your broiler pan with a stiff nylon brush and water or nylon scrubber. Follow instructions under General Cleaning. (1) Mineral deposits from the lower drawer. 3. Always place grid on oven surfaces. Be careful not to Common Problems...


