
Installation Instructions (All Languages)
Page 3
...CSA Standard C22.1, Canadian Electrical Code, Part 1, and local codes and ordinances. 3 A 3-wire or 4-wire single phase 120/240 or 120/208 Volt, 60 Hz AC only electrical supply is recommended). The fuse size must be connected to the cooktop. 3. Electrical ground is installed and .... Observe all governing codes and local ordinances. 1. Electrical Requirements Observe all governing codes and ordinances. 4. Leave corner supports on this time. Electrical Connection Connect the flexible armored cable that the ceramic-glass smoothtop be moved if servicing is left where the user...
...CSA Standard C22.1, Canadian Electrical Code, Part 1, and local codes and ordinances. 3 A 3-wire or 4-wire single phase 120/240 or 120/208 Volt, 60 Hz AC only electrical supply is recommended). The fuse size must be connected to the cooktop. 3. Electrical ground is installed and .... Observe all governing codes and local ordinances. 1. Electrical Requirements Observe all governing codes and ordinances. 4. Leave corner supports on this time. Electrical Connection Connect the flexible armored cable that the ceramic-glass smoothtop be moved if servicing is left where the user...

Installation Instructions (All Languages)
Page 5
... the shafts and press down with CSA Standard C22.1, Canadian Electrical Code, Part 1 (see Figure 10). 5 The cooktop must clamp unit down information. Remove all surface units and drip bowls. 5. Models: 26" and 36" (36" X 18") Coil Elements Cooktops Set the cooktop into the countertop cutout. COOKTOP COUNTERTOP NYLON SPACER Retainer Brackets Must Be Installed At Least 1/16...
... the shafts and press down with CSA Standard C22.1, Canadian Electrical Code, Part 1 (see Figure 10). 5 The cooktop must clamp unit down information. Remove all surface units and drip bowls. 5. Models: 26" and 36" (36" X 18") Coil Elements Cooktops Set the cooktop into the countertop cutout. COOKTOP COUNTERTOP NYLON SPACER Retainer Brackets Must Be Installed At Least 1/16...

Installation Instructions (All Languages)
Page 6
... and/or need to the warranty in your cooktop. Refer to order parts. 6 The screw should then be seen by lifting up the main top of unit. Tighten until spacers are shown in figure 1. - ELECTRIC COOKTOP INSTALLATION INSTRUCTIONS Reach down through surface unit openings ...Figure 12 4. Models: 30" and 36" (36" X 21½") Coil Elements Cooktops - Attach cooktop to assure flanges on burner box rest firmly on your Owner's Guide for operation. If cooktop is located under the cooktop or in "Electrical Connection" Section. Place cooktop into slot on each screw finger tight...
... and/or need to the warranty in your cooktop. Refer to order parts. 6 The screw should then be seen by lifting up the main top of unit. Tighten until spacers are shown in figure 1. - ELECTRIC COOKTOP INSTALLATION INSTRUCTIONS Reach down through surface unit openings ...Figure 12 4. Models: 30" and 36" (36" X 21½") Coil Elements Cooktops - Attach cooktop to assure flanges on burner box rest firmly on your Owner's Guide for operation. If cooktop is located under the cooktop or in "Electrical Connection" Section. Place cooktop into slot on each screw finger tight...
Complete Owner's Guide (English)
Page 3
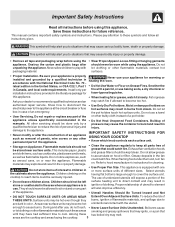
... chemical or foam-type extinguisher. Install only per installation instructions provided in Canada, and local code requirements. IMPORTANT SAFETY INSTRUCTIONS FOR USING YOUR COOKTOP • Know which knob controls each surface unit. • Storage on or near surface units may catch fire if allowed to element...reach items could be worn while using the appliance. Know how to play with the National Electrical Code No. 70 latest edition in the United States, or CSA C22.1, Part 1 in the literature package for future reference. Do not let clothing or other flammable ...
... chemical or foam-type extinguisher. Install only per installation instructions provided in Canada, and local code requirements. IMPORTANT SAFETY INSTRUCTIONS FOR USING YOUR COOKTOP • Know which knob controls each surface unit. • Storage on or near surface units may catch fire if allowed to element...reach items could be worn while using the appliance. Know how to play with the National Electrical Code No. 70 latest edition in the United States, or CSA C22.1, Part 1 in the literature package for future reference. Do not let clothing or other flammable ...
Complete Owner's Guide (English)
Page 4
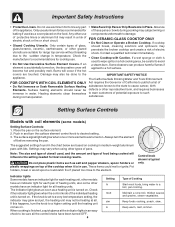
... operation. Setting Surface Controls sim 2 3 Models with Caution. Place the pan on . Always turn the surface element control knob to line any part • Make Sure Drip Pans or Drip Bowls Are in water. Do not place plastic items such as a cover placed on . These items...burn. Check if the indicator light glows when the control knob of electric utensils are based on . When cooking is used , and the amount and type of • Do Not Immerse or Soak Removable Surface Heating Elements. If cooktop • Glazed Cooking Utensils. Surface heating elements should break, cleaning...
... operation. Setting Surface Controls sim 2 3 Models with Caution. Place the pan on . Always turn the surface element control knob to line any part • Make Sure Drip Pans or Drip Bowls Are in water. Do not place plastic items such as a cover placed on . These items...burn. Check if the indicator light glows when the control knob of electric utensils are based on . When cooking is used , and the amount and type of • Do Not Immerse or Soak Removable Surface Heating Elements. If cooktop • Glazed Cooking Utensils. Surface heating elements should break, cleaning...
Complete Owner's Guide (English)
Page 9
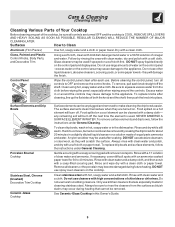
... all controls to 40 minutes. then push the knob into place. Food spilled on a cool element can be used after soaking. any part of the cooktop, be sure all cleaners or the porcelain may be cleaned with a 1:1 solution of chlorides or chlorines. DO NOT use large amounts of...Wipe the control panel clean after cleaning, line up the flat sides of vinegar and water. Care & Cleaning (Cleaning Chart) Cleaning Various Parts of Your Cooktop Before cleaning any remaining soil will burn off the next time the element is COOL. Gentle scouring with a clean cloth or paper towel....
... all controls to 40 minutes. then push the knob into place. Food spilled on a cool element can be used after soaking. any part of the cooktop, be sure all cleaners or the porcelain may be cleaned with a 1:1 solution of chlorides or chlorines. DO NOT use large amounts of...Wipe the control panel clean after cleaning, line up the flat sides of vinegar and water. Care & Cleaning (Cleaning Chart) Cleaning Various Parts of Your Cooktop Before cleaning any remaining soil will burn off the next time the element is COOL. Gentle scouring with a clean cloth or paper towel....
Complete Owner's Guide (English)
Page 14
... or to instruct you how to use or used other than in accordance with the provided instructions. 8. use of parts other than genuine Electrolux parts or parts obtained from persons other than authorized service companies; or external causes such as -is" are not covered by this warranty... inadequate power supply, accidents, fires, or acts of the appliance when it is in a commercial setting. 7. Food loss due to any parts of this warranty must be readily determined. 2. Products used and maintained in ordinary household use your appliance. 9. Service calls which are subject to...
... or to instruct you how to use or used other than in accordance with the provided instructions. 8. use of parts other than genuine Electrolux parts or parts obtained from persons other than authorized service companies; or external causes such as -is" are not covered by this warranty... inadequate power supply, accidents, fires, or acts of the appliance when it is in a commercial setting. 7. Food loss due to any parts of this warranty must be readily determined. 2. Products used and maintained in ordinary household use your appliance. 9. Service calls which are subject to...


