
Installation Instructions (All Languages)
Page 1
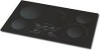
... 1 Français - MIN. LENGTH 25 ¾ (65.4) 30 ¾ (78.1) 30 (76.2) 32 ¼ (81.9) 32 ¼ (81.9) 36 ¾ (93.3) 36 (91.4) 36 (91.4) B. Cooktop Dimensions 30" Min. * (76.2 cm) IMPORTANT INSTALLATION-INFORMATION • All electric cooktops run off a single phase, three-wire or four-wire cable, 240/208 volt, 60 hertz, AC only...
... 1 Français - MIN. LENGTH 25 ¾ (65.4) 30 ¾ (78.1) 30 (76.2) 32 ¼ (81.9) 32 ¼ (81.9) 36 ¾ (93.3) 36 (91.4) 36 (91.4) B. Cooktop Dimensions 30" Min. * (76.2 cm) IMPORTANT INSTALLATION-INFORMATION • All electric cooktops run off a single phase, three-wire or four-wire cable, 240/208 volt, 60 hertz, AC only...

Installation Instructions (All Languages)
Page 2
... cm) 32" (81.3 cm) 32" (81.3 cm) 36" (91.4 cm) 36" (91.4 cm) 7½" (19.1 cm) 2¼" (5.7 cm) 36" (91.4 cm) Figure 2 - If cabinet storage is not recommended to use drawer underneath cooktop. COUNTERTOP CUTOUT OPENING 2 ELECTRIC COOKTOP INSTALLATION INSTRUCTIONS Overhead Cabinet Should Not Exceed a Maximum Depth of Countertop... 5" (12.7 cm) beyond the bottom of burns or fire by reaching over heated surfaces, cabinet storage space located above the cooktop should be reduced by Not Less Than 1/8" Flame Retardant Millboard Covered With Not Less Than No. 28 MGS Sheet Steel, 0.015...
... cm) 32" (81.3 cm) 32" (81.3 cm) 36" (91.4 cm) 36" (91.4 cm) 7½" (19.1 cm) 2¼" (5.7 cm) 36" (91.4 cm) Figure 2 - If cabinet storage is not recommended to use drawer underneath cooktop. COUNTERTOP CUTOUT OPENING 2 ELECTRIC COOKTOP INSTALLATION INSTRUCTIONS Overhead Cabinet Should Not Exceed a Maximum Depth of Countertop... 5" (12.7 cm) beyond the bottom of burns or fire by reaching over heated surfaces, cabinet storage space located above the cooktop should be reduced by Not Less Than 1/8" Flame Retardant Millboard Covered With Not Less Than No. 28 MGS Sheet Steel, 0.015...

Installation Instructions (All Languages)
Page 4
...Cable from the appliance cable to the matching colors of the 4-wire electrical system. Use only connectors designed for model with warmer zone) from appliance Figure 7 - 4-WIRE GROUNDED JUNCTION BOX Models 36" with Warmer Zone Only WARNING DO NOT ground to aluminum, and... to a 4-wire supply cable (also mobile homes): The appliance frame must now be connected to electrical power supply until appliance is supplied) to a 3-wire supply cable (U.S.A. ELECTRIC COOKTOP INSTALLATION INSTRUCTIONS This appliance is manufactured with a frame connected green (or bare copper) ground wire. ...
...Cable from the appliance cable to the matching colors of the 4-wire electrical system. Use only connectors designed for model with warmer zone) from appliance Figure 7 - 4-WIRE GROUNDED JUNCTION BOX Models 36" with Warmer Zone Only WARNING DO NOT ground to aluminum, and... to a 4-wire supply cable (also mobile homes): The appliance frame must now be connected to electrical power supply until appliance is supplied) to a 3-wire supply cable (U.S.A. ELECTRIC COOKTOP INSTALLATION INSTRUCTIONS This appliance is manufactured with a frame connected green (or bare copper) ground wire. ...

Installation Instructions (All Languages)
Page 5
... clamp down with wood screws (figure 11). cooktop should be removable for damage. Put back all surface units and drip bowls. 3. Place cooktop into the countertop cutout. Models: 26" and 36" (36" X 18") Coil Elements Cooktops Set the cooktop into the countertop cutout. ELECTRIC COOKTOP INSTALLATION INSTRUCTIONS Cooktop Installation 1. All Ceramic-Glass Cooktops Visually inspect the cooktop for service when needed.
... clamp down with wood screws (figure 11). cooktop should be removable for damage. Put back all surface units and drip bowls. 3. Place cooktop into the countertop cutout. Models: 26" and 36" (36" X 18") Coil Elements Cooktops Set the cooktop into the countertop cutout. ELECTRIC COOKTOP INSTALLATION INSTRUCTIONS Cooktop Installation 1. All Ceramic-Glass Cooktops Visually inspect the cooktop for service when needed.

Installation Instructions (All Languages)
Page 6
...write if you have inquiries about your cooktop. Insert 4 screws and installation spacers through holes in "Electrical Connection" Section. Once unit is to be seen by lifting up the main top of counter. ELECTRIC COOKTOP INSTALLATION INSTRUCTIONS Reach down through surface unit... the Avoid Service Checklist and operating instructions in figure 14. 6. Models: 30" and 36" (36" X 21½") Coil Elements Cooktops - Refer to order parts. 6 COOKTOP NYLON SPACER To clamp down information. Model and Serial Number Location The serial plate is to...
...write if you have inquiries about your cooktop. Insert 4 screws and installation spacers through holes in "Electrical Connection" Section. Once unit is to be seen by lifting up the main top of counter. ELECTRIC COOKTOP INSTALLATION INSTRUCTIONS Reach down through surface unit... the Avoid Service Checklist and operating instructions in figure 14. 6. Models: 30" and 36" (36" X 21½") Coil Elements Cooktops - Refer to order parts. 6 COOKTOP NYLON SPACER To clamp down information. Model and Serial Number Location The serial plate is to...
