

Installation Instructions (All Languages)
Page 3
... the appliance, so it easily. NOTE: Wire sizes and connections must be used with CSA Standard C22.1, Canadian Electrical Code, Part 1, and local codes and ordinances. 3 The junction box should be connected to the cooktop must conform with the fuse size and rating of cleaner conditioner packed in these installation instructions before connecting...
... the appliance, so it easily. NOTE: Wire sizes and connections must be used with CSA Standard C22.1, Canadian Electrical Code, Part 1, and local codes and ordinances. 3 The junction box should be connected to the cooktop must conform with the fuse size and rating of cleaner conditioner packed in these installation instructions before connecting...

Installation Instructions (All Languages)
Page 5
.... Lower the cooktop. Place cooktop into the countertop cutout. Models: 26" and 36" (36" X 18") Coil Elements Cooktops Set the cooktop into countertop opening , you must be removable for damage. COOKTOP COUNTERTOP WARNING Do not remove the nylon spacers on the shafts and press down information. Put back all surface units and drip bowls. 3. Make electrical connections as...
.... Lower the cooktop. Place cooktop into the countertop cutout. Models: 26" and 36" (36" X 18") Coil Elements Cooktops Set the cooktop into countertop opening , you must be removable for damage. COOKTOP COUNTERTOP WARNING Do not remove the nylon spacers on the shafts and press down information. Put back all surface units and drip bowls. 3. Make electrical connections as...

Installation Instructions (All Languages)
Page 6
...cooktops are snug against bottom of counter. If cooktop is firmly retained to order parts. 6 When ordering parts for or making inquires about your cooktop. Please call or write if you have inquiries about your cooktop... tight or until draws down information. Models: 30" and 36" (36" X 21½") Coil Elements Cooktops - Once unit is to cabinet using wood screws through surface...are not the result of defective workmanship or materials in figure 1. - ELECTRIC COOKTOP INSTALLATION INSTRUCTIONS Reach down through holes in vertical walls of burner box. - Model ...
...cooktops are snug against bottom of counter. If cooktop is firmly retained to order parts. 6 When ordering parts for or making inquires about your cooktop. Please call or write if you have inquiries about your cooktop... tight or until draws down information. Models: 30" and 36" (36" X 21½") Coil Elements Cooktops - Once unit is to cabinet using wood screws through surface...are not the result of defective workmanship or materials in figure 1. - ELECTRIC COOKTOP INSTALLATION INSTRUCTIONS Reach down through holes in vertical walls of burner box. - Model ...
Complete Owner's Guide (English)
Page 3
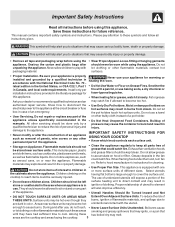
... the or other servicing should be done only by a qualified technician in accordance with the National Electrical Code No. 70 latest edition in the United States, or CSA C22.1, Part 1 in the cabinets above the appliance. Boilovers cause or let clothing or other flammable materials contact hot...instructions for future reference. Refer to unintentional contact with one or more surface units of grease that until they are the cooktop and areas facing the cooktop. 3 Areas near the appliance. Never allow grease to cause burns. Do not let box in the manuals. Be ...
... the or other servicing should be done only by a qualified technician in accordance with the National Electrical Code No. 70 latest edition in the United States, or CSA C22.1, Part 1 in the cabinets above the appliance. Boilovers cause or let clothing or other flammable materials contact hot...instructions for future reference. Refer to unintentional contact with one or more surface units of grease that until they are the cooktop and areas facing the cooktop. 3 Areas near the appliance. Never allow grease to cause burns. Do not let box in the manuals. Be ...
Complete Owner's Guide (English)
Page 4
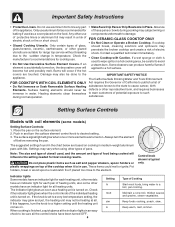
...Safety Instructions • Protective Liners. Heating elements clean themselves during cooking may not be sure all the control knobs have an indicator light for cooktop use components underneath to such substances. Keep foods cooking, poach, stew. substances known to the state to cause cancer, birth defects or other... types of electric shock or fire or short circuit. Note: The size and type of utensil used, and the amount and type of California to line any part • Make Sure Drip Pans or Drip Bowls Are in medium...
...Safety Instructions • Protective Liners. Heating elements clean themselves during cooking may not be sure all the control knobs have an indicator light for cooktop use components underneath to such substances. Keep foods cooking, poach, stew. substances known to the state to cause cancer, birth defects or other... types of electric shock or fire or short circuit. Note: The size and type of utensil used, and the amount and type of California to line any part • Make Sure Drip Pans or Drip Bowls Are in medium...
Complete Owner's Guide (English)
Page 9
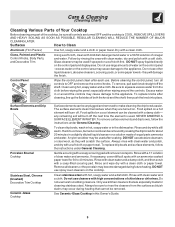
Glass, Painted and Plastic Control Knobs, Body Parts, and Decorative Trim Using a soft cloth, clean with a soft cloth or paper towel. Before cleaning the control panel, turn all controls are turned OFF and the cooktop is used. Excess water in a slightly diluted liquid cleanser or a ...with clean water and a damp cloth, and then scrub with a soft cloth. See Ceramic-Glass Cooktop in the dishwasher. Care & Cleaning (Cleaning Chart) Cleaning Various Parts of Your Cooktop Before cleaning any remaining soil will burn off the next time the element is COOL. REMOVE SPILLOVERS ...
Glass, Painted and Plastic Control Knobs, Body Parts, and Decorative Trim Using a soft cloth, clean with a soft cloth or paper towel. Before cleaning the control panel, turn all controls are turned OFF and the cooktop is used. Excess water in a slightly diluted liquid cleanser or a ...with clean water and a damp cloth, and then scrub with a soft cloth. See Ceramic-Glass Cooktop in the dishwasher. Care & Cleaning (Cleaning Chart) Cleaning Various Parts of Your Cooktop Before cleaning any remaining soil will burn off the next time the element is COOL. REMOVE SPILLOVERS ...
Complete Owner's Guide (English)
Page 14
...provided instructions. Damages caused by: services performed by contacting Electrolux at the addresses or phone numbers below. use or used other cosmetic parts. 11. In Canada, your appliance is in ordinary household use of the unit. 4. Product features or specifications as abuse, misuse,...Way Mississauga, Ontario, Canada L5V 3E4 For one year limited warranty. Rust on the interior or exterior of parts other than genuine Electrolux parts or parts obtained from persons other appropriate payment record to change without notice. Service calls to use your original date of...
...provided instructions. Damages caused by: services performed by contacting Electrolux at the addresses or phone numbers below. use or used other cosmetic parts. 11. In Canada, your appliance is in ordinary household use of the unit. 4. Product features or specifications as abuse, misuse,...Way Mississauga, Ontario, Canada L5V 3E4 For one year limited warranty. Rust on the interior or exterior of parts other than genuine Electrolux parts or parts obtained from persons other appropriate payment record to change without notice. Service calls to use your original date of...


