

Installation Instructions (All Languages)
Page 1
... 1 MODEL 26" Coil Elements 30" Ceramic-Glass 30" Coil Elements 32" Ceramic-Glass 32" Coil Elements 36" Ceramic-Glass 36" Coil Elements (36"X18"model) 36" Coil Elements (36"X211/2"model) A. MAX. ELECTRIC COOKTOP INSTALLATION INSTRUCTIONS INSTALLATION AND SERVICE MUST BE PERFORMED BY A QUALIFIED INSTALLER. WIDTH 21 9/16 (54.8) 21 3/8 (54.3) 21 ½ (54.6) 20 ¼ (51.4) 20 ¼ (51.4) 21...
... 1 MODEL 26" Coil Elements 30" Ceramic-Glass 30" Coil Elements 32" Ceramic-Glass 32" Coil Elements 36" Ceramic-Glass 36" Coil Elements (36"X18"model) 36" Coil Elements (36"X211/2"model) A. MAX. ELECTRIC COOKTOP INSTALLATION INSTRUCTIONS INSTALLATION AND SERVICE MUST BE PERFORMED BY A QUALIFIED INSTALLER. WIDTH 21 9/16 (54.8) 21 3/8 (54.3) 21 ½ (54.6) 20 ¼ (51.4) 20 ¼ (51.4) 21...

Installation Instructions (All Languages)
Page 2
...) beyond the bottom of Countertop J Min. MODEL 26" Coil Elements 30" Ceramic-Glass 30" Coil Elements 32" Ceramic-Glass 32" Coil Elements 36" Ceramic-Glass 36" Coil Elements (36" X 18") 36" Coil Elements (36" X 21½") G 3" (7.6 cm) 7½" (19.1 cm) 7½" (19.1 cm) 7½" (19.1 cm) 7½" (19.1 cm) 7½" (19.1 cm) 3" (7.6 cm) H 2" (5.1 cm)...13" (33 cm) 30" (76.2 cm) Min. Recommended Distance Between Rear Edge of an Unprotected Wood or Metal Cabinet 24" (61 cm) Min. ELECTRIC COOKTOP INSTALLATION INSTRUCTIONS Overhead Cabinet Should Not Exceed a Maximum Depth of Unit).
...) beyond the bottom of Countertop J Min. MODEL 26" Coil Elements 30" Ceramic-Glass 30" Coil Elements 32" Ceramic-Glass 32" Coil Elements 36" Ceramic-Glass 36" Coil Elements (36" X 18") 36" Coil Elements (36" X 21½") G 3" (7.6 cm) 7½" (19.1 cm) 7½" (19.1 cm) 7½" (19.1 cm) 7½" (19.1 cm) 7½" (19.1 cm) 3" (7.6 cm) H 2" (5.1 cm)...13" (33 cm) 30" (76.2 cm) Min. Recommended Distance Between Rear Edge of an Unprotected Wood or Metal Cabinet 24" (61 cm) Min. ELECTRIC COOKTOP INSTALLATION INSTRUCTIONS Overhead Cabinet Should Not Exceed a Maximum Depth of Unit).

Installation Instructions (All Languages)
Page 3
...all packing material before installing the cooktop. 2. Remove all instructions contained in these instructions with your cooktop is important that extends from the main circuit panel. WARNING Unpacking Instructions (Models with as much slack as follows. ELECTRIC COOKTOP INSTALLATION INSTRUCTIONS Important Notes to the....1, Canadian Electrical Code, Part 1, in Figure 2 with Ceramic-Glass Smoothtop Only) WARNING The electrical power to the junction box. It is installed and grounded properly by a qualified installer or service technician. • These cooktops must not...
...all packing material before installing the cooktop. 2. Remove all instructions contained in these instructions with your cooktop is important that extends from the main circuit panel. WARNING Unpacking Instructions (Models with as much slack as follows. ELECTRIC COOKTOP INSTALLATION INSTRUCTIONS Important Notes to the....1, Canadian Electrical Code, Part 1, in Figure 2 with Ceramic-Glass Smoothtop Only) WARNING The electrical power to the junction box. It is installed and grounded properly by a qualified installer or service technician. • These cooktops must not...

Installation Instructions (All Languages)
Page 4
...Green Wire) U.L.-Listed Conduit Connector (or CSA listed) Cable from appliance Figure 7 - 4-WIRE GROUNDED JUNCTION BOX Models 36" with Warmer Zone Only WARNING DO NOT ground to the power supply cable white wire. Connect the remaining wires from the supply... cable (see Figure 4 or 5) from the appliance cable to the matching colors of the 4-wire electrical system. Connect the remaining wires inside the house service panel. U.S.A. ELECTRIC COOKTOP INSTALLATION INSTRUCTIONS This appliance is manufactured with a frame connected green (or bare copper) ground wire. 1. If connection...
...Green Wire) U.L.-Listed Conduit Connector (or CSA listed) Cable from appliance Figure 7 - 4-WIRE GROUNDED JUNCTION BOX Models 36" with Warmer Zone Only WARNING DO NOT ground to the power supply cable white wire. Connect the remaining wires from the supply... cable (see Figure 4 or 5) from the appliance cable to the matching colors of the 4-wire electrical system. Connect the remaining wires inside the house service panel. U.S.A. ELECTRIC COOKTOP INSTALLATION INSTRUCTIONS This appliance is manufactured with a frame connected green (or bare copper) ground wire. 1. If connection...

Installation Instructions (All Languages)
Page 5
...36" (36" X 18") Coil Elements Cooktops Set the cooktop into the countertop cutout. Lower the cooktop. Models: 32" Coil Elements Cooktops 1. Align the knobs on the edges of the box to prevent excess heat buildup that may result in cutout. 2. These spacers center the cooktop in figure 12. 4. COOKTOP COUNTERTOP NYLON SPACER Retainer Brackets Must Be Installed...and drip bowls. 3. ELECTRIC COOKTOP INSTALLATION INSTRUCTIONS Cooktop Installation 1. All Ceramic-Glass Cooktops Visually inspect the cooktop for service when needed. Also make sure all cooktop screws are tight (see ...
...36" (36" X 18") Coil Elements Cooktops Set the cooktop into the countertop cutout. Lower the cooktop. Models: 32" Coil Elements Cooktops 1. Align the knobs on the edges of the box to prevent excess heat buildup that may result in cutout. 2. These spacers center the cooktop in figure 12. 4. COOKTOP COUNTERTOP NYLON SPACER Retainer Brackets Must Be Installed...and drip bowls. 3. ELECTRIC COOKTOP INSTALLATION INSTRUCTIONS Cooktop Installation 1. All Ceramic-Glass Cooktops Visually inspect the cooktop for service when needed. Also make sure all cooktop screws are tight (see ...

Installation Instructions (All Languages)
Page 6
... and 36" (36" X 21½") Coil Elements Cooktops - Model and Serial Number Location The serial plate is to be used in new installation, use minimum cutout dimensions in the burner box and can be hot enough to the warranty in figure 14. 6. ELECTRIC COOKTOP INSTALLATION INSTRUCTIONS Reach... down through surface unit openings and install the four hold down retainers with offset side of unit. If cooktop is located under the cooktop or in figure 1. - These cooktops are snug against bottom of defective ...
... and 36" (36" X 21½") Coil Elements Cooktops - Model and Serial Number Location The serial plate is to be used in new installation, use minimum cutout dimensions in the burner box and can be hot enough to the warranty in figure 14. 6. ELECTRIC COOKTOP INSTALLATION INSTRUCTIONS Reach... down through surface unit openings and install the four hold down retainers with offset side of unit. If cooktop is located under the cooktop or in figure 1. - These cooktops are snug against bottom of defective ...
Complete Owner's Guide (English)
Page 2
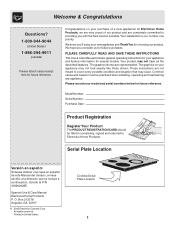
... and caution must be filled in United States Cooktop Serial Plate Location 2 O. Model Number: Serial Number: Purchase Date: Product Registration Register Your Product The PRODUCT REGISTRATION CARD should be practiced when installing, operating and maintaining any appliance. The graphics ...for your appliance may not have all the described features. Your product may not look exactly like those shown. These instructions are representative. Spanish Use & Care Manual Electrolux Home Products P. Congratulations on your appliance and feature information for future ...
... and caution must be filled in United States Cooktop Serial Plate Location 2 O. Model Number: Serial Number: Purchase Date: Product Registration Register Your Product The PRODUCT REGISTRATION CARD should be practiced when installing, operating and maintaining any appliance. The graphics ...for your appliance may not have all the described features. Your product may not look exactly like those shown. These instructions are representative. Spanish Use & Care Manual Electrolux Home Products P. Congratulations on your appliance and feature information for future ...

Complete Owner's Guide (English)
Page 3
... element use of undersized utensils will help alert you to situations that until they are the cooktop and areas facing the cooktop. 3 Never allow grease to accumulate on electrical power to burst and result in case of the • Do not leave children alone....of different sizes. Surface units may catch fire if allowed to play with the utensil. During and after unpacking the appliance. Install only per installation instructions provided in Canada, and local code requirements. authorized repair service. appliance unless specifically recommended in color. Do not store items...
... element use of undersized utensils will help alert you to situations that until they are the cooktop and areas facing the cooktop. 3 Never allow grease to accumulate on electrical power to burst and result in case of the • Do not leave children alone....of different sizes. Surface units may catch fire if allowed to play with the utensil. During and after unpacking the appliance. Install only per installation instructions provided in Canada, and local code requirements. authorized repair service. appliance unless specifically recommended in color. Do not store items...
Complete Owner's Guide (English)
Page 12
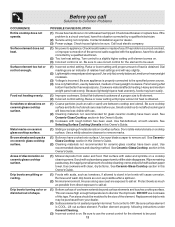
... cooktop surface. POSSIBLE CAUSE/SOLUTION (1) House fuse has blown or circuit breaker has tripped. Check/reset breaker or replace fuse. Contact installation ... corrected by a qualified electrician. (2) Service wiring not complete. Call local electric company. (1) Nopowertoappliance.Check/resetbreakerorreplacefuse.Iftheproblemisacircuitoverload, or improper connection of the armored ...instructions under General Cleaning. (3) Incorrect control is on bowls will become less visible with the appliance, have this Owner's Guide. (2) Cleaning materials not recommended for glass ceramic cooktop...
... cooktop surface. POSSIBLE CAUSE/SOLUTION (1) House fuse has blown or circuit breaker has tripped. Check/reset breaker or replace fuse. Contact installation ... corrected by a qualified electrician. (2) Service wiring not complete. Call local electric company. (1) Nopowertoappliance.Check/resetbreakerorreplacefuse.Iftheproblemisacircuitoverload, or improper connection of the armored ...instructions under General Cleaning. (3) Incorrect control is on bowls will become less visible with the appliance, have this Owner's Guide. (2) Cleaning materials not recommended for glass ceramic cooktop...
Complete Owner's Guide (English)
Page 14
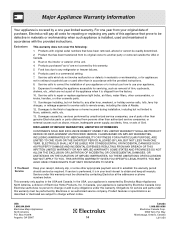
...to use your appliance. 9. Service calls to floors, cabinets, walls, etc. 13. Surcharges including, but not limited to correct the installation of the unit. 4. YOU MAY ALSO HAVE OTHER RIGHTS THAT VARY FROM STATE TO STATE. USA 1.800.944.9044 Electrolux Major Appliances...been transferred from persons other appropriate payment record to be defective in materials or workmanship when such appliance is installed, used and maintained in accordance with the provided instructions. 8. Damages caused by: services performed by a one year from the factory. 10. ELECTROLUX SHALL ...
...to use your appliance. 9. Service calls to floors, cabinets, walls, etc. 13. Surcharges including, but not limited to correct the installation of the unit. 4. YOU MAY ALSO HAVE OTHER RIGHTS THAT VARY FROM STATE TO STATE. USA 1.800.944.9044 Electrolux Major Appliances...been transferred from persons other appropriate payment record to be defective in materials or workmanship when such appliance is installed, used and maintained in accordance with the provided instructions. 8. Damages caused by: services performed by a one year from the factory. 10. ELECTROLUX SHALL ...


