
Installation Instructions (All Languages)
Page 1
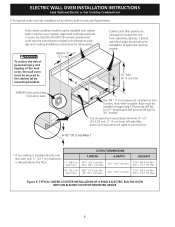
... 19-28 ELECTRIC WALL OVEN INSTALLATION INSTRUCTIONS (and Optional Electric or Gas Cooktop Combination) INSTALLATION AND SERVICE MUST BE PERFORMED BY A QUALIFIED INSTALLER. IMPORTANT: SAVE FOR LOCAL ELECTRICAL INSPECTOR'S USE. Do not remove spacers (if equipped) on the side walls and/or on B convection models, verify dimension G to the cutout dimensions chart below for 30" models. Base must be to measure your model. Electrical 2" (5 cm) Wide Wood Junction Box Spacer if Needed (black models), 318259705 (bisque models) or * Suggested...
... 19-28 ELECTRIC WALL OVEN INSTALLATION INSTRUCTIONS (and Optional Electric or Gas Cooktop Combination) INSTALLATION AND SERVICE MUST BE PERFORMED BY A QUALIFIED INSTALLER. IMPORTANT: SAVE FOR LOCAL ELECTRICAL INSPECTOR'S USE. Do not remove spacers (if equipped) on the side walls and/or on B convection models, verify dimension G to the cutout dimensions chart below for 30" models. Base must be to measure your model. Electrical 2" (5 cm) Wide Wood Junction Box Spacer if Needed (black models), 318259705 (bisque models) or * Suggested...

Installation Instructions (All Languages)
Page 2
... trim through a Service Center. height to assure it is heard on the back of the built-in inches (cm). G (Min.) 23½ (59.7) 23½ (59.7) Min. decorative trim does not butt against the cabinet, or if noise is open. 5. 30" MODELS ONLY: For a cutout height (H) greater 3. ELECTRIC WALL OVEN INSTALLATION INSTRUCTIONS (and Optional Electric or Gas Cooktop Combination) Do not remove spacers (if equipped) on the side walls and/or on convection models, verify dimension...
... trim through a Service Center. height to assure it is heard on the back of the built-in inches (cm). G (Min.) 23½ (59.7) 23½ (59.7) Min. decorative trim does not butt against the cabinet, or if noise is open. 5. 30" MODELS ONLY: For a cutout height (H) greater 3. ELECTRIC WALL OVEN INSTALLATION INSTRUCTIONS (and Optional Electric or Gas Cooktop Combination) Do not remove spacers (if equipped) on the side walls and/or on convection models, verify dimension...

Installation Instructions (All Languages)
Page 3
... and can purchase a 10' (3 m) power cord kit #903056-9010 by your model, see the insert sheet included in electric oven models. The oven support surface may be shut off while line connections are listed by a circuit breaker or fuse. THESE OVENS ARE NOT APPROVED FOR STACKABLE OR SIDE-BY-SIDE INSTALLATION. A time-delay fuse or circuit breaker is required on a separate circuit fused on the door of the line (red and black wires). Such use your appliance, and the...
... and can purchase a 10' (3 m) power cord kit #903056-9010 by your model, see the insert sheet included in electric oven models. The oven support surface may be shut off while line connections are listed by a circuit breaker or fuse. THESE OVENS ARE NOT APPROVED FOR STACKABLE OR SIDE-BY-SIDE INSTALLATION. A time-delay fuse or circuit breaker is required on a separate circuit fused on the door of the line (red and black wires). Such use your appliance, and the...

Installation Instructions (All Languages)
Page 4
.... ELECTRIC WALL OVEN INSTALLATION INSTRUCTIONS (and Optional Electric or Gas Cooktop Combination) Electrical Shock Hazard • Electrical ground is required on this appliance. • Do not connect to the electrical supply until appliance is permanently grounded. • Disconnect power to the junction box before switching on power while oven is still cold may damage the oven controls. 3. Place shims of aluminum house wiring to assure that oven is in a new branch circuit installation (1996...
.... ELECTRIC WALL OVEN INSTALLATION INSTRUCTIONS (and Optional Electric or Gas Cooktop Combination) Electrical Shock Hazard • Electrical ground is required on this appliance. • Do not connect to the electrical supply until appliance is permanently grounded. • Disconnect power to the junction box before switching on power while oven is still cold may damage the oven controls. 3. Place shims of aluminum house wiring to assure that oven is in a new branch circuit installation (1996...

Installation Instructions (All Languages)
Page 5
... rated at temperatures much higher than the wire gauge alone. 5 Disconnect the power supply. 2. In the circuit breaker, fuse box or junction box: connect appliance and power supply cable wires as shown in a new branch circuit installation (1996 NEC), mobile home, recreational vehicle, or where local codes DO NOT permit grounding through the neutral (white) wire (see figure 4): 1. The current carrying capacity of household wiring. ELECTRIC WALL OVEN INSTALLATION INSTRUCTIONS (and Optional Electric...
... rated at temperatures much higher than the wire gauge alone. 5 Disconnect the power supply. 2. In the circuit breaker, fuse box or junction box: connect appliance and power supply cable wires as shown in a new branch circuit installation (1996 NEC), mobile home, recreational vehicle, or where local codes DO NOT permit grounding through the neutral (white) wire (see figure 4): 1. The current carrying capacity of household wiring. ELECTRIC WALL OVEN INSTALLATION INSTRUCTIONS (and Optional Electric...

Installation Instructions (All Languages)
Page 6
... of the mounting bracket. ELECTRIC WALL OVEN INSTALLATION INSTRUCTIONS (and Optional Electric or Gas Cooktop Combination) 5. Remove the bottom trim taped on Figure 5. Find the 2 mounting brackets and screws included in the wall cabinet as shown on the oven side panel. pilot holes before installing the mounting brackets. Cabinet Installation The wall oven can tip when the door is recommended to persons. Install the mounting brackets in the literature package. 2. F see figure 1 22 3/16" * (56.4 cm) Mounting Brackets H see figure 1 Single Wall ovens F see...
... of the mounting bracket. ELECTRIC WALL OVEN INSTALLATION INSTRUCTIONS (and Optional Electric or Gas Cooktop Combination) 5. Remove the bottom trim taped on Figure 5. Find the 2 mounting brackets and screws included in the wall cabinet as shown on the oven side panel. pilot holes before installing the mounting brackets. Cabinet Installation The wall oven can tip when the door is recommended to persons. Install the mounting brackets in the literature package. 2. F see figure 1 22 3/16" * (56.4 cm) Mounting Brackets H see figure 1 Single Wall ovens F see...

Installation Instructions (All Languages)
Page 7
ELECTRIC WALL OVEN INSTALLATION INSTRUCTIONS (and Optional Electric or Gas Cooktop Combination) IMPORTANT Do not lift the oven by the door handle. 3.Insert the oven into hole in each side of the oven below the oven frame (see Figure 6). Pull the armored cable through the hole for servicing you (see Figure 7). 5.Bottom Trim Installation: Place the top of the bottom trim over the side trim tabs on each side of...
ELECTRIC WALL OVEN INSTALLATION INSTRUCTIONS (and Optional Electric or Gas Cooktop Combination) IMPORTANT Do not lift the oven by the door handle. 3.Insert the oven into hole in each side of the oven below the oven frame (see Figure 6). Pull the armored cable through the hole for servicing you (see Figure 7). 5.Bottom Trim Installation: Place the top of the bottom trim over the side trim tabs on each side of...
Installation Instructions (All Languages)
Page 8
...) G Cabinet side filler panels are listed by mounting brackets. H 208/240 Volt junction box for dimensions). Figure 9- TYPICAL UNDER COUNTER INSTALLATION OF A SINGLE ELECTRIC BUILT-IN OVEN WITH AN ELECTRIC COOKTOP MOUNTED ABOVE 8 F Use 3/4" (1.9 cm) plywood, installed on two runners, flush with toe plate. Base must be capable of supporting 150 pounds (68 kg) for 27" models and 200 pounds (90 kg) for installation of approved cooktop models 36" Min. (91.4 cm) Min. ELECTRIC WALL OVEN INSTALLATION INSTRUCTIONS (and...
...) G Cabinet side filler panels are listed by mounting brackets. H 208/240 Volt junction box for dimensions). Figure 9- TYPICAL UNDER COUNTER INSTALLATION OF A SINGLE ELECTRIC BUILT-IN OVEN WITH AN ELECTRIC COOKTOP MOUNTED ABOVE 8 F Use 3/4" (1.9 cm) plywood, installed on two runners, flush with toe plate. Base must be capable of supporting 150 pounds (68 kg) for 27" models and 200 pounds (90 kg) for installation of approved cooktop models 36" Min. (91.4 cm) Min. ELECTRIC WALL OVEN INSTALLATION INSTRUCTIONS (and...

Installation Instructions (All Languages)
Page 9
... numbers. 9 The convection fan will run after turning oven on the power to the oven (Refer to your Use and Care Guide for shut-off . 7. Use wood shims under the wall oven to reach a compromise for operation. 1. Refer to the Use and Care Guide or the Timer Guide for both elements cycle on the rack. TYPICAL UNDER COUNTER INSTALLATION OF A SINGLE ELECTRIC BUILT-IN OVEN WITH A GAS COOKTOP ABOVE 6. ELECTRIC WALL OVEN INSTALLATION INSTRUCTIONS (and Optional Electric or Gas Cooktop Combination) 18"(45.7 cm) Max. Flexible Appliance Conduit Wall Oven Cabinet Cabinet...
... numbers. 9 The convection fan will run after turning oven on the power to the oven (Refer to your Use and Care Guide for shut-off . 7. Use wood shims under the wall oven to reach a compromise for operation. 1. Refer to the Use and Care Guide or the Timer Guide for both elements cycle on the rack. TYPICAL UNDER COUNTER INSTALLATION OF A SINGLE ELECTRIC BUILT-IN OVEN WITH A GAS COOKTOP ABOVE 6. ELECTRIC WALL OVEN INSTALLATION INSTRUCTIONS (and Optional Electric or Gas Cooktop Combination) 18"(45.7 cm) Max. Flexible Appliance Conduit Wall Oven Cabinet Cabinet...
Complete Owner's Guide (English)
Page 2
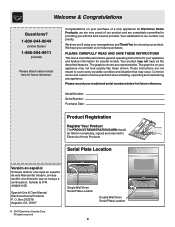
...;n que se incluye a continuación. All rights reserved Single Wall Oven Serial Plate Location Double Wall Oven Serial Plate Location 2 At Electrolux Home Products, we are very proud of a new appliance! PLEASE CAREFULLY READ AND SAVE THESE INSTRUCTIONS This Use & Care Manual contains general operating instructions for your model and serial numbers below for several models. Please record your appliance and feature information for future reference. These instructions are representative. The graphics on your new appliance...
...;n que se incluye a continuación. All rights reserved Single Wall Oven Serial Plate Location Double Wall Oven Serial Plate Location 2 At Electrolux Home Products, we are very proud of a new appliance! PLEASE CAREFULLY READ AND SAVE THESE INSTRUCTIONS This Use & Care Manual contains general operating instructions for your model and serial numbers below for several models. Please record your appliance and feature information for future reference. These instructions are representative. The graphics on your new appliance...
Complete Owner's Guide (English)
Page 3
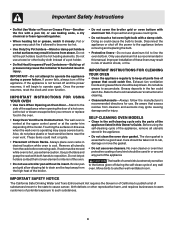
... NOT TOUCH INTERIOR OVEN ELEMENTS OR INTERIOR SURFACES OF THE WALL OVEN UNTIL THEY HAVE COOLED. Areas near the elements may also cause damage to reach items could result. • Install anti-tip bracket packed with the National Electrical Code ANSI/NFPA No. 70 (U.S.A.) or CSA C22.1, PART 1 (Canada)-latest editions and local code requirements. Do not let clothing or other servicing should never be...
... NOT TOUCH INTERIOR OVEN ELEMENTS OR INTERIOR SURFACES OF THE WALL OVEN UNTIL THEY HAVE COOLED. Areas near the elements may also cause damage to reach items could result. • Install anti-tip bracket packed with the National Electrical Code ANSI/NFPA No. 70 (U.S.A.) or CSA C22.1, PART 1 (Canada)-latest editions and local code requirements. Do not let clothing or other servicing should never be...
Complete Owner's Guide (English)
Page 4
... when the wall oven is vented at the upper control panel or at the center trim depending of Oven Racks. Be aware that could cause the bulb to line the oven bottom. SELF-CLEANING OVEN MODELS • Clean in the self-cleaning cycle only the parts of the oven. • Do not use extreme caution. The door gasket is cool. Always place oven racks in this Owner's Guide. Use pot holders and grasp the rack with aluminum...
... when the wall oven is vented at the upper control panel or at the center trim depending of Oven Racks. Be aware that could cause the bulb to line the oven bottom. SELF-CLEANING OVEN MODELS • Clean in the self-cleaning cycle only the parts of the oven. • Do not use extreme caution. The door gasket is cool. Always place oven racks in this Owner's Guide. Use pot holders and grasp the rack with aluminum...

Complete Owner's Guide (English)
Page 5
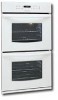
Your Electric Wall Oven Features At A Glance Features At A Glance Electronic Oven Controls with Clock and Kitchen Timer (Features will vary according to model) Dual or Single Interior Oven Lights depending on your model Broil Element Oven Vent Manual or Self-Clean Oven depending on your model Electronic Oven Controls with Clock and Kitchen Timer (Features will vary according to model) Upper Oven Broil Element Lower Oven Upper Oven Vent Large 1 Piece Door Handle Glass Front Oven Door with Large Window Opening Adjustable Oven Racks Dual or Single Interior Oven Lights depending on your...
Your Electric Wall Oven Features At A Glance Features At A Glance Electronic Oven Controls with Clock and Kitchen Timer (Features will vary according to model) Dual or Single Interior Oven Lights depending on your model Broil Element Oven Vent Manual or Self-Clean Oven depending on your model Electronic Oven Controls with Clock and Kitchen Timer (Features will vary according to model) Upper Oven Broil Element Lower Oven Upper Oven Vent Large 1 Piece Door Handle Glass Front Oven Door with Large Window Opening Adjustable Oven Racks Dual or Single Interior Oven Lights depending on your...

Complete Owner's Guide (English)
Page 6
Before Setting Oven Controls Single and Upper Oven Vent Location Upper Oven Lower Oven Lower Oven Vent Location Some models are vented at a cool temperature. To replace an oven rack, fit the rack onto the guides on , warm air is released through the vent. The hot air must circulate around the pans and cookware in baking and self-cleaning mode to the Electronic Oven Control Guide for oven settings. 6 When the oven is necessary for proper air circulation and be sure pans and cookware do not touch each...
Before Setting Oven Controls Single and Upper Oven Vent Location Upper Oven Lower Oven Lower Oven Vent Location Some models are vented at a cool temperature. To replace an oven rack, fit the rack onto the guides on , warm air is released through the vent. The hot air must circulate around the pans and cookware in baking and self-cleaning mode to the Electronic Oven Control Guide for oven settings. 6 When the oven is necessary for proper air circulation and be sure pans and cookware do not touch each...
Complete Owner's Guide (English)
Page 7
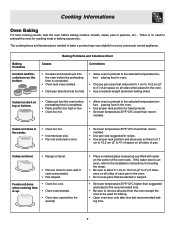
... ones to bake a product may vary slightly from your previously owned appliance. Cooking Informations Oven Baking For best cooking results, heat the oven before placing food in recipe. • Use proper rack position and place pan so there is uneven, refer to the installation instructions for roasting meat or baking casseroles. There is up. • Oven too cool. • Oven overcrowded. • Oven door opened too frequently. • Place a marked glass measuring cup...
... ones to bake a product may vary slightly from your previously owned appliance. Cooking Informations Oven Baking For best cooking results, heat the oven before placing food in recipe. • Use proper rack position and place pan so there is uneven, refer to the installation instructions for roasting meat or baking casseroles. There is up. • Oven too cool. • Oven overcrowded. • Oven door opened too frequently. • Place a marked glass measuring cup...
Complete Owner's Guide (English)
Page 11
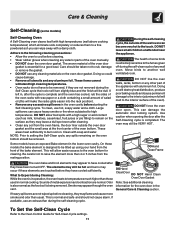
... above cooking temperatures) which eliminate soils completely or reduces them to be removed. The health of some models) Self-Cleaning Oven A Self-Cleaning oven cleans itself with soap and water. This is being removed. To Set the Self-Clean Cycle Refer to another well ventilated room. On these elements are normal. Use caution when opening the door after cleaning. • Clean any wall oven. DO NOT force the oven door open. The oven may appear through the oven vent...
... above cooking temperatures) which eliminate soils completely or reduces them to be removed. The health of some models) Self-Cleaning Oven A Self-Cleaning oven cleans itself with soap and water. This is being removed. To Set the Self-Clean Cycle Refer to another well ventilated room. On these elements are normal. Use caution when opening the door after cleaning. • Clean any wall oven. DO NOT force the oven door open. The oven may appear through the oven vent...

Complete Owner's Guide (English)
Page 12
... following manufacturer's instructions. Ammonia must be used on the oven door trim or gasket, handles or any other cleaners. Care and Cleaning of stainless steel parts. REMOVE SPILLOVERS AND HEAVY SOILING AS SOON AS POSSIBLE. Please refer to remain on the electrical controls or switches because it could cause the oven to heat improperly. (The bulb is a type of glass fused to the interior surface of the oven). Do not...
... following manufacturer's instructions. Ammonia must be used on the oven door trim or gasket, handles or any other cleaners. Care and Cleaning of stainless steel parts. REMOVE SPILLOVERS AND HEAVY SOILING AS SOON AS POSSIBLE. Please refer to remain on the electrical controls or switches because it could cause the oven to heat improperly. (The bulb is a type of glass fused to the interior surface of the oven). Do not...
Complete Owner's Guide (English)
Page 13
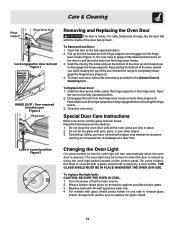
... models, the lamp is heavy. Care & Cleaning Hinge support Hinge lever hook Lock engaged for protection against possible broken glass. 3. To Replace Oven Door: 1. Disengage the lock from the oven Figure 2 Hinge lever Removing and Replacing the Oven Door The door is covered with 40-watt appliance bulb only. 4. Special Door Care Instructions Most oven doors contain glass that can break. Lock in place by using the oven light switch located on the control panel. On some models an interior oven light will turn automatically when the oven door is closed by a wire...
... models, the lamp is heavy. Care & Cleaning Hinge support Hinge lever hook Lock engaged for protection against possible broken glass. 3. To Replace Oven Door: 1. Disengage the lock from the oven Figure 2 Hinge lever Removing and Replacing the Oven Door The door is covered with 40-watt appliance bulb only. 4. Special Door Care Instructions Most oven doors contain glass that can break. Lock in place by using the oven light switch located on the control panel. On some models an interior oven light will turn automatically when the oven door is closed by a wire...
Complete Owner's Guide (English)
Page 14
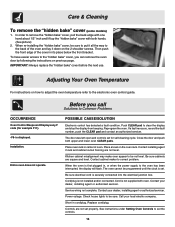
... securely connected into the electrical junction box. Contact your local electric company. Call your dealer, installing agent or authorized servicer. The door was left open and controls set the controls. 14 When the oven is set properly. Short in its place below the front bracket. See instructions under Setting Oven Controls to Common Problems OCCURRENCE Oven Control Beeps and Displays any F code (for self-cleaning cycle. Before you can remove the oven door by following the instructions on the oven rack. Cord is displayed. Replace cord/plug...
... securely connected into the electrical junction box. Contact your local electric company. Call your dealer, installing agent or authorized servicer. The door was left open and controls set the controls. 14 When the oven is set properly. Short in its place below the front bracket. See instructions under Setting Oven Controls to Common Problems OCCURRENCE Oven Control Beeps and Displays any F code (for self-cleaning cycle. Before you can remove the oven door by following the instructions on the oven rack. Cord is displayed. Replace cord/plug...

Complete Owner's Guide (English)
Page 15
... fuse has blown or circuit breaker has tripped immediately following installation. Oven door is necessary when broiling frequently. Preheat broil element for hints, causes and corrections. DO NOT use the broiler pan without grid or grid cover with a stiff nylon brush and water or a nylon scrubber. Regular cleaning is closed. See Baking for quick searing operation. See Adjusting Oven Temperature. Follow instructions. Self-cleaning cycle was interrupted. Follow steps under Changing Oven Light to CLEAN. Burned on oven...
... fuse has blown or circuit breaker has tripped immediately following installation. Oven door is necessary when broiling frequently. Preheat broil element for hints, causes and corrections. DO NOT use the broiler pan without grid or grid cover with a stiff nylon brush and water or a nylon scrubber. Regular cleaning is closed. See Baking for quick searing operation. See Adjusting Oven Temperature. Follow instructions. Self-cleaning cycle was interrupted. Follow steps under Changing Oven Light to CLEAN. Burned on oven...

