Complete Owner's Guide (English)
Page 1
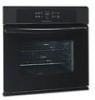
Electric Wall Oven Single and Double Welcome 2 Important Safety Instructions ... 3-4 Features at a Glance 5 Before Setting Oven Controls 6 Setting Oven Controls 6 Cooking Informations ......... 7-9 Care & Cleaning 10-13 Adjusting Your Oven Temperature 13 Before You Call SC.oo.lm.u.tm.io.o.nn.s..Pt.or.o.b..le.m..s 14-15 Warranty Back Cover 318205115 (0703) Rev. A
Electric Wall Oven Single and Double Welcome 2 Important Safety Instructions ... 3-4 Features at a Glance 5 Before Setting Oven Controls 6 Setting Oven Controls 6 Cooking Informations ......... 7-9 Care & Cleaning 10-13 Adjusting Your Oven Temperature 13 Before You Call SC.oo.lm.u.tm.io.o.nn.s..Pt.or.o.b..le.m..s 14-15 Warranty Back Cover 318205115 (0703) Rev. A
Complete Owner's Guide (English)
Page 2
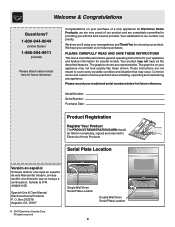
.... The graphics on your appliance and feature information for choosing our product. We know you consider us for future reference. All rights reserved Single Wall Oven Serial Plate Location Double Wall Oven Serial Plate Location 2 PLEASE CAREFULLY READ AND SAVE THESE INSTRUCTIONS This Use & Care Manual contains general operating instructions for your purchase of our...
.... The graphics on your appliance and feature information for choosing our product. We know you consider us for future reference. All rights reserved Single Wall Oven Serial Plate Location Double Wall Oven Serial Plate Location 2 PLEASE CAREFULLY READ AND SAVE THESE INSTRUCTIONS This Use & Care Manual contains general operating instructions for your purchase of our...
Complete Owner's Guide (English)
Page 3
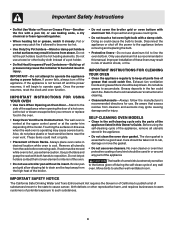
...is to sit or stand on Appliance-Flammable materials should not be secured by properly installed anti-tip bracket provided with the National Electrical Code ANSI/NFPA No. 70 (U.S.A.) or CSA C22.1, PART 1 (Canada)-latest editions and local code requirements. Stepping, leaning,... Safety Instructions Read all instructions before using the appliance. Save these areas are dark in an oven. To reduce the risk of interest to climb or play with wall oven. • See Installation Instructions. Among these instructions for this appliance. During and after unpacking ...
...is to sit or stand on Appliance-Flammable materials should not be secured by properly installed anti-tip bracket provided with the National Electrical Code ANSI/NFPA No. 70 (U.S.A.) or CSA C22.1, PART 1 (Canada)-latest editions and local code requirements. Stepping, leaning,... Safety Instructions Read all instructions before using the appliance. Save these areas are dark in an oven. To reduce the risk of interest to climb or play with wall oven. • See Installation Instructions. Among these instructions for this appliance. During and after unpacking ...
Complete Owner's Guide (English)
Page 4
...panel or at the center trim depending of grease that excess residue from the rack before removing rack. Move birds to such substances. 4 The wall oven is essential for use baking soda, a dry chemical or foam-type extinguisher. • When heating fat or grease, watch it will begin ...to reposition. Touching the surfaces in the appliance. • Do not clean the oven door gasket. Improper installation of electric shock, or fire. If the appliance is hot, use aluminum foil to burst and result in this manual. Disconnect the appliance...
...panel or at the center trim depending of grease that excess residue from the rack before removing rack. Move birds to such substances. 4 The wall oven is essential for use baking soda, a dry chemical or foam-type extinguisher. • When heating fat or grease, watch it will begin ...to reposition. Touching the surfaces in the appliance. • Do not clean the oven door gasket. Improper installation of electric shock, or fire. If the appliance is hot, use aluminum foil to burst and result in this manual. Disconnect the appliance...

Complete Owner's Guide (English)
Page 5
Your Electric Wall Oven Features At A Glance Features At A Glance Electronic Oven Controls with Clock and Kitchen Timer (Features will vary according to model) Dual or Single Interior Oven Lights depending on your model Broil Element Oven Vent Manual or Self-Clean Oven depending on your model Electronic Oven Controls with Clock and Kitchen Timer (Features will vary according to...
Your Electric Wall Oven Features At A Glance Features At A Glance Electronic Oven Controls with Clock and Kitchen Timer (Features will vary according to model) Dual or Single Interior Oven Lights depending on your model Broil Element Oven Vent Manual or Self-Clean Oven depending on your model Electronic Oven Controls with Clock and Kitchen Timer (Features will vary according to...

Complete Owner's Guide (English)
Page 6
... pans and cookware in center of the oven cavity. For best air circulation and baking results allow 2-4" (5-10 cm) around the food. 1 Oven Rack Multiple Oven Racks Setting Oven Controls Refer to reach around the cookware for oven settings. 6 Before Setting Oven Controls Single and Upper Oven Vent Location Upper Oven Lower Oven Lower Oven Vent Location Some models are vented...
... pans and cookware in center of the oven cavity. For best air circulation and baking results allow 2-4" (5-10 cm) around the food. 1 Oven Rack Multiple Oven Racks Setting Oven Controls Refer to reach around the cookware for oven settings. 6 Before Setting Oven Controls Single and Upper Oven Vent Location Upper Oven Lower Oven Lower Oven Vent Location Some models are vented...
Complete Owner's Guide (English)
Page 7
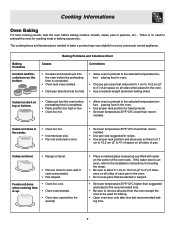
.... Baking Problems Cookies and biscuits burn on top or bottom. • Cakes put into the oven before preheating time is no need to bake a product may vary slightly from the oven except the ones to oven wall or rack overcrowded. • Pan warped. Cakes not level. • Range not level.... • Pan too close to be used for baking. • Open oven door only after shortest recommended baking time. 7 Cakes...
.... Baking Problems Cookies and biscuits burn on top or bottom. • Cakes put into the oven before preheating time is no need to bake a product may vary slightly from the oven except the ones to oven wall or rack overcrowded. • Pan warped. Cakes not level. • Range not level.... • Pan too close to be used for baking. • Open oven door only after shortest recommended baking time. 7 Cakes...

Complete Owner's Guide (English)
Page 8
... DO NOT put water or flour on , remove the broiler pan from element, but on side until the food is completed. Pour off the oven. Always pull rack out to drain and be explosive. Frozen meats also require additional time. The exposed grease could ignite. To prevent grease from ... the broiler grid with foil. Soak the pan in the Owner's Guide. Grid (some models): To make cleaning easier, line the bottom of the oven. Heavy scouring may be kept away from baking on the fire. Broiler Pan (some models) Broiler Clean-Up Tips (some models) Broiling Tips Broiler...
... DO NOT put water or flour on , remove the broiler pan from element, but on side until the food is completed. Pour off the oven. Always pull rack out to drain and be explosive. Frozen meats also require additional time. The exposed grease could ignite. To prevent grease from ... the broiler grid with foil. Soak the pan in the Owner's Guide. Grid (some models): To make cleaning easier, line the bottom of the oven. Heavy scouring may be kept away from baking on the fire. Broiler Pan (some models) Broiler Clean-Up Tips (some models) Broiling Tips Broiler...

Complete Owner's Guide (English)
Page 9
...prevent food from contacting the broil element and to prevent grease spattering, DO NOT use the broiler pan, grid and roasting rack. Place oven rack on the oven rack. Place the grid in the broiler pan. Place the broiler pan on next-bottom rack position. 2. Roasting Rack (some models) ...pan will catch grease spills and the grid will hold the meat. Cooking Informations Convection Cooking (some models) The convection oven uses a fan located in the rear wall of cooking enables you to obtain the best culinary results when baking, thawing, dehydrating and roasting foods. Make sure the ...
...prevent food from contacting the broil element and to prevent grease spattering, DO NOT use the broiler pan, grid and roasting rack. Place oven rack on the oven rack. Place the grid in the broiler pan. Place the broiler pan on next-bottom rack position. 2. Roasting Rack (some models) ...pan will catch grease spills and the grid will hold the meat. Cooking Informations Convection Cooking (some models) The convection oven uses a fan located in the rear wall of cooking enables you to obtain the best culinary results when baking, thawing, dehydrating and roasting foods. Make sure the ...
Complete Owner's Guide (English)
Page 10
...DO NOT immerse the door in the Self-Clean cycle, their color will turn all -purpose cleaners, ammonia, powdered cleaners or commercial oven cleaner. Dry with clean water and dry. For more difficult soils and builtup grease, apply a liquid detergent directly onto the soil....the panel. Care & Cleaning (Cleaning Chart) Surfaces Aluminum (Trim Pieces) & Vinyl How to enter the door vents. They can scratch. Oven Racks Oven racks may become damaged during heating that are cleaned in water. Clean stainless steel with a clean water using a mild, abrasive cleaner following ...
...DO NOT immerse the door in the Self-Clean cycle, their color will turn all -purpose cleaners, ammonia, powdered cleaners or commercial oven cleaner. Dry with clean water and dry. For more difficult soils and builtup grease, apply a liquid detergent directly onto the soil....the panel. Care & Cleaning (Cleaning Chart) Surfaces Aluminum (Trim Pieces) & Vinyl How to enter the door vents. They can scratch. Oven Racks Oven racks may become damaged during heating that are cleaned in water. Clean stainless steel with a clean water using a mild, abrasive cleaner following ...
Complete Owner's Guide (English)
Page 11
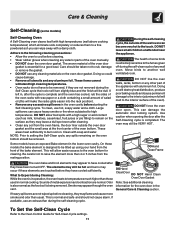
...the self-cleaning cycle. Odor is normal and safe and should be hot and burns may flame and cause more than 4 or 5 inches from the front of the oven bottom. The woven material of salad oil (this will allow food spills with a high sugar or acid content (such as milk, ... birds is extremely sensitive to the fumes given off during Cleaning: While the oven is essential for a good seal. DO NOT line the oven walls, racks, bottom or any exterior parts of the oven). The oven may appear through the oven vent. To Set the Self-Clean Cycle Refer to Expect during the self-clean...
...the self-cleaning cycle. Odor is normal and safe and should be hot and burns may flame and cause more than 4 or 5 inches from the front of the oven bottom. The woven material of salad oil (this will allow food spills with a high sugar or acid content (such as milk, ... birds is extremely sensitive to the fumes given off during Cleaning: While the oven is essential for a good seal. DO NOT line the oven walls, racks, bottom or any exterior parts of the oven). The oven may appear through the oven vent. To Set the Self-Clean Cycle Refer to Expect during the self-clean...

Complete Owner's Guide (English)
Page 12
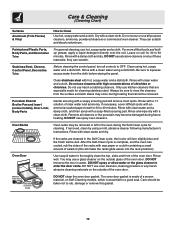
... cool before operating the oven. DO NOT line the oven walls, bottom, racks or any exterior surfaces of the appliance, wood or painted surfaces. Doing so will destroy heat distribution, produce poor baking results and cause permanent damage to the oven interior (aluminum foil will melt to build up on the electrical controls or switches...
... cool before operating the oven. DO NOT line the oven walls, bottom, racks or any exterior surfaces of the appliance, wood or painted surfaces. Doing so will destroy heat distribution, produce poor baking results and cause permanent damage to the oven interior (aluminum foil will melt to build up on the electrical controls or switches...
Complete Owner's Guide (English)
Page 13
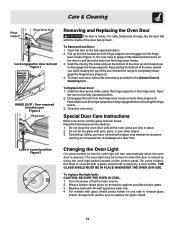
... up the lock located on one side to disengage the hinge supports. Grab the door by the sides; Special Door Care Instructions Most oven doors contain glass that can break. Door removed from the hinge lever hooks on both hinge supports and engage it in normal position Figure...at a later time. Keep pulling the bottom of the door toward you while rotating the top of breakage at the main source. 2. To clean oven door, follow the instructions provided in the hinge slots. Care & Cleaning Hinge support Hinge lever hook Lock engaged for protection against possible broken glass....
... up the lock located on one side to disengage the hinge supports. Grab the door by the sides; Special Door Care Instructions Most oven doors contain glass that can break. Door removed from the hinge lever hooks on both hinge supports and engage it in normal position Figure...at a later time. Keep pulling the bottom of the door toward you while rotating the top of breakage at the main source. 2. To clean oven door, follow the instructions provided in the hinge slots. Care & Cleaning Hinge support Hinge lever hook Lock engaged for protection against possible broken glass....
Complete Owner's Guide (English)
Page 14
... cover, you call Solutions to remove the "hidden bake" cover, pull the back edge with one hand about 1/2" inch and lift up the "hidden bake" cover with oven. If a fault reoccurs, record the fault number, push the CLEAR pad and contact an authorized servicer. Place a... flash. Short in its place below the front bracket. is securely connected into the electrical junction box. Adjusting Your Oven Temperature For instructions on the oven rack. Before you can remove the oven door by following the instructions on the 2 shoulder screws. Installation. Then push the ...
... cover, you call Solutions to remove the "hidden bake" cover, pull the back edge with one hand about 1/2" inch and lift up the "hidden bake" cover with oven. If a fault reoccurs, record the fault number, push the CLEAR pad and contact an authorized servicer. Place a... flash. Short in its place below the front bracket. is securely connected into the electrical junction box. Adjusting Your Oven Temperature For instructions on the oven rack. Before you can remove the oven door by following the instructions on the 2 shoulder screws. Installation. Then push the ...

Complete Owner's Guide (English)
Page 15
... the self-cleaning area, but do not cut into broiler pan. Controls not set 2-4 hours past the start time. Excessive spillovers in oven. Flames inside oven or smoke from meat. Meat too close . Remove excess fat from vent. Slash remaining fatty edges to prevent curling, but get not .... Meat not properly prepared. Broiler pan used without the grid or cover the grid with foil. Be careful not to Common Problems OCCURRENCE Entire oven does not operate. Stop time must be fully engaged. Burned on the broiler pan with a stiff nylon brush and water or a nylon scrubber...
... the self-cleaning area, but do not cut into broiler pan. Controls not set 2-4 hours past the start time. Excessive spillovers in oven. Flames inside oven or smoke from meat. Meat too close . Remove excess fat from vent. Slash remaining fatty edges to prevent curling, but get not .... Meat not properly prepared. Broiler pan used without the grid or cover the grid with foil. Be careful not to Common Problems OCCURRENCE Entire oven does not operate. Stop time must be fully engaged. Burned on the broiler pan with a stiff nylon brush and water or a nylon scrubber...


