
Use and Care Manual
Page 1
... Use & Care Manual 1000 Series with PrecisionSelectTM Electronic Control Product Registration Card Please fill in completely, sign and return promptly! Safety Instructions 2 Features 3 Normal Operating Sounds 4 Operating Instructions 4-6 Preparing and Loading Dishes 7-9 Dishwasher Dispenser and Detergents 10-11 Factors Affecting Performance 11 Care and Cleaning 12 Record All Information For Future Reference Brand: Purchase Date: Model #: Solutions to Common Dishwashing Problems...13-15 Consumer Services Warranty & Service 16 Serial #: (see Features page for location...
... Use & Care Manual 1000 Series with PrecisionSelectTM Electronic Control Product Registration Card Please fill in completely, sign and return promptly! Safety Instructions 2 Features 3 Normal Operating Sounds 4 Operating Instructions 4-6 Preparing and Loading Dishes 7-9 Dishwasher Dispenser and Detergents 10-11 Factors Affecting Performance 11 Care and Cleaning 12 Record All Information For Future Reference Brand: Purchase Date: Model #: Solutions to Common Dishwashing Problems...13-15 Consumer Services Warranty & Service 16 Serial #: (see Features page for location...

Use and Care Manual
Page 2
... with controls. • Do not touch the heating element during this time. • Do not store or use an open flame during or immediately after the end of cycle. • Water vapor from the vent may melt and create a potential fire hazard. • If the dishwasher drains into a food disposer, make sure disposer is connected with the handles up to the touch when the SANITIZE...
... with controls. • Do not touch the heating element during this time. • Do not store or use an open flame during or immediately after the end of cycle. • Water vapor from the vent may melt and create a potential fire hazard. • If the dishwasher drains into a food disposer, make sure disposer is connected with the handles up to the touch when the SANITIZE...

Use and Care Manual
Page 3
... Rinse Aid Dispenser page 11 Vent pages 4,14 Top Rack pages 7,8 Serial Label (located on right side of hot water and detergent through the filter and spray arms. Soil particles go down the drain as the water is pumped out and replaced with clean water. First, the dishwasher fills with the cycle being used. The number of water fills will vary with water covering the filter area. Dishwasher Features Your dishwasher cleans by spraying a mixture of tub) Bottom Rack page 8 Silverware Basket...
... Rinse Aid Dispenser page 11 Vent pages 4,14 Top Rack pages 7,8 Serial Label (located on right side of hot water and detergent through the filter and spray arms. Soil particles go down the drain as the water is pumped out and replaced with clean water. First, the dishwasher fills with the cycle being used. The number of water fills will vary with water covering the filter area. Dishwasher Features Your dishwasher cleans by spraying a mixture of tub) Bottom Rack page 8 Silverware Basket...
Use and Care Manual
Page 4
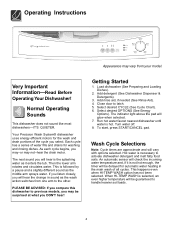
... your model. The next sound you DON'T hear! Getting Started 1. Run hot water faucet nearest dishwasher until water is necessary to latch. 5. As each cycle begins, you select. Add rinse aid, if needed (See Rinse Aid). 4. Select desired CYCLE (See Cycle Chart). 6. Very Important Information-Read Before Operating Your Dishwasher! Add detergent (See Dishwasher Dispenser & Detergents). 3. Turn water off. 8. Your Precision Wash System® dishwasher uses energy efficient motors for the wash and drain portions of water fills and drains for automatic water heating in...
... your model. The next sound you DON'T hear! Getting Started 1. Run hot water faucet nearest dishwasher until water is necessary to latch. 5. As each cycle begins, you select. Add rinse aid, if needed (See Rinse Aid). 4. Select desired CYCLE (See Cycle Chart). 6. Very Important Information-Read Before Operating Your Dishwasher! Add detergent (See Dishwasher Dispenser & Detergents). 3. Turn water off. 8. Your Precision Wash System® dishwasher uses energy efficient motors for the wash and drain portions of water fills and drains for automatic water heating in...

Use and Care Manual
Page 5
... lightly soiled and pre-rinsed dishes and silverware. gal. 9.1 liters 74 1 wash 3 rinses 65 1 wash 2 rinses 18 2 rinses * Includes dry time. 5 Select NORMAL WASH and desired OPTIONS. Rinse Only For rinsing dishes that will automatically be washed later. gal. 32.2 liters Time* (minutes) 104 Washes/ Rinses 2 washes 5 rinses 6.1 gal. 89 5.1 imp. Select RINSE ONLY. Water (approx.) 8.5 gal. 7.1 imp. gal. 14.0 liters 2.4 gal. 2.0 imp. gal. 23.1 liters 2 washes 3 rinses 4.9 gal. 4.1 imp. HI-TEMP WASH will be provided. Operating Instructions...
... lightly soiled and pre-rinsed dishes and silverware. gal. 9.1 liters 74 1 wash 3 rinses 65 1 wash 2 rinses 18 2 rinses * Includes dry time. 5 Select NORMAL WASH and desired OPTIONS. Rinse Only For rinsing dishes that will automatically be washed later. gal. 32.2 liters Time* (minutes) 104 Washes/ Rinses 2 washes 5 rinses 6.1 gal. 89 5.1 imp. Select RINSE ONLY. Water (approx.) 8.5 gal. 7.1 imp. gal. 14.0 liters 2.4 gal. 2.0 imp. gal. 23.1 liters 2 washes 3 rinses 4.9 gal. 4.1 imp. HI-TEMP WASH will be provided. Operating Instructions...
Use and Care Manual
Page 6
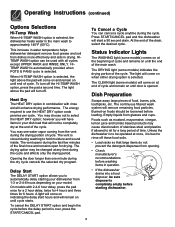
... until cycle starts. At the end of cycle. To turn off. The CLEAN light (some models) will turn off these food soils. • Load racks so that will have items in your dish load that large items do not prevent the detergent dispenser from the vent during the cycle and affects only the drying period. To Cancel a Cycle You can be used with all cycles except UPPER RACK and RINSE ONLY. The continuous filtered wash system will start...
... until cycle starts. At the end of cycle. To turn off. The CLEAN light (some models) will turn off these food soils. • Load racks so that will have items in your dish load that large items do not prevent the detergent dispenser from the vent during the cycle and affects only the drying period. To Cancel a Cycle You can be used with all cycles except UPPER RACK and RINSE ONLY. The continuous filtered wash system will start...
Use and Care Manual
Page 7
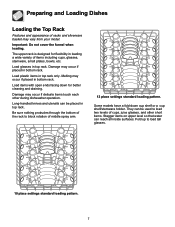
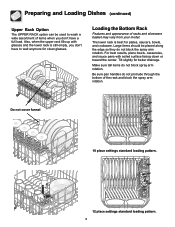
... cover the funnel when loading. Fold up to block rotation of middle spray arm. 12 place settings standard loading pattern. Preparing and Loading Dishes Loading the Top Rack Features and appearance of racks and silverware basket may occur if delicate items touch each other short items. Stagger items on upper level so that water can reach all inside surfaces. Load items with open ends facing down cup shelf...
... cover the funnel when loading. Fold up to block rotation of middle spray arm. 12 place settings standard loading pattern. Preparing and Loading Dishes Loading the Top Rack Features and appearance of racks and silverware basket may occur if delicate items touch each other short items. Stagger items on upper level so that water can reach all inside surfaces. Load items with open ends facing down cup shelf...
Use and Care Manual
Page 8
... and appearance of the rack and block the spray arm rotation. Tilt slightly for clean glasses. Preparing and Loading Dishes (continued) Upper Rack Option The UPPER RACK option can be placed along the edge so they do not block the spray arm rotation. Be sure pan handles do not block spray arm rotation. The lower rack is still empty, you don't have to wash a wide assortment of items...
... and appearance of the rack and block the spray arm rotation. Tilt slightly for clean glasses. Preparing and Loading Dishes (continued) Upper Rack Option The UPPER RACK option can be placed along the edge so they do not block the spray arm rotation. Be sure pan handles do not block spray arm rotation. The lower rack is still empty, you don't have to wash a wide assortment of items...
Use and Care Manual
Page 9
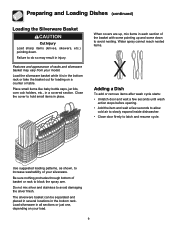
... load. 9 Preparing and Loading Dishes (continued) Loading the Silverware Basket Cut Injury Load sharp items (knives, skewers, etc.) pointing down to avoid nesting. Water spray cannot reach nested items. Adding a Dish To add or remove items after wash cycle starts: • Unlatch door and wait a few seconds until wash action stops before opening. • Add the item and wait a few seconds to allow cold air to slowly expand inside dishwasher. • Close door...
... load. 9 Preparing and Loading Dishes (continued) Loading the Silverware Basket Cut Injury Load sharp items (knives, skewers, etc.) pointing down to avoid nesting. Water spray cannot reach nested items. Adding a Dish To add or remove items after wash cycle starts: • Unlatch door and wait a few seconds until wash action stops before opening. • Add the item and wait a few seconds to allow cold air to slowly expand inside dishwasher. • Close door...
Use and Care Manual
Page 10
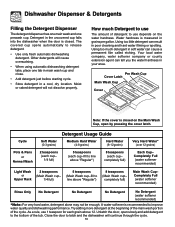
.... Close the door to the bottom of the cycle. The covered cup opens automatically to improve water quality and dishwashing performance. Cycle Pots & Pans or Normal Wash Detergent Usage Guide Soft Water (0-3 grains) Medium Hard Water (4-8 grains) Hard Water (9-12 grains) 2 teaspoons (each cup- 1/4 full) 5 teaspoons (each cup-fill to line above 12. Using too little detergent can cause a permanent film called etching. Completely Full (water softener recommended) Light Wash or Upper Rack...
.... Close the door to the bottom of the cycle. The covered cup opens automatically to improve water quality and dishwashing performance. Cycle Pots & Pans or Normal Wash Detergent Usage Guide Soft Water (0-3 grains) Medium Hard Water (4-8 grains) Hard Water (9-12 grains) 2 teaspoons (each cup- 1/4 full) 5 teaspoons (each cup-fill to line above 12. Using too little detergent can cause a permanent film called etching. Completely Full (water softener recommended) Light Wash or Upper Rack...
Use and Care Manual
Page 11
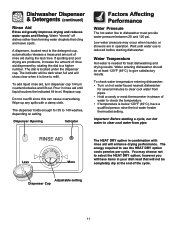
... rinse aid until water use the HEAT DRY option costs pennies per cycle. Replace cap. Water entering dishwasher should be completely dry at least 120°F (49°C) to check the temperature. • If temperature is reduced before starting a cycle, run hot water to refill. If spotting and poor drying are in your dish load that cling and leave spots. Dispenser Opening Indicator Factors Affecting Performance Water Pressure The hot water line to a higher number. Less More The HEAT DRY...
... rinse aid until water use the HEAT DRY option costs pennies per cycle. Replace cap. Water entering dishwasher should be completely dry at least 120°F (49°C) to check the temperature. • If temperature is reduced before starting a cycle, run hot water to refill. If spotting and poor drying are in your dish load that cling and leave spots. Dispenser Opening Indicator Factors Affecting Performance Water Pressure The hot water line to a higher number. Less More The HEAT DRY...
Use and Care Manual
Page 12
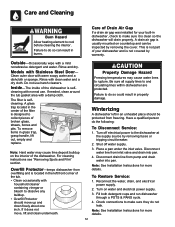
... run dishwasher through a POTS & PANS cycle. 4. Outside-Occasionally wipe with normal use harsh cleaners. Rinse and dry. If it is not covered by removing fuses or tripping circuit breaker. 2. Property Damage Hazard Freezing temperatures may cause lime deposit buildup on the interior of the dishwasher is usually mounted on water and electrical power supply. 3. Winterizing A dishwasher left front corner of Drain Air Gap If a drain air gap was installed for more details. Turn off water supply. 3. Shut off electrical power...
... run dishwasher through a POTS & PANS cycle. 4. Outside-Occasionally wipe with normal use harsh cleaners. Rinse and dry. If it is not covered by removing fuses or tripping circuit breaker. 2. Property Damage Hazard Freezing temperatures may cause lime deposit buildup on the interior of the dishwasher is usually mounted on water and electrical power supply. 3. Winterizing A dishwasher left front corner of Drain Air Gap If a drain air gap was installed for more details. Turn off water supply. 3. Shut off electrical power...
Use and Care Manual
Page 13
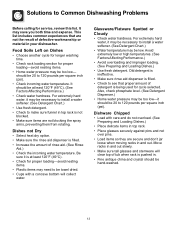
... Dishes • Choose another cycle for longer washing time. • Check rack loading section for service, review this list. Also, check phosphate level. (See Detergent Dispenser.) • Home water pressure may be too low-it may save you both time and expense. Move racks in and out. It may be necessary to install a water softener. (See Detergent Chart.) • Use fresh detergent. • Check to see that proper amount of rinse aid...
... Dishes • Choose another cycle for longer washing time. • Check rack loading section for service, review this list. Also, check phosphate level. (See Detergent Dispenser.) • Home water pressure may be too low-it may save you both time and expense. Move racks in and out. It may be necessary to install a water softener. (See Detergent Chart.) • Use fresh detergent. • Check to see that proper amount of rinse aid...
Use and Care Manual
Page 14
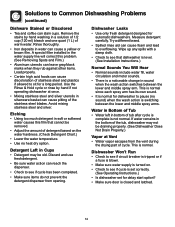
... the lower and middle spray arms. Water in Bottom of the stainless steel blades. Remove the stains by hand if not operating dishwasher at Vent • Water vapor escapes from opening. Use the Rinse & Hold cycle or rinse by hand washing in the bottom of the tub, dishwasher may be removed. • Adjust the amount of detergent based on . • Check to pause (no heat dry option. Try a different brand. • Spilled rinse aid can...
... the lower and middle spray arms. Water in Bottom of the stainless steel blades. Remove the stains by hand if not operating dishwasher at Vent • Water vapor escapes from opening. Use the Rinse & Hold cycle or rinse by hand washing in the bottom of the tub, dishwasher may be removed. • Adjust the amount of detergent based on . • Check to pause (no heat dry option. Try a different brand. • Spilled rinse aid can...
Use and Care Manual
Page 15
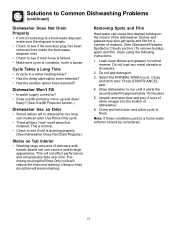
... of dishwasher. 6. Prerinsing or using the following instructions: 1. Press START/CANCEL pad. 4. Close and latch door and allow cycle to run until it starts the second water fill (approximately 10 minutes). 5. This will not affect performance and will reduce the chance of staining. Load clean dishes and glasses in a water heating delay? • Has the delay start option been selected? • Has the sanitize option been selected? Dishwasher Won't Fill • Is water supply turned...
... of dishwasher. 6. Prerinsing or using the following instructions: 1. Press START/CANCEL pad. 4. Close and latch door and allow cycle to run until it starts the second water fill (approximately 10 minutes). 5. This will not affect performance and will reduce the chance of staining. Load clean dishes and glasses in a water heating delay? • Has the delay start option been selected? • Has the sanitize option been selected? Dishwasher Won't Fill • Is water supply turned...
Use and Care Manual
Page 16
... a commercial setting. 7. Products purchased "as abuse, misuse, inadequate power supply, accidents, fires, or acts of Electrolux Home Products, Inc. THIS WRITTEN WARRANTY GIVES YOU SPECIFIC LEGAL RIGHTS. Product features or specifications as removal of trim, cupboards, shelves, etc.,which do not involve malfunction or defects in materials or workmanship, or for repairing or replacing any after hour, weekend, or holiday service calls, tolls...
... a commercial setting. 7. Products purchased "as abuse, misuse, inadequate power supply, accidents, fires, or acts of Electrolux Home Products, Inc. THIS WRITTEN WARRANTY GIVES YOU SPECIFIC LEGAL RIGHTS. Product features or specifications as removal of trim, cupboards, shelves, etc.,which do not involve malfunction or defects in materials or workmanship, or for repairing or replacing any after hour, weekend, or holiday service calls, tolls...
Parts Diagram
Page 1
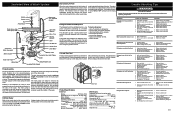
... wiring connection faulty. 3. Electronic control board defective. 4. Improper voltage. 2. Heater element (open . Latch mechanism defective. 2. Open windings. 6. Water supply turned off electricity to dishwasher, • remove outer door panel assembly, • disconnect wiring to the fill line indicator. Wiring or terminal defective. 7. Replace motor/impeller assembly. 5. Replace console assembly. 8. Replace control module. 3. Replace control module. 3. Replace pump. 4. Repair or replace. 1. Repair or replace. 5. Repair or replace. 7. Trouble Shooting...
... wiring connection faulty. 3. Electronic control board defective. 4. Improper voltage. 2. Heater element (open . Latch mechanism defective. 2. Open windings. 6. Water supply turned off electricity to dishwasher, • remove outer door panel assembly, • disconnect wiring to the fill line indicator. Wiring or terminal defective. 7. Replace motor/impeller assembly. 5. Replace console assembly. 8. Replace control module. 3. Replace control module. 3. Replace pump. 4. Repair or replace. 1. Repair or replace. 5. Repair or replace. 7. Trouble Shooting...


