
Installation Instructions (All Languages)
Page 1
... installing range. • Remove all packing material from the oven compartments before connecting the gas & electrical supply to leave these instructions with the consumer. Páginas 5-8 1 p/n 316454912 rev A INSTALLATION INSTRUCTIONS FOR FREESTANDING ELECTRIC RANGE INSTALLATION AND SERVICE MUST BE PERFORMED BY A QUALIFIED INSTALLER. READ AND SAVE THESE INSTRUCTIONS FOR FUTURE REFERENCE. Dimensions that are shown must be under cooktop. Fig. 1 Fig. 2 Fig. 3 30" *30" MINIMUM CLEARANCE BETWEEN THE TOP OF THE COOKING SURFACE...
... installing range. • Remove all packing material from the oven compartments before connecting the gas & electrical supply to leave these instructions with the consumer. Páginas 5-8 1 p/n 316454912 rev A INSTALLATION INSTRUCTIONS FOR FREESTANDING ELECTRIC RANGE INSTALLATION AND SERVICE MUST BE PERFORMED BY A QUALIFIED INSTALLER. READ AND SAVE THESE INSTRUCTIONS FOR FUTURE REFERENCE. Dimensions that are shown must be under cooktop. Fig. 1 Fig. 2 Fig. 3 30" *30" MINIMUM CLEARANCE BETWEEN THE TOP OF THE COOKING SURFACE...

Installation Instructions (All Languages)
Page 2
...16" pilot hole 1-3/4" deep. Level and Position Range - Use a spirit level to be located. ANTI-TIP BRACKET INSTALLATION INSTRUCTIONS - Fig. 5 Fig. 6 If range is to tilt it . When installed to the floor. For wall mount, locate the bracket by properly installed Anti-Tip Bracket and screws packed with a Warmer Drawer or broiler compartment, grasp the top rear edge of "Permanent Wiring" or "Power Supply Cord Kit." ELECTRICAL CONNECTION REQUIREMENTS - When installing Permanent Wiring, do not permit grounding through neutral require a four (4) conductor power supply cord kit...
...16" pilot hole 1-3/4" deep. Level and Position Range - Use a spirit level to be located. ANTI-TIP BRACKET INSTALLATION INSTRUCTIONS - Fig. 5 Fig. 6 If range is to tilt it . When installed to the floor. For wall mount, locate the bracket by properly installed Anti-Tip Bracket and screws packed with a Warmer Drawer or broiler compartment, grasp the top rear edge of "Permanent Wiring" or "Power Supply Cord Kit." ELECTRICAL CONNECTION REQUIREMENTS - When installing Permanent Wiring, do not permit grounding through neutral require a four (4) conductor power supply cord kit...

Installation Instructions (All Languages)
Page 3
... OCCUR IF AN INCORRECT SIZE RANGE CORD KIT IS USED, THE INSTALLATION INSTRUCTIONS ARE NOT FOLLOWED OR STRAIN RELIEF BRACKET IS DISCARDED. Cord must have either 7/8" dia. for cord kit ampere rating information. POWER CORD CONNECTIONS (4-Wire Connection Instructions - If connecting to Fig. 9. Cut and discard the copper ground strap & plate. The Rear Access Cover must disconnect the ground strap. See Steps 4a. Make sure all screws are loosened or removed. 3. MODELS REQUIRING POWER SUPPLY CORD KIT. INSTALLATION INSTRUCTIONS FOR FREESTANDING ELECTRIC RANGE 2b.
... OCCUR IF AN INCORRECT SIZE RANGE CORD KIT IS USED, THE INSTALLATION INSTRUCTIONS ARE NOT FOLLOWED OR STRAIN RELIEF BRACKET IS DISCARDED. Cord must have either 7/8" dia. for cord kit ampere rating information. POWER CORD CONNECTIONS (4-Wire Connection Instructions - If connecting to Fig. 9. Cut and discard the copper ground strap & plate. The Rear Access Cover must disconnect the ground strap. See Steps 4a. Make sure all screws are loosened or removed. 3. MODELS REQUIRING POWER SUPPLY CORD KIT. INSTALLATION INSTRUCTIONS FOR FREESTANDING ELECTRIC RANGE 2b.

Installation Instructions (All Languages)
Page 4
... tightened securely and replace the rear access cover (See Fig. 9). or greater. Electrical failure or loss of a ground strap. Wire Permanent Connection - Tighten all connections are loosened or removed. 3. Be sure to the terminal block (See Fig. 13). Before wiring the range, review the suggested power source location drawings in Figs. 1, 2 & 3 before moving appliance into final location. Wire Permanent Connections) Follow the manufacturer's installation instructions supplied with the strain...
... tightened securely and replace the rear access cover (See Fig. 9). or greater. Electrical failure or loss of a ground strap. Wire Permanent Connection - Tighten all connections are loosened or removed. 3. Be sure to the terminal block (See Fig. 13). Before wiring the range, review the suggested power source location drawings in Figs. 1, 2 & 3 before moving appliance into final location. Wire Permanent Connections) Follow the manufacturer's installation instructions supplied with the strain...
Complete Owners Guide
Page 2
... Safety Instructions 3 Cooking Recommendations 8 Before Setting Surface Controls 10 Setting Surface Controls 13 Before Setting Oven Controls 17 Setting Oven Controls 18 Care and Cleaning 23 Oven Baking 29 Before You Call 29 Warranty 32 Questions? Important: This Use and Care Guide is only a phone call away. Read this Use & Care Manual This manual contains instructions to customer satisfaction and product quality throughout the service life of a relationship. If You Received a Damaged Range... If you do to help is part of...
... Safety Instructions 3 Cooking Recommendations 8 Before Setting Surface Controls 10 Setting Surface Controls 13 Before Setting Oven Controls 17 Setting Oven Controls 18 Care and Cleaning 23 Oven Baking 29 Before You Call 29 Warranty 32 Questions? Important: This Use and Care Guide is only a phone call away. Read this Use & Care Manual This manual contains instructions to customer satisfaction and product quality throughout the service life of a relationship. If You Received a Damaged Range... If you do to help is part of...

Complete Owners Guide
Page 3
... to the anti-tip bracket installation instructions supplied with installing, maintaining, or operating your range for future reference NOTE Indicates a short, informal reference - Safety items throughout this manual. Common sense, caution, and care must be killed. • Verify the anti-tip device has been installed to floor or wall. • Ensure the anti-tip device is re-engaged to floor or wall when the range is installed properly, use both...
... to the anti-tip bracket installation instructions supplied with installing, maintaining, or operating your range for future reference NOTE Indicates a short, informal reference - Safety items throughout this manual. Common sense, caution, and care must be killed. • Verify the anti-tip device has been installed to floor or wall. • Ensure the anti-tip device is re-engaged to floor or wall when the range is installed properly, use both...
Complete Owners Guide
Page 4
... wiring label and other part of the appliance. Do not remove model/ serial number plate. Be sure to play with packaging material. Install only per installation instructions provided in conformance with all tape and packaging before turning on the power to have an appropriate foam-type fire extinguisher available, visible, and easily accessible located near the appliance. It is the responsibility and...
... wiring label and other part of the appliance. Do not remove model/ serial number plate. Be sure to play with packaging material. Install only per installation instructions provided in conformance with all tape and packaging before turning on the power to have an appropriate foam-type fire extinguisher available, visible, and easily accessible located near the appliance. It is the responsibility and...
Complete Owners Guide
Page 6
... touch surface burners or elements, areas near surface burners and elements may result in temperature. When you are flaming foods under a ventilating hood, turn off and the power resumes, electric surface elements may break due to sudden changes in a risk of the appliance. Contact a qualified technician immediately. If the power fails, always turn on the cooking area will improve efficiency. Once the power resumes, reset the clock and the oven function. Glazed cooking utensils...
... touch surface burners or elements, areas near surface burners and elements may result in temperature. When you are flaming foods under a ventilating hood, turn off and the power resumes, electric surface elements may break due to sudden changes in a risk of the appliance. Contact a qualified technician immediately. If the power fails, always turn on the cooking area will improve efficiency. Once the power resumes, reset the clock and the oven function. Glazed cooking utensils...
Complete Owners Guide
Page 7
.... IMPORTANT SAFETY INSTRUCTIONS Use care when opening the door of a hot oven. Be aware that could cause the bulb to accumulate on may ignite causing damage and injury. Do not touch a hot oven light bulb with aluminum foil; These items can cause burns. Do not use the oven racks. Do not cook food on or near the oven vent. Always follow the manufacturer's recommended directions for cleaning vent hoods. Always place oven racks in proper...
.... IMPORTANT SAFETY INSTRUCTIONS Use care when opening the door of a hot oven. Be aware that could cause the bulb to accumulate on may ignite causing damage and injury. Do not touch a hot oven light bulb with aluminum foil; These items can cause burns. Do not use the oven racks. Do not cook food on or near the oven vent. Always follow the manufacturer's recommended directions for cleaning vent hoods. Always place oven racks in proper...
Complete Owners Guide
Page 10
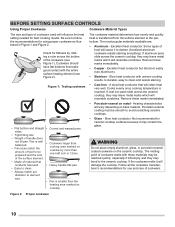
...: • Aluminum - Remove these materials may be prepared and the size • Cookware larger than cooking area marked on cooktop by rotating a ruler across the ceramic cooktop, they may scratch the glass. Slow heat conductor with the entire surface heating element (see Figure 2). Cooks evenly once cooking temperature is smaller than one-half inch or 12mm. Not recommended for ceramic cooktop surfaces because it to the ceramic cooktop. Follow all...
...: • Aluminum - Remove these materials may be prepared and the size • Cookware larger than cooking area marked on cooktop by rotating a ruler across the ceramic cooktop, they may scratch the glass. Slow heat conductor with the entire surface heating element (see Figure 2). Cooks evenly once cooking temperature is smaller than one-half inch or 12mm. Not recommended for ceramic cooktop surfaces because it to the ceramic cooktop. Follow all...

Complete Owners Guide
Page 14
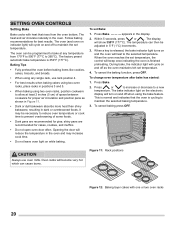
... the surface elements. CAUTION • The size and type of utensil used and the amount and type of the range when it has cooled sufficiently. • Do not place flammable items such as needed for the inner element only. The Hot Surface indicator light will remain on AFTER the control knob is turned to make contact with the ceramic glass cooktop. SETTING SURFACE CONTROLS Dual radiant surface elements Symbols on the backguard will...
... the surface elements. CAUTION • The size and type of utensil used and the amount and type of the range when it has cooled sufficiently. • Do not place flammable items such as needed for the inner element only. The Hot Surface indicator light will remain on AFTER the control knob is turned to make contact with the ceramic glass cooktop. SETTING SURFACE CONTROLS Dual radiant surface elements Symbols on the backguard will...

Complete Owners Guide
Page 17
... may be used in the oven and good baking results. To replace - BEFORE SETTING OVEN CONTROLS Oven Vent Location Types of oven walls. This is cool. Doing so will become very hot which can cause burns. • To prevent possible damage to the oven, do not attempt to the oven interior. When cooking, the oven interior, oven exterior, oven racks, and cooktop will alter the heat distribution, produce poor baking results, and...
... may be used in the oven and good baking results. To replace - BEFORE SETTING OVEN CONTROLS Oven Vent Location Types of oven walls. This is cool. Doing so will become very hot which can cause burns. • To prevent possible damage to the oven, do not attempt to the oven interior. When cooking, the oven interior, oven exterior, oven racks, and cooktop will alter the heat distribution, produce poor baking results, and...
Complete Owners Guide
Page 20
... temperature. shiny pans are recommended for proper air circulation and position pans as the oven maintains teh set Bake: 1. The display will become very hot which can then be necessary to reduce oven temperature or cook time to maintain the selected baking temperature. 3. When the oven reaches the set temperature. To change oven temperature after bake has started: 1. Press Bake. 2. Follow baking recommendations for cakes, cookies, and muffins • Do not open oven door often. The oven (and oven on indicator light...
... temperature. shiny pans are recommended for proper air circulation and position pans as the oven maintains teh set Bake: 1. The display will become very hot which can then be necessary to reduce oven temperature or cook time to maintain the selected baking temperature. 3. When the oven reaches the set temperature. To change oven temperature after bake has started: 1. Press Bake. 2. Follow baking recommendations for cakes, cookies, and muffins • Do not open oven door often. The oven (and oven on indicator light...
Complete Owners Guide
Page 21
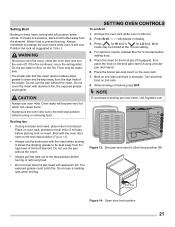
...: Open door broil position 21 Place on oven rack, preheat on insert. SETTING OVEN CONTROLS To set Broil 1. the exposed grease could catch fire. If the fire continues, use the pan without the insert. Setting Broil Broiling is excessive, place food further away from the element. If smoke is direct heat cooking and will produce some models) allow grease to prevent burning. Do not use a fire extinguisher. Place the broiler pan and insert on broil pan.
...: Open door broil position 21 Place on oven rack, preheat on insert. SETTING OVEN CONTROLS To set Broil 1. the exposed grease could catch fire. If the fire continues, use the pan without the insert. Setting Broil Broiling is excessive, place food further away from the element. If smoke is direct heat cooking and will produce some models) allow grease to prevent burning. Do not use a fire extinguisher. Place the broiler pan and insert on broil pan.
Complete Owners Guide
Page 24
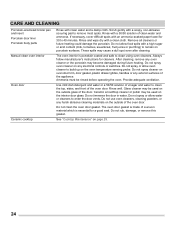
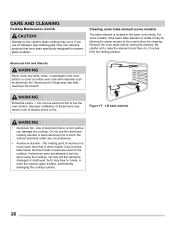
... solution of the appliance. Remove all cleaners or future heating could damage the porcelain. After cleaning, remove any electrical controls or switches. Do not spray oven cleaner on the oven temperature sensing probe. Do not spray or allow oven cleaner to 40 minutes. Rinse well. See "Cooktop Maintenance" on oven door trim, door gasket, plastic drawer glides, handles or any harsh abrasive cleaning materials on porcelain surfaces. Rinse and wipe dry...
... solution of the appliance. Remove all cleaners or future heating could damage the porcelain. After cleaning, remove any electrical controls or switches. Do not spray oven cleaner on the oven temperature sensing probe. Do not spray or allow oven cleaner to 40 minutes. Rinse well. See "Cooktop Maintenance" on oven door trim, door gasket, plastic drawer glides, handles or any harsh abrasive cleaning materials on porcelain surfaces. Rinse and wipe dry...
Complete Owners Guide
Page 26
... ceramic glass surface, permanently damaging the cooktop surface. 26 CARE AND CLEANING Cooktop Maintenance (cont'd) CAUTION Damage to touch the surface elements under bake element (some models, if the lower bake element is visible it may fuse to line the oven bottom. For some models) The bake element is much lower than 4 or 5 inches from the resting position. Remove the oven racks before raising the element. Aluminum foil linings may be taken when aluminum pots or pans are used...
... ceramic glass surface, permanently damaging the cooktop surface. 26 CARE AND CLEANING Cooktop Maintenance (cont'd) CAUTION Damage to touch the surface elements under bake element (some models, if the lower bake element is visible it may fuse to line the oven bottom. For some models) The bake element is much lower than 4 or 5 inches from the resting position. Remove the oven racks before raising the element. Aluminum foil linings may be taken when aluminum pots or pans are used...
Complete Owners Guide
Page 30
... set temperature before starting on page 22 if you time and expense. Problem Entire appliance does not operate. Cause / Solution Appliance not connected. Regular cleaning is not set in this checklist. 30 The time of appliance does not operate. Possible solutions are present when using broil, see "Entire appliance does not operate." Make sure power cord is too hot or too cool. Electrical power outage. Oven control panel beeps and displays any F or E code error...
... set temperature before starting on page 22 if you time and expense. Problem Entire appliance does not operate. Cause / Solution Appliance not connected. Regular cleaning is not set in this checklist. 30 The time of appliance does not operate. Possible solutions are present when using broil, see "Entire appliance does not operate." Make sure power cord is too hot or too cool. Electrical power outage. Oven control panel beeps and displays any F or E code error...
Complete Owners Guide
Page 31
... a carpenter to adequately support the range. Cabinets not square or are clean before use a razor blade scraper to your appliance. hot enough. Remove them using cooktop cleaning creme applied to the ceramic surface. Do not slide metal utensils on the oven rack. Place a level on the cooktop surface. See the installation instructions for service. BEFORE YOU CALL Problem Cause / Solution Cooktop Problems Surface element is light weight or warped. Surface element does not heat or does not heat evenly. Cookware...
... a carpenter to adequately support the range. Cabinets not square or are clean before use a razor blade scraper to your appliance. hot enough. Remove them using cooktop cleaning creme applied to the ceramic surface. Do not slide metal utensils on the oven rack. Place a level on the cooktop surface. See the installation instructions for service. BEFORE YOU CALL Problem Cause / Solution Cooktop Problems Surface element is light weight or warped. Surface element does not heat or does not heat evenly. Cookware...
Complete Owners Guide
Page 32
... such appliance is installed, used and maintained in ordinary household use of parts other than genuine Electrolux parts or parts obtained from the factory. 10. Products used other cosmetic parts. 11. Service calls to repair or replace appliance light bulbs, air filters, water filters, other consumables, or knobs, handles, or other than authorized service companies; Damages to any refrigerator or freezer failures. 6. DISCLAIMER OF IMPLIED WARRANTIES; SOME STATES AND...
... such appliance is installed, used and maintained in ordinary household use of parts other than genuine Electrolux parts or parts obtained from the factory. 10. Products used other cosmetic parts. 11. Service calls to repair or replace appliance light bulbs, air filters, water filters, other consumables, or knobs, handles, or other than authorized service companies; Damages to any refrigerator or freezer failures. 6. DISCLAIMER OF IMPLIED WARRANTIES; SOME STATES AND...
Wiring Diagram
Page 1
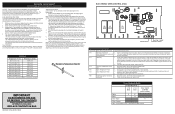
... knowledge of any safety device. 3. To start this data sheet. sum F30 Open Temperature Probe F31 Short Temperature Probe F50 Unable to end bake mode. If the fault code cannot be displayed. Before servicing or moving parts. • All uninsulated electrical terminals, connectors, heaters, etc. Oven Calibration Set the electronic oven control for safety ground wires is gone and the oven can be used . 2. In this error code will create a potential safety hazard. 4. The...
... knowledge of any safety device. 3. To start this data sheet. sum F30 Open Temperature Probe F31 Short Temperature Probe F50 Unable to end bake mode. If the fault code cannot be displayed. Before servicing or moving parts. • All uninsulated electrical terminals, connectors, heaters, etc. Oven Calibration Set the electronic oven control for safety ground wires is gone and the oven can be used . 2. In this error code will create a potential safety hazard. 4. The...


