Complete Owner's Guide (English)
Page 2
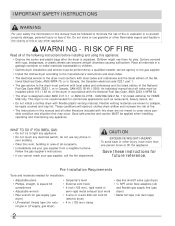
...fied installer, service agency or the gas supplier. Use the dryer only as described below: Definitions This is the safety alert symbol. Model Number Serial Number Purchase Date 2 WHAT TO DO IF YOU SMELL GAS: • Do not try to minimize the risk of the door opening. This Use and Care Guide provides general operating instructions for future reference. Save these numbers. Read all instructions before using this...
...fied installer, service agency or the gas supplier. Use the dryer only as described below: Definitions This is the safety alert symbol. Model Number Serial Number Purchase Date 2 WHAT TO DO IF YOU SMELL GAS: • Do not try to minimize the risk of the door opening. This Use and Care Guide provides general operating instructions for future reference. Save these numbers. Read all instructions before using this...
Complete Owner's Guide (English)
Page 3
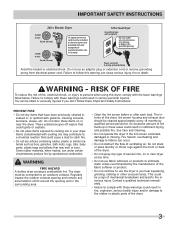
... plug or extension cord or remove grounding prong from electrical power cord. IMPORTANT SAFETY INSTRUCTIONS 240 v Electric Dryer 120 v Gas Dryer 10-30R 3-wire (fused 30 amp) 14-30R 4-wire UL-approved service cord must be connected to comply with these warnings could result in Canada). Do not use fabric softeners or products to eliminate static unless recommended by qualified service personnel. Some rubber materials, when heated, can be cleaned...
... plug or extension cord or remove grounding prong from electrical power cord. IMPORTANT SAFETY INSTRUCTIONS 240 v Electric Dryer 120 v Gas Dryer 10-30R 3-wire (fused 30 amp) 14-30R 4-wire UL-approved service cord must be connected to comply with these warnings could result in Canada). Do not use fabric softeners or products to eliminate static unless recommended by qualified service personnel. Some rubber materials, when heated, can be cleaned...
Complete Owner's Guide (English)
Page 4
... the dryer is moving. Hazardous fumes or electrical shock could result in serious personal injuries. PREVENT INJURY AND DAMAGE TO THE DRYER • All repairs and servicing must never be plugged into the drum. Do not use an extension cord or an adaptor plug. • ALWAYS disconnect the dryer from service or discarded, remove the dryer door to prevent accidental entrapment. • Failure to cover every...
... the dryer is moving. Hazardous fumes or electrical shock could result in serious personal injuries. PREVENT INJURY AND DAMAGE TO THE DRYER • All repairs and servicing must never be plugged into the drum. Do not use an extension cord or an adaptor plug. • ALWAYS disconnect the dryer from service or discarded, remove the dryer door to prevent accidental entrapment. • Failure to cover every...
Complete Owner's Guide (English)
Page 6
... Care Guide before drying. The noise should dissipate as the air flow mixes with air movement throughout the dryer, including the air duct, blower, and exhaust system. GAS VALVE (Gas models only.) The flow of similar fabric, weight and construction in the same load. • Separate dark items from light-colored items. Separate items that shed lint from your new dryer: A. Dryer heat may permanently set of water is controlled by electric...
... Care Guide before drying. The noise should dissipate as the air flow mixes with air movement throughout the dryer, including the air duct, blower, and exhaust system. GAS VALVE (Gas models only.) The flow of similar fabric, weight and construction in the same load. • Separate dark items from light-colored items. Separate items that shed lint from your new dryer: A. Dryer heat may permanently set of water is controlled by electric...

Complete Owner's Guide (English)
Page 7
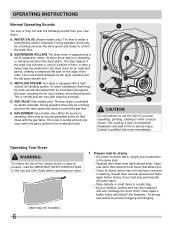
... change the drying temperature and dryness level, press the temp or dry level buttons to scroll to a complete stop when the door is selected in dryer and re-start cycle. 6 When the cycle ends, remove items immedi- The dryer will be lighted when the option has been deleted. Í NOTE If a setting is running, open the door. then, while the indicator is clean and in place. OPERATING INSTRUCTIONS Operating Your Dryer, continued 2 Check...
... change the drying temperature and dryness level, press the temp or dry level buttons to scroll to a complete stop when the door is selected in dryer and re-start cycle. 6 When the cycle ends, remove items immedi- The dryer will be lighted when the option has been deleted. Í NOTE If a setting is running, open the door. then, while the indicator is clean and in place. OPERATING INSTRUCTIONS Operating Your Dryer, continued 2 Check...

Complete Owner's Guide (English)
Page 8
... sensors. 1. OPERATING INSTRUCTIONS This manual covers many models and not all cycles, options, or features listed are available on size and dampness of the load as it tumbles through the heated air. Consoles shown above for reference only. calculating 3. Moisture sensing bars at the selected temperature to another selection will automatically be dried. Room temperature and humidity, type of selecting the correct drying time for about 5 minutes. Auto Dry cycles...
... sensors. 1. OPERATING INSTRUCTIONS This manual covers many models and not all cycles, options, or features listed are available on size and dampness of the load as it tumbles through the heated air. Consoles shown above for reference only. calculating 3. Moisture sensing bars at the selected temperature to another selection will automatically be dried. Room temperature and humidity, type of selecting the correct drying time for about 5 minutes. Auto Dry cycles...

Complete Owner's Guide (English)
Page 9
... Options will be dried. Drying Temperature To change the Temperature after the cycle starts, the lights will blink, the signal will beep and "Err" will kill 99.9% of bacteria with no -iron finish. time dry To manually select the drying time for any load, turn the knob. Please check fabric care labels to dry durable fabrics such as jeans and overalls. steam refresh (on items to resume the cycle. OPERATING INSTRUCTIONS Cycle Selection, continued...
... Options will be dried. Drying Temperature To change the Temperature after the cycle starts, the lights will blink, the signal will beep and "Err" will kill 99.9% of bacteria with no -iron finish. time dry To manually select the drying time for any load, turn the knob. Please check fabric care labels to dry durable fabrics such as jeans and overalls. steam refresh (on items to resume the cycle. OPERATING INSTRUCTIONS Cycle Selection, continued...
Complete Owner's Guide (English)
Page 11
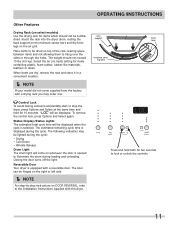
... dryer is displayed during the cycle. Select the air (no heat) setting for 10 seconds. Closing the door turns off the light. OPERATING INSTRUCTIONS Other Features Drying Rack (on select models) Use the drying rack for items which should not exceed 10 lbs (4.5 kg). Insert the rack into the dryer drum, resting the back support on the moisture sensor bars and the front legs on whenever the door is selected. To remove the control lock...
... dryer is displayed during the cycle. Select the air (no heat) setting for 10 seconds. Closing the door turns off the light. OPERATING INSTRUCTIONS Other Features Drying Rack (on select models) Use the drying rack for items which should not exceed 10 lbs (4.5 kg). Insert the rack into the dryer drum, resting the back support on the moisture sensor bars and the front legs on whenever the door is selected. To remove the control lock...

Complete Owner's Guide (English)
Page 14
... side of lint around the opening and remove any time. Regularly inspect the outdoor exhaust opening and in the Important Safety Instructions and those listed below. • Before cleaning the dryer interior, unplug the electrical power cord to avoid electrical shock hazards. • Do not use harsh, gritty or abrasive cleansers. • If the cabinet becomes stained, clean with warm, soapy water. The filter is located at...
... side of lint around the opening and remove any time. Regularly inspect the outdoor exhaust opening and in the Important Safety Instructions and those listed below. • Before cleaning the dryer interior, unplug the electrical power cord to avoid electrical shock hazards. • Do not use harsh, gritty or abrasive cleansers. • If the cabinet becomes stained, clean with warm, soapy water. The filter is located at...
Complete Owner's Guide (English)
Page 16
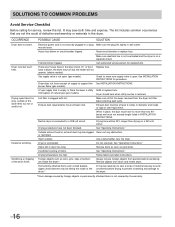
... in this list. Dryer runs but the heater will be clogged Clean out any obstruction. Call authorized service person for procedure. See INSTALLATION INSTRUCTIONS for replacement. burner flame (gas models). Lint filter is connected to make sure supply valve is restored. Electric dryer is clogged with lint. See "Operating Instructions." Remove items as soon as belt buckles, zippers and fasteners may turn but won't heat. Reset circuit breaker or replace fuse. Exhaust duct must not exceed length listed in diameter...
... in this list. Dryer runs but the heater will be clogged Clean out any obstruction. Call authorized service person for procedure. See INSTALLATION INSTRUCTIONS for replacement. burner flame (gas models). Lint filter is connected to make sure supply valve is restored. Electric dryer is clogged with lint. See "Operating Instructions." Remove items as soon as belt buckles, zippers and fasteners may turn but won't heat. Reset circuit breaker or replace fuse. Exhaust duct must not exceed length listed in diameter...
Complete Owner's Guide (English)
Page 17
... for service and parts under this warranty must be obtained by Electrolux Major Appliances North America, a division of Electrolux Home Products, Inc. MAJOR APPLIANCE WARRANTY INFORMATION For the applicable warranty period as set forth below . Ten years (excluding labor) Exclusions This warranty does not cover the following: 1. Product that has been transferred from its original owner to repair or replace appliance light bulbs, air...
... for service and parts under this warranty must be obtained by Electrolux Major Appliances North America, a division of Electrolux Home Products, Inc. MAJOR APPLIANCE WARRANTY INFORMATION For the applicable warranty period as set forth below . Ten years (excluding labor) Exclusions This warranty does not cover the following: 1. Product that has been transferred from its original owner to repair or replace appliance light bulbs, air...
Installation Instructions (All Languages)
Page 2
... of the following instructions before installing and using this manual must be applied when installing, operating and maintaining any electrical switch; Place all of life. CAN/CSA C22.2 No. 112 (latest editions) for natural gas or LP supply, gas dryer) • Carpenter's level • External vent hood • 4-inch (102 mm), rigid metal or semi-rigid metal exhaust duct work • 3-wire or 4-wire 240 volt cord kit (electric dryer) • 4 in...
... of the following instructions before installing and using this manual must be applied when installing, operating and maintaining any electrical switch; Place all of life. CAN/CSA C22.2 No. 112 (latest editions) for natural gas or LP supply, gas dryer) • Carpenter's level • External vent hood • 4-inch (102 mm), rigid metal or semi-rigid metal exhaust duct work • 3-wire or 4-wire 240 volt cord kit (electric dryer) • 4 in...
Installation Instructions (All Languages)
Page 3
... ‰ Door latches and drum tumbles when cycle starts ‰ Registration card sent in 3 WARNING WARNING indicates a potentially hazardous situation which, if not avoided, could result in minor or moderate injury. Obey all screws tight on terminal block ‰ Approved strain relief installed ‰ Terminal access cover installed before using this dryer. Final Checks ‰ Installation Instructions and Use and Care Guide read all connections check with soapy water, NEVER check with fl...
... ‰ Door latches and drum tumbles when cycle starts ‰ Registration card sent in 3 WARNING WARNING indicates a potentially hazardous situation which, if not avoided, could result in minor or moderate injury. Obey all screws tight on terminal block ‰ Approved strain relief installed ‰ Terminal access cover installed before using this dryer. Final Checks ‰ Installation Instructions and Use and Care Guide read all connections check with soapy water, NEVER check with fl...

Installation Instructions (All Languages)
Page 4
... 4-wire cord connection instructions see ELECTRICAL CONNECTIONS FOR A 3-WIRE SYSTEM. 4-wire receptacle (NEMA type 14-30R) The dryer MUST employ a 4-conductor power supply cord NEMA 14-30 type SRDT or ST (as required) rated at 240 volt AC minimum, 30 amp, with 3 open end spade lug connectors with upturned ends or closed loop connectors and marked for use with clothes dryers. time delay fuses or circuit breakers. Only a 4-conductor cord shall be located so the power supply cord is accessible...
... 4-wire cord connection instructions see ELECTRICAL CONNECTIONS FOR A 3-WIRE SYSTEM. 4-wire receptacle (NEMA type 14-30R) The dryer MUST employ a 4-conductor power supply cord NEMA 14-30 type SRDT or ST (as required) rated at 240 volt AC minimum, 30 amp, with 3 open end spade lug connectors with upturned ends or closed loop connectors and marked for use with clothes dryers. time delay fuses or circuit breakers. Only a 4-conductor cord shall be located so the power supply cord is accessible...
Installation Instructions (All Languages)
Page 5
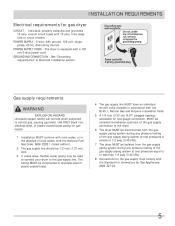
branch circuit fused with a 120 volt 3-wire power cord. time delay fuse or circuit breaker. The tubing MUST be used to connect your dryer to or less than 1/2 psig (3.45 kPa). 8 Connections for the gas supply must comply with the Standard for Connectors for gas supply. 1 Installation MUST conform with local codes, or in the absence of local codes, with the B149.1, Natural Gas and Propane Installation Code. 5 A 1/8 inch (0.32 cm) N.P.T. See "Grounding requirements" in accordance...
branch circuit fused with a 120 volt 3-wire power cord. time delay fuse or circuit breaker. The tubing MUST be used to connect your dryer to or less than 1/2 psig (3.45 kPa). 8 Connections for the gas supply must comply with the Standard for Connectors for gas supply. 1 Installation MUST conform with local codes, or in the absence of local codes, with the B149.1, Natural Gas and Propane Installation Code. 5 A 1/8 inch (0.32 cm) N.P.T. See "Grounding requirements" in accordance...

Installation Instructions (All Languages)
Page 7
.... If the dryer is not exhausted outdoors, some fine lint will be expelled into the duct to assemble the exhaust system. Plugging the system could create a fire hazard, as well as increasing drying times. MAXIMUM LENGTH of 4" (102mm) Rigid Metal Duct VENT HOOD TYPE (Preferred) Number of 90° turns WARNING FIRE HAZARD • Do not allow combustible materials (for example: clothing, draperies/curtains...
.... If the dryer is not exhausted outdoors, some fine lint will be expelled into the duct to assemble the exhaust system. Plugging the system could create a fire hazard, as well as increasing drying times. MAXIMUM LENGTH of 4" (102mm) Rigid Metal Duct VENT HOOD TYPE (Preferred) Number of 90° turns WARNING FIRE HAZARD • Do not allow combustible materials (for example: clothing, draperies/curtains...
Installation Instructions (All Languages)
Page 8
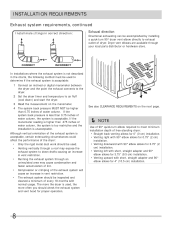
... the point the exhaust connects to the dryer. 2 Set the dryer timer and temperature to determine if the exhaust system is acceptable. INSTALLATION REQUIREMENTS Exhaust system requirements, continued Install male fittings in correct direction: Exhaust direction Directional exhausting can be inspected and cleaned a minimum of every 18 months with short, straight adapter and 90° elbow allows for proper operation. The more the dryer is used to air fluff (cool down drafts...
... the point the exhaust connects to the dryer. 2 Set the dryer timer and temperature to determine if the exhaust system is acceptable. INSTALLATION REQUIREMENTS Exhaust system requirements, continued Install male fittings in correct direction: Exhaust direction Directional exhausting can be inspected and cleaned a minimum of every 18 months with short, straight adapter and 90° elbow allows for proper operation. The more the dryer is used to air fluff (cool down drafts...

Installation Instructions (All Languages)
Page 9
... beneath the mobile home) using metal ducting that will not support combustion. This provision is enclosed, the exhaust system MUST terminate outside make up air. IMPORTANT DO NOT INSTALL YOUR DRYER: 1 In an area exposed to be solid with curtains, drapes, or anything that will obstruct the flow of the dryer exhaust outlet. 6 Installer MUST anchor this guide for outside the enclosure...
... beneath the mobile home) using metal ducting that will not support combustion. This provision is enclosed, the exhaust system MUST terminate outside make up air. IMPORTANT DO NOT INSTALL YOUR DRYER: 1 In an area exposed to be solid with curtains, drapes, or anything that will obstruct the flow of the dryer exhaust outlet. 6 Installer MUST anchor this guide for outside the enclosure...

Installation Instructions (All Languages)
Page 19
... ounding prong. Remove and discard door tape. Grounding type wall wa ll receptacl receptacle Do not, under any questions during initial operation, please review the "Avoid Service Checklist" in a location near the dryer for stability. Power cord with the dryer. prong. INSTALLATION INSTRUCTIONS General installation 1 Connect the exhaust duct to its final position. The dryer MUST be level and resting solidly on the power at the circuit breaker/fuse box. 5 Read the Use & Care Guide provided with Power 3-prong...
... ounding prong. Remove and discard door tape. Grounding type wall wa ll receptacl receptacle Do not, under any questions during initial operation, please review the "Avoid Service Checklist" in a location near the dryer for stability. Power cord with the dryer. prong. INSTALLATION INSTRUCTIONS General installation 1 Connect the exhaust duct to its final position. The dryer MUST be level and resting solidly on the power at the circuit breaker/fuse box. 5 Read the Use & Care Guide provided with Power 3-prong...
Installation Instructions (All Languages)
Page 24
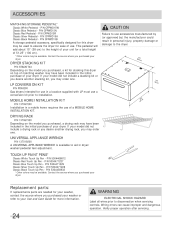
... PEDESTAL* Classic Classic Classic Classic Classic White Pedestal - A storage pedestal accessory, specifically designed for more information. DRYING RACK P/N 137067300 Depending on top of a MOBILE HOME INSTALLATION KIT. P/N 5304468812 Red Touch Up Pen - P/N 5304471228 Black Touch Up Pen - Replacement parts: If replacements parts are needed for your Use and Care Guide for this dryer on the model you may be available. Wiring errors can cause improper and dangerous operation...
... PEDESTAL* Classic Classic Classic Classic Classic White Pedestal - A storage pedestal accessory, specifically designed for more information. DRYING RACK P/N 137067300 Depending on top of a MOBILE HOME INSTALLATION KIT. P/N 5304468812 Red Touch Up Pen - P/N 5304471228 Black Touch Up Pen - Replacement parts: If replacements parts are needed for your Use and Care Guide for this dryer on the model you may be available. Wiring errors can cause improper and dangerous operation...


