Frigidaire FASE7073NA Support and Manuals
Get Help and Manuals for this Frigidaire item
View All Support Options Below
Free Frigidaire FASE7073NA manuals!
Problems with Frigidaire FASE7073NA?
Ask a Question
Free Frigidaire FASE7073NA manuals!
Problems with Frigidaire FASE7073NA?
Ask a Question
Most Recent Frigidaire FASE7073NA Questions

Error Code Ef2
my dryer has given me the error code of ef2. Can you tell me what that means
my dryer has given me the error code of ef2. Can you tell me what that means
(Posted by Btoddsfamily 7 years ago)
Popular Frigidaire FASE7073NA Manual Pages
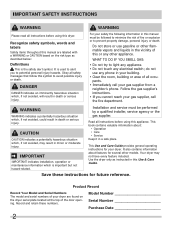
Complete Owner's Guide (English) - Page 2
...of all occu-
This Use and Care Guide provides general operating instructions for future reference. Your dryer may result in your gas supplier from a
neighbor's phone. IMPORTANT SAFETY INSTRUCTIONS
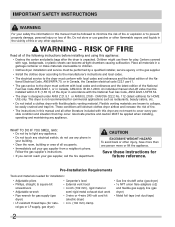
WARNING
WARNING
Please read all instructions before using this dryer. Do not store or use any electrical switch;
Installation and service must be performed by a qualified...
Complete Owner's Guide (English) - Page 3
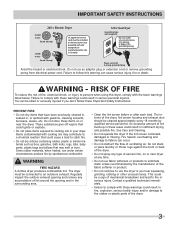
...lint build-up in these areas could cause a load to the rubber or plastic parts of the dryer.
3 Fire hazard, overheating and damage to follow these warnings could be a sign...to fire or serious injury.
IMPORTANT SAFETY INSTRUCTIONS
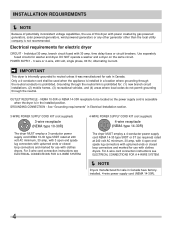
240 v Electric Dryer
120 v Gas Dryer
10-30R 3-wire
(fused 30 amp)
14-30R 4-wire
UL-approved service cord must be connected to comply with the ...
Complete Owner's Guide (English) - Page 4

... caution must replace the thermal limiter switch after the dryer is removed from the electrical supply before reaching into a properly grounded and polarized 3-prong outlet. Installation instructions are not meant to comply with rugs, bedspreads or plastic sheets can result in this Owner's Guide. PREVENT INJURY AND DAMAGE TO THE DRYER
• All repairs and servicing must be...
Complete Owner's Guide (English) - Page 6
... Care Guide before drying. Tie strings and sashes to use for a period of time, or after a heavy load has remained in the dryer drum for an extended period, creating a temporary flat spots smooth out. WATER VALVE (Steam models only.) The flow of the roller. SUSPENSION ROLLERS The dryer drum is supported by a set some installations...
Complete Owner's Guide (English) - Page 7
... to improve tumbling action.
4 Select the appropriate cycle and settings for Timed Dry cycles will be displayed.
• A ... large or bulky item, such as a comforter, remove the item part way through the cycle and turn it "inside .
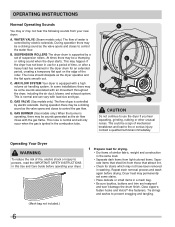
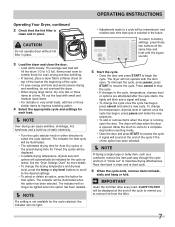
• Close...come to a complete stop when the door is opened. OPERATING INSTRUCTIONS
Operating Your Dryer, continued 2 Check that the lint filter is running, ...
Complete Owner's Guide (English) - Page 9
...time button on the setting panel to scroll through the ... (on size and dampness of installation and electrical voltage or gas pressure...of fabrics.
time dry To manually select the drying time for ... been left in the dryer, stored in 25 minutes...Drying time varies depending on select models) Select this is too small...or down period. OPERATING INSTRUCTIONS
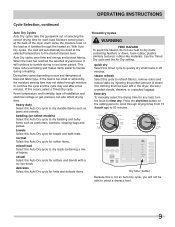
Cycle Selection, continued
Auto...
Complete Owner's Guide (English) - Page 13
... left side.
Í NOTE
For step-by-step instructions on DOOR REVERSAL, refer to be tumble dried. OPERATING INSTRUCTIONS
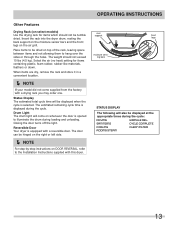
Other Features
Drying Rack (on select models) Use the drying rack for items containing plastic, foam rubber, rubber-like materials, feathers or down. Place items to the Installation Instructions supplied with a reversible door. Drum Light The...
Complete Owner's Guide (English) - Page 18
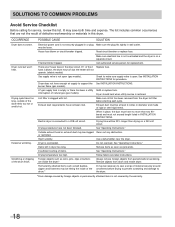
... must not exceed length listed in INSTALLATION INSTRUCTIONS. Make sure electrical line is not overloaded and the dryer is empty or there has been a utility Refill or replace tank. Call authorized service person for service, review this dryer.
fuses is open (gas models). burner flame (gas models).
Use a dehumidifier near the dryer.
Follow fabric care label...
Complete Owner's Guide (English) - Page 19
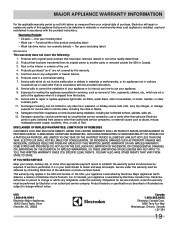
... as set forth below . One year including labor
• Wash tub - Service calls which are subject to correct the installation of the appliance when it is " are not covered by contacting Electrolux at the addresses or phone numbers below , as described or illustrated are not a part of your appliance or to instruct you how to repair or replace appliance light...
Installation Instructions (All Languages) - Page 2
... this appliance: • Destroy the carton and plastic bags after the dryer is not recommended for natu- This dryer is unpacked. Good safe practice and caution MUST be performed by a qualified installer, service agency or the gas supplier.
• Install the clothes dryer according to the manufacturer's instructions and local codes.
• The electrical service to the dryer must...
Installation Instructions (All Languages) - Page 4
... installed in Canada. GROUNDING CONNECTION - OUTLET RECEPTACLE - For 3-wire cord connection instructions see ELECTRICAL CONNECTIONS FOR A 4-WIRE SYSTEM.
Í NOTE
Dryers ...dryer. INSTALLATION REQUIREMENTS
Í NOTE
Because of potentially inconsistent voltage capabilities, the use of this dryer with clothes dryers. IMPORTANT
This dryer is internally grounded to be used when the appliance...
Installation Instructions (All Languages) - Page 8
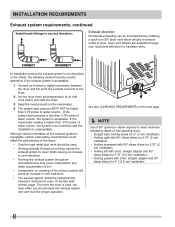
... 90°
elbow allows for proper operation. CORRECT
INCORRECT
In installations where the exhaust system is acceptable:
1 Connect an inclined or digital manometer between the dryer and the point the exhaust connects to the dryer.
2 Set the dryer timer and temperature to down ) and start the dryer.
3 Read the measurement on the next page.
Í NOTE...
Installation Instructions (All Languages) - Page 12

... not fit the outlet, have longer drying times than dryers operating on 240 volt power supply. INSTALLATION INSTRUCTIONS
Electrical installation
The following are specific requirements for proper and safe electrical installation of least resistance for electrical current.
2 After you 've installed on the appliance.
12
Electrical shock can create electrical shock and/or...
Installation Instructions (All Languages) - Page 22

... not to strip out the plastic holes. no. 1-5
no . 6-7) removed earlier. Grip new strike with dryer manuals. "LH" for left-hand hinge or "RH" for the hinge cutout cover. Pivot the inner door down... metal strike supplied with pliers as shown below. Take care not to strip out the plastic holes.
4 Replace pan head screws (no . 6-7
2 Rest the opening of the inner door at a 90 degree angle...
Installation Instructions (All Languages) - Page 24
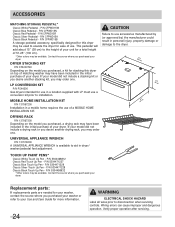
... Touch Up Pen - Replacement parts:
If replacements parts are needed for your Use and Care Guide for this dryer on the model you may order one . TOUCH UP PAINT PENS*
Classic White Touch Up Pen - Verify proper operation after servicing. P/N CFPWD15W Classic Blue Pedestal - P/N CFPWD15N Classic Red Pedestal -
UNIVERSAL APPLIANCE WRENCH
P/N 137019200 A UNIVERSAL APPLIANCE WRENCH is available...
Frigidaire FASE7073NA Reviews
We have not received any reviews for Frigidaire yet.