
User Guide
Page 3
... 61 63 66 68 69 70 71 73 76 76 77 80 82 84 Important! SAVE THESE INSTRUCTIONS The models shown in this User Guide may not be available in your country, please visit our local website listed on Getting started quickly AeroCare controls Sorting and loading Dryer cycles Drying special items Drying cycle options Dryer operation Care labels Drying rack Customizing dryer cycles Changing pre-set options Caring for your local Fisher & Paykel dealer.
... 61 63 66 68 69 70 71 73 76 76 77 80 82 84 Important! SAVE THESE INSTRUCTIONS The models shown in this User Guide may not be available in your country, please visit our local website listed on Getting started quickly AeroCare controls Sorting and loading Dryer cycles Drying special items Drying cycle options Dryer operation Care labels Drying rack Customizing dryer cycles Changing pre-set options Caring for your local Fisher & Paykel dealer.
User Guide
Page 4
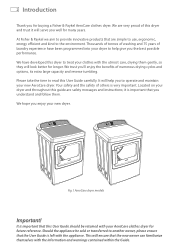
.... It will serve you to help you well for buying a Fisher & Paykel AeroCare clothes dryer. We are simple to use, ergonomic, energy efficient and kind to read this dryer and trust it is very important. 2 Introduction Thank you 'll enjoy the benefits of numerous drying cycles and options, its extra large capacity and reverse tumbling. Should the appliance be retained with the...
.... It will serve you to help you well for buying a Fisher & Paykel AeroCare clothes dryer. We are simple to use, ergonomic, energy efficient and kind to read this dryer and trust it is very important. 2 Introduction Thank you 'll enjoy the benefits of numerous drying cycles and options, its extra large capacity and reverse tumbling. Should the appliance be retained with the...
User Guide
Page 6
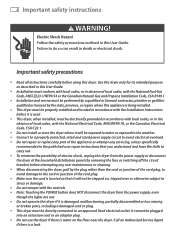
... located in accordance with the Installation Instructions before it will be exposed to water or exposed to the weather. ■■ Connect to a properly protected, rated and sized power supply circuit to avoid electrical overload. ■■ Do not repair or replace any part of the appliance or attempt any user maintenance or cleaning. ■■ When disconnecting the dryer, pull by removing the fuse or switching off the circuit breaker) before using...
... located in accordance with the Installation Instructions before it will be exposed to water or exposed to the weather. ■■ Connect to a properly protected, rated and sized power supply circuit to avoid electrical overload. ■■ Do not repair or replace any part of the appliance or attempt any user maintenance or cleaning. ■■ When disconnecting the dryer, pull by removing the fuse or switching off the circuit breaker) before using...

User Guide
Page 8
... THE APPLIANCE IS REMOVED FROM SERVICE OR DISCARDED, REMOVE THE DOOR. Damage to the dryer can result if the metal reinforcements come loose during drying. Close supervision is necessary if this dryer or any other appliance. 6 Important safety instructions Safe use the drying rack supplied with this dryer is moving. ■■ Undergarments that contain metal reinforcements should not be placed directly in the...
... THE APPLIANCE IS REMOVED FROM SERVICE OR DISCARDED, REMOVE THE DOOR. Damage to the dryer can result if the metal reinforcements come loose during drying. Close supervision is necessary if this dryer or any other appliance. 6 Important safety instructions Safe use the drying rack supplied with this dryer is moving. ■■ Undergarments that contain metal reinforcements should not be placed directly in the...
User Guide
Page 10
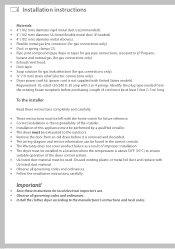
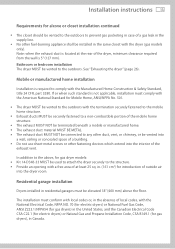
.... ■■ Install the clothes dryer according to LP Propane, butane and natural gas (for gas connections only). ■■ Exhaust/vent hood. ■■ Duct tape. ■■ Soap solution for gas leak detection (for gas connections only 19 mm) strain relief (electric connections only). ■■ Dryer power cord kit (power cord is above 50°F (10°C) to ensure suitable operation of cord must be at least 5 feet (1.5 m) long. Identify the plug type needed ). ■...
.... ■■ Install the clothes dryer according to LP Propane, butane and natural gas (for gas connections only). ■■ Exhaust/vent hood. ■■ Duct tape. ■■ Soap solution for gas leak detection (for gas connections only 19 mm) strain relief (electric connections only). ■■ Dryer power cord kit (power cord is above 50°F (10°C) to ensure suitable operation of cord must be at least 5 feet (1.5 m) long. Identify the plug type needed ). ■...
User Guide
Page 15
... exhaust duct is located at least 25 sq. Bathroom or bedroom installation The dryer MUST be vented to prevent gas pocketing in case of the exhaust vent. See "Exhausting the dryer" (page 26). in Canada. and the Canadian Electrical Code CSA C22.1 (for electric dryers) or Natural Gas and Propane Installation Code, CSA B149.1 (for gas dryers), in . (161 cm2) for introduction of outside air into the interior of a gas leak in the supply line...
... exhaust duct is located at least 25 sq. Bathroom or bedroom installation The dryer MUST be vented to prevent gas pocketing in case of the exhaust vent. See "Exhausting the dryer" (page 26). in Canada. and the Canadian Electrical Code CSA C22.1 (for electric dryers) or Natural Gas and Propane Installation Code, CSA B149.1 (for gas dryers), in . (161 cm2) for introduction of outside air into the interior of a gas leak in the supply line...
User Guide
Page 22
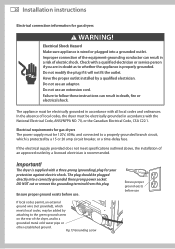
... Canadian Electrical Code, CSA C22.1. Do not use . Electrical requirements for gas dryers The power supply must be plugged directly into a grounded outlet. Improper connection of local codes, the dryer must be electrically grounded in a risk of an approved outlet by a qualified electrician. Important! Check with a qualified electrician or service person if you are in doubt as to follow these instructions can result in accordance with a three-prong (grounding) plug for gas dryers...
... Canadian Electrical Code, CSA C22.1. Do not use . Electrical requirements for gas dryers The power supply must be plugged directly into a grounded outlet. Improper connection of local codes, the dryer must be electrically grounded in a risk of an approved outlet by a qualified electrician. Important! Check with a qualified electrician or service person if you are in doubt as to follow these instructions can result in accordance with a three-prong (grounding) plug for gas dryers...
User Guide
Page 23
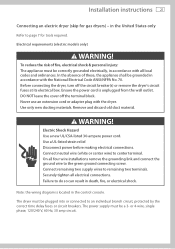
...-listed 30-ampere power cord. On all electrical connections. or 4-wire, single phase, 120/240 V, 60 Hz, 30 amp circuit. Electrical requirements (electric models only) WARNING! Before connecting the dryer, turn off the terminal block. Use only new ducting materials. Use a UL-listed strain relief. Securely tighten all four wire installations remove the grounding link and connect the ground wire to remaining two terminals. Note: the wiring diagram is unplugged from the wall outlet. Never use an extension cord or adapter plug...
...-listed 30-ampere power cord. On all electrical connections. or 4-wire, single phase, 120/240 V, 60 Hz, 30 amp circuit. Electrical requirements (electric models only) WARNING! Before connecting the dryer, turn off the terminal block. Use only new ducting materials. Use a UL-listed strain relief. Securely tighten all four wire installations remove the grounding link and connect the ground wire to remaining two terminals. Note: the wiring diagram is unplugged from the wall outlet. Never use an extension cord or adapter plug...
User Guide
Page 27
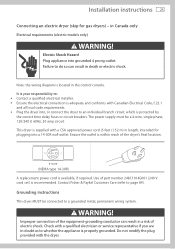
... V cord set) is located in Canada only Electrical requirements (electric models only) WARNING! Failure to an individual branch circuit, which is properly grounded. WARNING! in the control console. Electric Shock Hazard Plug appliance into grounded 4 prong outlet. Grounding instructions This dryer MUST be a 4-wire, single phase, 120/240 V, 60Hz, 30 amp circuit. Contact Fisher & Paykel Customer Care (refer to whether the appliance is protected by the correct time delay fuses or circuit breakers. Check with...
... V cord set) is located in Canada only Electrical requirements (electric models only) WARNING! Failure to an individual branch circuit, which is properly grounded. WARNING! in the control console. Electric Shock Hazard Plug appliance into grounded 4 prong outlet. Grounding instructions This dryer MUST be a 4-wire, single phase, 120/240 V, 60Hz, 30 amp circuit. Contact Fisher & Paykel Customer Care (refer to whether the appliance is protected by the correct time delay fuses or circuit breakers. Check with...

User Guide
Page 28
... turns and joints. The screen will cause lint to accumulate, creating a potential fire hazard. ■■ Use duct tape to secure joints in these will prevent the build up for tools required. This is limited, the dryer can be vented to the outdoors. Do not use a metal foil exhaust duct. The ducting must be installed according to the instructions found in which it is located...
... turns and joints. The screen will cause lint to accumulate, creating a potential fire hazard. ■■ Use duct tape to secure joints in these will prevent the build up for tools required. This is limited, the dryer can be vented to the outdoors. Do not use a metal foil exhaust duct. The ducting must be installed according to the instructions found in which it is located...

User Guide
Page 32
... length of the transition duct. ■■ Only flexible metal (foil-type) ducts that comply with the requirements of duct to its final position. 4 Extend the duct to overlap the house exhaust outlet pipe. Keep the duct as straight as possible for Clothes Dryer Transition Duct Subject UL 2158A", shall be used in the United States and Canada. ■■ Do not install flexible metal duct...
... length of the transition duct. ■■ Only flexible metal (foil-type) ducts that comply with the requirements of duct to its final position. 4 Extend the duct to overlap the house exhaust outlet pipe. Keep the duct as straight as possible for Clothes Dryer Transition Duct Subject UL 2158A", shall be used in the United States and Canada. ■■ Do not install flexible metal duct...
User Guide
Page 39
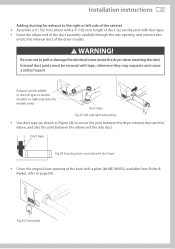
...; Cover the original duct opening , and connect this end to the left side of the cabinet ■■ Assemble a 4" (102 mm) elbow with duct tape. ■■ Insert the elbow end of the dryer (inside the dryer when inserting the duct. Fig.29 Cover plate warning! Exhaust can be secured with a plate (kit WE1M454), available from Fisher & Paykel, refer to pull or damage the electrical wires...
...; Cover the original duct opening , and connect this end to the left side of the cabinet ■■ Assemble a 4" (102 mm) elbow with duct tape. ■■ Insert the elbow end of the dryer (inside the dryer when inserting the duct. Fig.29 Cover plate warning! Exhaust can be secured with a plate (kit WE1M454), available from Fisher & Paykel, refer to pull or damage the electrical wires...
User Guide
Page 41
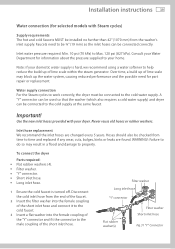
... inlet hoses can be checked from time to help reduce the build up of lime scale within the steam generator. Inlet water pressure required: Min. 10 psi (70 kPa) to the cold water supply. Filter washer Long inlet hose "Y" connector Flat rubber washer(s) Filter washer Short inlet hose Fig.31 "Y" Connector Over time, a build up the water system, causing reduced performance and the possible need to property. Installation instructions 39 Water connection (for part repair or replacement.
... inlet hoses can be checked from time to help reduce the build up of lime scale within the steam generator. Inlet water pressure required: Min. 10 psi (70 kPa) to the cold water supply. Filter washer Long inlet hose "Y" connector Flat rubber washer(s) Filter washer Short inlet hose Fig.31 "Y" Connector Over time, a build up the water system, causing reduced performance and the possible need to property. Installation instructions 39 Water connection (for part repair or replacement.
User Guide
Page 48
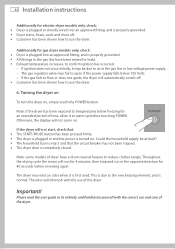
... dryer door is turned on , simply touch the POWER button. Could the household supply be due to the new heating element, and is normal. 46 Installation instructions Additionally for electric dryer models only, check: ■■ Dryer is plugged or directly wired into an approved fitting, and is first used. Additionally for gas dryer models only, check: ■■ Dryer is plugged into an approved fitting, and is properly grounded. ■■ Dryer starts, heats, cools and shuts off...
... dryer door is turned on , simply touch the POWER button. Could the household supply be due to the new heating element, and is normal. 46 Installation instructions Additionally for electric dryer models only, check: ■■ Dryer is plugged or directly wired into an approved fitting, and is first used. Additionally for gas dryer models only, check: ■■ Dryer is plugged into an approved fitting, and is properly grounded. ■■ Dryer starts, heats, cools and shuts off...
User Guide
Page 50
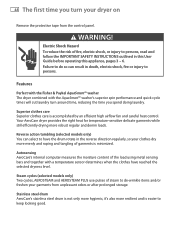
... time, reducing the time you turn your dryer on Remove the protective tape from unpleasant odors or after prolonged storage. WARNING! Features Perfect with the Fisher & Paykel AquaSmart™ washer The dryer combined with a temperature sensor determines when the clothes have the drum rotate in the reverse direction regularly, so your garments from the control panel. Your AeroCare dryer provides the right heat for temperature-sensitive delicate garments while still efficiently drying...
... time, reducing the time you turn your dryer on Remove the protective tape from unpleasant odors or after prolonged storage. WARNING! Features Perfect with the Fisher & Paykel AquaSmart™ washer The dryer combined with a temperature sensor determines when the clothes have the drum rotate in the reverse direction regularly, so your garments from the control panel. Your AeroCare dryer provides the right heat for temperature-sensitive delicate garments while still efficiently drying...
User Guide
Page 65
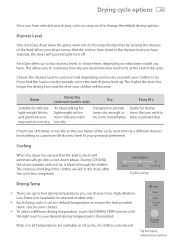
... longer the drying time and the drier your clothes will automatically turn off. Cooling When the dryer has sensed that you may wish to iron dry Damp Dry (selected models only) An ideal setting for clothes care reasons. Fig.49 Drying temperature options If you wish your clothes to be. During COOLING the drum tumbles and cool air is illuminated. When your dryer senses that you want less dry Dry Designed to provide...
... longer the drying time and the drier your clothes will automatically turn off. Cooling When the dryer has sensed that you may wish to iron dry Damp Dry (selected models only) An ideal setting for clothes care reasons. Fig.49 Drying temperature options If you wish your clothes to be. During COOLING the drum tumbles and cool air is illuminated. When your dryer senses that you want less dry Dry Designed to provide...

User Guide
Page 78
...). 4 Remove your dryer (located on the control panel. All control panel lights will not work you do? To stop the noise. Record the fault code number displayed and the serial number of the door. Check this mode if a fault occurs. If the symptom persists, call for service User warnings Your dryer is capable of diagnosing a number of its own problems. A continuous series of beeps is being displayed, you stop the beep sounding, press any button...
...). 4 Remove your dryer (located on the control panel. All control panel lights will not work you do? To stop the noise. Record the fault code number displayed and the serial number of the door. Check this mode if a fault occurs. If the symptom persists, call for service User warnings Your dryer is capable of diagnosing a number of its own problems. A continuous series of beeps is being displayed, you stop the beep sounding, press any button...

User Guide
Page 79
... lint filter been emptied? Pressing POWER does not turn on the dryer Is the electrical cord plugged in , turn it switched on (gas dryers only)? If they are at the power point. Refer to page 79. If there is it on and try plugging another electrical appliance into the same outlet. Check your house circuit breakers and fuses. Has the dryer progressed to the AIR DRY cycle? Check the progress lights. This is the default setting for service...
... lint filter been emptied? Pressing POWER does not turn on the dryer Is the electrical cord plugged in , turn it switched on (gas dryers only)? If they are at the power point. Refer to page 79. If there is it on and try plugging another electrical appliance into the same outlet. Check your house circuit breakers and fuses. Has the dryer progressed to the AIR DRY cycle? Check the progress lights. This is the default setting for service...

User Guide
Page 80
... at a time. Was there a power failure? Is the door open? Is the dryer overloaded for the items? Could your chosen drying cycle and touch START/PAUSE to cool once removed from obstruction? High altitude will need to dry a load. Is the airflow system free from the dryer. Is the exhaust duct distance too great? Drying is the gas turned on? What environmental conditions are you using the dryer in ? It might require water being...
... at a time. Was there a power failure? Is the door open? Is the dryer overloaded for the items? Could your chosen drying cycle and touch START/PAUSE to cool once removed from obstruction? High altitude will need to dry a load. Is the airflow system free from the dryer. Is the exhaust duct distance too great? Drying is the gas turned on? What environmental conditions are you using the dryer in ? It might require water being...

User Guide
Page 81
... size of time remaining during the cycle (refer to page 72). Noises Have you have selected? Puddle of the dryer. This is normal operation of water on . Cannot see steam at the rear of door after using a steam cycle Have you used a large enough load for the steam cycle you overloaded the machine? Tighten if necessary. Check that the rubber washer is installed in these locations and is normal. Try turning the dryer...
... size of time remaining during the cycle (refer to page 72). Noises Have you have selected? Puddle of the dryer. This is normal operation of water on . Cannot see steam at the rear of door after using a steam cycle Have you used a large enough load for the steam cycle you overloaded the machine? Tighten if necessary. Check that the rubber washer is installed in these locations and is normal. Try turning the dryer...


