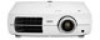
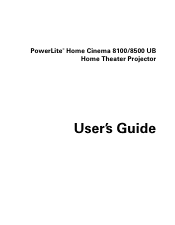
ESC/VP Level 21 Communication Manual (Home Projectors)
Page 1
... at your acceptance of the whole of the agreement. LICENSE AGREEMENT 1. Please read carefully the following "LICENSE AGREEMENT" before using the EPSON projector. You may change or modify this downloading service. Please read carefully "NOTICES" described in part without notice. 4. If you could ...use of the user's guide is owned by SEIKO EPSON Corporation (hereinafter referred to as direct, indirect, special, incidental and consequential damages incurred due to whether or not you do not...
User's Guide - PowerLite Home Cinema 8100 / 8500 UB
Page 1
PowerLite® Home Cinema 8100/8500 UB Home Theater Projector User's Guide
User's Guide - PowerLite Home Cinema 8100 / 8500 UB
Page 3
... the Cables Connecting Video and Computer Equipment Making Other Connections Installing Batteries in the Remote Control Turning the Projector On and Off Turning On the Projector Turning Off the Projector Selecting the Image Source Positioning the Image Making Basic Adjustments Focusing and Zooming Choosing the Aspect Ratio Choosing the ...Color Mode Advanced Color Adjustments Adjusting the Gamma Setting Adjusting RGBCMY Locking the Projector 7 8 10 11 11 12 13 13 17 19 19 21 22 22 22 23 24 25 27 27 28 29 30 30 ...
User's Guide - PowerLite Home Cinema 8100 / 8500 UB
Page 4
... Picture Quality Settings 37 Color Settings 39 Adjustments for Computer Images 41 Selecting Memory Settings and Resetting the Projector 42 Selecting Memory Settings 42 Creating Memory Settings 43 Renaming Memory Settings 43 Deleting Saved Memory Settings 43 Resetting the... Projector 44 Customizing Projector Features 45 Image Sizing 45 Screen Options 46 Other Setup Options 46 Maintenance 49 Cleaning the Lens 49 Cleaning the Projector Case 50 Cleaning and Replacing the Air Filter 50 Replacing ...
User's Guide - PowerLite Home Cinema 8100 / 8500 UB
Page 7
...Home Cinema 8500 UB) or 1800 lumens (Home Cinema 8100) of brightness (white light output and color light output) for incredibly rich, sharp images in any room lighting ■ Auto Iris system that constantly controls the light output based on the gamma and black/white levels of your own home. Introduction The PowerLite® Home Cinema 8100/8500 UB projector...of noise or artifacts ■ 10-bit (Home Cinema 8100) or 12-bit (Home Cinema 8500 UB) color quality for unmatched color accuracy, with over a billion colors available ■ Epson AccuCinema™ color management delivered by the ...
User's Guide - PowerLite Home Cinema 8100 / 8500 UB
Page 8
Projector Parts Front Lamp cover Control panel (top) Vertical lens shift dial Control panel (side) Ventilation slots Horizontal lens shift dial Focus ring Lens cover Zoom ring Infrared receiver Adjustable foot Back Component video port HDMI ports S-Video port Infrared receiver PC port Control (RS-232C) port Lamp cover release Trigger out port Kensington® lock port Air intake (filter) Cable holder Video port Main power switch AC power inlet 8 Introduction
User's Guide - PowerLite Home Cinema 8100 / 8500 UB
Page 9
Bottom Mounting bracket attachment points Optional cable cover attachment points (brass colored) Projector Control Panel Top control panel Side control panel Power button Source button Switches the video input source Menu navigation button Warning lights Menu button Displays the menus Enter button Selects menu items or opens the line menu Esc button Exits the current menu item Introduction 9
User's Guide - PowerLite Home Cinema 8100 / 8500 UB
Page 10
... the image 10 Introduction Illumination button Lights the remote control buttons for easy viewing Source buttons Switch between equipment connected to the projector Esc (escape) button Exits the current menu item Enter/Line Menu button Selects menu items or opens the line menu Menu button ...Displays the projector's menus Color Mode button Optimizes viewing for different lighting environments Aspect button Changes the picture's aspect ratio Sharpness button Adjusts image sharpness...
User's Guide - PowerLite Home Cinema 8100 / 8500 UB
Page 11
.../webreg. Introduction 11 To purchase online, visit www.epsonstore.com (U.S. sales) or www.epson.ca (Canadian sales). Registration and Warranty Your projector comes with a basic two-year carry-in the United States or Canada. In addition, Epson offers free Extra CareSM Home Service. For details, see page 75. Registering also lets you a replacement unit...
User's Guide - PowerLite Home Cinema 8100 / 8500 UB
Page 12
...damage to view FAQs (Frequently Asked Questions) or product information and e-mail your projector. 12 Introduction Use this site to your projector. Tip: Contains helpful projection tips. If you need to Epson support. Call (800) 637-7661 and enter the PIN on the PrivateLine support... card that came with your questions to use the Epson PrivateLine® Support service. Note: Contains important information about your equipment. Need additional help , you can use the projector, in addition to avoid bodily injury. Caution: Must be followed carefully...
User's Guide - PowerLite Home Cinema 8100 / 8500 UB
Page 13
Setting Up the Projector Follow the instructions in this section to choose a location for the viewing setups shown below, as well as rear projection. Center Side Ceiling Setting Up the Projector 13 Choosing a Location You can install the projector for the projector, connect the cables, and display an image.
User's Guide - PowerLite Home Cinema 8100 / 8500 UB
Page 14
..., you can use lens shift to move the lens by about one-half its width (for details, see page 26). If you may damage the projector. If this is centered between the top and bottom of the screen, as shown below. Horizontal lens shift dial Vertical lens shift dial Caution: Do... not try to move the image up or down by nearly its full height, and left or right by hand, or you place the projector off to the side, aim it at the center of the screen), then use the horizontal lens shift dial to center the image on the...
User's Guide - PowerLite Home Cinema 8100 / 8500 UB
Page 15
... Depending on your display settings and how you use the Zoom ring, the actual size may differ. Use these tables as a guide for projector placement: 16:9 aspect ratio Diagonal image size Projection distance (width × height) 2.8 to 6.2 feet 0.87 to 1.88 m 30 in. (26 × 15 in.) 76.2 cm (...
User's Guide - PowerLite Home Cinema 8100 / 8500 UB
Page 16
... you can use the Image Size Calculator. This program is within 9.8 feet (3 m) of a grounded electrical outlet or extension cord. 16 Setting Up the Projector Also keep these considerations in . 0 to 94.1 in mind: ■ Make sure there is plenty of loose materials that could block the vents underneath. ...■ Make sure the projector is available on the Epson website at www.epson.com/support. Do not set the projector on top of space for ventilation around and under the...
User's Guide - PowerLite Home Cinema 8100 / 8500 UB
Page 17
... steps: 1. Press the Menu button when done. In addition, the projector's Trigger out port can rotate the Epson logo plate 180 degrees when suspending the projector from a ceiling, you will need to determine the location, based on the remote control. 2. Setting Up the Projector 17 Open the Settings menu, then select Projection. 3. If you...
User's Guide - PowerLite Home Cinema 8100 / 8500 UB
Page 18
The following illustrations show the dimensions of the projector: Center of lens 5.4 in. 136 mm 0.5 in. 12 mm 0.2 in. 4.5 mm 17.7 in. 450 mm 11.8 in. 300 mm 5.2 in. 131 mm 3.0 in. 75 mm 1.8 in. 45 mm 5.9 in. 150 mm 2.2 in. 56 mm 5.8 in. 2.8 in. 148 mm 72 mm 5.3 in. 135 mm 15.3 in. 390 mm 6.3 in. 160 mm M4 × 9 mm 18 Setting Up the Projector
User's Guide - PowerLite Home Cinema 8100 / 8500 UB
Page 19
Match corresponding colors between the cable and the ports. Setting Up the Projector 19 PC - Video Use an RCA video cable: - You can also connect it to a computer RGB (monitor) port: S-Video Use an S-video cable: - You can ...® Macintosh® system. For details on compatible video formats, see page 68. Connecting the Cables Connecting Video and Computer Equipment You can connect the projector to many types of the commercially available cables shown below: Port name HDMI 1/ HDMI 2 Video equipment connection Use an HDMI cable: Computer connection Component Use...
User's Guide - PowerLite Home Cinema 8100 / 8500 UB
Page 20
For best results, connect your equipment doesn't support HDMI, connect it to the HDMI port, if possible. Connect video equipment to one of these ports 20 Setting Up the Projector If your video equipment to one of the following ports (highest quality listed first): Component (for component video), S-Video, or Video (for composite video). Connect a computer to one of these ports When you connect a large or heavy cable to the projector, such as an HDMI cable, it is recommended that you fasten it to one of the two holders using a commercially available cable tie.
User's Guide - PowerLite Home Cinema 8100 / 8500 UB
Page 21
...VP21 command codes on . Making Other Connections Connect the power cable and other cables described below, depending on how you plan to use the projector. ■ Plug the power cable into the projector and a grounded electrical outlet. ■ The Trigger out port outputs a 12-volt DC signal when the... projector is in use an AV controller with the projector, connect a 9-pin null modem serial cable to the port, as shown. Setting Up the Projector 21 This lets a central control system monitor whether the projector is on or off, and can be used to...
User's Guide - PowerLite Home Cinema 8100 / 8500 UB
Page 22
...on the cover and press it down until it clicks into place. Make sure you suspect the batteries are within 30 feet of the projector. Warning: Keep batteries away from children. Remove the lens cap. 2. Insert the tab on any connected equipment you plan to use. 3. Turning ...the Projector On and Off Turning On the Projector 1. Installing Batteries in the Remote Control The remote control uses two AA batteries. Turn on the main power switch on the back...