Installation Guide
Page 5
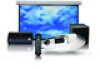
... at the screen-a sensor at the touch of art that 's needed to switch between video sources, watch movies, and adjust the volume. Introduction The Ensemble HDTM home cinema system by Epson® includes everything that can be seen when the screen is housed in one place. • AV controller - You can also connect existing AV...
... at the screen-a sensor at the touch of art that 's needed to switch between video sources, watch movies, and adjust the volume. Introduction The Ensemble HDTM home cinema system by Epson® includes everything that can be seen when the screen is housed in one place. • AV controller - You can also connect existing AV...

Installation Guide
Page 10
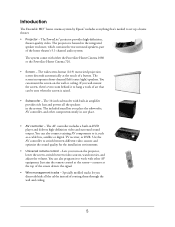
You may need at different points during the installation. Box #1 • Projector (PowerLite Home Cinema 1080 or PowerLite Home Cinema 720) • Projector ceiling mount • AV controller with built-in their containers until the instructions tell you have all the boxes listed below. That ...
You may need at different points during the installation. Box #1 • Projector (PowerLite Home Cinema 1080 or PowerLite Home Cinema 720) • Projector ceiling mount • AV controller with built-in their containers until the instructions tell you have all the boxes listed below. That ...
Installation Guide
Page 12
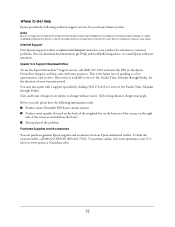
...it's free. Days and hours of support are subject to change without notice. Where To Get Help Epson provides the following information ready: ■ Product name (Ensemble HD home cinema system) ■ Product serial number (located on the back of the weighted bar on the bottom of ...the screen, on the Epson PrivateLine Support card that the home theater system be installed by dialing (562) 276-4394, 6 AM ...
...it's free. Days and hours of support are subject to change without notice. Where To Get Help Epson provides the following information ready: ■ Product name (Ensemble HD home cinema system) ■ Product serial number (located on the back of the weighted bar on the bottom of ...the screen, on the Epson PrivateLine Support card that the home theater system be installed by dialing (562) 276-4394, 6 AM ...
Installation Guide
Page 14
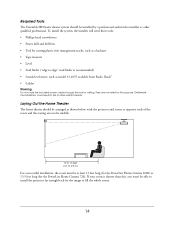
...8226; Tape measure • Level • Stud finder ("edge to edge" stud finder is shorter than this purpose. Laying Out the Home Theater The home theater should be able to install the projector far enough back for the image to 4.9 m) For a successful installation, the room must ...feet long (for the PowerLite Home Cinema 1080) or 13.5 feet long (for the PowerLite Home Cinema 720). They are not rated for this , you won't be installed by a professional audio/video installer or other safety hazards. Required Tools The Ensemble HD home theater system should be at opposite ends ...
...8226; Tape measure • Level • Stud finder ("edge to edge" stud finder is shorter than this purpose. Laying Out the Home Theater The home theater should be able to install the projector far enough back for the image to 4.9 m) For a successful installation, the room must ...feet long (for the PowerLite Home Cinema 1080) or 13.5 feet long (for the PowerLite Home Cinema 720). They are not rated for this , you won't be installed by a professional audio/video installer or other safety hazards. Required Tools The Ensemble HD home theater system should be at opposite ends ...
Installation Guide
Page 32
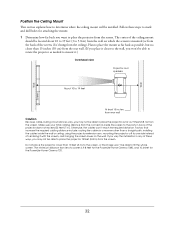
... from the back of the projector does not exceed 23 feet (7 m). and hanging the screen lower on which the screen is 9.8 feet for the PowerLite Home Cinema 1080, and 10.4 feet for attaching the mount. 1 Determine how far back you may not be installed. If you vary the installation in a manner other... instead of these steps to screen is mounted (or from the ceiling). The minimum distance from lens to mark and drill holes for the PowerLite Home Cinema 720. 32
... from the back of the projector does not exceed 23 feet (7 m). and hanging the screen lower on which the screen is 9.8 feet for the PowerLite Home Cinema 1080, and 10.4 feet for attaching the mount. 1 Determine how far back you may not be installed. If you vary the installation in a manner other... instead of these steps to screen is mounted (or from the ceiling). The minimum distance from lens to mark and drill holes for the PowerLite Home Cinema 720. 32
Installation Guide
Page 42
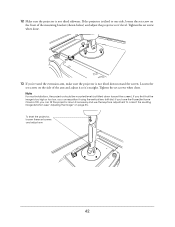
... or too low, you 've used the extension arm, make sure the projector is not tilted down toward the screen. If you have the PowerLite Home Cinema 720, you can reposition it 's level. If the projector is not tilted sideways. Note For most installations, the projector should be mounted level (not tilted...
... or too low, you 've used the extension arm, make sure the projector is not tilted down toward the screen. If you have the PowerLite Home Cinema 720, you can reposition it 's level. If the projector is not tilted sideways. Note For most installations, the projector should be mounted level (not tilted...
Installation Guide
Page 54
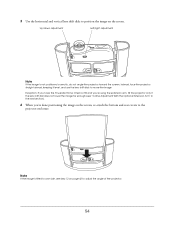
Exception: If you have the PowerLite Home Cinema 720 and you're using the extension arm, tilt the projector only if the lens shift dial does not lower the image far enough (see ...
Exception: If you have the PowerLite Home Cinema 720 and you're using the extension arm, tilt the projector only if the lens shift dial does not lower the image far enough (see ...
Installation Guide
Page 55
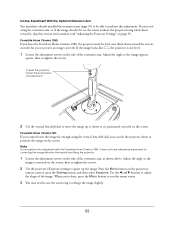
...to position the image on the screen. If you can tilt the projector down so it , skip this section and continue with the PowerLite Home Cinema 1080. It does not have already installed the extension arm (page 35) to be level (not tilted down toward the screen) in order... the image distortion that results from tilting the projector. 1 Loosen the adjustment screws on the side of the extension arm. PowerLite Home Cinema 1080: If you have the PowerLite Home Cinema 1080, the projector must have a keystone adjustment for you 're done, press the Menu button to exit the menu screen. ...
...to position the image on the screen. If you can tilt the projector down so it , skip this section and continue with the PowerLite Home Cinema 1080. It does not have already installed the extension arm (page 35) to be level (not tilted down toward the screen) in order... the image distortion that results from tilting the projector. 1 Loosen the adjustment screws on the side of the extension arm. PowerLite Home Cinema 1080: If you have the PowerLite Home Cinema 1080, the projector must have a keystone adjustment for you 're done, press the Menu button to exit the menu screen. ...

Installation Guide
Page 57
...'s Color Mode to the sRGB color standard (PowerLite Home Cinema 720 only) 4 The projector's remote control is not needed for making any other adjustments or using the Video menu in professional broadcast monitors For black-and-white movies or those in the Ensemble HD menu system. Note The Color Mode can press the COL-M button...
...'s Color Mode to the sRGB color standard (PowerLite Home Cinema 720 only) 4 The projector's remote control is not needed for making any other adjustments or using the Video menu in professional broadcast monitors For black-and-white movies or those in the Ensemble HD menu system. Note The Color Mode can press the COL-M button...
Installation Guide
Page 71
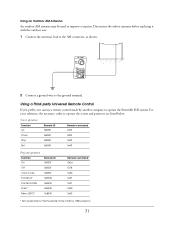
... a Third-party Universal Remote Control If you prefer, you can use a remote control made by another company to the PowerLite Home Cinema 1080 projector. 71 Screen operation Function Up Down Stop Set Remote ID 0x835f 0x835f 0x835f 0x835f Remote command 0x55 0x59 0x49 0x43 ... Menu (ESC)* Remote ID 0x835f 0x835f 0x835f 0x8345 0x8345 0x8345 0x8345 Remote command 0x0a 0x18 0x4b 0x4f 0x5f 0x40 0x42 * Not applicable to operate the Ensemble HD system. Disconnect the indoor antenna before replacing it with the outdoor one. 1 Connect the antenna's lead to the AM connector, as shown. 2 Connect a...
... a Third-party Universal Remote Control If you prefer, you can use a remote control made by another company to the PowerLite Home Cinema 1080 projector. 71 Screen operation Function Up Down Stop Set Remote ID 0x835f 0x835f 0x835f 0x835f Remote command 0x55 0x59 0x49 0x43 ... Menu (ESC)* Remote ID 0x835f 0x835f 0x835f 0x8345 0x8345 0x8345 0x8345 Remote command 0x0a 0x18 0x4b 0x4f 0x5f 0x40 0x42 * Not applicable to operate the Ensemble HD system. Disconnect the indoor antenna before replacing it with the outdoor one. 1 Connect the antenna's lead to the AM connector, as shown. 2 Connect a...
User's Guide - PowerLite Home Cinema 8100 / 8500 UB
Page 1
PowerLite® Home Cinema 8100/8500 UB Home Theater Projector User's Guide
PowerLite® Home Cinema 8100/8500 UB Home Theater Projector User's Guide
User's Guide - PowerLite Home Cinema 8100 / 8500 UB
Page 7
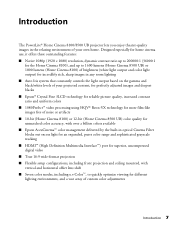
...to 200000:1 (36000:1 for the Home Cinema 8100), and up to 1600 lumens (Home Cinema 8500 UB) or 1800 lumens (Home Cinema 8100) of brightness (white light output and color light output) for incredibly rich, sharp images in any room lighting ■ Auto Iris system that constantly controls the light output ...wide-format projection ■ Flexible setup configurations, including front projection and ceiling mounted, with over a billion colors available ■ Epson AccuCinema™ color management delivered by the built-in the relaxing environment of custom color adjustments Introduction 7
...to 200000:1 (36000:1 for the Home Cinema 8100), and up to 1600 lumens (Home Cinema 8500 UB) or 1800 lumens (Home Cinema 8100) of brightness (white light output and color light output) for incredibly rich, sharp images in any room lighting ■ Auto Iris system that constantly controls the light output ...wide-format projection ■ Flexible setup configurations, including front projection and ceiling mounted, with over a billion colors available ■ Epson AccuCinema™ color management delivered by the built-in the relaxing environment of custom color adjustments Introduction 7
User's Guide - PowerLite Home Cinema 8100 / 8500 UB
Page 29
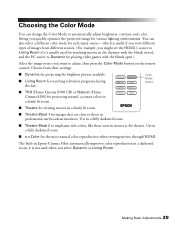
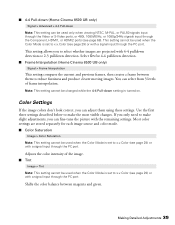
...source you want to adjust, then press the Color Mode button on the remote control. Color Mode button ■ THX (Home Cinema 8500 UB) or Natural (Home Cinema 8100) for projecting natural, accurate colors in a dimly lit room. ■ Theatre for viewing movies in a dimly lit ...room. ■ Theatre Black 1 for images that are close to emphasize rich colors, like those in professional-use broadcast monitors. Use in a darkened room; The built-in Epson Cinema...
...source you want to adjust, then press the Color Mode button on the remote control. Color Mode button ■ THX (Home Cinema 8500 UB) or Natural (Home Cinema 8100) for projecting natural, accurate colors in a dimly lit room. ■ Theatre for viewing movies in a dimly lit ...room. ■ Theatre Black 1 for images that are close to emphasize rich colors, like those in professional-use broadcast monitors. Use in a darkened room; The built-in Epson Cinema...
User's Guide - PowerLite Home Cinema 8100 / 8500 UB
Page 36
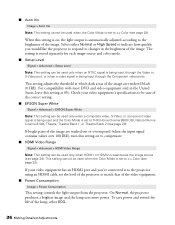
Check your video equipment has an HDMI port and you would like the projector to respond to THX (Home Cinema 8500 UB), Natural (Home Cinema 8100), Theatre, Theatre Black 1, or Theatre Black 2 (see page 24). Select either Normal or High Speed to indicate how quickly you 've ...save power and extend the life of the image. If your video equipment's specifications to be sure of the correct setting. ■ EPSON Super White Signal > Advanced > EPSON Super White Note: This setting can be used only when a composite video, S-Video, or component video signal is being input through...
Check your video equipment has an HDMI port and you would like the projector to respond to THX (Home Cinema 8500 UB), Natural (Home Cinema 8100), Theatre, Theatre Black 1, or Theatre Black 2 (see page 24). Select either Normal or High Speed to indicate how quickly you 've ...save power and extend the life of the image. If your video equipment's specifications to be sure of the correct setting. ■ EPSON Super White Signal > Advanced > EPSON Super White Note: This setting can be used only when a composite video, S-Video, or component video signal is being input through...

User's Guide - PowerLite Home Cinema 8100 / 8500 UB
Page 37
... with the Auto setting. Choose Thick-Line Enhancement to sharpen details such as hair and clothing. Leave the setting on Film/Auto (Home Cinema 8100) or Film (Home Cinema 8500 UB) for each image source and color mode setting. You can select from 2-2, 2-3, or 4-4 pulldown detection, depending on your... Signal > Progressive Converts interlaced to progressive signals. You can be used with a video camera. The projector uses 3D DigiScan™ HD Circuitry Processing for watching videos captured with a signal input through the Component, HDMI 1, or HDMI 2 ports (see page 39).
... with the Auto setting. Choose Thick-Line Enhancement to sharpen details such as hair and clothing. Leave the setting on Film/Auto (Home Cinema 8100) or Film (Home Cinema 8500 UB) for each image source and color mode setting. You can select from 2-2, 2-3, or 4-4 pulldown detection, depending on your... Signal > Progressive Converts interlaced to progressive signals. You can be used with a video camera. The projector uses 3D DigiScan™ HD Circuitry Processing for watching videos captured with a signal input through the Component, HDMI 1, or HDMI 2 ports (see page 39).
User's Guide - PowerLite Home Cinema 8100 / 8500 UB
Page 38
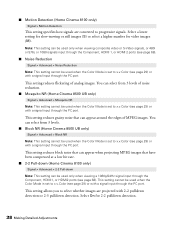
... lower setting for slow-moving or still images (S) or select a higher number for 2-2 pulldown detection. 38 Making Detailed Adjustments ■ Motion Detection (Home Cinema 8100 only) Signal > Motion Detection This setting specifies how signals are projected with 2-2 pulldown detection or 2-3 pulldown detection. You can select from 3 levels ... the PC port. This setting reduces grainy noise that have been compressed at a low bit rate. ■ 2-2 Pull-down (Home Cinema 8100 only) Signal > Advanced > 2-2 Pull-down Note: This setting can appear around the edges of analog images.
... lower setting for slow-moving or still images (S) or select a higher number for 2-2 pulldown detection. 38 Making Detailed Adjustments ■ Motion Detection (Home Cinema 8100 only) Signal > Motion Detection This setting specifies how signals are projected with 2-2 pulldown detection or 2-3 pulldown detection. You can select from 3 levels ... the PC port. This setting reduces grainy noise that have been compressed at a low bit rate. ■ 2-2 Pull-down (Home Cinema 8100 only) Signal > Advanced > 2-2 Pull-down Note: This setting can appear around the edges of analog images.
User's Guide - PowerLite Home Cinema 8100 / 8500 UB
Page 39
... the image colors don't look correct, you to select whether images are stored separately for 4-4 pulldown detection. ■ Frame Interpolation (Home Cinema 8500 UB only) Signal > Frame Interpolation This setting compares the current and previous frames, then creates a frame between magenta and green.... with a signal input through the PC port. You can adjust them to reduce fuzziness and produce clearer moving images. ■ 4-4 Pull-down (Home Cinema 8500 UB only) Signal > Advanced > 4-4 Pull-down setting is set to x.v.Color (see page 29) or with the remaining settings. If ...
... the image colors don't look correct, you to select whether images are stored separately for 4-4 pulldown detection. ■ Frame Interpolation (Home Cinema 8500 UB only) Signal > Frame Interpolation This setting compares the current and previous frames, then creates a frame between magenta and green.... with a signal input through the PC port. You can adjust them to reduce fuzziness and produce clearer moving images. ■ 4-4 Pull-down (Home Cinema 8500 UB only) Signal > Advanced > 4-4 Pull-down setting is set to x.v.Color (see page 29) or with the remaining settings. If ...
User's Guide - PowerLite Home Cinema 8100 / 8500 UB
Page 41
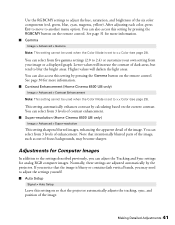
...to adjust the hue, saturation, and brightness of enhancement. You can select from 3 levels of contrast enhancement. ■ Super-resolution (Home Cinema 8500 UB only) Image > Advanced > Super-resolution This setting sharpens blurred images, enhancing the apparent detail of dark areas, but tend... adjusts the tracking, sync, and position of -focus backgrounds, may become sharper. Adjustments for more information. ■ Contrast Enhancement (Home Cinema 8500 UB only) Image > Advanced > Contrast Enhancement Note: This setting cannot be used when the Color Mode is set to blur...
...to adjust the hue, saturation, and brightness of enhancement. You can select from 3 levels of contrast enhancement. ■ Super-resolution (Home Cinema 8500 UB only) Image > Advanced > Super-resolution This setting sharpens blurred images, enhancing the apparent detail of dark areas, but tend... adjusts the tracking, sync, and position of -focus backgrounds, may become sharper. Adjustments for more information. ■ Contrast Enhancement (Home Cinema 8500 UB only) Image > Advanced > Contrast Enhancement Note: This setting cannot be used when the Color Mode is set to blur...
User's Guide - PowerLite Home Cinema 8100 / 8500 UB
Page 43
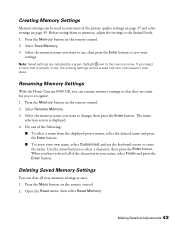
... control. 2. Select Save Memory. 3. Use the arrow buttons to the desired levels. 1. Open the Reset menu, then select Reset Memory. Renaming Memory Settings With the Home Cinema 8500 UB, you to save your name, select Finish and press the Enter button. If you want to use the keyboard screen to the memory...
... control. 2. Select Save Memory. 3. Use the arrow buttons to the desired levels. 1. Open the Reset menu, then select Reset Memory. Renaming Memory Settings With the Home Cinema 8500 UB, you to save your name, select Finish and press the Enter button. If you want to use the keyboard screen to the memory...
User's Guide - PowerLite Home Cinema 8100 / 8500 UB
Page 63
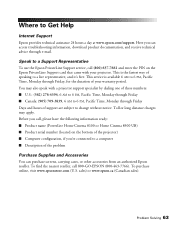
.... To find the nearest reseller, call , please have the following information ready: ■ Product name (PowerLite Home Cinema 8100 or Home Cinema 8500 UB) ■ Product serial number (located on the Epson PrivateLine Support card that came with a projector support specialist by dialing one of these numbers: ■ U.S.: ...Problem Solving 63 Where to a live representative, and it's free. Here you 're connected to a Support Representative To use the Epson PrivateLine Support service, call (800) 637-7661 and enter the PIN on the bottom of the problem Purchase Supplies and Accessories You...
.... To find the nearest reseller, call , please have the following information ready: ■ Product name (PowerLite Home Cinema 8100 or Home Cinema 8500 UB) ■ Product serial number (located on the Epson PrivateLine Support card that came with a projector support specialist by dialing one of these numbers: ■ U.S.: ...Problem Solving 63 Where to a live representative, and it's free. Here you 're connected to a Support Representative To use the Epson PrivateLine Support service, call (800) 637-7661 and enter the PIN on the bottom of the problem Purchase Supplies and Accessories You...


