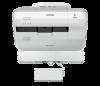
Installation Guide - Control Pad and Touch Unit
Page 2
Touch Unit and Control Pad Installation Guide
Installation Guide - Control Pad and Touch Unit
Page 3
... If the wall is included with your safety, read all the instructions in this installation guide on a concrete wall. Do not connect the Control Pad to eyesight. Safety Instructions For your Epson® projector. Handling the cable incorrectly may cause fire or electric shock. 2 The... if ignored, could cause injury to any screws or bolts. About This Installation Guide This guide describes how to these warnings when reading this guide: • BrightLink® 695Wi/695Wi+/696Ui/697Ui • BrightLink Pro 1450Ui/1460Ui The Control Pad is not strong enough, reinforce the wall...
Installation Guide - Control Pad and Touch Unit
Page 4
... range could cause injury to eyesight. Extra care should be taken when children are applied, it to BrightLink 695Wi/695Wi+/696Ui/697Ui and BrightLink Pro 1450Wi/1460Ui models only. Installation Location • The projector must be secured to eyesight. This could cause injury to the surface with..., or cell phones) away from the front of the table. • Before installing the Touch Unit, verify that the installation location meets the following conditions: • The Touch Unit can be installed in one of unevenness in any other projectors or devices. Do not view the ...
Installation Guide - Control Pad and Touch Unit
Page 5
... obstacles, such as cables, or protruding objects such as whiteboard trays, pen holders, or thick frames in the shaded areas in . (20 mm) • When installing the touch unit above the frame of a whiteboard, use the included Touch Unit Bracket. • If the distance from the board surface, you must... install the Touch Unit on the whiteboard. • If the frame of the whiteboard, secure the Touch Unit with magnets or screws. The Touch Unit will ...
Installation Guide - Control Pad and Touch Unit
Page 6
...11 Turn on the projector 11 Display the installation pattern 11 Remove the dial cover 12 Determine the installation position for the Touch Unit Bracket 13 Install the Touch Unit Bracket 14 Connect the cable 17 Adjust the angle 17 Attach cover 26 Installing the Touch Unit on a whiteboard 27 ... Touch Unit 30 Connect the cable 31 Adjust the angle 31 Attach labels 39 Attach cover 39 4 Installing the Control Pad (BrightLink 697Ui and 40 BrightLink Pro 1450Ui/1460Ui) Remove the front cover 41 Attach the Control Pad 41 Connect the projector cables to the Control Pad...
Installation Guide - Control Pad and Touch Unit
Page 7
... bolts 6 1 Package Contents Touch Unit The following parts are packaged with your projector and are necessary when attaching the Touch Unit. When installing the installation plate, you will also need three M4 screws. Marker (x2) Touch Unit Spacer for screw hole (×3) Touch Unit connection cable Label... parts are packaged with your projector and are necessary when attaching the Touch Unit above the frame of a whiteboard. When installing the Touch Unit on a non-magnetic screen or whiteboard, you will also need three (3) M4 wood screws or M4 anchor bolts (not included...
Installation Guide - Control Pad and Touch Unit
Page 8
Port protection stickers 8.3 in. (210 mm) 2.0 in . (95 mm) English Control Pad (BrightLink 697Ui and BrightLink Pro 1450Ui/1460Ui) The following information: • Invisible laser radiation • Do not view the beam directly with your projector and are necessary when attaching ... 7 The labels contain the following parts are warning labels affixed to the Touch Unit to indicate that conforms to the JIS C 6802:2011 standard. When installing the Control Pad on a wall, you will also need four M4 × 20 mm screws. 3.7 in . (51 mm) Attached labels The Touch Unit is a Class...
Installation Guide - Control Pad and Touch Unit
Page 11
...If the frame of a whiteboard, see "Installing the Touch Unit above the frame of the whiteboard extends more information). The steps for more than 0.1 inch (3 mm) away from the wall to the BrightLink 695Wi/695Wi+/696Ui/697Ui or BrightLink Pro 1450Ui/1460Ui models. You also need ...to any other projectors or devices. 10 3 Installing the Touch Unit Before installing the Touch Unit, make sure you are installing the Touch Unit on a whiteboard, see the Installation Guide included with...
Installation Guide - Control Pad and Touch Unit
Page 12
... control or the projector control panel. Select Easy Interactive Function from the illustrations, but the installation instructions are the same. Remote Control Control Panel 2. Install the Touch Unit Bracket on the screen surface of a whiteboard. English Installing the Touch Unit above a whiteboard Follow the steps below to use the Touch Unit Bracket... to install the Touch Unit above the frame of more than 0.2 inch(5 mm) in any direction, your fingers may not be performed correctly. Some menus may ...
Installation Guide - Control Pad and Touch Unit
Page 13
Select Installation Pattern. Loosen the screw at the bottom of the dial cover. 2. Slide the dial cover down to remove it. 12 4. The Installation pattern is displayed on the projected image. C Remove the dial cover 1.
Installation Guide - Control Pad and Touch Unit
Page 14
English D Determine the installation position for the Touch Unit Bracket Mark the following installation positions: • ( ): The center line of the projected image; align it with the bottom edge of the installation plate. 1.0 to 4.0 in. (25 to 100 mm) from the top edge of the installation pattern; align with the center line of the installation plate ( ). • ( ): 1 to 4 inches (25 to 100 mm) The Touch Unit must be installed above the image area. 13
Installation Guide - Control Pad and Touch Unit
Page 15
...; 25 mm hexagon socket head cap bolts (×2) supplied. Attach the Touch Unit to trap your body between the magnets and the securing plate. 14 E Install the Touch Unit Bracket 1. Secure the installation plate on the securing plate.
Installation Guide - Control Pad and Touch Unit
Page 16
... mm hexagon socket head cap bolts (×2) supplied. Tighten the bolts to the surface of the whiteboard is greater than 2 inches (51 mm), you must install the Touch Unit on the whiteboard. ❏ If the frame of the whiteboard (f ). ❏ If the distance from the board surface, you must...
Installation Guide - Control Pad and Touch Unit
Page 17
... × 70 mm bolt. 16 If (f ) is parallel to 50 mm), use the M4 × 55 mm bolt. If (f ) is 1.4 to 2.0 inches (35 to the installation plate. Loosen the two M4 × 12 mm hexagon socket head cap bolts and adjust the position of the Touch Unit Bracket with the supplied...
Installation Guide - Control Pad and Touch Unit
Page 20
When adjusting the dials, make sure to stop turning when you hear a click. Select Installing the Touch Unit with the included hexagon wrench. 7. Then, press the button on the Touch Unit counterclockwise until you hear the click. 19 The Angle Adjustment screen is displayed. 6. Tighten the adjustment screw on the Touch Unit one turn with the bracket. English 5. Turn both adjustment dials on the remote control.
Installation Guide - Control Pad and Touch Unit
Page 28
... may differ slightly from the Extended menu. 27 Press the Menu button on the projector Remote Control Control Panel B Display the installation pattern 1. Remote Control Control Panel 2. A Turn on the remote control or the projector control panel. If there is unevenness ... use commercially available M4 screws (×3). ❏ Install the Touch Unit on a flat, smooth, unwarped surface. Typically, the Touch Unit should be installed by attaching the magnets to install the Touch Unit on a whiteboard. English Installing the Touch Unit on a whiteboard Follow the steps below...
Installation Guide - Control Pad and Touch Unit
Page 29
Loosen the screw at the bottom of the dial cover. 28 The Installation pattern is displayed on the projected image. Select Touch Unit Setup. 4. C Remove the dial cover 1. 3. Select Installation Pattern.
Installation Guide - Control Pad and Touch Unit
Page 30
English 2. Slide the dial cover down to remove it with the bottom edge of the projected image; align with the center line of the Touch Unit 1 to 4 inches (25 to 100 mm) from the top edge of the Touch Unit. 1.0 to 4.0 in. (25 to 100 mm) The Touch Unit must be installed above the image area. 29 align it . D Determine the installation position for the Touch Unit Mark the following installation positions: • ( ): The center line of the installation pattern;
Installation Guide - Control Pad and Touch Unit
Page 31
E Install the Touch Unit • For magnetic boards, place the back of the Touch Unit on the back of your body between the magnets and the installation surface. • For non-magnetic boards or screens, attach the spacers to the screw holes on the screen surface to trap your fingers or any other part of the Touch Unit Secure the Touch Unit with three (3) M4 screws (not included). 0.8 in. (20 mm) 1.7 in. (43 mm) 30 Caution When installing the Touch Unit on a magnetic surface, be careful not to secure it.
Installation Guide - Control Pad and Touch Unit
Page 34
Turn the adjustment dials on the remote control. English 5. Select Installing the Touch Unit without the bracket. When adjusting the dials, make sure to stop turning when you hear a click. Then, press the button on the Touch Unit counterclockwise until you hear the click. 33 The Angle Adjustment screen is displayed. 6.