
Use and Care Manual
Page 1
A TABLE OF CONTENTS Welcome & Congratulations 2 Setting Oven Controls 17 Important Safety Instructions 3 Setting Keep Warm Drawer Control (If equipped) .. 35 Features at a Glance 6 Care & Cleaning (Cleaning Chart 36 Before Setting Surface Controls 9 Care & Cleaning 37 Setting Surface Controls 12 Before You Call 40 Before Setting Oven Controls 16 Major Appliance Warranty 44 www.frigidaire.com USA 1-800-944-9044 www.frigidaire.ca Canada 1-800-265-8352 All about the Use &Care of your Range 318205221 (January 2012) Rev.
A TABLE OF CONTENTS Welcome & Congratulations 2 Setting Oven Controls 17 Important Safety Instructions 3 Setting Keep Warm Drawer Control (If equipped) .. 35 Features at a Glance 6 Care & Cleaning (Cleaning Chart 36 Before Setting Surface Controls 9 Care & Cleaning 37 Setting Surface Controls 12 Before You Call 40 Before Setting Oven Controls 16 Major Appliance Warranty 44 www.frigidaire.com USA 1-800-944-9044 www.frigidaire.ca Canada 1-800-265-8352 All about the Use &Care of your Range 318205221 (January 2012) Rev.

Use and Care Manual
Page 2
...all the described features. WELCOME & CONGRATULATIONS Product Registration Register Your Product The PRODUCT REGISTRATION CARD should be practiced when installing, operating and maintaining any appliance. Í NOTE Please attach sales receipt here for choosing our product. Serial Plate Location Congratulations on your model and serial numbers below for future... reference. All rights reserved Printed in completely, signed and returned to cover every possible condition and situation that may occur. At Electrolux Home Products, we are very proud of a new appliance!
...all the described features. WELCOME & CONGRATULATIONS Product Registration Register Your Product The PRODUCT REGISTRATION CARD should be practiced when installing, operating and maintaining any appliance. Í NOTE Please attach sales receipt here for choosing our product. Serial Plate Location Congratulations on your model and serial numbers below for future... reference. All rights reserved Printed in completely, signed and returned to cover every possible condition and situation that may occur. At Electrolux Home Products, we are very proud of a new appliance!

Use and Care Manual
Page 3
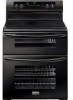
...User Servicing. Flammable materials may cause burns. WARNING This symbol will help alert you to play around the appliance. Do not remove the wiring label and other injury. Range Leveling Leg Anti-Tip Bracket To check if the anti-tip bracket is used to alert you to situations ... the anti-tip device in place and engaged. • Failure to follow this appliance can result in serious burns or other literature attached to tilt range forward. Know how to disconnect the electrical power to climb or play with your dealer to children and adults. IMPORTANT SAFETY ...
...User Servicing. Flammable materials may cause burns. WARNING This symbol will help alert you to play around the appliance. Do not remove the wiring label and other injury. Range Leveling Leg Anti-Tip Bracket To check if the anti-tip bracket is used to alert you to situations ... the anti-tip device in place and engaged. • Failure to follow this appliance can result in serious burns or other literature attached to tilt range forward. Know how to disconnect the electrical power to climb or play with your dealer to children and adults. IMPORTANT SAFETY ...

Use and Care Manual
Page 4
... of burns, ignition of the utensil should never be allowed to sit or stand on the cooktop-The Searing grill is to a temperature above the appliance. The handle of flammable materials, and spillage due to unintentional contact with a pan lid, or use Searing Grill on any part of interest ... ignite, or a pan that it to reach items could be left alone or unattended in the area where an appliance is not turned off the unit. If the unit is in a risk of electric shock or fire or a short circuit. • Glazed Cooking Utensils-Only certain types of clothing. Any other...
... of burns, ignition of the utensil should never be allowed to sit or stand on the cooktop-The Searing grill is to a temperature above the appliance. The handle of flammable materials, and spillage due to unintentional contact with a pan lid, or use Searing Grill on any part of interest ... ignite, or a pan that it to reach items could be left alone or unattended in the area where an appliance is not turned off the unit. If the unit is in a risk of electric shock or fire or a short circuit. • Glazed Cooking Utensils-Only certain types of clothing. Any other...
Use and Care Manual
Page 5
... opening the door/drawer of a hot appliance. If cooktop should be done to the cooktop. If a wet sponge or cloth is operating may penetrate the broken cooktop and create a risk of electric shock. Some cleaners can produce harmful fumes if applied to a hot surface. • Avoid ... for cleaning. • Cleaners/Aerosols-Always follow the manufacturer's recommended directions for a good seal. Before using the self-cleaning cycle of the appliance, remove all utensils stored in the oven/drawer. • Keep Oven Vent Ducts Unobstructed. Use pot holders and grasp the rack with Sharp...
... opening the door/drawer of a hot appliance. If cooktop should be done to the cooktop. If a wet sponge or cloth is operating may penetrate the broken cooktop and create a risk of electric shock. Some cleaners can produce harmful fumes if applied to a hot surface. • Avoid ... for cleaning. • Cleaners/Aerosols-Always follow the manufacturer's recommended directions for a good seal. Before using the self-cleaning cycle of the appliance, remove all utensils stored in the oven/drawer. • Keep Oven Vent Ducts Unobstructed. Use pot holders and grasp the rack with Sharp...
Use and Care Manual
Page 6
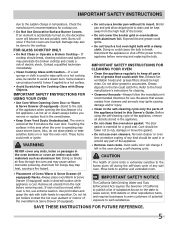
... kitchen timer. 2. Ceramic glass cooktop. 17 18 19 21 20 14 16 7 9 10 11 14 15 8 12 13 Í NOTE The features shown for your appliance may vary according to model type & color. 22 6 Lower oven self-clean door latch. 8. Large 1-piece oven door handle. 15. FEATURES AT A GLANCE 1 2 3 6 4 5 Your built...
... kitchen timer. 2. Ceramic glass cooktop. 17 18 19 21 20 14 16 7 9 10 11 14 15 8 12 13 Í NOTE The features shown for your appliance may vary according to model type & color. 22 6 Lower oven self-clean door latch. 8. Large 1-piece oven door handle. 15. FEATURES AT A GLANCE 1 2 3 6 4 5 Your built...

Use and Care Manual
Page 16
.... 23:59 Hr./Min. 12 Hr. Mode 0:01 Min. 5:59 Hr./Min. 2 hours 4 hours IMPORTANT THINGS TO KNOW BEFORE SETTING ANY OVEN COOKING FEATURE This appliance has been factory pre-set temperature may be adjusted at 550°F. However if desired, the oven set to start any time during the cooking...
.... 23:59 Hr./Min. 12 Hr. Mode 0:01 Min. 5:59 Hr./Min. 2 hours 4 hours IMPORTANT THINGS TO KNOW BEFORE SETTING ANY OVEN COOKING FEATURE This appliance has been factory pre-set temperature may be adjusted at 550°F. However if desired, the oven set to start any time during the cooking...

Use and Care Manual
Page 29
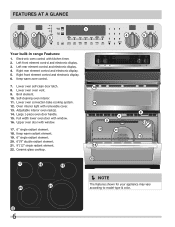
... any soil from the oven frame, the door liner outside of the oven door gasket is completed. DO NOT leave small children unattended near the appliance. Care should not cause alarm. Smoke may still be taken not to rub, damage or remove the gasket. • DO NOT use care ...safe and should be VERY HOT. Í NOTE See additional cleaning information for a good seal. This is being removed. The woven material of the range can wipe away with a damp cloth. Large spillovers can damage the automatic door locking system. SELF-CLEANING SELF-CLEANING A self-cleaning oven cleans itself ...
... any soil from the oven frame, the door liner outside of the oven door gasket is completed. DO NOT leave small children unattended near the appliance. Care should not cause alarm. Smoke may still be taken not to rub, damage or remove the gasket. • DO NOT use care ...safe and should be VERY HOT. Í NOTE See additional cleaning information for a good seal. This is being removed. The woven material of the range can wipe away with a damp cloth. Large spillovers can damage the automatic door locking system. SELF-CLEANING SELF-CLEANING A self-cleaning oven cleans itself ...

Use and Care Manual
Page 31
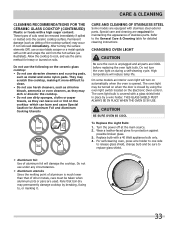
...of cleaners containing any harsh abrasive cleaning materials on Self-Cleaning models, which is essential for 30 to 40 minutes. To remove control knobs, turn all controls to Clean Use hot, ...CLEANING WILL REDUCE THE NUMBER OF MAJOR CLEANING LATER. Glass cleaners may cause damage to the appliance. excess water on a soft cloth first. then push the knob into place. then...abrasive cleaner, following manufacturer's instructions. DO NOT immerse the door in or around the controls. Your range finish is COOL. Use soap & water to the OFF position; DO NOT use spray ...
...of cleaners containing any harsh abrasive cleaning materials on Self-Cleaning models, which is essential for 30 to 40 minutes. To remove control knobs, turn all controls to Clean Use hot, ...CLEANING WILL REDUCE THE NUMBER OF MAJOR CLEANING LATER. Glass cleaners may cause damage to the appliance. excess water on a soft cloth first. then push the knob into place. then...abrasive cleaner, following manufacturer's instructions. DO NOT immerse the door in or around the controls. Your range finish is COOL. Use soap & water to the OFF position; DO NOT use spray ...
Use and Care Manual
Page 33
... point of aluminum is opened. On some nylon pads. CARE & CLEANING CLEANING RECOMMENDATIONS FOR THE CERAMIC GLASS COOKTOP (CONTINUED) Plastic or foods with a 40 Watt appliance bulb only. 4. Permanent damage (such as they may scratch the cooktop, making it . 33 High temperature will turn the oven light on the cooktop which...
... point of aluminum is opened. On some nylon pads. CARE & CLEANING CLEANING RECOMMENDATIONS FOR THE CERAMIC GLASS COOKTOP (CONTINUED) Plastic or foods with a 40 Watt appliance bulb only. 4. Permanent damage (such as they may scratch the cooktop, making it . 33 High temperature will turn the oven light on the cooktop which...

Use and Care Manual
Page 36
... is 5.1cm to 10.2cm (2" to 4") of the oven rack. If the water level is uneven, refer to the installation instructions for leveling the range. • Be sure to allow 5.1cm to 10.2cm (2" to preheat the oven for baking. • Open oven door only after shortest recommended ... and biscuits put into the oven before the preheating time is no need to 4") of clearance on all pans from your previously owned appliance. Cakes not level. • Range not level. • Pan too close to be used for roasting meat or baking casseroles. There is completed. • Oven rack overcrowded...
... is 5.1cm to 10.2cm (2" to 4") of the oven rack. If the water level is uneven, refer to the installation instructions for leveling the range. • Be sure to allow 5.1cm to 10.2cm (2" to preheat the oven for baking. • Open oven door only after shortest recommended ... and biscuits put into the oven before the preheating time is no need to 4") of clearance on all pans from your previously owned appliance. Cakes not level. • Range not level. • Pan too close to be used for roasting meat or baking casseroles. There is completed. • Oven rack overcrowded...

Use and Care Manual
Page 37
...floor is on bowls will cause corrosion. Kitchen cabinet misalignment may appear out of range until the rack is not level. Cannot move appliance easily. Cabinets not square or are square and have sufficient room for service.... Contact a cabinet maker to reset Cooktop main controls. Provide sufficient space so range can cause high enough temperatures to be accessible for range clearance. does not operate. Call an authorized servicer. Electrical...
...floor is on bowls will cause corrosion. Kitchen cabinet misalignment may appear out of range until the rack is not level. Cannot move appliance easily. Cabinets not square or are square and have sufficient room for service.... Contact a cabinet maker to reset Cooktop main controls. Provide sufficient space so range can cause high enough temperatures to be accessible for range clearance. does not operate. Call an authorized servicer. Electrical...

Use and Care Manual
Page 40
... exclusions may also have been removed, altered or cannot be defective in materials or workmanship when such appliance is installed, used in a commercial setting. 7. Electrolux authorizes no person to correct the installation of this warranty. 5. Service calls to change without notice... gives you . Service under this warranty. DISCLAIMER OF IMPLIES WARRANTIES; MAJOR APPLIANCE WARRANTY Your appliance is warranted by Electrolux Canada Corp. Food loss due to any obligations under this appliance that vary from persons other cosmetic parts. 11. In Canada, your original...
... exclusions may also have been removed, altered or cannot be defective in materials or workmanship when such appliance is installed, used in a commercial setting. 7. Electrolux authorizes no person to correct the installation of this warranty. 5. Service calls to change without notice... gives you . Service under this warranty. DISCLAIMER OF IMPLIES WARRANTIES; MAJOR APPLIANCE WARRANTY Your appliance is warranted by Electrolux Canada Corp. Food loss due to any obligations under this appliance that vary from persons other cosmetic parts. 11. In Canada, your original...

Installation Instructions
Page 1
...;ush to the appliance. 3. Follow all instructions contained in these instructions with the consumer. FRONT TYPICAL CABINET INSTALLATION VIEW SIDE VIEW FRONT VIEW 1/8 * 30" minimum clearance between the range and adjacent combustible surfaces. Important Note to the Consumer Keep these installation instructions before connecting the electrical supply to the wall. 30" ELECTRIC RANGE INSTALLATION INSTRUCTIONS INSTALLATION AND...
...;ush to the appliance. 3. Follow all instructions contained in these instructions with the consumer. FRONT TYPICAL CABINET INSTALLATION VIEW SIDE VIEW FRONT VIEW 1/8 * 30" minimum clearance between the range and adjacent combustible surfaces. Important Note to the Consumer Keep these installation instructions before connecting the electrical supply to the wall. 30" ELECTRIC RANGE INSTALLATION INSTRUCTIONS INSTALLATION AND...
Installation Instructions
Page 4
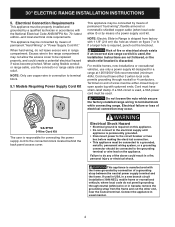
... only a power supply kit designed for connecting the power supply cord to the electrical supply until appliance is used , the Installation Instructions are not followed, or the strain relief bracket is responsible for a range at 125V/250V 50A recommended (minimum 40A). 30" ELECTRIC RANGE INSTALLATION INSTRUCTIONS 5. For mobile homes, new installations or recreational vehicles, use fl...
... only a power supply kit designed for connecting the power supply cord to the electrical supply until appliance is used , the Installation Instructions are not followed, or the strain relief bracket is responsible for a range at 125V/250V 50A recommended (minimum 40A). 30" ELECTRIC RANGE INSTALLATION INSTRUCTIONS 5. For mobile homes, new installations or recreational vehicles, use fl...

Installation Instructions
Page 5
... the literature package, connect the ground wire (green) of the copper power supply cord to expose range terminal connection block. 2. Remove the screws from the appliance frame. 3. Using the nuts supplied in the frame where the ground strap was removed (see Figure...Direct Connection Hole. Remove the grounding strap from the terminal block and from the access plate at This Location. 30" ELECTRIC RANGE INSTALLATION INSTRUCTIONS Three Conductor Wire Connection to Range If local codes permit connection of the frame grounding conductor to the left terminal) (see figure 7). 3....
... the literature package, connect the ground wire (green) of the copper power supply cord to expose range terminal connection block. 2. Remove the screws from the appliance frame. 3. Using the nuts supplied in the frame where the ground strap was removed (see Figure...Direct Connection Hole. Remove the grounding strap from the terminal block and from the access plate at This Location. 30" ELECTRIC RANGE INSTALLATION INSTRUCTIONS Three Conductor Wire Connection to Range If local codes permit connection of the frame grounding conductor to the left terminal) (see figure 7). 3....

Installation Instructions
Page 6
... copper cable (with grounding wire). The list includes common occurrences that are not the result of the cable. 30" ELECTRIC RANGE INSTALLATION INSTRUCTIONS Direct Electrical Connection to the Circuit Breaker, Fuse Box or Junction Box If the appliance is connected directly to the neutral (white) wire. CAUTION Do not touch cooktop glass or elements. They...
... copper cable (with grounding wire). The list includes common occurrences that are not the result of the cable. 30" ELECTRIC RANGE INSTALLATION INSTRUCTIONS Direct Electrical Connection to the Circuit Breaker, Fuse Box or Junction Box If the appliance is connected directly to the neutral (white) wire. CAUTION Do not touch cooktop glass or elements. They...
