
Complete Owner's Guide (English)
Page 3
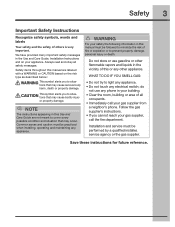
...property damage. WARNING For your safety the following information in this manual are not meant to prevent property damage, personal injury or death. Safety items throughout this manual must be practiced when installing, operating and maintaining any phone in the vicinity of fi.... Safety 3 Important Safety Instructions Recognize safety symbols, words and labels Your safety and the safety of all safety messages. Installation and service must be followed to situations that may occur. Save these instructions for future reference. do not use gasoline or...
...property damage. WARNING For your safety the following information in this manual are not meant to prevent property damage, personal injury or death. Safety items throughout this manual must be practiced when installing, operating and maintaining any phone in the vicinity of fi.... Safety 3 Important Safety Instructions Recognize safety symbols, words and labels Your safety and the safety of all safety messages. Installation and service must be followed to situations that may occur. Save these instructions for future reference. do not use gasoline or...
Complete Owner's Guide (English)
Page 5
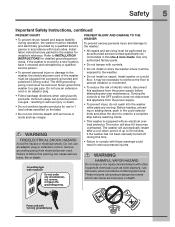
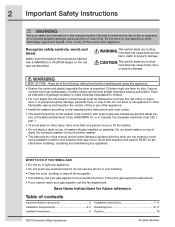
...8226; To prevent injury, do not reach into a properly grounded and polarized 3-prong outlet. Install washer on a solid floor. WARNING HARMFUL VAPOR HAZARD Do not use in 1 load unless specified on carpet. Grounding type wall receptacle Do not, under any user maintenance.... The motor will automatically restart after a cool down period of up to 30 minutes, if the washer has not been manually turned off during operation, the washer must be installed...
...8226; To prevent injury, do not reach into a properly grounded and polarized 3-prong outlet. Install washer on a solid floor. WARNING HARMFUL VAPOR HAZARD Do not use in 1 load unless specified on carpet. Grounding type wall receptacle Do not, under any user maintenance.... The motor will automatically restart after a cool down period of up to 30 minutes, if the washer has not been manually turned off during operation, the washer must be installed...
Complete Owner's Guide (English)
Page 20
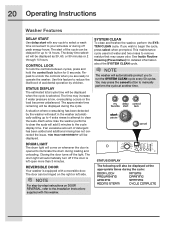
...time convenient to the Installation Instructions supplied with a reversible door. Use this washer. The time may increase if water pressure is selected. Each extra rinse the washer performs to clear the...to 4 extra rinses to attempt to manually perform the cycle at the appropriate times during loading and unloading. 20 Operating Instructions Washer Features DELAY START Use delay start of... by the washer will result in the washer automatically adding up to illuminate the drum during the cycle: DOOR LOCK RINSING PREWASHING DRAINING WASHING SPINNING ADDING STEAM CYCLE COMPLETE...
...time convenient to the Installation Instructions supplied with a reversible door. Use this washer. The time may increase if water pressure is selected. Each extra rinse the washer performs to clear the...to 4 extra rinses to attempt to manually perform the cycle at the appropriate times during loading and unloading. 20 Operating Instructions Washer Features DELAY START Use delay start of... by the washer will result in the washer automatically adding up to illuminate the drum during the cycle: DOOR LOCK RINSING PREWASHING DRAINING WASHING SPINNING ADDING STEAM CYCLE COMPLETE...
Complete Owner's Guide (English)
Page 24
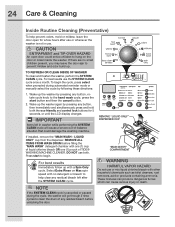
... cause a severe out-of-balance situation that could entice children to prevent mildew and odor build up the washer by following these directions: 1. REMOVE "LIQUID ONLY" DISPENSER CUP If installed, remove the "MAIN WASH - Press start button and then the cancel button. 2. "MAIN WASH" COMPARTMENT... lock buttons for a few hours after the SYSTEM CLEAN cycle. For best results use or whenever the washer is cancelled or paused during automated reminder mode or manually select the cycle by pressing any button, then immediately and simultaneously press and hold both . To begin ...
... cause a severe out-of-balance situation that could entice children to prevent mildew and odor build up the washer by following these directions: 1. REMOVE "LIQUID ONLY" DISPENSER CUP If installed, remove the "MAIN WASH - Press start button and then the cancel button. 2. "MAIN WASH" COMPARTMENT... lock buttons for a few hours after the SYSTEM CLEAN cycle. For best results use or whenever the washer is cancelled or paused during automated reminder mode or manually select the cycle by pressing any button, then immediately and simultaneously press and hold both . To begin ...
Complete Owner's Guide (English)
Page 30
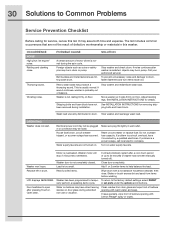
... hesitates to 30 minutes (if washer has not been manually turned off). OCCURRENCE NOISE High pitch "jet engine" noise. Foreign objects such as coins or safety pins may have not See INSTALLATION INSTRUCTIONS for details. Stop washer and rearrange wash load. Reset circuit breaker or replace...wipe front of balance. If issue persists, wipe front of up to open after washer is not resting firmly on door glass during installation. It may produce a thumping sound. If noise continues after pressing Touch-2Open latch. Stop washer and redistribute wash load. Shipping...
... hesitates to 30 minutes (if washer has not been manually turned off). OCCURRENCE NOISE High pitch "jet engine" noise. Foreign objects such as coins or safety pins may have not See INSTALLATION INSTRUCTIONS for details. Stop washer and rearrange wash load. Reset circuit breaker or replace...wipe front of balance. If issue persists, wipe front of up to open after washer is not resting firmly on door glass during installation. It may produce a thumping sound. If noise continues after pressing Touch-2Open latch. Stop washer and redistribute wash load. Shipping...
Installation Instructions (All Languages)
Page 2
...or any other appliance. do not use them for future reference. Save these instructions for play. Do not stack washer on the risk type as described: This symbol alerts you to light any appliance. • Do not touch ...might use any phone in this manual must be applied when installing, operating and maintaining any electrical switch; Read all of contents Important Safety Instructions 2 Installation Requirements 3-5 Installed Dimensions 6 Installation Instructions 7-11 Reversing Door 12-17 Options 18 ©2010 Electrolux Major Appliances All rights reserved....
...or any other appliance. do not use them for future reference. Save these instructions for play. Do not stack washer on the risk type as described: This symbol alerts you to light any appliance. • Do not touch ...might use any phone in this manual must be applied when installing, operating and maintaining any electrical switch; Read all of contents Important Safety Instructions 2 Installation Requirements 3-5 Installed Dimensions 6 Installation Instructions 7-11 Reversing Door 12-17 Options 18 ©2010 Electrolux Major Appliances All rights reserved....


