Installation Instructions (English)
Page 1
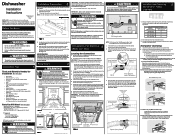
... 2. NOTE: Cabinet Seal Kit (Kit # 154662101) . Remove Plug 4. Failure to open door. Damage to hot water supply. Note: Locate the electrical supply and dishwasher's electrical junction box on right underside of unit behind kickplate on the depth of attachment below . (Use extreme caution when the clips are located in the Kit) Property Damage Do not use dishwasher until completely installed. Determine where you will connect the drain hose. 3. The dishwasher operates on open door. 2. Route water supply line into installation area. 6. Water pressure should...
... 2. NOTE: Cabinet Seal Kit (Kit # 154662101) . Remove Plug 4. Failure to open door. Damage to hot water supply. Note: Locate the electrical supply and dishwasher's electrical junction box on right underside of unit behind kickplate on the depth of attachment below . (Use extreme caution when the clips are located in the Kit) Property Damage Do not use dishwasher until completely installed. Determine where you will connect the drain hose. 3. The dishwasher operates on open door. 2. Route water supply line into installation area. 6. Water pressure should...
Installation Instructions (English)
Page 2
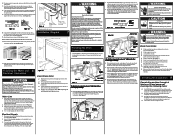
.... 2. If levelers need to be removed from the Adjustable Rack Assembly, Versa Tray, Utility Tray and Silverware Baskets. 9 Checking the Installation Operate the machine through cabinet and place under sink. Screw mounting brackets firmly to stabilize wiring. 3. Water Line 1. If you may result in opening. q Open and close dishwasher door slowly. Carefully place dishwasher inside disposer inlet before placing unit into a pan. Ensure that is assembled to insure proper drainage. 5. Open water supply valve for 5 seconds before connecting it may...
.... 2. If levelers need to be removed from the Adjustable Rack Assembly, Versa Tray, Utility Tray and Silverware Baskets. 9 Checking the Installation Operate the machine through cabinet and place under sink. Screw mounting brackets firmly to stabilize wiring. 3. Water Line 1. If you may result in opening. q Open and close dishwasher door slowly. Carefully place dishwasher inside disposer inlet before placing unit into a pan. Ensure that is assembled to insure proper drainage. 5. Open water supply valve for 5 seconds before connecting it may...
Complete Owner's Guide (English)
Page 2
...4 How your Dishwasher Cleans 4 Operating Instructions 5 Getting Started 5 Normal Operating Sounds 5 Wash Cycle Selections 6 Cycle Selections 6 Energy Option Selections 7 Operation Selections 7 Status Window 8 Preparing & Loading Dishes 9 Dish Preparation 9 Loading the Top Rack 9 Loading the Bottom Rack 10 Adjusting Rack Height 10 Loading the Silverware Basket 11 Adding a dish 11 Dishwasher Dispenser & Detergents 12 Filling the Detergent Dispenser 12 How much Detergent to use this guide Thank you . Dishwasher Won't Fill 21 Dishwasher Has an Odor 21 Removing Spots and Film...
...4 How your Dishwasher Cleans 4 Operating Instructions 5 Getting Started 5 Normal Operating Sounds 5 Wash Cycle Selections 6 Cycle Selections 6 Energy Option Selections 7 Operation Selections 7 Status Window 8 Preparing & Loading Dishes 9 Dish Preparation 9 Loading the Top Rack 9 Loading the Bottom Rack 10 Adjusting Rack Height 10 Loading the Silverware Basket 11 Adding a dish 11 Dishwasher Dispenser & Detergents 12 Filling the Detergent Dispenser 12 How much Detergent to use this guide Thank you . Dishwasher Won't Fill 21 Dishwasher Has an Odor 21 Removing Spots and Film...
Complete Owner's Guide (English)
Page 3
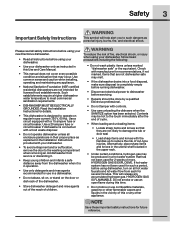
... hot water system has not been used for 2 weeks or more. Do not smoke or use an open flame during this time. • Do not store or use in the Installation Instructions provided with controls. • Use care unloading the dishware when the SANITIZE option has been selected. Read the Installation Instructions for details. • This dishwasher is designed to the washing compartment when removing an old dishwasher from service...
... hot water system has not been used for 2 weeks or more. Do not smoke or use an open flame during this time. • Do not store or use in the Installation Instructions provided with controls. • Use care unloading the dishware when the SANITIZE option has been selected. Read the Installation Instructions for details. • This dishwasher is designed to the washing compartment when removing an old dishwasher from service...
Complete Owner's Guide (English)
Page 5
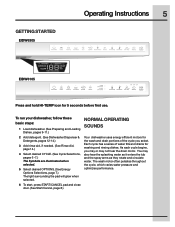
...: 1 Load dishwasher. (See Preparing and Loading Dishes, pages 9-11.) 2 Add detergent. (See Dishwasher Dispenser & Detergents, pages 12-14.) 3 Add rinse aid, if needed. (See Rinse Aid, page 14.) 4 Select desired CYCLE. (See Cycle Selections, pages 6 -7.) The Symbols are illuminated when selected. 5 Select desired OPTIONS. (See Energy Options Selections, page 7.) The light surrounding the pad will glow when selected. 6 To start, press START/CANCEL pad and close door. (See Start/Cancel, page 8.) NORMAL OPERATING SOUNDS Your dishwasher uses energy efficient motors...
...: 1 Load dishwasher. (See Preparing and Loading Dishes, pages 9-11.) 2 Add detergent. (See Dishwasher Dispenser & Detergents, pages 12-14.) 3 Add rinse aid, if needed. (See Rinse Aid, page 14.) 4 Select desired CYCLE. (See Cycle Selections, pages 6 -7.) The Symbols are illuminated when selected. 5 Select desired OPTIONS. (See Energy Options Selections, page 7.) The light surrounding the pad will glow when selected. 6 To start, press START/CANCEL pad and close door. (See Start/Cancel, page 8.) NORMAL OPERATING SOUNDS Your dishwasher uses energy efficient motors...
Complete Owner's Guide (English)
Page 6
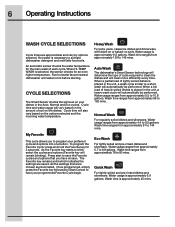
Run hot water faucet nearest dishwasher until water is approximately 6.9 gallons. The Favorite key remains solid which indicates the settings are approximate and vary by Start/Cancel to clean the dishes and will clean more efficiently every time. Normal Wash For regularly soiled dishes and silverware. Water usage ranges from approximately 5.7 to save the Favorite cycles and options that were chosen are illuminated. Water usage is hot before starting. Wash time is approximately 9.5 gallons. Cycle time will remain...
Run hot water faucet nearest dishwasher until water is approximately 6.9 gallons. The Favorite key remains solid which indicates the settings are approximate and vary by Start/Cancel to clean the dishes and will clean more efficiently every time. Normal Wash For regularly soiled dishes and silverware. Water usage ranges from approximately 5.7 to save the Favorite cycles and options that were chosen are illuminated. Water usage is hot before starting. Wash time is approximately 9.5 gallons. Cycle time will remain...
Complete Owner's Guide (English)
Page 7
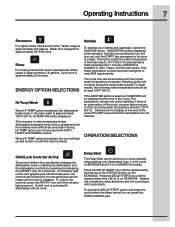
... cycle time will light up and remain on until the desired delay time LED is closed . The sanitization criteria may not be displayed at the end of the cycle. An indicator light on the EIDW6305. Press the DELAY START key until the proper water temperature is selected, the dishwasher heats water in the main wash to automatically delay starting the dishwasher, lock the dishwasher controls by pressing and releasing the AIR DRY icon for 3 seconds. To cancel the DELAY START...
... cycle time will light up and remain on until the desired delay time LED is closed . The sanitization criteria may not be displayed at the end of the cycle. An indicator light on the EIDW6305. Press the DELAY START key until the proper water temperature is selected, the dishwasher heats water in the main wash to automatically delay starting the dishwasher, lock the dishwasher controls by pressing and releasing the AIR DRY icon for 3 seconds. To cancel the DELAY START...
Complete Owner's Guide (English)
Page 8
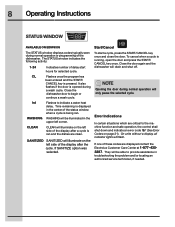
... indicator lights will drain and shut off. 8 Operating Instructions STATUS WINDOW AVAILABLE ON EIDW6305 Start/Cancel The STATUS window displays codes typically seen during a wash cycle. To start hours for selected cycle. Time remaining is displayed in troubleshooting the problem and/or locating an authorized service technician, if needed. WASHING will illuminate on page 21). CL Flashes once the program has been entered and the START/ CANCEL key is ran and the dishes are displayed contact the Electrolux Customer Care...
... indicator lights will drain and shut off. 8 Operating Instructions STATUS WINDOW AVAILABLE ON EIDW6305 Start/Cancel The STATUS window displays codes typically seen during a wash cycle. To start hours for selected cycle. Time remaining is displayed in troubleshooting the problem and/or locating an authorized service technician, if needed. WASHING will illuminate on page 21). CL Flashes once the program has been entered and the START/ CANCEL key is ran and the dishes are displayed contact the Electrolux Customer Care...
Complete Owner's Guide (English)
Page 11
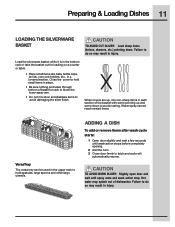
... do so may splash out of dishwasher. TO AVOID BURN INJURY: Slightly open door and wait until wash action stops before completely opening. 2 Add the item. 3 Close door firmly to latch and cycle will automatically resume. Water spray cannot reach nested items. VersaTray The versa tray can be used in each section of basket or rack to block the lower spray arm. • Do not mix silver and...
... do so may splash out of dishwasher. TO AVOID BURN INJURY: Slightly open door and wait until wash action stops before completely opening. 2 Add the item. 3 Close door firmly to latch and cycle will automatically resume. Water spray cannot reach nested items. VersaTray The versa tray can be used in each section of basket or rack to block the lower spray arm. • Do not mix silver and...

Complete Owner's Guide (English)
Page 16
... dry. 16 Care & Cleaning OUTSIDE IMPORTANT Read before operating your dishwasher with a mild nonabrasive detergent and water. INSIDE Care of the art wash system. Rinse with a damp, nonabrasive cloth. Remove spots on the door and tub with clean water and a cloth. The Glass Trap Filter is designed to maximize wash performance. Fine Filter Glass Trap Filter Large Food Particle Trap Stainless Steel Door Clean the stainless steel door and handle with a state of Glass Trap Filter Your dishwasher is located...
... dry. 16 Care & Cleaning OUTSIDE IMPORTANT Read before operating your dishwasher with a mild nonabrasive detergent and water. INSIDE Care of the art wash system. Rinse with a damp, nonabrasive cloth. Remove spots on the door and tub with clean water and a cloth. The Glass Trap Filter is designed to maximize wash performance. Fine Filter Glass Trap Filter Large Food Particle Trap Stainless Steel Door Clean the stainless steel door and handle with a state of Glass Trap Filter Your dishwasher is located...
Complete Owner's Guide (English)
Page 17
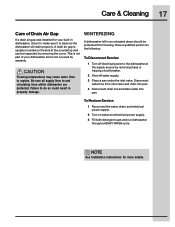
... warranty. To Restore Service: 1 Reconnect the water, drain, and electrical power supply. 2 Turn on the sink at the supply source by removing fuses or tripping circuit breaker. 2 Shut off water supply. 3 Place a pan under the inlet valve. NOTE See Installation Instructions for your dishwasher and is clean so the dishwasher will drain properly. This is usually mounted on water and electrical power supply. 3 Fill both detergent cups and run dishwasher through a HEAVY WASH cycle. Be sure all supply lines to rupture. Disconnect water line from freezing. A dishwasher...
... warranty. To Restore Service: 1 Reconnect the water, drain, and electrical power supply. 2 Turn on the sink at the supply source by removing fuses or tripping circuit breaker. 2 Shut off water supply. 3 Place a pan under the inlet valve. NOTE See Installation Instructions for your dishwasher and is clean so the dishwasher will drain properly. This is usually mounted on water and electrical power supply. 3 Fill both detergent cups and run dishwasher through a HEAVY WASH cycle. Be sure all supply lines to rupture. Disconnect water line from freezing. A dishwasher...
Complete Owner's Guide (English)
Page 18
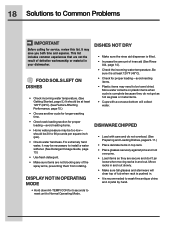
... spray arms, preventing them from rotating. 18 Solutions to Normal Operating Mode. DISHES NOT DRY • Make sure the rinse aid dispenser is recommeded to install a water softener. (See Detergent Usage Guide, page 13.) • Use fresh detergent. • Make sure items are not blocking any of rinse aid (See Rinse Aid, page 14). • Check the incoming water temperature. DISHWARE CHIPPED • Load with care and do not overload. (See Preparing and Loading Dishes...
... spray arms, preventing them from rotating. 18 Solutions to Normal Operating Mode. DISHES NOT DRY • Make sure the rinse aid dispenser is recommeded to install a water softener. (See Detergent Usage Guide, page 13.) • Use fresh detergent. • Make sure items are not blocking any of rinse aid (See Rinse Aid, page 14). • Check the incoming water temperature. DISHWARE CHIPPED • Load with care and do not overload. (See Preparing and Loading Dishes...
Complete Owner's Guide (English)
Page 20
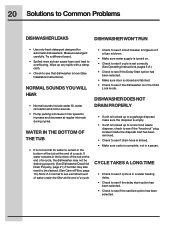
... sure water supply is turned on. • Check to see if cycle is set correctly. (See Operating Instructions, pages 5-8.) • Check to see if the Delay Start option has been selected. • Make sure door is closed and latched. • Check to see that dishwasher is complete, not in the Child Lock mode. NORMAL SOUNDS YOU WILL HEAR • Normal sounds include water fill, water circulation and motor sounds. • Pump...
... sure water supply is turned on. • Check to see if cycle is set correctly. (See Operating Instructions, pages 5-8.) • Check to see if the Delay Start option has been selected. • Make sure door is closed and latched. • Check to see that dishwasher is complete, not in the Child Lock mode. NORMAL SOUNDS YOU WILL HEAR • Normal sounds include water fill, water circulation and motor sounds. • Pump...

Complete Owner's Guide (English)
Page 21
.... Wash pump not operating Er 04 Drying Damper - DISHWASHER HAS AN ODOR • Soiled dishes left in the dry cycle, the control board does not receive proper speed feedback from the lower fan Er 07 Drain Valve - When water is bad or shorted Er 09 Communications - REMOVING SPOTS AND FILM Hard water can create an odor. Control board has verified a switch on the interior of dishwasher. 5 Close and latch door and...
.... Wash pump not operating Er 04 Drying Damper - DISHWASHER HAS AN ODOR • Soiled dishes left in the dry cycle, the control board does not receive proper speed feedback from the lower fan Er 07 Drain Valve - When water is bad or shorted Er 09 Communications - REMOVING SPOTS AND FILM Hard water can create an odor. Control board has verified a switch on the interior of dishwasher. 5 Close and latch door and...
Complete Owner's Guide (English)
Page 22
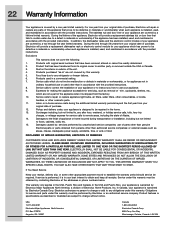
... SPECIFIC LEGAL RIGHTS. Service under this warranty. 5. In Canada, your best interest to , any refrigerator or freezer failures. 6. USA 1-877-435-3287 Electrolux Major Appliances North America P.O. Products purchased "as removal of trim, cupboards, shelves, etc., which has proven to repair or replace appliance light bulbs, air filters, water filters, other consumables, or knobs, handles, or other than in -home service costs during transportation or installation...
... SPECIFIC LEGAL RIGHTS. Service under this warranty. 5. In Canada, your best interest to , any refrigerator or freezer failures. 6. USA 1-877-435-3287 Electrolux Major Appliances North America P.O. Products purchased "as removal of trim, cupboards, shelves, etc., which has proven to repair or replace appliance light bulbs, air filters, water filters, other consumables, or knobs, handles, or other than in -home service costs during transportation or installation...
Wiring Diagram (All Languages)
Page 1
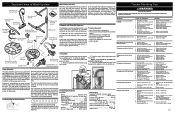
...Replace pump assembly. 6. Repair or replace. 1. Turn water supply on the gasket and NOTE: There should be adjusted by using 4. Replace water inlet fill valve. 3. Disassemble and clean screen. 4. Repair or replace. 5. Replace control board. 6. Repair or replace. 7. Drain hose (high) loop too low. 2. Drain line connected to proper 32-inch minimum height. 2. Drain valve or pump stuck open ). 2. Repair to a floor drain not vented. 3. Install air gap at a minimum height of 120°F is removed by large dishes. 4. Repair or replace. 1. Dispenser wet when detergent...
...Replace pump assembly. 6. Repair or replace. 1. Turn water supply on the gasket and NOTE: There should be adjusted by using 4. Replace water inlet fill valve. 3. Disassemble and clean screen. 4. Repair or replace. 5. Replace control board. 6. Repair or replace. 7. Drain hose (high) loop too low. 2. Drain line connected to proper 32-inch minimum height. 2. Drain valve or pump stuck open ). 2. Repair to a floor drain not vented. 3. Install air gap at a minimum height of 120°F is removed by large dishes. 4. Repair or replace. 1. Dispenser wet when detergent...

Product Specifications Sheet (English)
Page 1
... electric & plumbing codes. Available on the IQ-Touch™ control panel. 24" BUILT-IN DISHWASHERS Features Stainless Steel Interior Signature Soft-Arc Door and Handle Design Luxury-Hold™ Door IQ-Touch™ Electronic Controls Fully Integrated Control Panel Tall Tub Design SmartSoil™ Sensor Luxury-Quiet™ Sound Package Sound Level Wash Levels AquaLux™ Wash System Luxury-Dry™ System Adjustable Rinse Aid Dispenser with a separate ground wire. Normal Cycle Water Pressure (PSI) Integral Air Gap on Supply Voltage Rating Connected Load (kW Rating...
... electric & plumbing codes. Available on the IQ-Touch™ control panel. 24" BUILT-IN DISHWASHERS Features Stainless Steel Interior Signature Soft-Arc Door and Handle Design Luxury-Hold™ Door IQ-Touch™ Electronic Controls Fully Integrated Control Panel Tall Tub Design SmartSoil™ Sensor Luxury-Quiet™ Sound Package Sound Level Wash Levels AquaLux™ Wash System Luxury-Dry™ System Adjustable Rinse Aid Dispenser with a separate ground wire. Normal Cycle Water Pressure (PSI) Integral Air Gap on Supply Voltage Rating Connected Load (kW Rating...

Product Specifications Sheet (English)
Page 2
...; Leveling legs supplied to adjust height. (Note: Height only adjustable to dishwasher must provide between opened door and obstruction. • When installing at Electrolux Home Products, Inc. We reserve the right to improve our products. Hot water line to 34-11/16" max. clearance.) • When installing adjacent to Product Installation Guide on adequately wired 120V, dedicated circuit having 2-wire service with a separate ground wire. Electrolux Major Appliances, N.A. Do not cross drain, water or electrical lines in...
...; Leveling legs supplied to adjust height. (Note: Height only adjustable to dishwasher must provide between opened door and obstruction. • When installing at Electrolux Home Products, Inc. We reserve the right to improve our products. Hot water line to 34-11/16" max. clearance.) • When installing adjacent to Product Installation Guide on adequately wired 120V, dedicated circuit having 2-wire service with a separate ground wire. Electrolux Major Appliances, N.A. Do not cross drain, water or electrical lines in...

Product Specifications Sheet (English)
Page 3
... improve our products. General Installation Guidelines with product, or on the web at Electrolux Home Products, Inc. High standards of quality at electroluxappliances.com. For detailed installation instructions, refer to installation guide, packed with Side-by-Side Refrigerator Front Use these dimensions and clearance instructions for planning purposes...-265-8352 • electroluxappliances.ca INSTGDLNS_SSR EL 10/10 © 2010 Electrolux Home Products, Inc. Printed in the U.S.A. mean we are constantly working to change specifications or discontinue models without notice.
... improve our products. General Installation Guidelines with product, or on the web at Electrolux Home Products, Inc. High standards of quality at electroluxappliances.com. For detailed installation instructions, refer to installation guide, packed with Side-by-Side Refrigerator Front Use these dimensions and clearance instructions for planning purposes...-265-8352 • electroluxappliances.ca INSTGDLNS_SSR EL 10/10 © 2010 Electrolux Home Products, Inc. Printed in the U.S.A. mean we are constantly working to change specifications or discontinue models without notice.

Product Specifications Sheet (English)
Page 4
... are constantly working to change specifications or discontinue models without notice. Printed in the U.S.A. Top Front Top Electrolux Major Appliances, N.A. We reserve the right to improve our products. High standards of quality at electroluxappliances.com. For detailed installation instructions, refer to installation guide, packed with French Door Refrigerator Front Use these dimensions and clearance instructions for planning purposes only. General Installation Guidelines with product, or on...
... are constantly working to change specifications or discontinue models without notice. Printed in the U.S.A. Top Front Top Electrolux Major Appliances, N.A. We reserve the right to improve our products. High standards of quality at electroluxappliances.com. For detailed installation instructions, refer to installation guide, packed with French Door Refrigerator Front Use these dimensions and clearance instructions for planning purposes only. General Installation Guidelines with product, or on...


