Owners Guide
Page 2
...reference. In the event you require assistance, please contact the dealer where you for choosing Electrolux, the new premium brand in the USA These numbers are located just below the control panel on... the unit. With the oven door open, the air intake vents are also printed on the front of your new range. I M P O R TA N T PLEASE READ all instructions completely before attempting to know your model number and... service, you will help you , please use this page to this manual. To ensure our ability to continue serving you quickly identify a problem and get it remedied. You ...
...reference. In the event you require assistance, please contact the dealer where you for choosing Electrolux, the new premium brand in the USA These numbers are located just below the control panel on... the unit. With the oven door open, the air intake vents are also printed on the front of your new range. I M P O R TA N T PLEASE READ all instructions completely before attempting to know your model number and... service, you will help you , please use this page to this manual. To ensure our ability to continue serving you quickly identify a problem and get it remedied. You ...
Owners Guide
Page 3
... validate the registration date. Purchase Date Electrolux Model Number Electrolux Serial Number Dealer Name Dealer Address Dealer Telephone Keep this manual also includes your dealer's name, address and telephone number. QUESTIONS? Please record the purchase date of your Electrolux unit and your product registration information. NOTE Registering your Electrolux range was purchased. Complete and mail the...
... validate the registration date. Purchase Date Electrolux Model Number Electrolux Serial Number Dealer Name Dealer Address Dealer Telephone Keep this manual also includes your dealer's name, address and telephone number. QUESTIONS? Please record the purchase date of your Electrolux unit and your product registration information. NOTE Registering your Electrolux range was purchased. Complete and mail the...

Owners Guide
Page 5
... which is the safety alert symbol. I M P O R TA N T Indicates installation, operation or maintenance information which , if not avoided, could result in this manual. Obey all safety messages that follow this manual are labeled with a Warning or Caution based on the risk type. Definitions This is important but not hazard related. It is used...
... which is the safety alert symbol. I M P O R TA N T Indicates installation, operation or maintenance information which , if not avoided, could result in this manual. Obey all safety messages that follow this manual are labeled with a Warning or Caution based on the risk type. Definitions This is important but not hazard related. It is used...
Owners Guide
Page 6
...as outlined in this manual, cleaning only the parts listed. • Use only dry potholders to applying heat. Also, have the installer show you where the fuse or junction box is used only by those individuals who are able to operate it properly. • Use the range only for cooking ... gas shut-off valve and turning off when you smell gas, do not use utensils with easily grasped handles that are suitable for use the range. • Select utensils of the proper size, material and construction for its intended purpose. If you are finished cooking. • Before performing any...
...as outlined in this manual, cleaning only the parts listed. • Use only dry potholders to applying heat. Also, have the installer show you where the fuse or junction box is used only by those individuals who are able to operate it properly. • Use the range only for cooking ... gas shut-off valve and turning off when you smell gas, do not use utensils with easily grasped handles that are suitable for use the range. • Select utensils of the proper size, material and construction for its intended purpose. If you are finished cooking. • Before performing any...
Owners Guide
Page 7
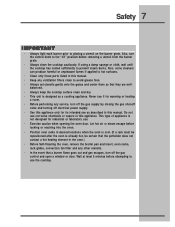
Also, some cleaners can produce harmful or unpleasant fumes if applied to hot surfaces. • Clean only those parts listed in this manual. • Keep any ventilation filters clean to avoid grease fires. • Always set utensils gently onto the grates and center them so that... clean and dry. • This unit is not designed for its intended use the cooktop. This type of appliance is designed as described in this manual. Safety 7 I M P O R TA N T • Always light each burner prior to the "off" position before removing a utensil from the burner grate. • Always ...
Also, some cleaners can produce harmful or unpleasant fumes if applied to hot surfaces. • Clean only those parts listed in this manual. • Keep any ventilation filters clean to avoid grease fires. • Always set utensils gently onto the grates and center them so that... clean and dry. • This unit is not designed for its intended use the cooktop. This type of appliance is designed as described in this manual. Safety 7 I M P O R TA N T • Always light each burner prior to the "off" position before removing a utensil from the burner grate. • Always ...
Owners Guide
Page 18
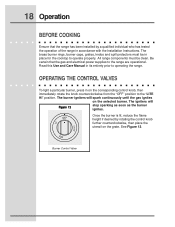
... until the gas ignites on the corresponding control knob, then immediately rotate the knob counterclockwise from the "OFF" position to operating the range. Once the burner is lit, reduce the flame height if desired by a qualified individual who has tested the operation of the...12. The burner igniters will Figure 12 stop sparking as soon as the burner ignites. Read this Use and Care Manual in on the selected burner. Burner Control Valve All range components must be clean. OPERATING THE CONTROL VALVES To light a particular burner, press in its entirety prior to the...
... until the gas ignites on the corresponding control knob, then immediately rotate the knob counterclockwise from the "OFF" position to operating the range. Once the burner is lit, reduce the flame height if desired by a qualified individual who has tested the operation of the...12. The burner igniters will Figure 12 stop sparking as soon as the burner ignites. Read this Use and Care Manual in on the selected burner. Burner Control Valve All range components must be clean. OPERATING THE CONTROL VALVES To light a particular burner, press in its entirety prior to the...

Owners Guide
Page 33
... on the oven door is turned off during a self-clean to high temperatures. These areas heat sufficiently during the SelfClean cycle of the oven manually. Racks" LED will begin to be run in the oven cavity before starting the clean cycle. NOTE: For model E48DF76ESP, the racks and ... the Following Cleaning Precautions: • Allow the oven to cool before cleaning. • Wear rubber gloves when cleaning any exterior parts of any range. Wait until the oven is extremely sensitive to the fumes given off . DO NOT clean the oven door gasket. Remove any excess spillovers in...
... on the oven door is turned off during a self-clean to high temperatures. These areas heat sufficiently during the SelfClean cycle of the oven manually. Racks" LED will begin to be run in the oven cavity before starting the clean cycle. NOTE: For model E48DF76ESP, the racks and ... the Following Cleaning Precautions: • Allow the oven to cool before cleaning. • Wear rubber gloves when cleaning any exterior parts of any range. Wait until the oven is extremely sensitive to the fumes given off . DO NOT clean the oven door gasket. Remove any excess spillovers in...

Owners Guide
Page 35
...use a soft cloth or sponge lightly dampened with a solution of cooking. Read and follow these recommendations may result in this Use & Care Manual, should be maintained throughout the lifetime of the product. Each material and finish must be properly cleaned according to the following recommendations. Failure to ... by a qualified appliance technician. Proper cleaning is necessary to clean the cooktop. Care and Cleaning 35 CLEANING TIPS FOR RANGE COOKTOP No maintenance, other than the Care and Cleaning identified in permanent damage to the cooktop. WARNING • Before ...
...use a soft cloth or sponge lightly dampened with a solution of cooking. Read and follow these recommendations may result in this Use & Care Manual, should be maintained throughout the lifetime of the product. Each material and finish must be properly cleaned according to the following recommendations. Failure to ... by a qualified appliance technician. Proper cleaning is necessary to clean the cooktop. Care and Cleaning 35 CLEANING TIPS FOR RANGE COOKTOP No maintenance, other than the Care and Cleaning identified in permanent damage to the cooktop. WARNING • Before ...
Installation Instructions
Page 2
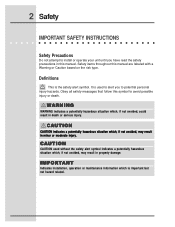
...precautions in minor or moderate injury. WARNING WARNING indicates a potentially hazardous situation which , if not avoided, may result in this manual. It is used without the safety alert symbol indicates a potentially hazardous situation which , if not avoided, could result in property... damage. Obey all safety messages that follow this manual are labeled with a Warning or Caution based on the risk type. I M P O R TA N T Indicates installation, operation or maintenance ...
...precautions in minor or moderate injury. WARNING WARNING indicates a potentially hazardous situation which , if not avoided, may result in this manual. It is used without the safety alert symbol indicates a potentially hazardous situation which , if not avoided, could result in property... damage. Obey all safety messages that follow this manual are labeled with a Warning or Caution based on the risk type. I M P O R TA N T Indicates installation, operation or maintenance ...

Installation Instructions
Page 3
.... • This appliance must be installed with the gas pressure regulator supplied with these instructions and the accompanying Use & Care Manual. Do not use corrosive chemicals or vapors in the vicinity of appliance is not designed for its intended use gasoline or other flammable...Safety 3 SAFETY PRECAUTIONS WARNING • Read all instructions before installing or servicing the appliance. • This appliance must be heated on this manual. Do not store or use as described in accordance with it has been damaged or dropped. • This appliance should not be grounded....
.... • This appliance must be installed with the gas pressure regulator supplied with these instructions and the accompanying Use & Care Manual. Do not use corrosive chemicals or vapors in the vicinity of appliance is not designed for its intended use gasoline or other flammable...Safety 3 SAFETY PRECAUTIONS WARNING • Read all instructions before installing or servicing the appliance. • This appliance must be heated on this manual. Do not store or use as described in accordance with it has been damaged or dropped. • This appliance should not be grounded....

Installation Instructions
Page 4
If you smell gas: - Do not try to do not use any phone in this manual is not followed exactly, a fire or explosion may result causing property damage, personal injury, or death. • What to light any electrical switch, do if ...
If you smell gas: - Do not try to do not use any phone in this manual is not followed exactly, a fire or explosion may result causing property damage, personal injury, or death. • What to light any electrical switch, do if ...
Installation Instructions
Page 5
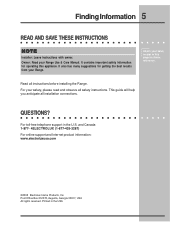
...-435-3287) For online support and Internet product information: www.electroluxusa.com ©2005 Electrolux Home Products, Inc. For toll-free telephone support in the USA Attach your Range. QUESTIONS? Finding Information 5 READ AND SAVE THESE INSTRUCTIONS NOTE Installer: Leave instructions with ...owner. It contains important safety information for operating this page for getting the best results from your sales receipt to this appliance. For your Range Use & Care Manual...
...-435-3287) For online support and Internet product information: www.electroluxusa.com ©2005 Electrolux Home Products, Inc. For toll-free telephone support in the USA Attach your Range. QUESTIONS? Finding Information 5 READ AND SAVE THESE INSTRUCTIONS NOTE Installer: Leave instructions with ...owner. It contains important safety information for operating this page for getting the best results from your sales receipt to this appliance. For your Range Use & Care Manual...
Installation Instructions
Page 7
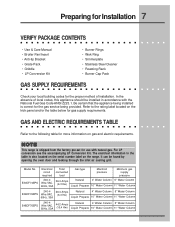
...located on the serial number label on the range. Be certain that the appliance being provided. NOTE This range is shipped from the factory pre-set ... E36DF76EPS Wire VAC, (6.3 Kw) 60Hz, 30A Liquid Propane 10" Water Column 11" Water Column 240-4 E48DF76EPS Wire VAC, 44.2 Amps Natural 4" Water Column 5" Water Column 60Hz, 50A (10.4 Kw) Liquid ...Propane 10" Water Column 11" Water Column Preparing for Installation 7 VERIFY PACKAGE CONTENTS • Use & Care Manual • Broiler Pan/Insert • Anti-tip Bracket • Grate Pack • Griddle • LP... Fuel Gas Code ANSI Z223.1.
...located on the serial number label on the range. Be certain that the appliance being provided. NOTE This range is shipped from the factory pre-set ... E36DF76EPS Wire VAC, (6.3 Kw) 60Hz, 30A Liquid Propane 10" Water Column 11" Water Column 240-4 E48DF76EPS Wire VAC, 44.2 Amps Natural 4" Water Column 5" Water Column 60Hz, 50A (10.4 Kw) Liquid ...Propane 10" Water Column 11" Water Column Preparing for Installation 7 VERIFY PACKAGE CONTENTS • Use & Care Manual • Broiler Pan/Insert • Anti-tip Bracket • Grate Pack • Griddle • LP... Fuel Gas Code ANSI Z223.1.
Installation Instructions
Page 9
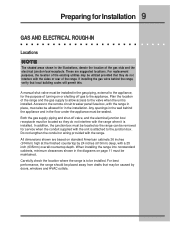
... and shut-off gas to the appliance. In addition, the junction box must be installed. Carefully check the location where the range is installed. A manual shut valve must be located so the range can be located so they do not interfere with a 25 inch (635mm) overall countertop depth. All dimensions shown are suggested...
... and shut-off gas to the appliance. In addition, the junction box must be installed. Carefully check the location where the range is installed. A manual shut valve must be located so the range can be located so they do not interfere with a 25 inch (635mm) overall countertop depth. All dimensions shown are suggested...

Installation Instructions
Page 23
... anti-tip bracket. WARNING Never attempt to operating the cooktop or oven sections of the range, please read the accompanying Use and Care Manual carefully. Installation 23 INSTALLING THE RANGE Measure from their shipping packages. Carefully slide the range into the matching notches in the base. Place each grate onto the top frame, being...
... anti-tip bracket. WARNING Never attempt to operating the cooktop or oven sections of the range, please read the accompanying Use and Care Manual carefully. Installation 23 INSTALLING THE RANGE Measure from their shipping packages. Carefully slide the range into the matching notches in the base. Place each grate onto the top frame, being...
Installation Instructions
Page 24
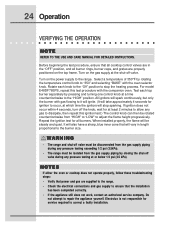
...burners. Do not attempt to the range. Turn on the gas supply at or below 1/2 psi (3.5 kPa). Electrolux is not responsible for all burner ...E48DF76EPS, repeat this ignition test.) The control knob can then be steady and quiet. All ignitors will spark continuously, but only the burner with the companion oven. WARNING • The range... and shut-off valve. When installed properly, the flame will stop the heating process. Repeat the ignition test for service required to the "HIGH" position. 24 Operation VERIFYING THE OPERATION NOTE REFER TO THE USE AND CARE MANUAL...
...burners. Do not attempt to the range. Turn on the gas supply at or below 1/2 psi (3.5 kPa). Electrolux is not responsible for all burner ...E48DF76EPS, repeat this ignition test.) The control knob can then be steady and quiet. All ignitors will spark continuously, but only the burner with the companion oven. WARNING • The range... and shut-off valve. When installed properly, the flame will stop the heating process. Repeat the ignition test for service required to the "HIGH" position. 24 Operation VERIFYING THE OPERATION NOTE REFER TO THE USE AND CARE MANUAL...

