
Specification sheet
Page 1
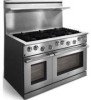
.... 48" DUAL-FUEL FREESTANDING RANGE CONTROL PANEL FEATURES Electronic Oven Control Yes Professional-Style Stainless Steel Console Yes Large Professional Skirted Knobs with Bezel 10 RANGETOP FEATURES Sealed Power Burner™ (BTU) Sealed Precision Burner™ (BTU) Continuous Grates Electronic Ignition with Auto Re-Ignition 2 (17,000) 2 (15,000) 2 (8,500 - 850) 3 Yes LARGE OVEN CAVITY FEATURES Capacity Bake Element (Watts) / Broil Element (Watts) Convection Element (Watts) Third Element European Convection System Self-Clean with Door Lock Halogen Oven Light Eight-Pass Bake & Broil...
.... 48" DUAL-FUEL FREESTANDING RANGE CONTROL PANEL FEATURES Electronic Oven Control Yes Professional-Style Stainless Steel Console Yes Large Professional Skirted Knobs with Bezel 10 RANGETOP FEATURES Sealed Power Burner™ (BTU) Sealed Precision Burner™ (BTU) Continuous Grates Electronic Ignition with Auto Re-Ignition 2 (17,000) 2 (15,000) 2 (8,500 - 850) 3 Yes LARGE OVEN CAVITY FEATURES Capacity Bake Element (Watts) / Broil Element (Watts) Convection Element (Watts) Third Element European Convection System Self-Clean with Door Lock Halogen Oven Light Eight-Pass Bake & Broil...
Specification sheet
Page 2
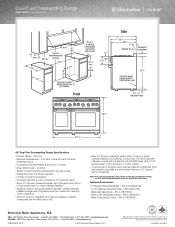
...; To reduce risk of fire when using overhead cabinetry, install vent hood that projects horizontally a recommended minimum of 5" beyond bottom of cabinets. Front Side 31" 295/16" 281/8" 3" Optional 9" Standard 3" backsplash Gas inlet / power supply location (right bottom rear) 325/8" 27/8"- 6" adjustable legs 355/8" 4715/16" 48" Dual-Fuel Freestanding Range Specifications • Product Weight - 540 Lbs. • Electrical Requirements - 240 Volts, 4-wire, 60 Hertz, 50-Amp Dedicated Circuit...
...; To reduce risk of fire when using overhead cabinetry, install vent hood that projects horizontally a recommended minimum of 5" beyond bottom of cabinets. Front Side 31" 295/16" 281/8" 3" Optional 9" Standard 3" backsplash Gas inlet / power supply location (right bottom rear) 325/8" 27/8"- 6" adjustable legs 355/8" 4715/16" 48" Dual-Fuel Freestanding Range Specifications • Product Weight - 540 Lbs. • Electrical Requirements - 240 Volts, 4-wire, 60 Hertz, 50-Amp Dedicated Circuit...
Owners Guide
Page 4
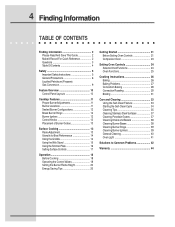
... 14 Using the Griddle 14 Using the Wok Stand 15 Using the Simmer Plate 16 Setting Surface Controls 17 Operation 18 Before Cooking 18 Operating the Control Valves 18 Setting the Burner Flame Height 20 Energy Saving Tips 20 Getting Started 21 Before Setting Oven Controls 21 Companion Oven 23 Setting Oven Controls 24 Selector Knob Functions 24 Oven Functions 25 Cooking Instructions 26 Baking 26 Baking Problems 27 Convection Baking 28 Convection Roasting 29 Broiling 31 Care and Cleaning 33 Using the Self-Clean Feature 33 Starting the Self-Clean Cycle 34 Cleaning Tips 35...
... 14 Using the Griddle 14 Using the Wok Stand 15 Using the Simmer Plate 16 Setting Surface Controls 17 Operation 18 Before Cooking 18 Operating the Control Valves 18 Setting the Burner Flame Height 20 Energy Saving Tips 20 Getting Started 21 Before Setting Oven Controls 21 Companion Oven 23 Setting Oven Controls 24 Selector Knob Functions 24 Oven Functions 25 Cooking Instructions 26 Baking 26 Baking Problems 27 Convection Baking 28 Convection Roasting 29 Broiling 31 Care and Cleaning 33 Using the Self-Clean Feature 33 Starting the Self-Clean Cycle 34 Cleaning Tips 35...
Owners Guide
Page 6
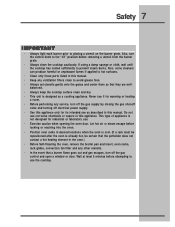
... installation and grounding of the appliance by those individuals who are able to operate it properly. • Use the range only for cooking tasks expected of a home appliance as outlined in this manual, cleaning only the parts listed. • Use only dry potholders to avoid steam burns when removing hot cookware. • In the event that a burner flame goes out and gas escapes, open a window or door...
... installation and grounding of the appliance by those individuals who are able to operate it properly. • Use the range only for cooking tasks expected of a home appliance as outlined in this manual, cleaning only the parts listed. • Use only dry potholders to avoid steam burns when removing hot cookware. • In the event that a burner flame goes out and gas escapes, open a window or door...
Owners Guide
Page 7
... cooktop surface clean and dry. • This unit is not designed for its intended use corrosive chemicals or vapors in the oven.) • Before Self-Cleaning the oven, remove the broiler pan and insert, oven racks, rack glides, convection fan filter and any ventilation filters clean to avoid grease fires. • Always set utensils gently onto the grates and center them so that a burner flame goes out and gas escapes, turn the control knob...
... cooktop surface clean and dry. • This unit is not designed for its intended use corrosive chemicals or vapors in the oven.) • Before Self-Cleaning the oven, remove the broiler pan and insert, oven racks, rack glides, convection fan filter and any ventilation filters clean to avoid grease fires. • Always set utensils gently onto the grates and center them so that a burner flame goes out and gas escapes, turn the control knob...
Owners Guide
Page 9
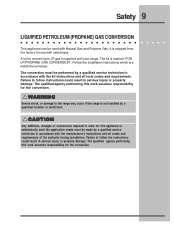
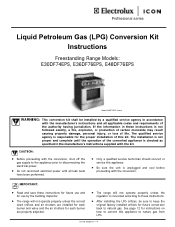
... agency performing this work assumes responsibility for the conversion. The kit is supplied with the kit instructions and all codes and requirements of the authority having jurisdiction. A kit for use with natural gas. The conversion must be made by a qualified service technician in serious injury or property damage. It is shipped from the factory for converting to follow the instructions could result in accordance with Natural Gas and Propane Gas.
... agency performing this work assumes responsibility for the conversion. The kit is supplied with the kit instructions and all codes and requirements of the authority having jurisdiction. A kit for use with natural gas. The conversion must be made by a qualified service technician in serious injury or property damage. It is shipped from the factory for converting to follow the instructions could result in accordance with Natural Gas and Propane Gas.
Owners Guide
Page 10
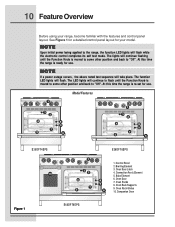
See Figure 1 for a detailed control panel layout for use . The function LED lights will flash while the electronic control completes its self test mode. Control Panel 2. Oven Door Latch 4. Convection Fan & Element 5. Bake Element 8 6. At this time the range is moved to some other position and back to the range, the function LED lights will flash. Oven Rack Supports 9. The LED lights will continue to flash until the Function Knob is re-set for use . Companion Oven Figure 1 E48DF76EPS Oven Door 7. The lights will take place. Model Features 1 3 2 ...
See Figure 1 for a detailed control panel layout for use . The function LED lights will flash while the electronic control completes its self test mode. Control Panel 2. Oven Door Latch 4. Convection Fan & Element 5. Bake Element 8 6. At this time the range is moved to some other position and back to the range, the function LED lights will flash. Oven Rack Supports 9. The LED lights will continue to flash until the Function Knob is re-set for use . Companion Oven Figure 1 E48DF76EPS Oven Door 7. The lights will take place. Model Features 1 3 2 ...
Owners Guide
Page 18
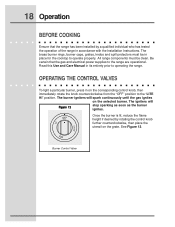
... range are operational. Read this Use and Care Manual in accordance with the Installation Instructions. See Figure 12. 18 Operation BEFORE COOKING Ensure that the gas and electrical power supplies to operating the range. Burner Control Valve OPERATING THE CONTROL VALVES To light a particular burner, press in place for the cooktop to the "LITE HI" position. The brass burner rings, burner caps, grates, knobs and spill protectors must be in on the corresponding control knob, then immediately rotate the knob...
... range are operational. Read this Use and Care Manual in accordance with the Installation Instructions. See Figure 12. 18 Operation BEFORE COOKING Ensure that the gas and electrical power supplies to operating the range. Burner Control Valve OPERATING THE CONTROL VALVES To light a particular burner, press in place for the cooktop to the "LITE HI" position. The brass burner rings, burner caps, grates, knobs and spill protectors must be in on the corresponding control knob, then immediately rotate the knob...
Owners Guide
Page 28
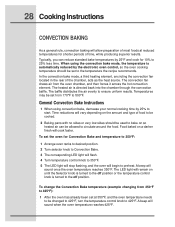
... the electronic oven control, so the oven cooking temperature should be used to bake on the amount and type of food to be cooked. 2 Baking pans with no sides or very low sides should be set at reduced temperatures for 10% to the off position. Time reductions will vary depending on so heated air can reduce standard bake temperatures by 25% to ensure uniform results. 28 Cooking Instructions CONVECTION BAKING As a general rule, convection baking...
... the electronic oven control, so the oven cooking temperature should be used to bake on the amount and type of food to be cooked. 2 Baking pans with no sides or very low sides should be set at reduced temperatures for 10% to the off position. Time reductions will vary depending on so heated air can reduce standard bake temperatures by 25% to ensure uniform results. 28 Cooking Instructions CONVECTION BAKING As a general rule, convection baking...

Owners Guide
Page 31
... allow dripping grease to suit for the element to BROIL. Cooking Instructions 31 BROILING Broiling is browned; Wait for doneness. DO NOT cover the broiler pan insert with the oven door closed. Preheating Preheating is accomplished with foil. Oven Broiling Recommendations Food Item Rack Position Knob Setting Steak 1" thick Pork Chops 3/4" thick Chicken - Broiling Tips The broiler pan and its insert. Boneless Fish Shrimp Hamburger 1" thick 6 or 7 6 or 7 6 or 7 4 6 or 7 6 or 7 4 6 or 7 4 BROIL BROIL BROIL BROIL BROIL BROIL BROIL BROIL BROIL Cook Time 1st...
... allow dripping grease to suit for the element to BROIL. Cooking Instructions 31 BROILING Broiling is browned; Wait for doneness. DO NOT cover the broiler pan insert with the oven door closed. Preheating Preheating is accomplished with foil. Oven Broiling Recommendations Food Item Rack Position Knob Setting Steak 1" thick Pork Chops 3/4" thick Chicken - Broiling Tips The broiler pan and its insert. Boneless Fish Shrimp Hamburger 1" thick 6 or 7 6 or 7 6 or 7 4 6 or 7 6 or 7 4 6 or 7 4 BROIL BROIL BROIL BROIL BROIL BROIL BROIL BROIL BROIL Cook Time 1st...
Owners Guide
Page 32
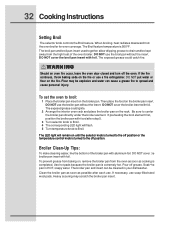
... broiler pan directly under the broiler element. The exposed grease could ignite. 2 Arrange the interior oven rack and place the broiler pan on until the selector knob is turned to the off position. DO NOT cover the broil pan insert with foil. DO NOT cover the broiler insert with aluminum foil. Clean the broiler pan as soon as cooking is turned to drain and be cleaned in HOT, soapy water. 32 Cooking Instructions Setting Broil The selector knob controls the Broil feature...
... broiler pan directly under the broiler element. The exposed grease could ignite. 2 Arrange the interior oven rack and place the broiler pan on until the selector knob is turned to the off position. DO NOT cover the broil pan insert with foil. DO NOT cover the broiler insert with aluminum foil. Clean the broiler pan as soon as cooking is turned to drain and be cleaned in HOT, soapy water. 32 Cooking Instructions Setting Broil The selector knob controls the Broil feature...
Owners Guide
Page 38
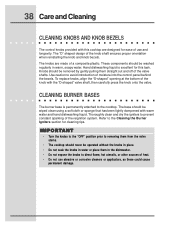
... the control panel behind the bezels. Hand dishwashing liquid is permanently attached to direct flame, hot utensils, or other sources of the valve shafts. These components should be washed regularly in warm, soapy water. Knobs should be removed by gently pulling them straight out and off of heat. • Do not use and longevity. The base should never be wiped clean using a soft...
... the control panel behind the bezels. Hand dishwashing liquid is permanently attached to direct flame, hot utensils, or other sources of the valve shafts. These components should be washed regularly in warm, soapy water. Knobs should be removed by gently pulling them straight out and off of heat. • Do not use and longevity. The base should never be wiped clean using a soft...
Owners Guide
Page 41
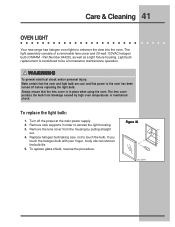
... finger, body oils can shorten the bulb life. 5. To replace the light bulb: 1. Remove rack supports in place when using the oven. To replace glass shield, reverse the procedure. Replace halogen bulb taking care not to be a homeowner maintenance operation. The light assembly consists of a removable lens cover and 20-watt 120VAC halogen bulb (OSRAM - Care & Cleaning 41 OVEN LIGHT Your new range has halogen oven lights to the oven has been turned off the power at the main power supply. 2.
... finger, body oils can shorten the bulb life. 5. To replace the light bulb: 1. Remove rack supports in place when using the oven. To replace glass shield, reverse the procedure. Replace halogen bulb taking care not to be a homeowner maintenance operation. The light assembly consists of a removable lens cover and 20-watt 120VAC halogen bulb (OSRAM - Care & Cleaning 41 OVEN LIGHT Your new range has halogen oven lights to the oven has been turned off the power at the main power supply. 2.
Owners Guide
Page 42
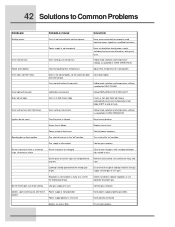
... are not positioned properly. Foods overcooked. Incorrect cooking time, temperature. Adjust time, temperature or rack position. Oven light will not heat after flame ignition. Oven control knob set for the wrong type of cooktop matches the gas supply (natural gas or L.P. Follow mode selection and temperature settings specified for proper gas. Oven will not work. Sparking but flame is not grounded. Gas supply is interrupted. Contact gas company. Remove and carefully re-install burner rings and caps. Ensure that the type of gas. Dry or clean ignitors.
... are not positioned properly. Foods overcooked. Incorrect cooking time, temperature. Adjust time, temperature or rack position. Oven light will not heat after flame ignition. Oven control knob set for the wrong type of cooktop matches the gas supply (natural gas or L.P. Follow mode selection and temperature settings specified for proper gas. Oven will not work. Sparking but flame is not grounded. Gas supply is interrupted. Contact gas company. Remove and carefully re-install burner rings and caps. Ensure that the type of gas. Dry or clean ignitors.
Owners Guide
Page 44
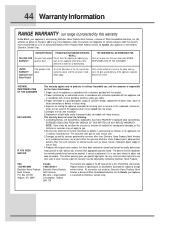
... service calls. 3.Damages caused by services performed by Electrolux Canada Corp. THE CONSUMER WILL BE RESPONSIBLE FOR: Costs of the appliance in accordance with instructions provided with all local plumbing, electrical and/or gas codes. 3.Proper connection to change or add to any purchase date parts of this appliance which are subject to a grounded power supply of sufficient voltage, replacement of blown fuses, repair of loose connections...
... service calls. 3.Damages caused by services performed by Electrolux Canada Corp. THE CONSUMER WILL BE RESPONSIBLE FOR: Costs of the appliance in accordance with instructions provided with all local plumbing, electrical and/or gas codes. 3.Proper connection to change or add to any purchase date parts of this appliance which are subject to a grounded power supply of sufficient voltage, replacement of blown fuses, repair of loose connections...
Installation Instructions
Page 6
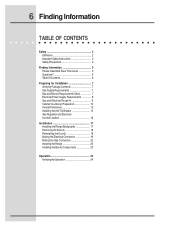
... 6 Preparing for Installation 7 Verifying Package Contents 7 Gas Supply Requirements 7 Gas and Electric Requirements Table 7 Electrical Power Supply Requirements 8 Gas and Electrical Rough-In 9 Cabinet/Counterop Preparation 10 Overal Dimensions 12 Installing the Anti-Tip Bracket 13 Gas Regulator and Electrical Conduit Location 16 Installation 17 Installing the Range Backguards 17 Removing the Door(s 18 Reinstalling the Door(s 18 Making the Electrical Connection 19 Making the Gas Connection 22 Installing the Range 23 Installing the Burner Components 23 Operation 24 Verifying...
... 6 Preparing for Installation 7 Verifying Package Contents 7 Gas Supply Requirements 7 Gas and Electric Requirements Table 7 Electrical Power Supply Requirements 8 Gas and Electrical Rough-In 9 Cabinet/Counterop Preparation 10 Overal Dimensions 12 Installing the Anti-Tip Bracket 13 Gas Regulator and Electrical Conduit Location 16 Installation 17 Installing the Range Backguards 17 Removing the Door(s 18 Reinstalling the Door(s 18 Making the Electrical Connection 19 Making the Gas Connection 22 Installing the Range 23 Installing the Burner Components 23 Operation 24 Verifying...
Installation Instructions
Page 7
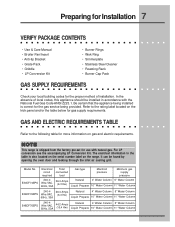
... the serial number label on the range. In the absence of installation. The electrical information in accordance with natural gas. For LP conversion see the accompanying LP Conversion Kit. Preparing for Installation 7 VERIFY PACKAGE CONTENTS • Use & Care Manual • Broiler Pan/Insert • Anti-tip Bracket • Grate Pack • Griddle • LP Conversion Kit • Burner Rings • Wok Ring • Simmerplate • Stainless Steel Cleaner • Roasting Rack • Burner Cap Pack GAS SUPPLY REQUIREMENTS...
... the serial number label on the range. In the absence of installation. The electrical information in accordance with natural gas. For LP conversion see the accompanying LP Conversion Kit. Preparing for Installation 7 VERIFY PACKAGE CONTENTS • Use & Care Manual • Broiler Pan/Insert • Anti-tip Bracket • Grate Pack • Griddle • LP Conversion Kit • Burner Rings • Wok Ring • Simmerplate • Stainless Steel Cleaner • Roasting Rack • Burner Cap Pack GAS SUPPLY REQUIREMENTS...
Installation Instructions
Page 24
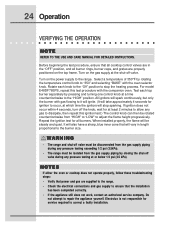
... to the range. Turn on the power supply to stop sparking. For model E48DF76EPS, repeat this ignition test.) The control knob can then be rotated counterclockwise from the gas supply piping by pressing and turning one control knob at a time counterclockwise to occur, at the shut-off the knob, wait for ignition to the "HIGH" position. When installed properly, the flame will vary in the "OFF" position, and all cooktop control valves are...
... to the range. Turn on the power supply to stop sparking. For model E48DF76EPS, repeat this ignition test.) The control knob can then be rotated counterclockwise from the gas supply piping by pressing and turning one control knob at a time counterclockwise to occur, at the shut-off the knob, wait for ignition to the "HIGH" position. When installed properly, the flame will vary in the "OFF" position, and all cooktop control valves are...
Installation Instructions
Page 25
... a qualified service technician should convert or service this appliance to nature gas from LPG. Part No. 65558 Rev. 1-4 Do not reconnect electrical power until the operation of the converted appliance is responsible for the proper installation of this kit. The range will not operate properly unless the regulator is unplugged and cool before proceeding with the conversion, shut off the gas supply to the appliance prior to natural gas. See page...
... a qualified service technician should convert or service this appliance to nature gas from LPG. Part No. 65558 Rev. 1-4 Do not reconnect electrical power until the operation of the converted appliance is responsible for the proper installation of this kit. The range will not operate properly unless the regulator is unplugged and cool before proceeding with the conversion, shut off the gas supply to the appliance prior to natural gas. See page...

Installation Instructions
Page 32
... LPG supply line. 8-5 Make sure all knobs on the front of the range are in Table 9-2 for the appropriate model number and the burner location. 9-6 Hold the shutter connector with the 8" adjustable wrench. pressure does not meet specifications. 8-4 Close the LPG supply valve. Place end of tube over main orifice Figure 8-1 Pressure Test Set-up STEP 9 Adjust Air Shutter Gaps 9-1 Determine the appropriate air shutter part number for the left rear column...
... LPG supply line. 8-5 Make sure all knobs on the front of the range are in Table 9-2 for the appropriate model number and the burner location. 9-6 Hold the shutter connector with the 8" adjustable wrench. pressure does not meet specifications. 8-4 Close the LPG supply valve. Place end of tube over main orifice Figure 8-1 Pressure Test Set-up STEP 9 Adjust Air Shutter Gaps 9-1 Determine the appropriate air shutter part number for the left rear column...


