
User Manual
Page 5
Installing and Configuring the EVGA nForce 680i SLI Motherboard Networking with NVIDIA nForce 5 NVIDIA Native Gigabit Ethernet 5 NVIDIA FirstPacket™ technology 5 NVIDIA DualNet® technology 5 High Definition Audio (HDA 6 USB 2.0 ...6 Motherboard Specifications 7 Unpacking and Parts Descriptions 9 Unpacking ...9 Equipment ...9 NVIDIA nForce 680i SLI Motherboard 10 Hardware Installation 13 Safety Instructions 13 Preparing the Motherboard 14 Installing the CPU 14 Installing the CPU Fan 15 Installing Memory...
Installing and Configuring the EVGA nForce 680i SLI Motherboard Networking with NVIDIA nForce 5 NVIDIA Native Gigabit Ethernet 5 NVIDIA FirstPacket™ technology 5 NVIDIA DualNet® technology 5 High Definition Audio (HDA 6 USB 2.0 ...6 Motherboard Specifications 7 Unpacking and Parts Descriptions 9 Unpacking ...9 Equipment ...9 NVIDIA nForce 680i SLI Motherboard 10 Hardware Installation 13 Safety Instructions 13 Preparing the Motherboard 14 Installing the CPU 14 Installing the CPU Fan 15 Installing Memory...

User Manual
Page 7
Installing and Configuring the EVGA nForce 680i SLI Motherboard Network Boot Priority 39 CPU Internal Cache 39 Quick Power On Self Test 40 First/Second/Third Boot Device 40 Boot Other Device 40 Boot Up NumLock Status 40 Security ... Full Screen LOGO Show 41 Advanced Chipset Features 42 System Clocks 43 Frequency Settings 44 HT Multiplier 45 Spread Spectrum 45 FSB & Memory Config 46 CPU Configuration 50 System Voltages 51 NVMEM Memory Test 53 PCI Clocks 53 Load Timing/Voltage Set 53 Save Timing/Voltage Set 54 System BIOS Cacheable...
Installing and Configuring the EVGA nForce 680i SLI Motherboard Network Boot Priority 39 CPU Internal Cache 39 Quick Power On Self Test 40 First/Second/Third Boot Device 40 Boot Other Device 40 Boot Up NumLock Status 40 Security ... Full Screen LOGO Show 41 Advanced Chipset Features 42 System Clocks 43 Frequency Settings 44 HT Multiplier 45 Spread Spectrum 45 FSB & Memory Config 46 CPU Configuration 50 System Voltages 51 NVMEM Memory Test 53 PCI Clocks 53 Load Timing/Voltage Set 53 Save Timing/Voltage Set 54 System BIOS Cacheable...

User Manual
Page 15
To view temperatures and fans, click the button. To display the NVIDIA Monitor, select Start¾All Programs¾NVIDIA Corporation¾NVIDIA Monitor. xiv It also monitors the Bus speeds and voltages. Installing and Configuring the EVGA nForce 680i SLI Motherboard NVIDIA Monitor The NVIDIA Monitor application can be used at any time with any applications to view the real-time status of the CPU, disk, memory, and network. This display shows the performance (usage) of various system components.
To view temperatures and fans, click the button. To display the NVIDIA Monitor, select Start¾All Programs¾NVIDIA Corporation¾NVIDIA Monitor. xiv It also monitors the Bus speeds and voltages. Installing and Configuring the EVGA nForce 680i SLI Motherboard NVIDIA Monitor The NVIDIA Monitor application can be used at any time with any applications to view the real-time status of the CPU, disk, memory, and network. This display shows the performance (usage) of various system components.

User Manual
Page 17
...performance to explain each setting. Installing and Configuring the EVGA nForce 680i SLI Motherboard ª View system information ª Adjust custom rules Manual Tuning The Manual Tuning option provides the ability to adjust motherboard settings, adjust CPU settings, and make changes to drag the slider. ...Note that will be changed in the Adjust Motherboard Settings screen let you pass the cursor over the various ...
...performance to explain each setting. Installing and Configuring the EVGA nForce 680i SLI Motherboard ª View system information ª Adjust custom rules Manual Tuning The Manual Tuning option provides the ability to adjust motherboard settings, adjust CPU settings, and make changes to drag the slider. ...Note that will be changed in the Adjust Motherboard Settings screen let you pass the cursor over the various ...

User Manual
Page 18
NVIDIA and the board manufacturer are not responsible for the FSB reference clock, the CPU core frequency, the FSB Frequency and the memory bus frequency are exceeded. Note that may void its warranty due to adjust the reference... component can result in damage. System Clocks This section of a component may occur when component tolerances are dynamically changed. Adjust Motherboard Settings (nTune) CAUTION: Increasing the voltage or the clock speed of the Adjust Motherboard Settings allows you change the slider for damage that as you to exceeding recommended specifications.
NVIDIA and the board manufacturer are not responsible for the FSB reference clock, the CPU core frequency, the FSB Frequency and the memory bus frequency are exceeded. Note that may void its warranty due to adjust the reference... component can result in damage. System Clocks This section of a component may occur when component tolerances are dynamically changed. Adjust Motherboard Settings (nTune) CAUTION: Increasing the voltage or the clock speed of the Adjust Motherboard Settings allows you change the slider for damage that as you to exceeding recommended specifications.

User Manual
Page 19
Yellow means to the components. System Fans This section of each fan. Installing and Configuring the EVGA nForce 680i SLI Motherboard In this menu, you can specify to show the temperatures in Celsius or Fahrenheit. From this section of the components can manually control ...each slider. you are changing. If the indicator square is within range and will not damage any of the Adjust Motherboard Settings you must understand what you to control the CPU, System, nForce, MCP, and the auxiliary fans. When in manual control, you can adjust the following voltages: ‰...
Yellow means to the components. System Fans This section of each fan. Installing and Configuring the EVGA nForce 680i SLI Motherboard In this menu, you can specify to show the temperatures in Celsius or Fahrenheit. From this section of the components can manually control ...each slider. you are changing. If the indicator square is within range and will not damage any of the Adjust Motherboard Settings you must understand what you to control the CPU, System, nForce, MCP, and the auxiliary fans. When in manual control, you can adjust the following voltages: ‰...

User Manual
Page 24
To edit an item, select an option from the motherboard manufacturer. General Settings This section of the Dynamic BIOS Access menu allows you to set the following options: ‰ Security options ¾ Setup ¾ System &#... only with each item. Introduction Available BIOS Pages In the Dynamic BIOS Access page, select a BIOS page that you want to Enable or Disable the CPU Internal Cache and the Quick Power on the Dynamic BIOS Access menu are available for changing. When finished making your changes, click OK or Apply...
To edit an item, select an option from the motherboard manufacturer. General Settings This section of the Dynamic BIOS Access menu allows you to set the following options: ‰ Security options ¾ Setup ¾ System &#... only with each item. Introduction Available BIOS Pages In the Dynamic BIOS Access page, select a BIOS page that you want to Enable or Disable the CPU Internal Cache and the Quick Power on the Dynamic BIOS Access menu are available for changing. When finished making your changes, click OK or Apply...

User Manual
Page 29
xxviii Versions of the system, including current system clock speeds, system temperatures, memory timings, and system voltages can be logged. Installing and Configuring the EVGA nForce 680i SLI Motherboard Hardware and driver version information can be viewed and saved using this interface. Detailed CPU and memory information is displayed when you double-click on a processor or DIMM listed under Software information. The status of NVIDIA software and other system software are listed under Hardware information.
xxviii Versions of the system, including current system clock speeds, system temperatures, memory timings, and system voltages can be logged. Installing and Configuring the EVGA nForce 680i SLI Motherboard Hardware and driver version information can be viewed and saved using this interface. Detailed CPU and memory information is displayed when you double-click on a processor or DIMM listed under Software information. The status of NVIDIA software and other system software are listed under Hardware information.

User Manual
Page 42
... typical network configuration functions that are simultaneously transmitting data to the Internet ‰ TCP/IP Acceleration When TCP/IP acceleration is enabled, it lowers the CPU utilization and provides overall better system performance when the networking traffic is mainly TCP/IP. ‰ Teaming Teaming increase bandwidth when serving files in a LAN...
... typical network configuration functions that are simultaneously transmitting data to the Internet ‰ TCP/IP Acceleration When TCP/IP acceleration is enabled, it lowers the CPU utilization and provides overall better system performance when the networking traffic is mainly TCP/IP. ‰ Teaming Teaming increase bandwidth when serving files in a LAN...

User Manual
Page 45
... enhances your network performance but can cause your computer's CPU to its nForce hardware resulting in greatly improved system performance. Overall system performance is greatly improved because the CPU is a networking solution that are off-loaded to browse... for the Sam2.exe and add it. 30. xliv Click Add to the hardware. NVIDIA TCP/IP Acceleration technology is not tied up processing network traffic, especially at full-duplex gigabit Ethernet speeds. Installing and Configuring the EVGA nForce 680i SLI Motherboard...
... enhances your network performance but can cause your computer's CPU to its nForce hardware resulting in greatly improved system performance. Overall system performance is greatly improved because the CPU is a networking solution that are off-loaded to browse... for the Sam2.exe and add it. 30. xliv Click Add to the hardware. NVIDIA TCP/IP Acceleration technology is not tied up processing network traffic, especially at full-duplex gigabit Ethernet speeds. Installing and Configuring the EVGA nForce 680i SLI Motherboard...

User Manual
Page 46
...screen. Note that by default, TCP/IP acceleration is turned off (the Not be hardware-accelerated radio button is laborious and affects CPU overhead, memory bandwidth, and overall system latency. xlv Introduction In traditional networking environments, inspecting packets is checked). In comparison, the... NVIDIA TCP/IP Acceleration engine discards bad packets before the CPU detects them. In addition, good packets take an "express lane" and bypass the traditional "network stack" process, improving overall throughput ...
...screen. Note that by default, TCP/IP acceleration is turned off (the Not be hardware-accelerated radio button is laborious and affects CPU overhead, memory bandwidth, and overall system latency. xlv Introduction In traditional networking environments, inspecting packets is checked). In comparison, the... NVIDIA TCP/IP Acceleration engine discards bad packets before the CPU detects them. In addition, good packets take an "express lane" and bypass the traditional "network stack" process, improving overall throughput ...

User Manual
Page 53
...CPU and memory speeds without rebooting. Save and automatically load profiles for overclocking and/or future FSB speeds. With comprehensive overclocking tools to more settings from inside Windows. Extreme FSB speeds The front side bus (FSB) in the NVIDIA nForce 680i SLI...and support for higher memory speeds, the NVIDIA nForce 680i SLI MCPs were designed for overclocking. Installing and Configuring the EVGA nForce 680i SLI Motherboard Extreme Overclocking Unleash the underlying hardware. Through overclocking, however, the EVGA nForce 680i SLI MCP can deliver FSB speeds well beyond to ...
...CPU and memory speeds without rebooting. Save and automatically load profiles for overclocking and/or future FSB speeds. With comprehensive overclocking tools to more settings from inside Windows. Extreme FSB speeds The front side bus (FSB) in the NVIDIA nForce 680i SLI...and support for higher memory speeds, the NVIDIA nForce 680i SLI MCPs were designed for overclocking. Installing and Configuring the EVGA nForce 680i SLI Motherboard Extreme Overclocking Unleash the underlying hardware. Through overclocking, however, the EVGA nForce 680i SLI MCP can deliver FSB speeds well beyond to ...

User Manual
Page 54
... scale graphics performance by combining multiple NVIDIA graphics solutions in a single system with EVGA nForce 680i SLI motherboards. NVIDIA SLI-Ready Memory NVIDIA nForce 680i SLI MCP automatically increases bandwidth when select SLI Certified memory modules are relayed through the system as quickly as possible for incredible performance...for NVIDIA SLI Technology NVIDIA® SLI™ technology is ready for the future. This feature offers twice the PCI Express bandwidth of -the-art Dual DDR2 memory controller allows high bandwidth and low latency data access to the CPU and GPU...
... scale graphics performance by combining multiple NVIDIA graphics solutions in a single system with EVGA nForce 680i SLI motherboards. NVIDIA SLI-Ready Memory NVIDIA nForce 680i SLI MCP automatically increases bandwidth when select SLI Certified memory modules are relayed through the system as quickly as possible for incredible performance...for NVIDIA SLI Technology NVIDIA® SLI™ technology is ready for the future. This feature offers twice the PCI Express bandwidth of -the-art Dual DDR2 memory controller allows high bandwidth and low latency data access to the CPU and GPU...

User Manual
Page 56
...other PCs. Only NVIDIA integrates this level of Ping' with NVIDIA nForce NVIDIA networking delivers the highest network throughput at the lowest CPU utilization. NVIDIA DualNet® technology Get Double-Barrel Gigabit Ethernet with two integrated networking connections on your NVIDIA nForce 680i MCP. ‰ Dual Gigabit Ethernet with Teaming Teaming allows the two... stable NVIDIA networking solution results in better networking management and a lower total cost of data from home file servers to preferences set by offloading CPU-intensive packet filtering tasks in an intuitive wizard.
...other PCs. Only NVIDIA integrates this level of Ping' with NVIDIA nForce NVIDIA networking delivers the highest network throughput at the lowest CPU utilization. NVIDIA DualNet® technology Get Double-Barrel Gigabit Ethernet with two integrated networking connections on your NVIDIA nForce 680i MCP. ‰ Dual Gigabit Ethernet with Teaming Teaming allows the two... stable NVIDIA networking solution results in better networking management and a lower total cost of data from home file servers to preferences set by offloading CPU-intensive packet filtering tasks in an intuitive wizard.

User Manual
Page 62
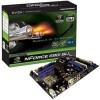
... panel audio connections 29. USB Header1 & 2 30. Front panel connector 8. Serial connector 16. Power on/off switch 20. CPU fan connector 4. NVIDIA MCP 11. Two Serial-ATA connectors 13. PCI Express x16 slots (SLI) 24. DDR DIMM Slots 0 - 3 5. 24-pin ATX Power Connector 6. LED POST codes 14. Reset switch 21. On-board... 18 29 17 16 15 18 27 31 1 2 3 4 14 13 12 11 10 1. FDD Connector 7. Floppy drive connector 7 8 9 6 12. NVIDIA SPP with passive heat sink 3. CPU Socket 2. Motherboard battery 15.
... panel audio connections 29. USB Header1 & 2 30. Front panel connector 8. Serial connector 16. Power on/off switch 20. CPU fan connector 4. NVIDIA MCP 11. Two Serial-ATA connectors 13. PCI Express x16 slots (SLI) 24. DDR DIMM Slots 0 - 3 5. 24-pin ATX Power Connector 6. LED POST codes 14. Reset switch 21. On-board... 18 29 17 16 15 18 27 31 1 2 3 4 14 13 12 11 10 1. FDD Connector 7. Floppy drive connector 7 8 9 6 12. NVIDIA SPP with passive heat sink 3. CPU Socket 2. Motherboard battery 15.

User Manual
Page 64
... before removing or installing any equipment from/to the computer chassis. 13 The topics covered in this section are: ‰ Preparing the motherboard ¾ Installing the CPU ¾ Installing the CPU fan ¾ Installing the memory ‰ Installing the motherboard ‰ Connecting cables and setting switches Safety Instructions To reduce the risk of the...
... before removing or installing any equipment from/to the computer chassis. 13 The topics covered in this section are: ‰ Preparing the motherboard ¾ Installing the CPU ¾ Installing the CPU fan ¾ Installing the memory ‰ Installing the motherboard ‰ Connecting cables and setting switches Safety Instructions To reduce the risk of the...

User Manual
Page 65
... down while you have a safe place to protect the socket when there is fully seated and level in the box does not contain a CPU or memory. Installing and Configuring the EVGA nForce 680i SLI Motherboard Preparing the Motherboard The motherboard shipped in the socket. It is a good idea to save the cover so that whenever you remove the...
... down while you have a safe place to protect the socket when there is fully seated and level in the box does not contain a CPU or memory. Installing and Configuring the EVGA nForce 680i SLI Motherboard Preparing the Motherboard The motherboard shipped in the socket. It is a good idea to save the cover so that whenever you remove the...

User Manual
Page 66
Follow the instruction that came with this motherboard. They also support dual channel DDR2 memory technology up to the DIMM ....7GB/s. The idea is correct for installing memory. ‰ One DIMM: Install into slot 0. Hardware Installation Installing the CPU Fan There are many different fan types that can install the DIMM into any slot, however, slot 0 is installed properly...clips at least one gap near the center of the DIMM slot automatically lock the DIMM into the connector. 15 CPU side DIMM Slot 0 DIMM Slot 2 DIMM Slot 1 DIMM Slot 3 Card-edge side Use the following the ...
Follow the instruction that came with this motherboard. They also support dual channel DDR2 memory technology up to the DIMM ....7GB/s. The idea is correct for installing memory. ‰ One DIMM: Install into slot 0. Hardware Installation Installing the CPU Fan There are many different fan types that can install the DIMM into any slot, however, slot 0 is installed properly...clips at least one gap near the center of the DIMM slot automatically lock the DIMM into the connector. 15 CPU side DIMM Slot 0 DIMM Slot 2 DIMM Slot 1 DIMM Slot 3 Card-edge side Use the following the ...

User Manual
Page 67
...the chassis. Carefully place the motherboard onto the studs/spacers located inside of a short circuit. 1. Securing the Motherboard into the chassis depends on the covers. Installing and Configuring the EVGA nForce 680i SLI Motherboard Installing the Motherboard The sequence of installing the motherboard into the Chassis Most computer chassis... connections. Align the connectors to the I /O shield and secure the motherboard into place and make sure the CPU Fan assembly is recommended that you remove that the CPU fan assembly has enough clearance for the chassis covers to lock into the...
...the chassis. Carefully place the motherboard onto the studs/spacers located inside of a short circuit. 1. Securing the Motherboard into the chassis depends on the covers. Installing and Configuring the EVGA nForce 680i SLI Motherboard Installing the Motherboard The sequence of installing the motherboard into the Chassis Most computer chassis... connections. Align the connectors to the I /O shield and secure the motherboard into place and make sure the CPU Fan assembly is recommended that you remove that the CPU fan assembly has enough clearance for the chassis covers to lock into the...

User Manual
Page 70
... 12V Power (PWR2) PWR2, the 8-pin ATX 12V power connection, is strongly recommended that you have a four-pin power supply, plug the connector to the CPU. Align the pins to the connector and press firmly until seated. 5 1 12V GND 8 4 Connect a four-pin power plug to pins 1, 2, 5, and 6. 5 1 It is used to... connector is only required for graphics cards. however, if you use an 8-pin ATX 12V power supply; This connection is an auxiliary power connection for SLI configrations when running (2) cards at the same time. +5V GND GND +1.2 19
... 12V Power (PWR2) PWR2, the 8-pin ATX 12V power connection, is strongly recommended that you have a four-pin power supply, plug the connector to the CPU. Align the pins to the connector and press firmly until seated. 5 1 12V GND 8 4 Connect a four-pin power plug to pins 1, 2, 5, and 6. 5 1 It is used to... connector is only required for graphics cards. however, if you use an 8-pin ATX 12V power supply; This connection is an auxiliary power connection for SLI configrations when running (2) cards at the same time. +5V GND GND +1.2 19