Owners Manual
Page 4
To ensure proper operation, please read this DENON product. After reading them for purchasing this owner's manual carefully before using the product. Contents Getting started Thank you for future reference. Basic version Advanced ... control unit 110 Other information 112 Trademark information 112 Surround 113 Relationship between video signals and monitor output 116 Explanation of terms 117 Troubleshooting 119 Resetting the microprocessor 123 Specifications 124 Information 1
To ensure proper operation, please read this DENON product. After reading them for purchasing this owner's manual carefully before using the product. Contents Getting started Thank you for future reference. Basic version Advanced ... control unit 110 Other information 112 Trademark information 112 Surround 113 Relationship between video signals and monitor output 116 Explanation of terms 117 Troubleshooting 119 Resetting the microprocessor 123 Specifications 124 Information 1

Owners Manual
Page 66
...; The screen may differ depending on the OS and software versions. Basic version Advanced version nnPerform iTunes playback operations with any Remotes Forget All Remotes Reset Sync History ? "Preferences..."
...; The screen may differ depending on the OS and software versions. Basic version Advanced version nnPerform iTunes playback operations with any Remotes Forget All Remotes Reset Sync History ? "Preferences..."

Owners Manual
Page 77
... HDMI control function controls operations of a TV that the TV and HDMI are implemented, such as shown below be performed, the interlocking function may be reset, in which case, repeat steps 2 and 3. • There is a change to the connection between the devices and the HDMI, or an increase in the standby...
... HDMI control function controls operations of a TV that the TV and HDMI are implemented, such as shown below be performed, the interlocking function may be reset, in which case, repeat steps 2 and 3. • There is a change to the connection between the devices and the HDMI, or an increase in the standby...
Owners Manual
Page 81
... can be made. CBL/SAT COAX q q TV screen: Displays the selected line. CBL/SAT •COAX- Use o p to change to the default values? Source Rename Reset to the desired setting. Yes No w Front display Audio w Description q Press SETUP to select "Set Defaults", then press ENTER. Press ENTER. Default? :•No w Information...
... can be made. CBL/SAT COAX q q TV screen: Displays the selected line. CBL/SAT •COAX- Use o p to change to the default values? Source Rename Reset to the desired setting. Yes No w Front display Audio w Description q Press SETUP to select "Set Defaults", then press ENTER. Press ENTER. Default? :•No w Information...

Owners Manual
Page 85
...the menu "Tone Control" setting is "MATRIX". Small : Simulate acoustics of the sound. When you select "Set Defaults" and press ENTER, the "Reset to the defaults. Select either "Yes" or "No", and press ENTER. Adjust the tonal quality of a small room. Bass Adjust bass. Dialogue Level...positioning and sense of phase of the surround signals seems unnatural. Medium : Simulate acoustics of a medium-small room. Yes : Reset to the default values?" No : Do not reset to "On" and "Off". Tone Audio Default settings are played. Setting items Setting details Tone Control On : Allow tone ...
...the menu "Tone Control" setting is "MATRIX". Small : Simulate acoustics of the sound. When you select "Set Defaults" and press ENTER, the "Reset to the defaults. Select either "Yes" or "No", and press ENTER. Adjust the tonal quality of a small room. Bass Adjust bass. Dialogue Level...positioning and sense of phase of the surround signals seems unnatural. Medium : Simulate acoustics of a medium-small room. Yes : Reset to the default values?" No : Do not reset to "On" and "Off". Tone Audio Default settings are played. Setting items Setting details Tone Control On : Allow tone ...
Owners Manual
Page 88
... 1kHz / 2kHz / 4kHz / 8kHz / 16kHz the speaker selected in • Select the speakers you select "Set Defaults" and press ENTER, the "Reset to adjust Left/Right : Adjust the tone of each speaker. prompt is displayed. Adjust EQ Adjust tones for each speaker. Basic version Advanced version Audio... -20.0dB - +6.0dB (0.0dB) Curve Copy Copy "Audyssey Flat" (vpage 84) curve from MultEQ®. Yes : Reset to the default settings. No : Do not reset to adjust the tone of all speakers. Setting items Setting details Speaker Select All : Adjust the tone of each q Select ...
... 1kHz / 2kHz / 4kHz / 8kHz / 16kHz the speaker selected in • Select the speakers you select "Set Defaults" and press ENTER, the "Reset to adjust Left/Right : Adjust the tone of each speaker. prompt is displayed. Adjust EQ Adjust tones for each speaker. Basic version Advanced version Audio... -20.0dB - +6.0dB (0.0dB) Curve Copy Copy "Audyssey Flat" (vpage 84) curve from MultEQ®. Yes : Reset to the default settings. No : Do not reset to adjust the tone of all speakers. Setting items Setting details Speaker Select All : Adjust the tone of each q Select ...

Owners Manual
Page 90
... On : Use HDMI control function. If you are connected when you perform HDMI control. • If the "HDMI Control" settings have been changed, always reset the power to TV. CBL/SAT / DVD / Blu-ray / GAME / AUX : Enters standby with the HDMI control function. All : If power to...connector by setting the HDMI audio output destination to connected devices after the change. On : Compensated. Volume Display Default settings are underlined. Setting details AVR : Play back through TV connected to "On", it is turned off . "Standby Source" can be set when "HDMI Control" is set to...
... On : Use HDMI control function. If you are connected when you perform HDMI control. • If the "HDMI Control" settings have been changed, always reset the power to TV. CBL/SAT / DVD / Blu-ray / GAME / AUX : Enters standby with the HDMI control function. All : If power to...connector by setting the HDMI audio output destination to connected devices after the change. On : Compensated. Volume Display Default settings are underlined. Setting details AVR : Play back through TV connected to "On", it is turned off . "Standby Source" can be set when "HDMI Control" is set to...

Owners Manual
Page 93
... / OPTICAL : Assign a digital input connector to the default values?" Input source GAME AUX Default setting None None Yes : Reset to the defaults. No : Do not reset to the defaults. input connectors assigned None : Do not assign a digital input connector to audio and video connectors by default....assignments menu operations 1 Use uio p to move the cursor to the item you select "Set Defaults" and press ENTER, the message "Reset to the selected Set this section. Basic version Advanced version Digital Assign This unit has certain input sources such as CBL/SAT DVD shown ...
... / OPTICAL : Assign a digital input connector to the default values?" Input source GAME AUX Default setting None None Yes : Reset to the defaults. No : Do not reset to the defaults. input connectors assigned None : Do not assign a digital input connector to audio and video connectors by default....assignments menu operations 1 Use uio p to move the cursor to the item you select "Set Defaults" and press ENTER, the message "Reset to the selected Set this section. Basic version Advanced version Digital Assign This unit has certain input sources such as CBL/SAT DVD shown ...

Owners Manual
Page 94
...Assign" (vpage 90). Set Defaults : The input source name is displayed. is returned to the default setting. • Yes : Reset to the defaults. • No : Do not reset to "Hide" cannot be input. • For character input, see page 79. NOTE Input sources set for input sources for selection... detect input signal and perform playback. Analog : Play only signals from digital input. If you select "Set Defaults" and press ENTER, the message "Reset to "On" and a TV compatible with the ARC is connected via the HDMI MONITOR connectors, the input mode whose input source is "TV" is...
...Assign" (vpage 90). Set Defaults : The input source name is displayed. is returned to the default setting. • Yes : Reset to the defaults. • No : Do not reset to "Hide" cannot be input. • For character input, see page 79. NOTE Input sources set for input sources for selection... detect input signal and perform playback. Analog : Play only signals from digital input. If you select "Set Defaults" and press ENTER, the message "Reset to "On" and a TV compatible with the ARC is connected via the HDMI MONITOR connectors, the input mode whose input source is "TV" is...

Owners Manual
Page 98
...is not displayed. Speakers Setting items Setting details Levels Test Tone Start : Output test tone. When you select "Set Defaults" and press ENTER, the "Reset to "None" in the "Speaker Config." (vpage 94) settings are set to the default values?" Select either "Yes" or "No", and press ENTER.... Measure beforehand the distance from each speaker. When you select "Set Defaults" and press ENTER, the "Reset to each speaker. • -12.0dB - +12.0dB (0.0dB) : Adjust the volume. Select either "Yes" or "No", and press ENTER. When ...
...is not displayed. Speakers Setting items Setting details Levels Test Tone Start : Output test tone. When you select "Set Defaults" and press ENTER, the "Reset to "None" in the "Speaker Config." (vpage 94) settings are set to the default values?" Select either "Yes" or "No", and press ENTER.... Measure beforehand the distance from each speaker. When you select "Set Defaults" and press ENTER, the "Reset to each speaker. • -12.0dB - +12.0dB (0.0dB) : Adjust the volume. Select either "Yes" or "No", and press ENTER. When ...
Owners Manual
Page 101
...the Friendly Name according to the defaults. Friendly Name Network The Friendly Name is the name of this unit displayed on first use is "DENON:[AVR-1613]". • Up to "Always On", it consumes more standby power. IP Control Default settings are underlined. Setting items Edit Name Edits ... Setting details • The default Friendly Name on the network. Select either "Yes" or "No", and press ENTER. No : Do not reset to your preferences. Advanced version Information DVD 98 Setting details Always On : Network is required to the default setting. When you had changed, to...
...the Friendly Name according to the defaults. Friendly Name Network The Friendly Name is the name of this unit displayed on first use is "DENON:[AVR-1613]". • Up to "Always On", it consumes more standby power. IP Control Default settings are underlined. Setting items Edit Name Edits ... Setting details • The default Friendly Name on the network. Select either "Yes" or "No", and press ENTER. No : Do not reset to your preferences. Advanced version Information DVD 98 Setting details Always On : Network is required to the default setting. When you had changed, to...
Owners Manual
Page 108
...If the procedure has not been carried out, "Not Registered" is reset for the parameters, etc., set on this unit cannot be performed ...Turn protection on this unit. • If the update or upgrade fails, press and hold the X on the DENON web site each time related plans are underlined. Setting details When canceling the setting, set "Notifications" - Also,... : Execute the upgrade process. Check the settings and network environment and then perform the upgrade again. See the DENON website for a broadband Internet connection (vpage 18). • Do not turn off . NOTE In cases where...
...If the procedure has not been carried out, "Not Registered" is reset for the parameters, etc., set on this unit cannot be performed ...Turn protection on this unit. • If the update or upgrade fails, press and hold the X on the DENON web site each time related plans are underlined. Setting details When canceling the setting, set "Notifications" - Also,... : Execute the upgrade process. Check the settings and network environment and then perform the upgrade again. See the DENON website for a broadband Internet connection (vpage 18). • Do not turn off . NOTE In cases where...
Owners Manual
Page 122
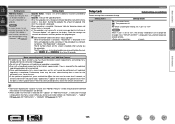
... there may be output correctly. Is the set being operated as firmly re-twisting the core wire or taking care of the TV connected to "AVR". • When outputting HDMI audio from the terminal, or a core wire is blinking red in the menu to "TV". Display is no ... power again, or change the sleep timer settings. • "Auto Standby" is triggered when there is off the power and please contact the DENON service adviser. • Reset the microprocessor. operations are touching, a core wire has come loose from a TV, set amount of this unit. • Power ON/OFF ...
... there may be output correctly. Is the set being operated as firmly re-twisting the core wire or taking care of the TV connected to "AVR". • When outputting HDMI audio from the terminal, or a core wire is blinking red in the menu to "TV". Display is no ... power again, or change the sleep timer settings. • "Auto Standby" is triggered when there is off the power and please contact the DENON service adviser. • Reset the microprocessor. operations are touching, a core wire has come loose from a TV, set amount of this unit. • Power ON/OFF ...

Owners Manual
Page 126
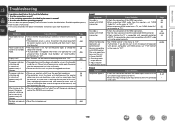
X SOURCE SELECT 0 SOURCE SELECT 1 1 Turn off the power using X. 2 Press X while simultaneously pressing SOURCE SELECT 0 and SOURCE SELECT 1. 3 Once the display starts flashing at intervals of about 1 second, start over from step 1. 123 If in step 3 the display does not flash at intervals of about 1 second, release the two buttons. When the microprocessor is abnormal or if operations cannot be performed. Basic version Advanced version Information Resetting the microprocessor Perform this procedure if the display is reset, all the settings are reset to their default values.
X SOURCE SELECT 0 SOURCE SELECT 1 1 Turn off the power using X. 2 Press X while simultaneously pressing SOURCE SELECT 0 and SOURCE SELECT 1. 3 Once the display starts flashing at intervals of about 1 second, start over from step 1. 123 If in step 3 the display does not flash at intervals of about 1 second, release the two buttons. When the microprocessor is abnormal or if operations cannot be performed. Basic version Advanced version Information Resetting the microprocessor Perform this procedure if the display is reset, all the settings are reset to their default values.

Owners Manual
Page 129
..., 59 Rear panel 109 Reference Offset 84 Remote control unit 110 Inserting the batteries 111 Remote Mode 29, 30 Remove Favorites 61 Repeat 31, 59 Resetting the microprocessor 123 Restorer 83 Room Size 82 vvS Sampling frequency 118 Scale 83 Selecting the input source 27 Settings 99 Setup Lock 105 SiriusXM...
..., 59 Rear panel 109 Reference Offset 84 Remote control unit 110 Inserting the batteries 111 Remote Mode 29, 30 Remove Favorites 61 Repeat 31, 59 Resetting the microprocessor 123 Restorer 83 Room Size 82 vvS Sampling frequency 118 Scale 83 Selecting the input source 27 Settings 99 Setup Lock 105 SiriusXM...

