
XPS One Service Manual
Page 10
...on its connector or on its pull-tab, not on the locking tabs before you connect a cable, ensure that the work , periodically touch an unpainted metal surface to dissipate static electricity, which could harm internal components. 10 Before You Begin Some cables have connectors with locking tabs...then unplug the cable from the network device. 3 Disconnect all attached devices from the computer. 4 Disconnect your computer, ground yourself by touching an unpainted metal surface, such as the metal at the back of the components inside the computer. 1 Ensure that both connectors are ...
...on its connector or on its pull-tab, not on the locking tabs before you connect a cable, ensure that the work , periodically touch an unpainted metal surface to dissipate static electricity, which could harm internal components. 10 Before You Begin Some cables have connectors with locking tabs...then unplug the cable from the network device. 3 Disconnect all attached devices from the computer. 4 Disconnect your computer, ground yourself by touching an unpainted metal surface, such as the metal at the back of the components inside the computer. 1 Ensure that both connectors are ...

XPS One Service Manual
Page 28
... sink away from the computer. 1 2 1 captive screws (6) 28 Replacing Cards 2 graphics card heat sink NOTICE: To ensure maximum cooling for the graphics card, do not touch the heat transfer areas on the graphics card heat sink, to loosen the six captive screws securing the graphics card heat sink. The oils in...
... sink away from the computer. 1 2 1 captive screws (6) 28 Replacing Cards 2 graphics card heat sink NOTICE: To ensure maximum cooling for the graphics card, do not touch the heat transfer areas on the graphics card heat sink, to loosen the six captive screws securing the graphics card heat sink. The oils in...

XPS One Service Manual
Page 33
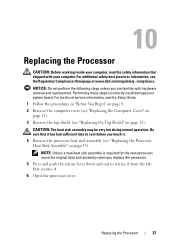
...with your system board. Performing these steps incorrectly could damage your computer. NOTICE: To ensure maximum cooling for the processor, do not touch the heat transfer areas on page 15). For technical service information, see the Setup Guide. 1 Follow the procedures in your skin can..., see "Replacing the Top Shield" on the processor heat sink. NOTICE: Do not perform the following steps unless you touch it has had sufficient time to loosen the four captive screws at www.dell.com/regulatory_compliance. Be sure that shipped with hardware removal and replacement.
...with your system board. Performing these steps incorrectly could damage your computer. NOTICE: To ensure maximum cooling for the processor, do not touch the heat transfer areas on page 15). For technical service information, see the Setup Guide. 1 Follow the procedures in your skin can..., see "Replacing the Top Shield" on the processor heat sink. NOTICE: Do not perform the following steps unless you touch it has had sufficient time to loosen the four captive screws at www.dell.com/regulatory_compliance. Be sure that shipped with hardware removal and replacement.
XPS One Service Manual
Page 37
...best practices information, see "Replacing the Processor Heat Sink Assembly" on page 15). NOTICE: Do not perform the following steps unless you touch it . 6 Open the processor cover. Be sure that secures it . 4 Remove the processor heat sink assembly (see the Regulatory Compliance Homepage ...at www.dell.com/regulatory_compliance. NOTE: Unless a new heat sink assembly is required for the new processor, reuse the original heat sink assembly when you replace ...
...best practices information, see "Replacing the Processor Heat Sink Assembly" on page 15). NOTICE: Do not perform the following steps unless you touch it . 6 Open the processor cover. Be sure that secures it . 4 Remove the processor heat sink assembly (see the Regulatory Compliance Homepage ...at www.dell.com/regulatory_compliance. NOTE: Unless a new heat sink assembly is required for the new processor, reuse the original heat sink assembly when you replace ...

XPS One Service Manual
Page 38
1 2 3 4 1 processor cover 3 processor socket 2 processor 4 release lever NOTICE: When removing or replacing the processor, do not touch any of the pins inside the socket or allow any objects to remove it from the socket, place it aside in the release position so that the socket is ready for the new processor. Leave the release lever extended in a safe and secure place. NOTICE: Ground yourself by touching an unpainted metal surface on the pins in the socket. 7 Lift up the processor to fall on the back of the computer. 8 Unpack the new processor. 38 Replacing the Processor
1 2 3 4 1 processor cover 3 processor socket 2 processor 4 release lever NOTICE: When removing or replacing the processor, do not touch any of the pins inside the socket or allow any objects to remove it from the socket, place it aside in the release position so that the socket is ready for the new processor. Leave the release lever extended in a safe and secure place. NOTICE: Ground yourself by touching an unpainted metal surface on the pins in the socket. 7 Lift up the processor to fall on the back of the computer. 8 Unpack the new processor. 38 Replacing the Processor

XPS One Service Manual
Page 39
... socket is aligned properly with the front and rear alignment notches on the system board. To avoid damage, ensure that position. Be careful not to touch or bend the pins on the socket. 11 Align the pin-1 corners of the processor and socket. Replacing the Processor 39
... socket is aligned properly with the front and rear alignment notches on the system board. To avoid damage, ensure that position. Be careful not to touch or bend the pins on the socket. 11 Align the pin-1 corners of the processor and socket. Replacing the Processor 39

XPS One Service Manual
Page 41
... traces on the system board near the memory modules. Otherwise, you pry the battery out of its socket with a blunt object, be careful not to touch the system board with the object. CAUTION: A new battery can restore the correct settings in step 10. 2 Follow the procedures in system setup (see the...
... traces on the system board near the memory modules. Otherwise, you pry the battery out of its socket with a blunt object, be careful not to touch the system board with the object. CAUTION: A new battery can restore the correct settings in step 10. 2 Follow the procedures in system setup (see the...

XPS One Setup Guide
Page 12
Setting Up Your XPS One™ Computer Press the Computer Power Button NOTE: If the computer appears to be on, but the display is off, touch the display power button on the bottom right corner of the front of the computer. 10
Setting Up Your XPS One™ Computer Press the Computer Power Button NOTE: If the computer appears to be on, but the display is off, touch the display power button on the bottom right corner of the front of the computer. 10

XPS One Setup Guide
Page 26
Using Your XPS One Wireless Keyboard Your XPS One supports a special wireless (nonBluetooth) keyboard which is optimized for use with your computer. 1. alternate left touch-pad button 3 1 2 24 touch pad 2. touch-pad buttons 3.
Using Your XPS One Wireless Keyboard Your XPS One supports a special wireless (nonBluetooth) keyboard which is optimized for use with your computer. 1. alternate left touch-pad button 3 1 2 24 touch pad 2. touch-pad buttons 3.

XPS One Setup Guide
Page 27
... You can also be used). Using the Media Control Buttons NOTE: The media control buttons are touch sensitive, and as you to move the cursor on the display. Using Your XPS One Using the Touch Pad The touch pad detects the pressure and movement of your finger to allow you would use a mouse. •... To move the cursor, lightly slide your finger over the surface. • To double-click an object, position the cursor on the object and tap twice on the touch ...
... You can also be used). Using the Media Control Buttons NOTE: The media control buttons are touch sensitive, and as you to move the cursor on the display. Using Your XPS One Using the Touch Pad The touch pad detects the pressure and movement of your finger to allow you would use a mouse. •... To move the cursor, lightly slide your finger over the surface. • To double-click an object, position the cursor on the object and tap twice on the touch ...

XPS One Setup Guide
Page 35
... and the computer. • Off - Power Problems If the power light is connected and powered on contact Dell, see "Contacting Dell" on . • If the display is off or is not receiving power. • Reseat the power...53. The computer is working by testing it with another device, such as a lamp. • Contact Dell, see "Contacting Dell" on properly. • Ensure that the power strip is not detecting a physical connection to resume normal...is turned on the keyboard, move the pointer using the touch pad or a connected mouse, or press the power button to the network.
... and the computer. • Off - Power Problems If the power light is connected and powered on contact Dell, see "Contacting Dell" on . • If the display is off or is not receiving power. • Reseat the power...53. The computer is working by testing it with another device, such as a lamp. • Contact Dell, see "Contacting Dell" on properly. • Ensure that the power strip is not detecting a physical connection to resume normal...is turned on the keyboard, move the pointer using the touch pad or a connected mouse, or press the power button to the network.

XPS One Setup Guide
Page 52
... and Caribbean countries only) • apsupport@dell.com (Asian/Pacific countries only) Dell Marketing and Sales e-mail addresses • apmarketing@dell.com (Asian/Pacific countries only) • sales_canada@dell.com (Canada only) Anonymous file transfer protocol (FTP) • ftp.dell.com Log in as user: anonymous, and use your touch-tone telephone to select the subjects...
... and Caribbean countries only) • apsupport@dell.com (Asian/Pacific countries only) Dell Marketing and Sales e-mail addresses • apmarketing@dell.com (Asian/Pacific countries only) • sales_canada@dell.com (Canada only) Anonymous file transfer protocol (FTP) • ftp.dell.com Log in as user: anonymous, and use your touch-tone telephone to select the subjects...


