
Dell Monitor Users Guide
Page 7
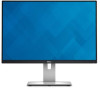
...and Video Electronics Standards Association (VESA™) 100 mm mounting holes for flexible mounting solutions. • Extensive all digital connectivity with DisplayPort, mini DisplayPort, HDMI (MHL), USB 3.0 helps future proof your monitor. • Plug and play capability if supported by your system. • Color gamut of 99...level being consumed by the monitor in real time. • Analogue backlight dimming control for flicker free display. Product Features The Dell U2415 flat panel display has an active matrix, Thin-Film Transistor (TFT), Liquid Crystal Display (LCD) and LED backlight.
...and Video Electronics Standards Association (VESA™) 100 mm mounting holes for flexible mounting solutions. • Extensive all digital connectivity with DisplayPort, mini DisplayPort, HDMI (MHL), USB 3.0 helps future proof your monitor. • Plug and play capability if supported by your system. • Color gamut of 99...level being consumed by the monitor in real time. • Analogue backlight dimming control for flicker free display. Product Features The Dell U2415 flat panel display has an active matrix, Thin-Film Transistor (TFT), Liquid Crystal Display (LCD) and LED backlight.

Dell Monitor Users Guide
Page 10
Connect your computer with Mini-DP to DP cable. 10 | About Your Monitor Connect your MHL devices with MHL cable. Attach the optional Dell Soundbar. (Concealed below removable plastic sheets) Connect your computer with DP cable. Side View Bottom View Bottom view without monitor stand Label Description 1 AC power cord connector 2 Dell Soundbar mounting slots 3 HDMI (MHL) port connector 4 DisplayPort in connector 5 Mini DisplayPort in connector Use Connect the power cable.
Connect your computer with Mini-DP to DP cable. 10 | About Your Monitor Connect your MHL devices with MHL cable. Attach the optional Dell Soundbar. (Concealed below removable plastic sheets) Connect your computer with DP cable. Side View Bottom View Bottom view without monitor stand Label Description 1 AC power cord connector 2 Dell Soundbar mounting slots 3 HDMI (MHL) port connector 4 DisplayPort in connector 5 Mini DisplayPort in connector Use Connect the power cable.

Dell Monitor Users Guide
Page 14
...1920 x 1080 at 60Hz 3 3 3 3 Electrical Specifications Model Video input signals AC input voltage/frequency/ current Inrush current U2415 • HDMI 1.4 (MHL 2.0)*, 600mV for each differential line, 100 ohm input impedance per differential pair • DisplayPort 1.2**, 600mV for ... A (Max.) at 0 °C (cold start) • 240 V: 80 A (Max.) at 0 °C (cold start) * Not Support HDMI 1.4 optional specification, include HDMI Ethernet Channel (HEC), Audio Return Channel (ARC), standard for 3D format and resolutions, standard for 2K and 4K digital cinema resolution. ** Support DP1.2 (...
...1920 x 1080 at 60Hz 3 3 3 3 Electrical Specifications Model Video input signals AC input voltage/frequency/ current Inrush current U2415 • HDMI 1.4 (MHL 2.0)*, 600mV for each differential line, 100 ohm input impedance per differential pair • DisplayPort 1.2**, 600mV for ... A (Max.) at 0 °C (cold start) • 240 V: 80 A (Max.) at 0 °C (cold start) * Not Support HDMI 1.4 optional specification, include HDMI Ethernet Channel (HEC), Audio Return Channel (ARC), standard for 3D format and resolutions, standard for 2K and 4K digital cinema resolution. ** Support DP1.2 (...

Dell Monitor Users Guide
Page 15
... 3.0 Signal cable type • Digital: detachable, HDMI, 19 pins • Digital: detachable, MHL, 19 pins • Digital: detachable, Mini-DP to DP, 20 pins • Universal Serial Bus: detachable, USB, 9 pins Dimensions (...) Weight of stand assembly 2.10 kg (4.62 lb) Front frame gloss Black Frame - 8%-13% gloss unit About Your Monitor | 15 Mini DisplayPort; Physical Characteristics Model U2415 Connector type DP, black connector (include DP in and DP out);
... 3.0 Signal cable type • Digital: detachable, HDMI, 19 pins • Digital: detachable, MHL, 19 pins • Digital: detachable, Mini-DP to DP, 20 pins • Universal Serial Bus: detachable, USB, 9 pins Dimensions (...) Weight of stand assembly 2.10 kg (4.62 lb) Front frame gloss Black Frame - 8%-13% gloss unit About Your Monitor | 15 Mini DisplayPort; Physical Characteristics Model U2415 Connector type DP, black connector (include DP in and DP out);

Dell Monitor Users Guide
Page 17
NOTE: This monitor is pressed in the normal operation mode. About Your Monitor | 17 When any button is ENERGY STAR®-compliant. The OSD functions only in the Active-off mode, one of the following messages will be displayed: HDMI (MHL)/Mini DisplayPort/DP input HDMI (MHL) input Activate the computer and the monitor to gain access to the OSD.
NOTE: This monitor is pressed in the normal operation mode. About Your Monitor | 17 When any button is ENERGY STAR®-compliant. The OSD functions only in the Active-off mode, one of the following messages will be displayed: HDMI (MHL)/Mini DisplayPort/DP input HDMI (MHL) input Activate the computer and the monitor to gain access to the OSD.

Dell Monitor Users Guide
Page 20
HDMI Connector Pin 19-pin Side of the Number Connected Signal Cable 1 TMDS DATA 2+ 2 TMDS DATA 2 SHIELD 3 TMDS DATA 2- 4 TMDS DATA 1+ 5 TMDS DATA 1 SHIELD 6 TMDS DATA 1- 7 TMDS DATA 0+ 8 TMDS DATA 0 SHIELD 9 TMDS DATA 0- 10 TMDS CLOCK+ 11 TMDS CLOCK SHIELD 12 TMDS CLOCK- 13 CEC 14 Reserved (N.C. on device) 15 DDC CLOCK (SCL) 16 DDC DATA (SDA) 17 DDC/CEC Ground 18 +5V POWER 19 HOT PLUG DETECT 20 | About Your Monitor
HDMI Connector Pin 19-pin Side of the Number Connected Signal Cable 1 TMDS DATA 2+ 2 TMDS DATA 2 SHIELD 3 TMDS DATA 2- 4 TMDS DATA 1+ 5 TMDS DATA 1 SHIELD 6 TMDS DATA 1- 7 TMDS DATA 0+ 8 TMDS DATA 0 SHIELD 9 TMDS DATA 0- 10 TMDS CLOCK+ 11 TMDS CLOCK SHIELD 12 TMDS CLOCK- 13 CEC 14 Reserved (N.C. on device) 15 DDC CLOCK (SCL) 16 DDC DATA (SDA) 17 DDC/CEC Ground 18 +5V POWER 19 HOT PLUG DETECT 20 | About Your Monitor

Dell Monitor Users Guide
Page 26
Connecting Your Monitor WARNING: Before you begin any of the procedures in this section, follow the Safety Instructions. To connect your computer and disconnect the power cable. Connect the DP/Mini-DP to DP/HDMI cable from your monitor to the computer: 1 Turn Off your monitor to the computer. Connecting the HDMI cable Connecting the black DisplayPort (Mini-DP to the computer at the same time. NOTE: Do not connect all cables to DP) cable 26 | Setting Up the Monitor
Connecting Your Monitor WARNING: Before you begin any of the procedures in this section, follow the Safety Instructions. To connect your computer and disconnect the power cable. Connect the DP/Mini-DP to DP/HDMI cable from your monitor to the computer: 1 Turn Off your monitor to the computer. Connecting the HDMI cable Connecting the black DisplayPort (Mini-DP to the computer at the same time. NOTE: Do not connect all cables to DP) cable 26 | Setting Up the Monitor

Dell Monitor Users Guide
Page 30
Connecting the USB 3.0 cable After you have completed connecting the Mini-DP to DP/DP/HDMI cable, follow the procedures below to connect the USB 3.0 cable to the computer and complete your monitor setup: 1 Connect the upstream USB 3.0 port (cable supplied) ...
Connecting the USB 3.0 cable After you have completed connecting the Mini-DP to DP/DP/HDMI cable, follow the procedures below to connect the USB 3.0 cable to the computer and complete your monitor setup: 1 Connect the upstream USB 3.0 port (cable supplied) ...

Dell Monitor Users Guide
Page 31
... is MHL certified. NOTE: Some MHL source devices may take more than a few seconds or longer to output an image, depending on monitor to HDMI (MHL) 1 or HDMI (MHL) 2 port on the monitor with a MHL certified cable (See Bottom View for details.) 5 If it does not display an image, see Mobile High... massage below steps: 1 Plug the power cable on your monitor into a AC outlet. 2 Connect the (micro) USB port on you MHL source device to HDMI (MHL) 1 or HDMI (MHL) 2 by using OSD Menu (See Using the On-Screen Display (OSD) Menu for details). 3 Turn On the monitor and the MHL source device...
... is MHL certified. NOTE: Some MHL source devices may take more than a few seconds or longer to output an image, depending on monitor to HDMI (MHL) 1 or HDMI (MHL) 2 port on the monitor with a MHL certified cable (See Bottom View for details.) 5 If it does not display an image, see Mobile High... massage below steps: 1 Plug the power cable on your monitor into a AC outlet. 2 Connect the (micro) USB port on you MHL source device to HDMI (MHL) 1 or HDMI (MHL) 2 by using OSD Menu (See Using the On-Screen Display (OSD) Menu for details). 3 Turn On the monitor and the MHL source device...

Dell Monitor Users Guide
Page 37
OK 4 Use the Back button to go back to launch the OSD menu and display the main menu. Main Menu for the OSD menu to disappear. 1 Press the button to the previous menu. The changes are also saved if you change the settings and then wait for digital (HDMI (MHL) 1/ HDMI (MHL) 2) input or Operating the Monitor | 37 3 Use the OK button to another menu or exit the OSD menu, the monitor automatically saves those changes. Back Using the On-Screen Display (OSD) Menu Accessing the Menu System NOTE: If you change the settings and then either proceed to confirm your selection.
OK 4 Use the Back button to go back to launch the OSD menu and display the main menu. Main Menu for the OSD menu to disappear. 1 Press the button to the previous menu. The changes are also saved if you change the settings and then wait for digital (HDMI (MHL) 1/ HDMI (MHL) 2) input or Operating the Monitor | 37 3 Use the OK button to another menu or exit the OSD menu, the monitor automatically saves those changes. Back Using the On-Screen Display (OSD) Menu Accessing the Menu System NOTE: If you change the settings and then either proceed to confirm your selection.

Dell Monitor Users Guide
Page 40
... color setting mode. 40 | Operating the Monitor Color Use Color to select the DisplayPort input source. Press to select the HDMI (MHL) 1 or HDMI (MHL) 2 input source. HDMI (MHL) 1 HDMI (MHL) 2 Select the HDMI (MHL) 1 or HDMI (MHL) 2 input when you are using the DisplayPort (DP) connector. Mini Select the Mini DisplayPort input when you are...
... color setting mode. 40 | Operating the Monitor Color Use Color to select the DisplayPort input source. Press to select the HDMI (MHL) 1 or HDMI (MHL) 2 input source. HDMI (MHL) 1 HDMI (MHL) 2 Select the HDMI (MHL) 1 or HDMI (MHL) 2 input when you are using the DisplayPort (DP) connector. Mini Select the Mini DisplayPort input when you are...

Dell Monitor Users Guide
Page 41
Or if the DVD (or MHL devices) color output setting is connected to a computer (or DVD player) using HDMI cable (or DisplayPort cable); Operating the Monitor | 41 Gamma Allows you to set the Gamma to PC or MAC. or MHL devices using MHL cable. or MHL devices by YPbPr using the HDMI cable (or DisplayPort cable); YPbPr: Select this option if your monitor is connected to a DVD player by YPbPr using MHL cable. Input Color Format Allows you to set the video input mode to: RGB: Select this option if your monitor is not RGB.
Or if the DVD (or MHL devices) color output setting is connected to a computer (or DVD player) using HDMI cable (or DisplayPort cable); Operating the Monitor | 41 Gamma Allows you to set the Gamma to PC or MAC. or MHL devices using MHL cable. or MHL devices by YPbPr using the HDMI cable (or DisplayPort cable); YPbPr: Select this option if your monitor is connected to a DVD player by YPbPr using MHL cable. Input Color Format Allows you to set the video input mode to: RGB: Select this option if your monitor is not RGB.

Dell Monitor Users Guide
Page 49
If you press any button other than the power button, one of the following messages will appear depending on the selected input: HDMI (MHL)/Mini DisplayPort/DP input HDMI (MHL) input If either HDMI (MHL), Mini DisplayPort, or DP input is selected and the corresponding cable is not connected, a floating dialog box as shown below appears. or Operating the Monitor | 49 Activate the computer and wake up the monitor to gain access to the OSD.
If you press any button other than the power button, one of the following messages will appear depending on the selected input: HDMI (MHL)/Mini DisplayPort/DP input HDMI (MHL) input If either HDMI (MHL), Mini DisplayPort, or DP input is selected and the corresponding cable is not connected, a floating dialog box as shown below appears. or Operating the Monitor | 49 Activate the computer and wake up the monitor to gain access to the OSD.

Dell Monitor Users Guide
Page 62
...; Position your MHL device is not in Standby mode. • Check physical MHL cable connection is corresponding to input source selected on OSD Menu i.e., HDMI (MHL) 1 or HDMI (MHL) 2. • Wait for 30 seconds after connecting MHL cable as possible from the USB 3.0 port. Universal Serial Bus (USB) Specific Problems Specific Symptoms...
...; Position your MHL device is not in Standby mode. • Check physical MHL cable connection is corresponding to input source selected on OSD Menu i.e., HDMI (MHL) 1 or HDMI (MHL) 2. • Wait for 30 seconds after connecting MHL cable as possible from the USB 3.0 port. Universal Serial Bus (USB) Specific Problems Specific Symptoms...

Dell Monitor Statement of Volatility
Page 1
...data and tells you how to avoid the problem. Non-volatile (NV) components continue to prevent loss of data) System U22 EEPROM HDMI 1 U1 EDID EEPROM HDMI 2 U6 EDID EEPROM Serial U23 Flash 16 Kbit EEPROM Non No Volatile memory for storage of system setting (OSD) / DP EDID... power cord and removing the battery) destroys all user data on the system board lose data if power is removed from the component. Dell U2415 CAUTION: A CAUTION indicates either potential damage to hardware or loss of Volatility - and international copyright and intellectual property laws. in off ...
...data and tells you how to avoid the problem. Non-volatile (NV) components continue to prevent loss of data) System U22 EEPROM HDMI 1 U1 EDID EEPROM HDMI 2 U6 EDID EEPROM Serial U23 Flash 16 Kbit EEPROM Non No Volatile memory for storage of system setting (OSD) / DP EDID... power cord and removing the battery) destroys all user data on the system board lose data if power is removed from the component. Dell U2415 CAUTION: A CAUTION indicates either potential damage to hardware or loss of Volatility - and international copyright and intellectual property laws. in off ...


