
Monitor Users Guide
Page 6
Your monitor ships with your monitor. For more information on contacting Dell, See Contacting Dell. Display Stand riser Stand base VESA cover Power cable (varies by country) 6 | About your monitor About your monitor Package contents NOTE: Some components may be optional and may not ship with the components shown in the table below. If any component is missing, contact Dell technical support for assistance.
Your monitor ships with your monitor. For more information on contacting Dell, See Contacting Dell. Display Stand riser Stand base VESA cover Power cable (varies by country) 6 | About your monitor About your monitor Package contents NOTE: Some components may be optional and may not ship with the components shown in the table below. If any component is missing, contact Dell technical support for assistance.

Monitor Users Guide
Page 8
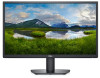
... Standards Association (VESA™) 100 mm mounting holes for flexible mounting solutions. • Plug and play capability, if supported by your computer. • On-Screen Display (OSD) adjustments for ease of 72% NTSC (typical),CIE 1931. • Digital connectivity with a TÜV-certified flicker-free screen. Product features The Dell SE2422H/SE2422HX monitor has...
... Standards Association (VESA™) 100 mm mounting holes for flexible mounting solutions. • Plug and play capability, if supported by your computer. • On-Screen Display (OSD) adjustments for ease of 72% NTSC (typical),CIE 1931. • Digital connectivity with a TÜV-certified flicker-free screen. Product features The Dell SE2422H/SE2422HX monitor has...

Monitor Users Guide
Page 10
...100 mm). Refer to this label if you need to contact Dell for technical support. 5 Cable-management slot Connect the cables by inserting them through the slot. 6 VESA cover The two endpoints on the front of the VESA cover are aligned with your monitor and is sold separately. 2 ...gently pressed. 10 | About your monitor and access warranty information. NOTE: Wall mount kit is not shipped with the VESA mounting holes and the VESA cover is a unique alphanumeric Tag label identifier that enables Dell service technicians to identify the hardware components in your monitor
...100 mm). Refer to this label if you need to contact Dell for technical support. 5 Cable-management slot Connect the cables by inserting them through the slot. 6 VESA cover The two endpoints on the front of the VESA cover are aligned with your monitor and is sold separately. 2 ...gently pressed. 10 | About your monitor and access warranty information. NOTE: Wall mount kit is not shipped with the VESA mounting holes and the VESA cover is a unique alphanumeric Tag label identifier that enables Dell service technicians to identify the hardware components in your monitor

Monitor Users Guide
Page 16
no cables) Weight of stand assembly SE2422H SE2422HX • One HDMI 1.4 port • One VGA port • HDMI 1.8 m cable • VGA 1.8 m cable (SE2422HX only) 420.25 mm (16.55 in.) 552.64 ... Depth Stand dimensions Height (extended) Width Depth Weight Weight with packaging Weight with stand assembly and cables Weight without stand assembly (For wall mount or VESA mount considerations -
no cables) Weight of stand assembly SE2422H SE2422HX • One HDMI 1.4 port • One VGA port • HDMI 1.8 m cable • VGA 1.8 m cable (SE2422HX only) 420.25 mm (16.55 in.) 552.64 ... Depth Stand dimensions Height (extended) Width Depth Weight Weight with packaging Weight with stand assembly and cables Weight without stand assembly (For wall mount or VESA mount considerations -

Monitor Users Guide
Page 26
Insert the stand-riser bracket into monitor groove until it snaps into place. 4 5 5. Open the monitor protective cover and install the VESA cover. 26 | Setting up the monitor Align the tabs on the stand-riser bracket with the grooves at the back of the monitor. 4. 3.
Insert the stand-riser bracket into monitor groove until it snaps into place. 4 5 5. Open the monitor protective cover and install the VESA cover. 26 | Setting up the monitor Align the tabs on the stand-riser bracket with the grooves at the back of the monitor. 4. 3.

Monitor Users Guide
Page 33
...: Press the dimple on the VESA cover to release it with the display facing down. 2. See the documentation that shipped with the wall-mounting kit and mount the monitor on it ... the monitor. 5. NOTE: For use only with UL or CSA or GS-listed wall mount bracket with the VESA-compatible wall mounting kit. 1. Connect the mounting bracket from the back of 11.60 kg (SE2422H)/13.80 kg (SE2422HX). Setting up the monitor | 33 Remove the stand. 3. Wall mounting (optional) NOTE: Use...
...: Press the dimple on the VESA cover to release it with the display facing down. 2. See the documentation that shipped with the wall-mounting kit and mount the monitor on it ... the monitor. 5. NOTE: For use only with UL or CSA or GS-listed wall mount bracket with the VESA-compatible wall mounting kit. 1. Connect the mounting bracket from the back of 11.60 kg (SE2422H)/13.80 kg (SE2422HX). Setting up the monitor | 33 Remove the stand. 3. Wall mounting (optional) NOTE: Use...


