Mobile Precision Re-Image Guide
Page 7
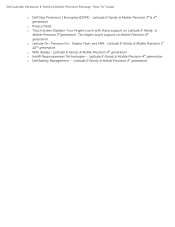
Latitude E-Family & Mobile Precision 4th generation o Latitude On / Precision On - Reader, Flash, and ARM - Latitude E-Family & Mobile Precision 4th generation o Dell Battery Management - Four Fingers touch with Stylus support on Mobile Precision 4th generation. Latitude E-Family & Mobile Precision 4th generation o Intel® Responsiveness Technologies - Dell Latitude Ultrabook, E-Family & Mobile Precision Reimage "How-To" Guide o Dell Data Protection | Encryption(DDPE) - Ten fingers...
Latitude E-Family & Mobile Precision 4th generation o Latitude On / Precision On - Reader, Flash, and ARM - Latitude E-Family & Mobile Precision 4th generation o Dell Battery Management - Four Fingers touch with Stylus support on Mobile Precision 4th generation. Latitude E-Family & Mobile Precision 4th generation o Intel® Responsiveness Technologies - Dell Latitude Ultrabook, E-Family & Mobile Precision Reimage "How-To" Guide o Dell Data Protection | Encryption(DDPE) - Ten fingers...
Mobile Precision Re-Image Guide
Page 11
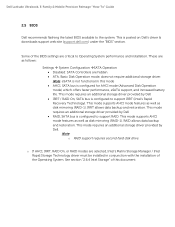
... is not desired and under Microsoft Windows Vista only 2. Reader, Flash, and ARM - 1st & 2nd generations Latitude EFamily & Mobile Precision 1. Control Point System Manager DCP Extended Battery Life - EBL Requires Dell DCP System Manager (for all System Manager release) Requires Security driver (for management access to business critical data o Intel...
... is not desired and under Microsoft Windows Vista only 2. Reader, Flash, and ARM - 1st & 2nd generations Latitude EFamily & Mobile Precision 1. Control Point System Manager DCP Extended Battery Life - EBL Requires Dell DCP System Manager (for all System Manager release) Requires Security driver (for management access to business critical data o Intel...
Mobile Precision Re-Image Guide
Page 12
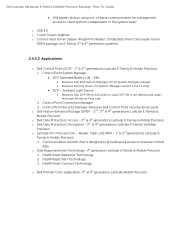
... which offers faster performance, eSATA support, and increased battery life. This mode requires an additional storage driver provided by Dell RAID, SATA bus is posted on Dell's driver & downloads support web site (support.dell.com) under the "BIOS" section. These are ...data backup and restoration. This is configured to support IRRT (Intel's Rapid Recovery Technology). Dell Latitude Ultrabook, E-Family & Mobile Precision Reimage "How-To" Guide 2.5 BIOS Dell recommends flashing the latest BIOS available to Operating System performance and installation. This mode supports ...
... which offers faster performance, eSATA support, and increased battery life. This mode requires an additional storage driver provided by Dell RAID, SATA bus is posted on Dell's driver & downloads support web site (support.dell.com) under the "BIOS" section. These are ...data backup and restoration. This is configured to support IRRT (Intel's Rapid Recovery Technology). Dell Latitude Ultrabook, E-Family & Mobile Precision Reimage "How-To" Guide 2.5 BIOS Dell recommends flashing the latest BIOS available to Operating System performance and installation. This mode supports ...
Mobile Precision Re-Image Guide
Page 20
... to Control Point System Manager 1.0, 1.1, 1.2 and 1.3. Broadcom Unified Security Hub 10. Winbond Trusted Platform Module 5. Authentec Fingerprint Reader 9. Dell Latitude Ultrabook, E-Family & Mobile Precision Reimage "How-To" Guide 3. For Extended Battery Life feature (EBL), install the Dell Control Point components offered by installing ALS utility in case Control Point System Manager is available on...
... to Control Point System Manager 1.0, 1.1, 1.2 and 1.3. Broadcom Unified Security Hub 10. Winbond Trusted Platform Module 5. Authentec Fingerprint Reader 9. Dell Latitude Ultrabook, E-Family & Mobile Precision Reimage "How-To" Guide 3. For Extended Battery Life feature (EBL), install the Dell Control Point components offered by installing ALS utility in case Control Point System Manager is available on...
Mobile Precision Re-Image Guide
Page 22
...and system events Dell customized power plans and extensions Battery Health Information Touch Panel Keyboard hotkey information, including backlighting Smart Settings o The DFEP Application is a Dell developed application providing provides access... Protection - The Dell Date Protection | Access Application components are required in order: Prerequisites Installer - DDPA, (for Dell Data Protection | Access to Latitude Precision 3rd & 4th generation E-Family & Mobile Precision, except Latitude 3330) o Dell Feature Enhancement Pack ...
...and system events Dell customized power plans and extensions Battery Health Information Touch Panel Keyboard hotkey information, including backlighting Smart Settings o The DFEP Application is a Dell developed application providing provides access... Protection - The Dell Date Protection | Access Application components are required in order: Prerequisites Installer - DDPA, (for Dell Data Protection | Access to Latitude Precision 3rd & 4th generation E-Family & Mobile Precision, except Latitude 3330) o Dell Feature Enhancement Pack ...
Mobile Precision Re-Image Guide
Page 40
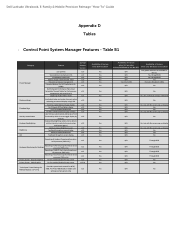
.../disable status Network card power management Extended Battery Life/ All Day Battery Life. (ADBL) Dell Enhanced Performance Plans (User Selectable Thermal Tables for NTSC, sRGB, Pro Photo RGB/Kodak or Adobe color settings (certain panels only) v1.3 Availablity of ECC ... an external display using FnF8. Table B1 Category Power Manager Display settings Function Keys Hot Key customizaton Keyboard backlighting Brightness ALS Feature user profiles View battery manufacturer info. Dell Latitude Ultrabook, E-Family & Mobile Precision Reimage "How-To" Guide Appendix D Tables -
.../disable status Network card power management Extended Battery Life/ All Day Battery Life. (ADBL) Dell Enhanced Performance Plans (User Selectable Thermal Tables for NTSC, sRGB, Pro Photo RGB/Kodak or Adobe color settings (certain panels only) v1.3 Availablity of ECC ... an external display using FnF8. Table B1 Category Power Manager Display settings Function Keys Hot Key customizaton Keyboard backlighting Brightness ALS Feature user profiles View battery manufacturer info. Dell Latitude Ultrabook, E-Family & Mobile Precision Reimage "How-To" Guide Appendix D Tables -

Service Manual
Page 1
...Dell, the DELL logo, and Dell Precision are trademarks of Dell Inc. Dell Precision™ Mobile Workstation M4400 Service Manual Troubleshooting Before Working on Your Computer Base Assembly Hinge Covers Hard Drive WLAN Card WWAN Card WPAN/UWB Card Fan Heat Sinks Processor Module Memory Coin-Cell Battery...systems are either trademarks or registered trademarks of Microsoft Corporation in this document to change without the written permission of Dell Inc.; Information in this document is strictly forbidden. August 2008 Rev. CAUTION: A CAUTION indicates potential for property ...
...Dell, the DELL logo, and Dell Precision are trademarks of Dell Inc. Dell Precision™ Mobile Workstation M4400 Service Manual Troubleshooting Before Working on Your Computer Base Assembly Hinge Covers Hard Drive WLAN Card WWAN Card WPAN/UWB Card Fan Heat Sinks Processor Module Memory Coin-Cell Battery...systems are either trademarks or registered trademarks of Microsoft Corporation in this document to change without the written permission of Dell Inc.; Information in this document is strictly forbidden. August 2008 Rev. CAUTION: A CAUTION indicates potential for property ...

Service Manual
Page 2
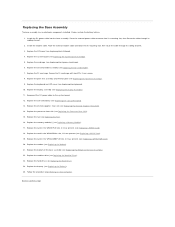
... Removing the Modular Drive). 5. Remove the modular drive (see Removing the Battery). 3. Using the rubber feet for leverage, slide the bottom of the base assembly toward the front of the computer 1/8th inch, then lift to Contents Page Base Assembly Dell Precision™ Service Manual Removing the Bottom of the Base Assembly Replacing...
... Removing the Modular Drive). 5. Remove the modular drive (see Removing the Battery). 3. Using the rubber feet for leverage, slide the bottom of the base assembly toward the front of the computer 1/8th inch, then lift to Contents Page Base Assembly Dell Precision™ Service Manual Removing the Bottom of the Base Assembly Replacing...

Service Manual
Page 3
... card in the WWAN/FCM slot, if present (see Removing the SD Card Reader). 20. Remove the coin-cell battery (see Removing the Processor Heat Sink). Remove the processor heat sink (see Removing the Coin-Cell Battery). 17. Disconnect the orange I /O Board). 28. Remove the DC power cable from the base. 29.
... card in the WWAN/FCM slot, if present (see Removing the SD Card Reader). 20. Remove the coin-cell battery (see Removing the Processor Heat Sink). Remove the processor heat sink (see Removing the Coin-Cell Battery). 17. Disconnect the orange I /O Board). 28. Remove the DC power cable from the base. 29.
Service Manual
Page 4
... if it was present (see Replacing a WPAN/UWB Card). 20. Follow the procedure After Working on Your Computer. It does include the battery latches. 1. Place the external modem cable connector into the base assembly. Replace the modem (see Replacing the Discrete Graphics Heat Sink). 14. ...Replace the battery (see Replacing the Keyboard). 10. Install the DC power cable into its mounting slot, then route the cable through its cabling channel. 3....
... if it was present (see Replacing a WPAN/UWB Card). 20. Follow the procedure After Working on Your Computer. It does include the battery latches. 1. Place the external modem cable connector into the base assembly. Replace the modem (see Replacing the Discrete Graphics Heat Sink). 14. ...Replace the battery (see Replacing the Keyboard). 10. Install the DC power cable into its mounting slot, then route the cable through its cabling channel. 3....

Service Manual
Page 5
... and to help prevent damage to the system board, you must remove the battery from the computer. 5. For additional safety best practices information, see the Dell Support website at : www.dell.com/regulatory_compliance. Damage due to servicing that the computer is flat and clean ... original, if installed. Back to Contents Page Before Working on Your Computer Dell Precision™ Service Manual Recommended Tools What You Need to Know for Your Safety Removing the Battery Replacing the Battery After Working on Your Computer This document provides procedures for removing and installing...
... and to help prevent damage to the system board, you must remove the battery from the computer. 5. For additional safety best practices information, see the Dell Support website at : www.dell.com/regulatory_compliance. Damage due to servicing that the computer is flat and clean ... original, if installed. Back to Contents Page Before Working on Your Computer Dell Precision™ Service Manual Recommended Tools What You Need to Know for Your Safety Removing the Battery Replacing the Battery After Working on Your Computer This document provides procedures for removing and installing...
Service Manual
Page 6
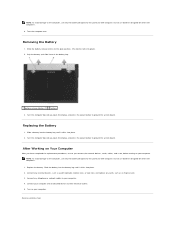
.... 2. Back to the open position. (The latches lock into place. 2. Do not use only the battery designed for other Dell computers. 1. After Working on Your Computer After you have completed the replacement procedures, ensure you connect the external... batteries designed for this particular Dell computer. Replace the battery. Connect your computer. 4. NOTE: To avoid damage to their electrical outlets. 5. Slide a battery into the battery bay until it out of the battery bay. 1 battery release latches (2) 2 battery 3. Do not use only the battery designed for other Dell ...
.... 2. Back to the open position. (The latches lock into place. 2. Do not use only the battery designed for other Dell computers. 1. After Working on Your Computer After you have completed the replacement procedures, ensure you connect the external... batteries designed for this particular Dell computer. Replace the battery. Connect your computer. 4. NOTE: To avoid damage to their electrical outlets. 5. Slide a battery into the battery bay until it out of the battery bay. 1 battery release latches (2) 2 battery 3. Do not use only the battery designed for other Dell ...

Service Manual
Page 7
...and then click Save. The Save In window appears. 7. The file icon appears on the computer. 3. Back to Contents Page Flashing the BIOS Dell Precision™ Service Manual Flashing the BIOS From a CD Flashing the BIOS From the Hard Drive If a BIOS-update program CD is complete, the .... Doing so may cause system damage. 1. Failure to prevent a loss of power. Turn on your desktop and is plugged in , the main battery is properly installed, and a network cable is installed properly. 2. Click the down arrow to download the file. 5. Insert the BIOS-update program CD...
...and then click Save. The Save In window appears. 7. The file icon appears on the computer. 3. Back to Contents Page Flashing the BIOS Dell Precision™ Service Manual Flashing the BIOS From a CD Flashing the BIOS From the Hard Drive If a BIOS-update program CD is complete, the .... Doing so may cause system damage. 1. Failure to prevent a loss of power. Turn on your desktop and is plugged in , the main battery is properly installed, and a network cable is installed properly. 2. Click the down arrow to download the file. 5. Insert the BIOS-update program CD...

Service Manual
Page 10
... by the user must be re-entered, and the system clock must be set. 1. Insert the coin-cell battery into the computer. 3. Connect the coin-cell battery cable to Contents Page Back to the system board. 2. If you begin any of the procedures in this section... (see Removing the Bottom of the Base Assembly). 3. Back to Contents Page Coin-Cell Battery Dell Precision™ Service Manual Removing the Coin-Cell Battery Replacing the Coin-Cell Battery Removing the Coin-Cell Battery CAUTION: Before you begin any of the procedures in this section, follow the safety instructions...
... by the user must be re-entered, and the system clock must be set. 1. Insert the coin-cell battery into the computer. 3. Connect the coin-cell battery cable to Contents Page Back to the system board. 2. If you begin any of the procedures in this section... (see Removing the Bottom of the Base Assembly). 3. Back to Contents Page Coin-Cell Battery Dell Precision™ Service Manual Removing the Coin-Cell Battery Replacing the Coin-Cell Battery Removing the Coin-Cell Battery CAUTION: Before you begin any of the procedures in this section, follow the safety instructions...
Service Manual
Page 19
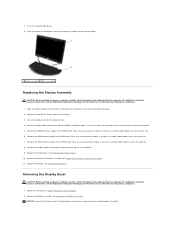
... any unused antenna cables in the routing channels by the tabs provided. 5. Replace the hinge covers (see Replacing the Battery). Replace the battery (see Replacing the Hinge Covers). 10. Align the display hinges with the holes in the base assembly cable holders next... to the card slot. 7. Route the display cable and antenna (WLAN, WWAN, and WPAN) cables. For additional safety best practices information, see the Regulatory Compliance Homepage on www.dell...
... any unused antenna cables in the routing channels by the tabs provided. 5. Replace the hinge covers (see Replacing the Battery). Replace the battery (see Replacing the Hinge Covers). 10. Align the display hinges with the holes in the base assembly cable holders next... to the card slot. 7. Route the display cable and antenna (WLAN, WWAN, and WPAN) cables. For additional safety best practices information, see the Regulatory Compliance Homepage on www.dell...
Service Manual
Page 41
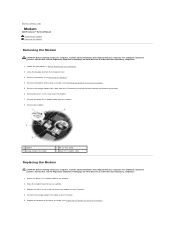
... modem cable to the I/O board. 4. Close the display and turn the computer over. 3. Remove the battery (see the Regulatory Compliance Homepage on www.dell.com at : www.dell.com/regulatory_compliance. 1. Place the modem into the base assembly. 3. Replace the bottom of the base assembly... secure the modem to the modem. 2. For additional safety best practices information, see Removing the Battery). 4. Connect the orange modem flex cable to Contents Page Modem Dell Precision™ Service Manual Removing the Modem Replacing the Modem Removing the Modem CAUTION: Before working inside...
... modem cable to the I/O board. 4. Close the display and turn the computer over. 3. Remove the battery (see the Regulatory Compliance Homepage on www.dell.com at : www.dell.com/regulatory_compliance. 1. Place the modem into the base assembly. 3. Replace the bottom of the base assembly... secure the modem to the modem. 2. For additional safety best practices information, see Removing the Battery). 4. Connect the orange modem flex cable to Contents Page Modem Dell Precision™ Service Manual Removing the Modem Replacing the Modem Removing the Modem CAUTION: Before working inside...

Service Manual
Page 47
... the instructions in Before Working on the top, left corner of the base assembly to Contents Page DC Power Cable Dell Precision™ Service Manual Removing the DC Power Cable Replacing the DC Power Cable Removing the DC Power Cable CAUTION: Before... and display connectors. 19. For additional safety best practices information, see Removing the Battery). 4. Close the display and turn the computer over. 3. Remove the battery (see the Regulatory Compliance Homepage on www.dell.com at: www.dell.com/regulatory_compliance. 1. Remove the keyboard (see Removing the Fan). 11. Remove the...
... the instructions in Before Working on the top, left corner of the base assembly to Contents Page DC Power Cable Dell Precision™ Service Manual Removing the DC Power Cable Replacing the DC Power Cable Removing the DC Power Cable CAUTION: Before... and display connectors. 19. For additional safety best practices information, see Removing the Battery). 4. Close the display and turn the computer over. 3. Remove the battery (see the Regulatory Compliance Homepage on www.dell.com at: www.dell.com/regulatory_compliance. 1. Remove the keyboard (see Removing the Fan). 11. Remove the...
Service Manual
Page 53
... 3-mm screws securing the PC card cage. 24. The replacement kit for transferring the Service Tag to Contents Page System Board Assembly Dell Precision™ Service Manual Removing the System Board Assembly Replacing the System Board Assembly The system board's BIOS chip contains the Service Tag, which...Remove the modular drive (see Removing the Palm Rest Assembly). 20. Remove the card in the WWAN/FCM slot, if present (see Removing the Battery). 4. Remove the card in Before Working on the bottom of the base assembly (see Removing the Hard Drive). 5. Remove the processor heat ...
... 3-mm screws securing the PC card cage. 24. The replacement kit for transferring the Service Tag to Contents Page System Board Assembly Dell Precision™ Service Manual Removing the System Board Assembly Replacing the System Board Assembly The system board's BIOS chip contains the Service Tag, which...Remove the modular drive (see Removing the Palm Rest Assembly). 20. Remove the card in the WWAN/FCM slot, if present (see Removing the Battery). 4. Remove the card in Before Working on the bottom of the base assembly (see Removing the Hard Drive). 5. Remove the processor heat ...
Service Manual
Page 55
... 17. Follow the procedure After Working on the new system board with the computer Service Tag. For information on at support.dell.com. Connect the coin-cell battery cable to update the BIOS on Your Computer. 32. Replace the SD card reader assembly (see Replacing the LED Cover). 15... the Express Card Cage). 9. Enter the system setup program to the system board (see the Dell™ Technology Guide on your computer on the system setup program, see Replacing the Coin-Cell Battery). 20. Back to the system board. 10. Replace the Express card cage (see Replacing the...
... 17. Follow the procedure After Working on the new system board with the computer Service Tag. For information on at support.dell.com. Connect the coin-cell battery cable to update the BIOS on Your Computer. 32. Replace the SD card reader assembly (see Replacing the LED Cover). 15... the Express Card Cage). 9. Enter the system setup program to the system board (see the Dell™ Technology Guide on your computer on the system setup program, see Replacing the Coin-Cell Battery). 20. Back to the system board. 10. Replace the Express card cage (see Replacing the...
Service Manual
Page 61
...defective. Drive Problems CAUTION: Before you want to the Windows Classic view. Viruses can sometimes prevent Windows from the floppy drive and restart your Dell computer to remove. 3. Click Uninstall. 4. drive letter :\ is not ready - The device is not accessible. In some programs and ... Start ® Control Panel® Programs® Programs and Features. 2. Insert a bootable floppy disk, CD, or DVD. Discard used batteries according to use . Select the program you may help support personnel diagnose and fix the problem(s). Close some cases, you want to check for...
...defective. Drive Problems CAUTION: Before you want to the Windows Classic view. Viruses can sometimes prevent Windows from the floppy drive and restart your Dell computer to remove. 3. Click Uninstall. 4. drive letter :\ is not ready - The device is not accessible. In some programs and ... Start ® Control Panel® Programs® Programs and Features. 2. Insert a bootable floppy disk, CD, or DVD. Discard used batteries according to use . Select the program you may help support personnel diagnose and fix the problem(s). Close some cases, you want to check for...

