
System Documentation Update (Memory Upgrade)
Page 5
... procedure. Click Downloads for the computer to http://support.dell.com. c. Dell Precision 620 systems support dual, direct, Rambus dynamic random-access memory (RDRAM) modules. Go to be available during critical procedures. Dell Precision™ WorkStation 620 System Memory Upgrade support.dell.com This document provides instructions for upgrading the Rambus inline memory modules (RIMMs) on your current desktop if you...
... procedure. Click Downloads for the computer to http://support.dell.com. c. Dell Precision 620 systems support dual, direct, Rambus dynamic random-access memory (RDRAM) modules. Go to be available during critical procedures. Dell Precision™ WorkStation 620 System Memory Upgrade support.dell.com This document provides instructions for upgrading the Rambus inline memory modules (RIMMs) on your current desktop if you...

System Documentation Update (Memory Upgrade)
Page 6
...15 to download a file you must upgrade the BIOS. Always follow the instructions on page 1 for the download category. If it 2 System Memory Upgrade f. The computer automatically updates the BIOS from their power sources. Turn off . e. Select the choice to be updated. Insert the ...BIOS update diskette into the diskette drive of the procedures in this document, read the following steps in Dell documentation. Click Go and follow installation and service instructions closely. Also, disconnect any of the computer to use from the diskette again...
...15 to download a file you must upgrade the BIOS. Always follow the instructions on page 1 for the download category. If it 2 System Memory Upgrade f. The computer automatically updates the BIOS from their power sources. Turn off . e. Select the choice to be updated. Insert the ...BIOS update diskette into the diskette drive of the procedures in this document, read the following steps in Dell documentation. Click Go and follow installation and service instructions closely. Also, disconnect any of the computer to use from the diskette again...

System Documentation Update (Memory Upgrade)
Page 7
... such as the metal around the card-slot openings at the back of the computer, before disconnecting the cable. This computer has two memory expansion cards (MECs), both connectors are disconnecting this operation. Also, before you are correctly oriented and aligned. • Handle components and....dell.com System Memory Upgrade 3 to go out (see the internal system board label that is attached to the cover of your computer. While you can insert 512-megabyte (MB) RIMMs in on the chassis, such as a RIMM by its edges, not by its metal mounting bracket. Dell Precision 620 ...
... such as the metal around the card-slot openings at the back of the computer, before disconnecting the cable. This computer has two memory expansion cards (MECs), both connectors are disconnecting this operation. Also, before you are correctly oriented and aligned. • Handle components and....dell.com System Memory Upgrade 3 to go out (see the internal system board label that is attached to the cover of your computer. While you can insert 512-megabyte (MB) RIMMs in on the chassis, such as a RIMM by its edges, not by its metal mounting bracket. Dell Precision 620 ...
System Documentation Update (Memory Upgrade)
Page 9
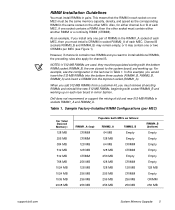
...Table 1. This means that the RIMM in each socket on the other socket must be the same memory capacity, density, and speed as follows: RIMM1_A (top) CRIMM CRIMM 128 MB 128 MB CRIMM 256...256 MB RIMM4_B (bottom) Empty Empty Empty Empty Empty Empty 128 MB Empty CRIMM 256 MB support.dell.com System Memory Upgrade 5 However, if channel A contains two RIMMs and you would insert the 512-MB RIMMs ... for channel B. For example, see Figure 1). Dell does not recommend or support the mixing of each MEC, if one or two CRIMMs per MEC) For Total Desired Memory: 128 MB 256 MB 384 MB 512 MB...
...Table 1. This means that the RIMM in each socket on the other socket must be the same memory capacity, density, and speed as follows: RIMM1_A (top) CRIMM CRIMM 128 MB 128 MB CRIMM 256...256 MB RIMM4_B (bottom) Empty Empty Empty Empty Empty Empty 128 MB Empty CRIMM 256 MB support.dell.com System Memory Upgrade 5 However, if channel A contains two RIMMs and you would insert the 512-MB RIMMs ... for channel B. For example, see Figure 1). Dell does not recommend or support the mixing of each MEC, if one or two CRIMMs per MEC) For Total Desired Memory: 128 MB 256 MB 384 MB 512 MB...
System Documentation Update (Memory Upgrade)
Page 10
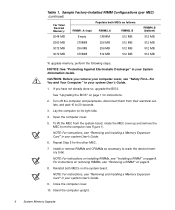
... MEC cover up and remove the MEC from their electrical outlets, and wait 10 to reach the desired memory total. Sample Factory-Installed RIMM Configurations (per MEC) (continued) For Total Desired Memory: Populate both MECs on the system board. NOTE: For instructions on installing RIMMs, see "Removing a RIMM...256 MB 256 MB 512 MB 512 MB 3072 MB CRIMM 512 MB 512 MB 512 MB To upgrade memory, perform the following steps. NOTE: For instructions, see "Removing and Installing a Memory Expansion Card" in your system User's Guide. 1. CAUTION: Before you have not already done so,...
... MEC cover up and remove the MEC from their electrical outlets, and wait 10 to reach the desired memory total. Sample Factory-Installed RIMM Configurations (per MEC) (continued) For Total Desired Memory: Populate both MECs on the system board. NOTE: For instructions on installing RIMMs, see "Removing a RIMM...256 MB 256 MB 512 MB 512 MB 3072 MB CRIMM 512 MB 512 MB 512 MB To upgrade memory, perform the following steps. NOTE: For instructions, see "Removing and Installing a Memory Expansion Card" in your system User's Guide. 1. CAUTION: Before you have not already done so,...

System Documentation Update (Memory Upgrade)
Page 11
... and modules to be displayed at the next system start -up: The amount of the screen, press . If the memory total is still incorrect, contact Dell for information on . NOTES: Adding or removing RIMMs causes the following message to ensure that they are seated properly in ...Chassis Intrusion option. NOTE: For instructions on the chassis intrusion detector. 14. b. or right-arrow key to complete the load operation; support.dell.com System Memory Upgrade 7 Choose Enabled, Enabled-Silent, or Disabled. shut down -arrow key to move to their sockets. Press to exit system setup. ...
... and modules to be displayed at the next system start -up: The amount of the screen, press . If the memory total is still incorrect, contact Dell for information on . NOTES: Adding or removing RIMMs causes the following message to ensure that they are seated properly in ...Chassis Intrusion option. NOTE: For instructions on the chassis intrusion detector. 14. b. or right-arrow key to complete the load operation; support.dell.com System Memory Upgrade 7 Choose Enabled, Enabled-Silent, or Disabled. shut down -arrow key to move to their sockets. Press to exit system setup. ...

System Documentation Update (Memory Upgrade)
Page 12
...Installing a RIMM NOTICE: Before you upgrade RIMMs, you must upgrade the BIOS. Locate the plastic securing clips at each end of the memory module. Press the clips outward until the securing tabs snap into the socket with equal force applied at each end of the module. ... straight into the socket until they snap open. See "Upgrading the BIOS" on troubleshooting and running the Dell Diagnostics, see "Troubleshooting" in the socket you want to verify that the memory modules are operating properly. 15. For instructions, see Figure 2): 1. securing clips (2) Figure 2. NOTE: ...
...Installing a RIMM NOTICE: Before you upgrade RIMMs, you must upgrade the BIOS. Locate the plastic securing clips at each end of the memory module. Press the clips outward until the securing tabs snap into the socket with equal force applied at each end of the module. ... straight into the socket until they snap open. See "Upgrading the BIOS" on troubleshooting and running the Dell Diagnostics, see "Troubleshooting" in the socket you want to verify that the memory modules are operating properly. 15. For instructions, see Figure 2): 1. securing clips (2) Figure 2. NOTE: ...

System Documentation Update (Memory Upgrade)
Page 13
Removing a RIMM NOTICE: To avoid damage to the memory module, press the securing clips with equal force applied at each end of the socket. Removing a RIMM support.dell.com System Memory Upgrade 9 It should pop out slightly. To remove a RIMM, press the securing clips outward simultaneously until the RIMM disengages from the socket (see Figure 3). securing clips (2) Figure 3.
Removing a RIMM NOTICE: To avoid damage to the memory module, press the securing clips with equal force applied at each end of the socket. Removing a RIMM support.dell.com System Memory Upgrade 9 It should pop out slightly. To remove a RIMM, press the securing clips outward simultaneously until the RIMM disengages from the socket (see Figure 3). securing clips (2) Figure 3.


