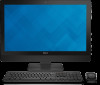

5348 AIO Owners Manual
Page 5
Replacing the Hard Drive 40 Procedure...40 Post-requisites 40 Removing the VESA-Mount Bracket 41 Prerequisites...41 Procedure...41 Replacing the VESA-Mount Bracket 42 Procedure...42 Post-requisites 42 Removing the Control-Buttons Board 43 Prerequisites...43 Procedure...43 Replacing the Control-Buttons Board 45 Procedure...45 Post-requisites 45 Removing the Converter Board 46 Prerequisites...46 Procedure...46 Replacing the Converter Board 48 Procedure...48 Post-requisites 48 Removing the Power-Supply Diagnostic Board 49 Prerequisites...49 Procedure...49
Replacing the Hard Drive 40 Procedure...40 Post-requisites 40 Removing the VESA-Mount Bracket 41 Prerequisites...41 Procedure...41 Replacing the VESA-Mount Bracket 42 Procedure...42 Post-requisites 42 Removing the Control-Buttons Board 43 Prerequisites...43 Procedure...43 Replacing the Control-Buttons Board 45 Procedure...45 Post-requisites 45 Removing the Converter Board 46 Prerequisites...46 Procedure...46 Replacing the Converter Board 48 Procedure...48 Post-requisites 48 Removing the Power-Supply Diagnostic Board 49 Prerequisites...49 Procedure...49

5348 AIO Owners Manual
Page 6
Replacing the Power-Supply Diagnostic Board 51 Procedure...51 Post-requisites 51 Removing the Microphone 52 Prerequisites...52 Procedure...52 Replacing the Microphone 54 Procedure...54 Post-requisites 54 Removing the Wireless Card 55 Prerequisites...55 Procedure...55 Replacing the Wireless Card 56 Procedure...56 Post-requisites 56 Removing the Coin-Cell Battery 57 Prerequisites...57 Procedure...58 Replacing the Coin-Cell Battery 59 Procedure...59 Post-requisites 59 Removing the I/O Bracket 60 Prerequisites...60 Procedure...61
Replacing the Power-Supply Diagnostic Board 51 Procedure...51 Post-requisites 51 Removing the Microphone 52 Prerequisites...52 Procedure...52 Replacing the Microphone 54 Procedure...54 Post-requisites 54 Removing the Wireless Card 55 Prerequisites...55 Procedure...55 Replacing the Wireless Card 56 Procedure...56 Post-requisites 56 Removing the Coin-Cell Battery 57 Prerequisites...57 Procedure...58 Replacing the Coin-Cell Battery 59 Procedure...59 Post-requisites 59 Removing the I/O Bracket 60 Prerequisites...60 Procedure...61

5348 AIO Owners Manual
Page 7
Replacing the I/O Bracket 63 Procedure...63 Post-requisites 63 Removing the Optical Drive 64 Prerequisites...64 Procedure...65 Replacing the Optical Drive 68 Procedure...68 Post-requisites 68 Removing the Power-Supply Fan 69 Prerequisites...69 Procedure...70 Replacing the Power-Supply Fan 72 Procedure...72 Post-requisites 72 Removing the Power-Supply Unit 73 Prerequisites...73 Procedure...73 Replacing the Power-Supply Unit 76 Procedure...76 Post-requisites 76 Removing the Processor Heat-Sink 77 Prerequisites...77 Procedure...77
Replacing the I/O Bracket 63 Procedure...63 Post-requisites 63 Removing the Optical Drive 64 Prerequisites...64 Procedure...65 Replacing the Optical Drive 68 Procedure...68 Post-requisites 68 Removing the Power-Supply Fan 69 Prerequisites...69 Procedure...70 Replacing the Power-Supply Fan 72 Procedure...72 Post-requisites 72 Removing the Power-Supply Unit 73 Prerequisites...73 Procedure...73 Replacing the Power-Supply Unit 76 Procedure...76 Post-requisites 76 Removing the Processor Heat-Sink 77 Prerequisites...77 Procedure...77

5348 AIO Owners Manual
Page 14
... at dell.com/regulatory_compliance. After working inside your computer and follow the instructions in Before Working Inside Your Computer. Technical Overview WARNING: Before working inside your computer, read the safety information that shipped with your computer, follow the steps in After Working Inside Your Computer. Inside View of Your Computer 1 antennas (2) 2 power-supply...
... at dell.com/regulatory_compliance. After working inside your computer and follow the instructions in Before Working Inside Your Computer. Technical Overview WARNING: Before working inside your computer, read the safety information that shipped with your computer, follow the steps in After Working Inside Your Computer. Inside View of Your Computer 1 antennas (2) 2 power-supply...

5348 AIO Owners Manual
Page 49
... more safety best practices, see the Regulatory Compliance home page at dell.com/regulatory_compliance. Removing the Power-Supply Diagnostic Board WARNING: Before working inside your computer, read the safety information that secures the power-supply diagnostic board to the I/O bracket. 49 Procedure 1 Disconnect the power-supply diagnostic board cable from the powersupply diagnostic board. 2 Remove the screw...
... more safety best practices, see the Regulatory Compliance home page at dell.com/regulatory_compliance. Removing the Power-Supply Diagnostic Board WARNING: Before working inside your computer, read the safety information that secures the power-supply diagnostic board to the I/O bracket. 49 Procedure 1 Disconnect the power-supply diagnostic board cable from the powersupply diagnostic board. 2 Remove the screw...

5348 AIO Owners Manual
Page 50
3 Lift the power-supply diagnostic board off the I/O bracket. 1 power-supply diagnostic board 3 screw 2 power-supply diagnostic board cable 4 I/O bracket 50
3 Lift the power-supply diagnostic board off the I/O bracket. 1 power-supply diagnostic board 3 screw 2 power-supply diagnostic board cable 4 I/O bracket 50

5348 AIO Owners Manual
Page 51
... Computer. For more safety best practices, see the Regulatory Compliance home page at dell.com/regulatory_compliance. Post-requisites 1 Replace the VESA-mount bracket. 2 Replace the system-board shield. 3 Replace the back cover. 4 Replace the stand assembly. 51 Replacing the Power-Supply Diagnostic Board WARNING: Before working inside your computer, read the safety information...
... Computer. For more safety best practices, see the Regulatory Compliance home page at dell.com/regulatory_compliance. Post-requisites 1 Replace the VESA-mount bracket. 2 Replace the system-board shield. 3 Replace the back cover. 4 Replace the stand assembly. 51 Replacing the Power-Supply Diagnostic Board WARNING: Before working inside your computer, read the safety information...

5348 AIO Owners Manual
Page 60
Removing the I/O Bracket WARNING: Before working inside your computer, read the safety information that shipped with your computer, follow the steps in After Working Inside Your Computer. For more safety best practices, see the Regulatory Compliance home page at dell.com/regulatory_compliance. Prerequisites 1 Remove the stand assembly. 2 Remove the back cover. 3 Remove the system-board shield. 4 Remove the VESA-mount bracket. 5 Remove the power-supply diagnostic board. 60 After working inside your computer and follow the instructions in Before Working Inside Your Computer.
Removing the I/O Bracket WARNING: Before working inside your computer, read the safety information that shipped with your computer, follow the steps in After Working Inside Your Computer. For more safety best practices, see the Regulatory Compliance home page at dell.com/regulatory_compliance. Prerequisites 1 Remove the stand assembly. 2 Remove the back cover. 3 Remove the system-board shield. 4 Remove the VESA-mount bracket. 5 Remove the power-supply diagnostic board. 60 After working inside your computer and follow the instructions in Before Working Inside Your Computer.

5348 AIO Owners Manual
Page 63
... with the screw holes on the I /O bracket. For more safety best practices, see the Regulatory Compliance home page at dell.com/regulatory_compliance. Post-requisites 1 Replace the power-supply diagnostic board. 2 Replace the VESA-mount bracket. 3 Replace the system-board shield. 4 Replace the back cover. 5 Replace the stand assembly. 63 Replacing the I/O Bracket WARNING...
... with the screw holes on the I /O bracket. For more safety best practices, see the Regulatory Compliance home page at dell.com/regulatory_compliance. Post-requisites 1 Replace the power-supply diagnostic board. 2 Replace the VESA-mount bracket. 3 Replace the system-board shield. 4 Replace the back cover. 5 Replace the stand assembly. 63 Replacing the I/O Bracket WARNING...
5348 AIO Owners Manual
Page 64
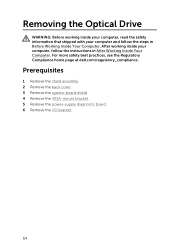
.... 2 Remove the back cover. 3 Remove the system-board shield. 4 Remove the VESA-mount bracket. 5 Remove the power-supply diagnostic board. 6 Remove the I/O bracket. 64 For more safety best practices, see the Regulatory Compliance home page at dell.com/regulatory_compliance. Removing the Optical Drive WARNING: Before working inside your computer, read the safety information...
.... 2 Remove the back cover. 3 Remove the system-board shield. 4 Remove the VESA-mount bracket. 5 Remove the power-supply diagnostic board. 6 Remove the I/O bracket. 64 For more safety best practices, see the Regulatory Compliance home page at dell.com/regulatory_compliance. Removing the Optical Drive WARNING: Before working inside your computer, read the safety information...

5348 AIO Owners Manual
Page 68
Post-requisites 1 Replace the I/O bracket. 2 Replace the power-supply diagnostic board. 3 Replace the VESA-mount bracket. 4 Replace the system-board shield. 5 Replace the back cover. 6 Replace the stand assembly. 68 For more safety best practices, see the Regulatory Compliance home page at dell.com/regulatory_compliance. Procedure 1 Route the power cable and data cable through the...
Post-requisites 1 Replace the I/O bracket. 2 Replace the power-supply diagnostic board. 3 Replace the VESA-mount bracket. 4 Replace the system-board shield. 5 Replace the back cover. 6 Replace the stand assembly. 68 For more safety best practices, see the Regulatory Compliance home page at dell.com/regulatory_compliance. Procedure 1 Route the power cable and data cable through the...
5348 AIO Owners Manual
Page 69
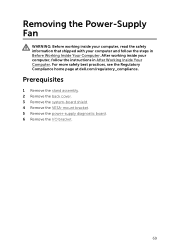
... back cover. 3 Remove the system-board shield. 4 Remove the VESA-mount bracket. 5 Remove the power-supply diagnostic board. 6 Remove the I/O bracket. 69 For more safety best practices, see the Regulatory Compliance home page at dell.com/regulatory_compliance. Removing the Power-Supply Fan WARNING: Before working inside your computer, read the safety information that shipped with...
... back cover. 3 Remove the system-board shield. 4 Remove the VESA-mount bracket. 5 Remove the power-supply diagnostic board. 6 Remove the I/O bracket. 69 For more safety best practices, see the Regulatory Compliance home page at dell.com/regulatory_compliance. Removing the Power-Supply Fan WARNING: Before working inside your computer, read the safety information that shipped with...

5348 AIO Owners Manual
Page 70
Procedure 1 Remove the screw that secures the power-supply fan bracket to the display-panel base. 2 Lift the power-supply fan bracket off the display-panel base. 1 screw 2 power-supply fan bracket 3 Disconnect the power-supply fan cable from the power-supply unit. 70
Procedure 1 Remove the screw that secures the power-supply fan bracket to the display-panel base. 2 Lift the power-supply fan bracket off the display-panel base. 1 screw 2 power-supply fan bracket 3 Disconnect the power-supply fan cable from the power-supply unit. 70

5348 AIO Owners Manual
Page 71
4 Remove the screws that secure the power-supply fan to the displaypanel base. 1 power-supply fan 3 power-supply fan cable 2 screws (2) 71
4 Remove the screws that secure the power-supply fan to the displaypanel base. 1 power-supply fan 3 power-supply fan cable 2 screws (2) 71

5348 AIO Owners Manual
Page 72
...power-supply fan cable to the power-supply unit. 2 Align the screw holes on the power-supply fan with the screw holes on the display-panel base. 3 Replace the screws that secure the power-supply... fan to the display-panel base. Post-requisites 1 Replace the I/O bracket. 2 Replace the power-supply diagnostic board. 3 .... 6 Replace the stand assembly. 72 Replacing the Power-Supply Fan WARNING: Before working inside your computer, read ...power-supply fan bracket with the screw holes on the display-panel base. 5 Replace the screw that secures the power-supply...
...power-supply fan cable to the power-supply unit. 2 Align the screw holes on the power-supply fan with the screw holes on the display-panel base. 3 Replace the screws that secure the power-supply... fan to the display-panel base. Post-requisites 1 Replace the I/O bracket. 2 Replace the power-supply diagnostic board. 3 .... 6 Replace the stand assembly. 72 Replacing the Power-Supply Fan WARNING: Before working inside your computer, read ...power-supply fan bracket with the screw holes on the display-panel base. 5 Replace the screw that secures the power-supply...

5348 AIO Owners Manual
Page 73
... safety best practices, see the Regulatory Compliance home page at dell.com/regulatory_compliance. Prerequisites 1 Remove the stand assembly. 2 Remove the back cover. 3 Remove the system-board shield. 4 Remove the VESA-mount bracket. 5 Remove the power-supply diagnostic board. 6 Remove the I/O bracket. Removing the Power-Supply Unit WARNING: Before working inside your computer, read the safety...
... safety best practices, see the Regulatory Compliance home page at dell.com/regulatory_compliance. Prerequisites 1 Remove the stand assembly. 2 Remove the back cover. 3 Remove the system-board shield. 4 Remove the VESA-mount bracket. 5 Remove the power-supply diagnostic board. 6 Remove the I/O bracket. Removing the Power-Supply Unit WARNING: Before working inside your computer, read the safety...

5348 AIO Owners Manual
Page 74
4 Disconnect the power-supply fan cable from the power-supply unit. 1 power-port cable 3 power-supply fan cable 5 power-supply fan cable 2 processor power cable 4 main power cable 5 Remove the screw that secures the power-supply unit to the displaypanel base. 74
4 Disconnect the power-supply fan cable from the power-supply unit. 1 power-port cable 3 power-supply fan cable 5 power-supply fan cable 2 processor power cable 4 main power cable 5 Remove the screw that secures the power-supply unit to the displaypanel base. 74

5348 AIO Owners Manual
Page 75
6 Slide and lift the power-supply unit to release it from the display-panel base. 1 power-supply unit 2 screw 75
6 Slide and lift the power-supply unit to release it from the display-panel base. 1 power-supply unit 2 screw 75

5348 AIO Owners Manual
Page 76
... computer and follow the instructions in Before Working Inside Your Computer. Post-requisites 1 Replace the I/O bracket. 2 Replace the power-supply diagnostic board. 3 Replace the VESA-mount bracket. 4 Replace the system-board shield. 5 Replace the back cover. 6 ...the Regulatory Compliance home page at dell.com/regulatory_compliance. supply fan cable to the power-supply unit. 5 Route the power-port cable through the routing guides on the display-panel base. 7 Connect the main power cable, processor power cable and power- Replacing the Power-Supply Unit WARNING: Before working inside ...
... computer and follow the instructions in Before Working Inside Your Computer. Post-requisites 1 Replace the I/O bracket. 2 Replace the power-supply diagnostic board. 3 Replace the VESA-mount bracket. 4 Replace the system-board shield. 5 Replace the back cover. 6 ...the Regulatory Compliance home page at dell.com/regulatory_compliance. supply fan cable to the power-supply unit. 5 Route the power-port cable through the routing guides on the display-panel base. 7 Connect the main power cable, processor power cable and power- Replacing the Power-Supply Unit WARNING: Before working inside ...

5348 AIO Owners Manual
Page 87
.... Prerequisites 1 Remove the stand assembly. 2 Remove the back cover. 3 Remove the memory module(s). 4 Remove the system-board shield. 5 Remove the VESA-mount bracket. 6 Remove the power-supply diagnostic board. 7 Remove the I/O bracket. 8 Remove the processor heat-sink. 9 Remove the processor fan. 10 Remove the processor. 11 Remove the hard drive. 12 Remove.... NOTE: Replacing the system board removes any changes you replace the system board. For more safety best practices, see the Regulatory Compliance home page at dell.com/regulatory_compliance.
.... Prerequisites 1 Remove the stand assembly. 2 Remove the back cover. 3 Remove the memory module(s). 4 Remove the system-board shield. 5 Remove the VESA-mount bracket. 6 Remove the power-supply diagnostic board. 7 Remove the I/O bracket. 8 Remove the processor heat-sink. 9 Remove the processor fan. 10 Remove the processor. 11 Remove the hard drive. 12 Remove.... NOTE: Replacing the system board removes any changes you replace the system board. For more safety best practices, see the Regulatory Compliance home page at dell.com/regulatory_compliance.


