
Specifications
Page 2
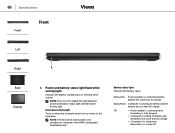
Specifications Front Front Views Left Right 1 Base Display 1 Power and battery-status light/hard-drive activity light Indicates the battery-charge status or the hard-drive activity. NOTE: The hard-drive activity light is in sleep state, hibernation, or turned off. Off • Power adapter is connected and the battery is fully charged. • Computer is running on computers with eMMC (embedded MultiMediaCard). Solid yellow Computer is connected and the battery has more than 5% charge. • Computer is not available...
Specifications Front Front Views Left Right 1 Base Display 1 Power and battery-status light/hard-drive activity light Indicates the battery-charge status or the hard-drive activity. NOTE: The hard-drive activity light is in sleep state, hibernation, or turned off. Off • Power adapter is connected and the battery is fully charged. • Computer is running on computers with eMMC (embedded MultiMediaCard). Solid yellow Computer is connected and the battery has more than 5% charge. • Computer is not available...
Specifications
Page 8
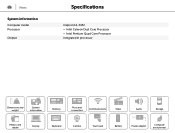
Views System information Computer model Processor Chipset Specifications Inspiron 14-3452 • Intel Celeron Dual Core Processor • Intel Pentium Quad Core Processor Integrated in processor Dimensions and weight System information Memory Ports and connectors Communications Video Audio Storage Media-card reader Display Keyboard Camera Touch pad Battery Power adapter Computer environment
Views System information Computer model Processor Chipset Specifications Inspiron 14-3452 • Intel Celeron Dual Core Processor • Intel Pentium Quad Core Processor Integrated in processor Dimensions and weight System information Memory Ports and connectors Communications Video Audio Storage Media-card reader Display Keyboard Camera Touch pad Battery Power adapter Computer environment
Specifications
Page 17
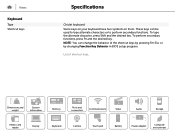
... or by changing Function Key Behavior in BIOS setup program. To type the alternate character, press Shift and the desired key. To perform secondary functions, press Fn and the desired key. Views Keyboard Type Shortcut keys Specifications Chiclet keyboard Some keys on your keyboard have two symbols on them. Dimensions and weight System information Memory Ports and connectors Communications Video Audio Storage Media-card reader Display Keyboard Camera Touch pad Battery Power adapter Computer environment NOTE: You can be used to type alternate...
... or by changing Function Key Behavior in BIOS setup program. To type the alternate character, press Shift and the desired key. To perform secondary functions, press Fn and the desired key. Views Keyboard Type Shortcut keys Specifications Chiclet keyboard Some keys on your keyboard have two symbols on them. Dimensions and weight System information Memory Ports and connectors Communications Video Audio Storage Media-card reader Display Keyboard Camera Touch pad Battery Power adapter Computer environment NOTE: You can be used to type alternate...
Specifications
Page 18
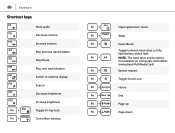
System request Toggle Scroll Lock Home End Page up Page down w Keyboard Shortcut keys Mute audio Decrease volume Increase volume Play previous track/chapter Play/Pause Play next track/chapter Switch to external display Search Decrease brightness Increase brightness Toggle Fn-key lock Turn off/on wireless Open application menu Sleep Pause/Break Toggle between hard-drive activity light/battery-status light NOTE: The hard-drive activity light is not available on computers with eMMC (embedded MultiMediaCard).
System request Toggle Scroll Lock Home End Page up Page down w Keyboard Shortcut keys Mute audio Decrease volume Increase volume Play previous track/chapter Play/Pause Play next track/chapter Switch to external display Search Decrease brightness Increase brightness Toggle Fn-key lock Turn off/on wireless Open application menu Sleep Pause/Break Toggle between hard-drive activity light/battery-status light NOTE: The hard-drive activity light is not available on computers with eMMC (embedded MultiMediaCard).
Service Manual
Page 4
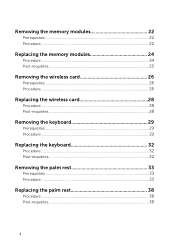
Removing the memory modules 22 Prerequisites...22 Procedure...22 Replacing the memory modules 24 Procedure...24 Post-requisites 25 Removing the wireless card 26 Prerequisites...26 Procedure...26 Replacing the wireless card 28 Procedure...28 Post-requisites 28 Removing the keyboard 29 Prerequisites...29 Procedure...29 Replacing the keyboard 32 Procedure...32 Post-requisites 32 Removing the palm rest 33 Prerequisites...33 Procedure...33 Replacing the palm rest 38 Procedure...38 Post-requisites 38 4
Removing the memory modules 22 Prerequisites...22 Procedure...22 Replacing the memory modules 24 Procedure...24 Post-requisites 25 Removing the wireless card 26 Prerequisites...26 Procedure...26 Replacing the wireless card 28 Procedure...28 Post-requisites 28 Removing the keyboard 29 Prerequisites...29 Procedure...29 Replacing the keyboard 32 Procedure...32 Post-requisites 32 Removing the palm rest 33 Prerequisites...33 Procedure...33 Replacing the palm rest 38 Procedure...38 Post-requisites 38 4
Service Manual
Page 10
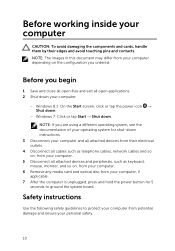
... peripherals, such as keyboard, mouse, monitor, and so on , from your computer. 5 Disconnect all attached devices from their edges and avoid touching pins and contacts. Windows 8.1: On the Start screen, click or tap the power icon → Shut down . Windows 7: Click or tap Start → Shut down . - Safety instructions Use the following safety guidelines to ground the system board. Before working inside your computer CAUTION...
... peripherals, such as keyboard, mouse, monitor, and so on , from your computer. 5 Disconnect all attached devices from their edges and avoid touching pins and contacts. Windows 8.1: On the Start screen, click or tap the power icon → Shut down . Windows 7: Click or tap Start → Shut down . - Safety instructions Use the following safety guidelines to ground the system board. Before working inside your computer CAUTION...
Service Manual
Page 11
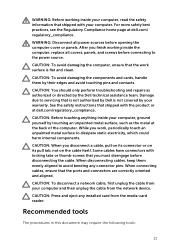
... safety instructions that the work , periodically touch an unpainted metal surface to the power source. CAUTION: Before touching anything inside your computer and then unplug the cable from the media-card reader. CAUTION: When you work surface is not covered by your computer. CAUTION: You should only perform troubleshooting and repairs as the metal at dell.com/ regulatory_compliance. WARNING: Disconnect all covers, panels, and screws before connecting...
... safety instructions that the work , periodically touch an unpainted metal surface to the power source. CAUTION: Before touching anything inside your computer and then unplug the cable from the media-card reader. CAUTION: When you work surface is not covered by your computer. CAUTION: You should only perform troubleshooting and repairs as the metal at dell.com/ regulatory_compliance. WARNING: Disconnect all covers, panels, and screws before connecting...
Service Manual
Page 13
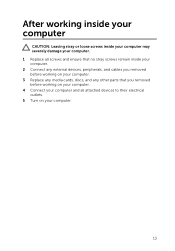
After working inside your computer CAUTION: Leaving stray or loose screws inside your computer may severely damage your computer. 1 Replace all screws and ensure that no stray screws remain inside your computer. 2 Connect any external devices, peripherals, and cables you removed before working on your computer. 3 Replace any media cards, discs, and any other parts that you removed before working on your computer. 4 Connect your computer and all attached devices to their electrical outlets. 5 Turn on your computer. 13
After working inside your computer CAUTION: Leaving stray or loose screws inside your computer may severely damage your computer. 1 Replace all screws and ensure that no stray screws remain inside your computer. 2 Connect any external devices, peripherals, and cables you removed before working on your computer. 3 Replace any media cards, discs, and any other parts that you removed before working on your computer. 4 Connect your computer and all attached devices to their electrical outlets. 5 Turn on your computer. 13
Service Manual
Page 22
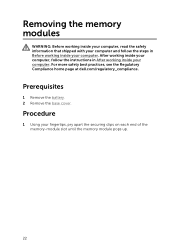
... apart the securing clips on each end of the memory-module slot until the memory module pops up. 22 Prerequisites 1 Remove the battery. 2 Remove the base cover. For more safety best practices, see the Regulatory Compliance home page at dell.com/regulatory_compliance. Removing the memory modules WARNING: Before working inside your computer, read the safety information that shipped with your computer and follow the instructions in...
... apart the securing clips on each end of the memory-module slot until the memory module pops up. 22 Prerequisites 1 Remove the battery. 2 Remove the base cover. For more safety best practices, see the Regulatory Compliance home page at dell.com/regulatory_compliance. Removing the memory modules WARNING: Before working inside your computer, read the safety information that shipped with your computer and follow the instructions in...
Service Manual
Page 25
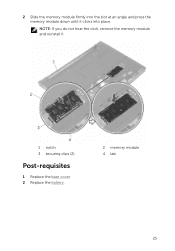
2 Slide the memory module firmly into place. NOTE: If you do not hear the click, remove the memory module and reinstall it clicks into the slot at an angle and press the memory module down until it . 1 notch 3 securing clips (2) Post-requisites 1 Replace the base cover. 2 Replace the battery. 2 memory module 4 tab 25
2 Slide the memory module firmly into place. NOTE: If you do not hear the click, remove the memory module and reinstall it clicks into the slot at an angle and press the memory module down until it . 1 notch 3 securing clips (2) Post-requisites 1 Replace the base cover. 2 Replace the battery. 2 memory module 4 tab 25
Service Manual
Page 52
... enter the Service Tag in the BIOS setup program after you replace the system board. Prerequisites 1 Remove the battery. 2 Remove the base cover. 3 Follow the procedure from step 1 to step 3 in "Removing the hard drive". 4 Remove the memory modules. 5 Remove the wireless card. 6 Remove the keyboard. 7 Follow the procedure from the system board. 52 Procedure 1 Peel the tape that you can reconnect them correctly after you replace the system board. You must make the desired changes...
... enter the Service Tag in the BIOS setup program after you replace the system board. Prerequisites 1 Remove the battery. 2 Remove the base cover. 3 Follow the procedure from step 1 to step 3 in "Removing the hard drive". 4 Remove the memory modules. 5 Remove the wireless card. 6 Remove the keyboard. 7 Follow the procedure from the system board. 52 Procedure 1 Peel the tape that you can reconnect them correctly after you replace the system board. You must make the desired changes...
Service Manual
Page 55
... BIOS using the BIOS setup program. You must make the desired changes again after you replace the system board. Replacing the system board WARNING: Before working inside your computer, read the safety information that secures the display cable to step 4 in "Replacing the thermal- CAUTION: Ensure that no cables are placed under the system board. 5 Replace the screw that secures the system board to the computer base. 6 Connect the power-adapter port cable...
... BIOS using the BIOS setup program. You must make the desired changes again after you replace the system board. Replacing the system board WARNING: Before working inside your computer, read the safety information that secures the display cable to step 4 in "Replacing the thermal- CAUTION: Ensure that no cables are placed under the system board. 5 Replace the screw that secures the system board to the computer base. 6 Connect the power-adapter port cable...
Service Manual
Page 57
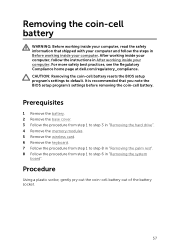
... 3 in "Removing the hard drive". 4 Remove the memory modules. 5 Remove the wireless card. 6 Remove the keyboard. 7 Follow the procedure from step 1 to default. Procedure Using a plastic scribe, gently pry out the coin-cell battery out of the battery socket. 57 CAUTION: Removing the coin-cell battery resets the BIOS setup program's settings to step 6 in "Removing the palm rest". 8 Follow the procedure from step 1 to step 8 in "Removing the system board". After working inside your...
... 3 in "Removing the hard drive". 4 Remove the memory modules. 5 Remove the wireless card. 6 Remove the keyboard. 7 Follow the procedure from step 1 to default. Procedure Using a plastic scribe, gently pry out the coin-cell battery out of the battery socket. 57 CAUTION: Removing the coin-cell battery resets the BIOS setup program's settings to step 6 in "Removing the palm rest". 8 Follow the procedure from step 1 to step 8 in "Removing the system board". After working inside your...
Service Manual
Page 60
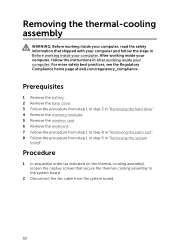
... the fan cable from step 1 to step 8 in "Removing the system board". Procedure 1 In sequential order (as indicated on the thermal-cooling assembly), loosen the captive screws that shipped with your computer and follow the instructions in Before working inside your computer. Prerequisites 1 Remove the battery. 2 Remove the base cover. 3 Follow the procedure from step 1 to step 3 in "Removing the hard drive". 4 Remove the memory modules. 5 Remove the wireless card. 6 Remove the keyboard...
... the fan cable from step 1 to step 8 in "Removing the system board". Procedure 1 In sequential order (as indicated on the thermal-cooling assembly), loosen the captive screws that shipped with your computer and follow the instructions in Before working inside your computer. Prerequisites 1 Remove the battery. 2 Remove the base cover. 3 Follow the procedure from step 1 to step 3 in "Removing the hard drive". 4 Remove the memory modules. 5 Remove the wireless card. 6 Remove the keyboard...
Service Manual
Page 63
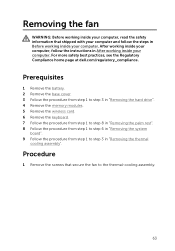
... that shipped with your computer and follow the instructions in After working inside your computer. For more safety best practices, see the Regulatory Compliance home page at dell.com/regulatory_compliance. Prerequisites 1 Remove the battery. 2 Remove the base cover. 3 Follow the procedure from step 1 to step 3 in "Removing the hard drive". 4 Remove the memory modules. 5 Remove the wireless card. 6 Remove the keyboard. 7 Follow the procedure from step 1 to step...
... that shipped with your computer and follow the instructions in After working inside your computer. For more safety best practices, see the Regulatory Compliance home page at dell.com/regulatory_compliance. Prerequisites 1 Remove the battery. 2 Remove the base cover. 3 Follow the procedure from step 1 to step 3 in "Removing the hard drive". 4 Remove the memory modules. 5 Remove the wireless card. 6 Remove the keyboard. 7 Follow the procedure from step 1 to step...
Service Manual
Page 66
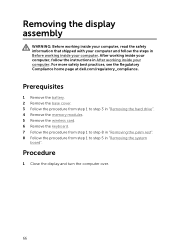
... cover. 3 Follow the procedure from step 1 to step 3 in "Removing the hard drive". 4 Remove the memory modules. 5 Remove the wireless card. 6 Remove the keyboard. 7 Follow the procedure from step 1 to step 8 in "Removing the palm rest". 8 Follow the procedure from step 1 to step 5 in Before working inside your computer. For more safety best practices, see the Regulatory Compliance home page at dell.com/regulatory_compliance. Removing the display...
... cover. 3 Follow the procedure from step 1 to step 3 in "Removing the hard drive". 4 Remove the memory modules. 5 Remove the wireless card. 6 Remove the keyboard. 7 Follow the procedure from step 1 to step 8 in "Removing the palm rest". 8 Follow the procedure from step 1 to step 5 in Before working inside your computer. For more safety best practices, see the Regulatory Compliance home page at dell.com/regulatory_compliance. Removing the display...
Service Manual
Page 72
... your computer. Prerequisites 1 Remove the battery. 2 Remove the base cover. 3 Follow the procedure from step 1 to step 3 in "Removing the hard drive". 4 Remove the memory modules. 5 Remove the wireless card. 6 Remove the keyboard. 7 Follow the procedure from step 1 to step 8 in "Removing the palm rest". 8 Follow the procedure from step 1 to step 5 in After working inside your computer, follow the steps in Before working inside your fingertips, gently...
... your computer. Prerequisites 1 Remove the battery. 2 Remove the base cover. 3 Follow the procedure from step 1 to step 3 in "Removing the hard drive". 4 Remove the memory modules. 5 Remove the wireless card. 6 Remove the keyboard. 7 Follow the procedure from step 1 to step 8 in "Removing the palm rest". 8 Follow the procedure from step 1 to step 5 in After working inside your computer, follow the steps in Before working inside your fingertips, gently...
Service Manual
Page 75
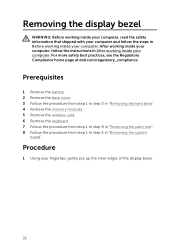
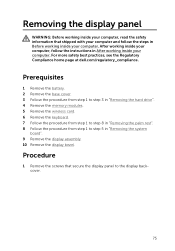
... Regulatory Compliance home page at dell.com/regulatory_compliance. Removing the display panel WARNING: Before working inside your computer, read the safety information that secure the display panel to step 5 in "Removing the system board". 9 Remove the display assembly. 10 Remove the display bezel. Prerequisites 1 Remove the battery. 2 Remove the base cover. 3 Follow the procedure from step 1 to step 3 in "Removing the hard drive". 4 Remove the memory modules. 5 Remove the wireless card. 6 Remove the keyboard. 7 Follow the procedure from...
... Regulatory Compliance home page at dell.com/regulatory_compliance. Removing the display panel WARNING: Before working inside your computer, read the safety information that secure the display panel to step 5 in "Removing the system board". 9 Remove the display assembly. 10 Remove the display bezel. Prerequisites 1 Remove the battery. 2 Remove the base cover. 3 Follow the procedure from step 1 to step 3 in "Removing the hard drive". 4 Remove the memory modules. 5 Remove the wireless card. 6 Remove the keyboard. 7 Follow the procedure from...
Service Manual
Page 85
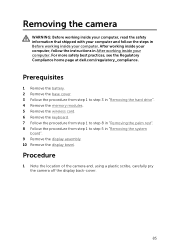
... Regulatory Compliance home page at dell.com/regulatory_compliance. Removing the camera WARNING: Before working inside your computer, read the safety information that shipped with your computer and follow the instructions in After working inside your computer. Prerequisites 1 Remove the battery. 2 Remove the base cover. 3 Follow the procedure from step 1 to step 3 in "Removing the hard drive". 4 Remove the memory modules. 5 Remove the wireless card. 6 Remove the keyboard. 7 Follow the procedure from...
... Regulatory Compliance home page at dell.com/regulatory_compliance. Removing the camera WARNING: Before working inside your computer, read the safety information that shipped with your computer and follow the instructions in After working inside your computer. Prerequisites 1 Remove the battery. 2 Remove the base cover. 3 Follow the procedure from step 1 to step 3 in "Removing the hard drive". 4 Remove the memory modules. 5 Remove the wireless card. 6 Remove the keyboard. 7 Follow the procedure from...
Quick Start Guide
Page 1
... Wireless-Netzwerk ein, wenn Sie dazu aufgefordert werden. Folgen Sie den Anweisungen auf dem Bildschirm, um das Setup abzuschließen. Suivez les instructions qui s'affichent pour terminer la configuration. Volg de aanwijzingen op het scherm om de installatie te voltooien. Inspiron 14 3000 Series Quick Start Guide Snelstartgids Guide d'information rapide Schnellstart-Handbuch Guida introduttiva rapida 1 Connect the power adapter and press the power button...
... Wireless-Netzwerk ein, wenn Sie dazu aufgefordert werden. Folgen Sie den Anweisungen auf dem Bildschirm, um das Setup abzuschließen. Suivez les instructions qui s'affichent pour terminer la configuration. Volg de aanwijzingen op het scherm om de installatie te voltooien. Inspiron 14 3000 Series Quick Start Guide Snelstartgids Guide d'information rapide Schnellstart-Handbuch Guida introduttiva rapida 1 Connect the power adapter and press the power button...


