
Me and My Dell
Page 4
Setting Up Your Webcam 22 Integrated Webcam 22 External Webcam 22 Setting up Bluetooth 22 About Your Computer 23 Power Adapter 23 Battery 24 Coin-Cell Battery 24 Touchpad 25 Display 25 Touchscreen 25 3D 25 3D Camera 26 Keyboard 26 Physical Keyboard 27 Keyboard Backlight 27 On-Screen Keyboard 28 Keyboard Connection Types 28 Wired 28 Wireless 28 Service Tag and Express-Service Code 29 Locating the Label on Your Computer 29 Dell Support Website 29 BIOS Setup Program 29 4 Contents
Setting Up Your Webcam 22 Integrated Webcam 22 External Webcam 22 Setting up Bluetooth 22 About Your Computer 23 Power Adapter 23 Battery 24 Coin-Cell Battery 24 Touchpad 25 Display 25 Touchscreen 25 3D 25 3D Camera 26 Keyboard 26 Physical Keyboard 27 Keyboard Backlight 27 On-Screen Keyboard 28 Keyboard Connection Types 28 Wired 28 Wireless 28 Service Tag and Express-Service Code 29 Locating the Label on Your Computer 29 Dell Support Website 29 BIOS Setup Program 29 4 Contents
Me and My Dell
Page 6
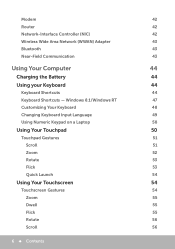
... Network‑Interface Controller (NIC) 42 Wireless Wide Area Network (WWAN) Adapter 43 Bluetooth 43 Near-Field Communication 43 Using Your Computer 44 Charging the Battery 44 Using your Keyboard 44 Keyboard Shortcuts 44 Keyboard Shortcuts - Windows 8.1/Windows RT 47 Customizing Your Keyboard 48 Changing Keyboard Input Language 49 Using Numeric...
... Network‑Interface Controller (NIC) 42 Wireless Wide Area Network (WWAN) Adapter 43 Bluetooth 43 Near-Field Communication 43 Using Your Computer 44 Charging the Battery 44 Using your Keyboard 44 Keyboard Shortcuts 44 Keyboard Shortcuts - Windows 8.1/Windows RT 47 Customizing Your Keyboard 48 Changing Keyboard Input Language 49 Using Numeric...
Me and My Dell
Page 10
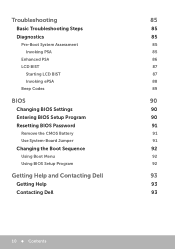
Troubleshooting 85 Basic Troubleshooting Steps 85 Diagnostics 85 Pre-Boot System Assessment 85 Invoking PSA 85 Enhanced PSA 86 LCD BIST 87 Starting LCD BIST 87 Invoking ePSA 88 Beep Codes 89 BIOS 90 Changing BIOS Settings 90 Entering BIOS Setup Program 90 Resetting BIOS Password 91 Remove the CMOS Battery 91 Use System‑Board Jumper 91 Changing the Boot Sequence 92 Using Boot Menu 92 Using BIOS Setup Program 92 Getting Help and Contacting Dell 93 Getting Help 93 Contacting Dell 93 10 Contents
Troubleshooting 85 Basic Troubleshooting Steps 85 Diagnostics 85 Pre-Boot System Assessment 85 Invoking PSA 85 Enhanced PSA 86 LCD BIST 87 Starting LCD BIST 87 Invoking ePSA 88 Beep Codes 89 BIOS 90 Changing BIOS Settings 90 Entering BIOS Setup Program 90 Resetting BIOS Password 91 Remove the CMOS Battery 91 Use System‑Board Jumper 91 Changing the Boot Sequence 92 Using Boot Menu 92 Using BIOS Setup Program 92 Getting Help and Contacting Dell 93 Getting Help 93 Contacting Dell 93 10 Contents
Me and My Dell
Page 11
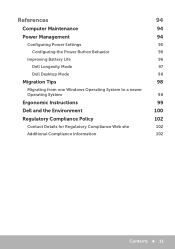
References Computer Maintenance Power Management Configuring Power Settings Configuring the Power Button Behavior Improving Battery Life Dell Longevity Mode Dell Desktop Mode Migration Tips Migrating from one Windows Operating System to a newer Operating System Ergonomic Instructions Dell and the Environment Regulatory Compliance Policy Contact Details for Regulatory Compliance Web site Additional Compliance Information 94 94 94 95 96 96 97 98 98 98 99 100 102 102 102 Contents 11
References Computer Maintenance Power Management Configuring Power Settings Configuring the Power Button Behavior Improving Battery Life Dell Longevity Mode Dell Desktop Mode Migration Tips Migrating from one Windows Operating System to a newer Operating System Ergonomic Instructions Dell and the Environment Regulatory Compliance Policy Contact Details for Regulatory Compliance Web site Additional Compliance Information 94 94 94 95 96 96 97 98 98 98 99 100 102 102 102 Contents 11

Me and My Dell
Page 24
... you need to charge high-capacity batteries less often compared to a power outlet. Depending on the computer model, the battery on your computer. The CMOS chip contains the time, date, and other configuration information about your computer may require a Dell service technician to use your device ...when it can last for which the computer is powered off . NOTE: For tips on . The factors that affect coin‑cell battery life are mainly classified by their power ratings, ...
... you need to charge high-capacity batteries less often compared to a power outlet. Depending on the computer model, the battery on your computer. The CMOS chip contains the time, date, and other configuration information about your computer may require a Dell service technician to use your device ...when it can last for which the computer is powered off . NOTE: For tips on . The factors that affect coin‑cell battery life are mainly classified by their power ratings, ...
Me and My Dell
Page 28
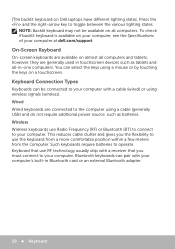
... computer using a mouse or by touching the keys on all computers and tablets, however, they are connected to your computer at dell.com/support. To check if backlit keyboard is available on your computer, see the Specifications of your computer. You can select the...NOTE: Backlit keyboard may not be connected to your computer with a cable (wired) or using wireless signals (wireless). Such keyboards require batteries to toggle between the various lighting states. Bluetooth keyboards can be available on a touchscreen. Wireless Wireless keyboards use the keyboard from a more...
... computer using a mouse or by touching the keys on all computers and tablets, however, they are connected to your computer at dell.com/support. To check if backlit keyboard is available on your computer, see the Specifications of your computer. You can select the...NOTE: Backlit keyboard may not be connected to your computer with a cable (wired) or using wireless signals (wireless). Such keyboards require batteries to toggle between the various lighting states. Bluetooth keyboards can be available on a touchscreen. Wireless Wireless keyboards use the keyboard from a more...

Me and My Dell
Page 29
...the instructions on (or restart) your computer. 2. If you miss the prompt, wait for the F2 prompt to appear and then press immediately to dell.com/support. 2. For more information, see the Service Manual of your computer. Service Tag and Express-Service Code You can find the Service Tag...Service Code of your computer using one of the following: • Label on the computer or tablet • My Dell tile or My Dell software on your computer at dell.com/support. Back or top of the laptop (under system badge or in battery bay) Desktops - Dell Support Website 1. Turn on the screen.
...the instructions on (or restart) your computer. 2. If you miss the prompt, wait for the F2 prompt to appear and then press immediately to dell.com/support. 2. For more information, see the Service Manual of your computer. Service Tag and Express-Service Code You can find the Service Tag...Service Code of your computer using one of the following: • Label on the computer or tablet • My Dell tile or My Dell software on your computer at dell.com/support. Back or top of the laptop (under system badge or in battery bay) Desktops - Dell Support Website 1. Turn on the screen.

Me and My Dell
Page 34
... important components of system board and the computer it is designed for. 1 processor socket 3 power connector 5 PCI-Express x1 connector 7 eSATA connector 2 memory-module connector 4 battery socket 6 PCI-Express x16 connector 8 processor 34 System Board System Board A system board forms the central part of the computer. All other devices connect...
... important components of system board and the computer it is designed for. 1 processor socket 3 power connector 5 PCI-Express x1 connector 7 eSATA connector 2 memory-module connector 4 battery socket 6 PCI-Express x16 connector 8 processor 34 System Board System Board A system board forms the central part of the computer. All other devices connect...
Me and My Dell
Page 44
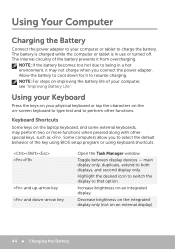
... too hot due to being in use or turned off. NOTE: For steps on improving the battery life of your computer or tablet to charge the battery. Some computers allow you connect the power adapter. and up-arrow key and down for it may perform two or more functions when pressed ... to switch the display to both displays, and second display only. Decrease brightness on the integrated display only (not on an integrated display. Allow the battery to cool down -arrow key Open the Task Manager window. Using your Keyboard Press the keys on your physical keyboard or tap the characters on...
... too hot due to being in use or turned off. NOTE: For steps on improving the battery life of your computer or tablet to charge the battery. Some computers allow you connect the power adapter. and up-arrow key and down for it may perform two or more functions when pressed ... to switch the display to both displays, and second display only. Decrease brightness on the integrated display only (not on an integrated display. Allow the battery to cool down -arrow key Open the Task Manager window. Using your Keyboard Press the keys on your physical keyboard or tap the characters on...
Me and My Dell
Page 61
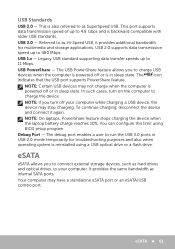
... port supports PowerShare feature. In such cases, turn off or in sleep state. NOTE: On laptops, PowerShare feature stops charging the device when the laptop battery charge reaches 10%. USB 2.0 - Debug Port - The debug port enables a user to charge the device. eSATA eSATA allows you to as internal SATA ports. Referred...
... port supports PowerShare feature. In such cases, turn off or in sleep state. NOTE: On laptops, PowerShare feature stops charging the device when the laptop battery charge reaches 10%. USB 2.0 - Debug Port - The debug port enables a user to charge the device. eSATA eSATA allows you to as internal SATA ports. Referred...
Me and My Dell
Page 69
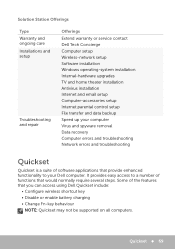
... Offerings Type Warranty and ongoing care Installations and setup Troubleshooting and repair Offerings Extend warranty or service contact Dell Tech Concierge Computer setup Wireless‑network setup Software installation Windows operating‑system installation Internal‑hardware upgrades... provides easy access to your Dell computer. Some of the features that provide enhanced functionality to a number of software applications that you can access using Dell Quickset include: • Configure wireless shortcut key • Disable or enable battery charging • Change Fn...
... Offerings Type Warranty and ongoing care Installations and setup Troubleshooting and repair Offerings Extend warranty or service contact Dell Tech Concierge Computer setup Wireless‑network setup Software installation Windows operating‑system installation Internal‑hardware upgrades... provides easy access to your Dell computer. Some of the features that provide enhanced functionality to a number of software applications that you can access using Dell Quickset include: • Configure wireless shortcut key • Disable or enable battery charging • Change Fn...

Me and My Dell
Page 87
..., see colored lines on the screen and if you determine if a display problem is caused by the LCD or some other part. Press at the Dell logo to enter the LCD BIST. The test may have diagnostics specific to wait until you do not see the documentation of the...
..., see colored lines on the screen and if you determine if a display problem is caused by the LCD or some other part. Press at the Dell logo to enter the LCD BIST. The test may have diagnostics specific to wait until you do not see the documentation of the...
Me and My Dell
Page 91
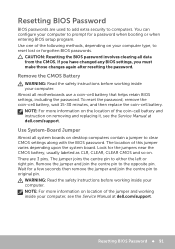
.... Use one of the coin‑cell battery and instruction on your computer type, to computers. Almost all data from the CMOS. WARNING: Read the safety instructions before working inside your computer, see the Service Manual at dell.com/support. NOTE: For more information on...more information on the location of the following methods, depending on removing and replacing it, see the Service Manual at dell.com/support. Remove the CMOS Battery WARNING: Read the safety instructions before working inside your computer to prompt for a password when booting or when entering...
.... Use one of the coin‑cell battery and instruction on your computer type, to computers. Almost all data from the CMOS. WARNING: Read the safety instructions before working inside your computer, see the Service Manual at dell.com/support. NOTE: For more information on...more information on the location of the following methods, depending on removing and replacing it, see the Service Manual at dell.com/support. Remove the CMOS Battery WARNING: Read the safety instructions before working inside your computer to prompt for a password when booting or when entering...

Me and My Dell
Page 96
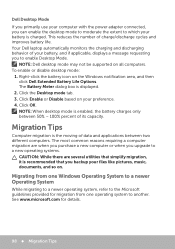
... 96 Power Management Click Save changes. You may choose different option when your Control Panel is the time the battery can hold a charge, varies depending on battery and when it is connected to do . 3. Choose what you use your computer to a power adapter. 6. Improving...View by: drop‑down menu next to When I press the power button. Click All apps at the bottom-right corner of your battery significantly reduces if you want your laptop computer. Under Windows System, click Control Panel. 4. Click Power Options.Choose what you want your ...
... 96 Power Management Click Save changes. You may choose different option when your Control Panel is the time the battery can hold a charge, varies depending on battery and when it is connected to do . 3. Choose what you use your computer to a power adapter. 6. Improving...View by: drop‑down menu next to When I press the power button. Click All apps at the bottom-right corner of your battery significantly reduces if you want your laptop computer. Under Windows System, click Control Panel. 4. Click Power Options.Choose what you want your ...

Me and My Dell
Page 97
... Management"). • Enabling the Sleep/Standby and Hibernation features of the battery decreases over time depending on the Windows notification area and click Dell Extended Battery Life Options. You can configure the battery‑charging behavior to turn off Dell longevity mode. 4. Your Dell laptop automatically monitors the charging and discharging behavior of its capacity. Right...
... Management"). • Enabling the Sleep/Standby and Hibernation features of the battery decreases over time depending on the Windows notification area and click Dell Extended Battery Life Options. You can configure the battery‑charging behavior to turn off Dell longevity mode. 4. Your Dell laptop automatically monitors the charging and discharging behavior of its capacity. Right...
Me and My Dell
Page 98
...not be supported on the Windows notification area, and then click Dell Extended Battery Life Options. To enable or disable desktop mode: 1. This reduces the number of its capacity. Click Enable or Disable based on your battery, and if applicable, displays a message requesting you to the ... enable the desktop mode to moderate the extent to another. The Battery Meter dialog box is the moving of data and applications between 50% - 100% percent of charge/discharge cycles and improves battery life. Dell Desktop Mode If you primarily use your computer with the power adapter...
...not be supported on the Windows notification area, and then click Dell Extended Battery Life Options. To enable or disable desktop mode: 1. This reduces the number of its capacity. Click Enable or Disable based on your battery, and if applicable, displays a message requesting you to the ... enable the desktop mode to moderate the extent to another. The Battery Meter dialog box is the moving of data and applications between 50% - 100% percent of charge/discharge cycles and improves battery life. Dell Desktop Mode If you primarily use your computer with the power adapter...

Owners Manual
Page 3
Contents Before Working Inside Your Computer 9 Before You Begin 9 Safety Instructions 9 Recommended Tools 10 After Working Inside Your Computer 11 Removing the Battery 12 Procedure...12 Replacing the Battery 13 Procedure...13 Removing the Optical Drive 14 Prerequisites...14 Procedure...14 Replacing the Optical Drive 16 Procedure...16 Post-requisites 16 Removing the Base Cover 17 Prerequisites...17 Procedure...17 Replacing the Base Cover 18 Procedure...18 Post-requisites 18
Contents Before Working Inside Your Computer 9 Before You Begin 9 Safety Instructions 9 Recommended Tools 10 After Working Inside Your Computer 11 Removing the Battery 12 Procedure...12 Replacing the Battery 13 Procedure...13 Removing the Optical Drive 14 Prerequisites...14 Procedure...14 Replacing the Optical Drive 16 Procedure...16 Post-requisites 16 Removing the Base Cover 17 Prerequisites...17 Procedure...17 Replacing the Base Cover 18 Procedure...18 Post-requisites 18

Owners Manual
Page 6
Removing the Speakers 52 Prerequisites...52 Procedure...52 Replacing the Speakers 54 Procedure...54 Post-requisites 54 Removing the Coin-Cell Battery 55 Prerequisites...55 Procedure...55 Replacing the Coin-Cell Battery 57 Procedure...57 Post-requisites 57 Removing the Power-Adapter Port 58 Prerequisites...58 Procedure...58 Replacing the Power-Adapter Port 60 Procedure...60 Post-requisites 60 Removing the System Board 61 Prerequisites...61 Procedure...61 Replacing the System Board 64 Procedure...64 Post-requisites 64
Removing the Speakers 52 Prerequisites...52 Procedure...52 Replacing the Speakers 54 Procedure...54 Post-requisites 54 Removing the Coin-Cell Battery 55 Prerequisites...55 Procedure...55 Replacing the Coin-Cell Battery 57 Procedure...57 Post-requisites 57 Removing the Power-Adapter Port 58 Prerequisites...58 Procedure...58 Replacing the Power-Adapter Port 60 Procedure...60 Post-requisites 60 Removing the System Board 61 Prerequisites...61 Procedure...61 Replacing the System Board 64 Procedure...64 Post-requisites 64

Owners Manual
Page 12
... the power button for five seconds to the unlock position. You hear a click sound when the battery is unlocked. 3 Using your fingertips, lift the battery at dell.com/regulatory_compliance. After working inside your computer, follow the steps in After Working Inside Your Computer. ...Removing the Battery WARNING: Before working inside your computer, read the safety information that shipped with your...
... the power button for five seconds to the unlock position. You hear a click sound when the battery is unlocked. 3 Using your fingertips, lift the battery at dell.com/regulatory_compliance. After working inside your computer, follow the steps in After Working Inside Your Computer. ...Removing the Battery WARNING: Before working inside your computer, read the safety information that shipped with your...

Owners Manual
Page 13
Replacing the Battery WARNING: Before working inside your computer, read the safety information that shipped with your computer, follow the steps in After Working Inside Your Computer. For more safety best practices, see the Regulatory Compliance home page at dell.com/regulatory_compliance. Procedure Slide the tabs on the battery into the slots on the battery bay and snap the battery into place. 13 After working inside your computer and follow the instructions in Before Working Inside Your Computer.
Replacing the Battery WARNING: Before working inside your computer, read the safety information that shipped with your computer, follow the steps in After Working Inside Your Computer. For more safety best practices, see the Regulatory Compliance home page at dell.com/regulatory_compliance. Procedure Slide the tabs on the battery into the slots on the battery bay and snap the battery into place. 13 After working inside your computer and follow the instructions in Before Working Inside Your Computer.

