
Service Manual
Page 1
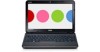
... this document to refer to either trademarks or registered trademarks of these materials in trademarks and trade names other countries; Dell™ Inspiron™ 1121 Service Manual Before You Begin Battery Memory Module(s) Keyboard Hard Drive Palm Rest Power Button Board Wireless Mini-Card(s) Audio Board Coin-Cell Battery Display Camera Middle Cover AC Adapter...
... this document to refer to either trademarks or registered trademarks of these materials in trademarks and trade names other countries; Dell™ Inspiron™ 1121 Service Manual Before You Begin Battery Memory Module(s) Keyboard Hard Drive Palm Rest Power Button Board Wireless Mini-Card(s) Audio Board Coin-Cell Battery Display Camera Middle Cover AC Adapter...

Service Manual
Page 2
... the AC Adapter Connector 1. Lift and remove the bracket off the computer base. Back to Contents Page AC Adapter Connector Dell™ Inspiron™ 1121 Service Manual Removing the AC Adapter Connector Replacing the AC Adapter Connector WARNING: Before working inside your computer, read the safety... by Dell™ is not covered by periodically touching an unpainted metal surface (such as shown in Before You Begin. 2. CAUTION: Only a certified service technician should perform repairs on the system board. 11. CAUTION: To help prevent damage to step 6 in Removing the Hard Drive. 5....
... the AC Adapter Connector 1. Lift and remove the bracket off the computer base. Back to Contents Page AC Adapter Connector Dell™ Inspiron™ 1121 Service Manual Removing the AC Adapter Connector Replacing the AC Adapter Connector WARNING: Before working inside your computer, read the safety... by Dell™ is not covered by periodically touching an unpainted metal surface (such as shown in Before You Begin. 2. CAUTION: Only a certified service technician should perform repairs on the system board. 11. CAUTION: To help prevent damage to step 6 in Removing the Hard Drive. 5....

Service Manual
Page 3
... Replacing the Display Assembly). 8. Failure to do so may result in damage to the connector on the system board. 4. Follow the instructions in Replacing the Hard Drive. 10. Replace the middle cover (see Replacing the Palm Rest). 9. Replace the palm rest (see Replacing the Middle Cover). 7. CAUTION: Before turning on the computer...
... Replacing the Display Assembly). 8. Failure to do so may result in damage to the connector on the system board. 4. Follow the instructions in Replacing the Hard Drive. 10. Replace the middle cover (see Replacing the Palm Rest). 9. Replace the palm rest (see Replacing the Middle Cover). 7. CAUTION: Before turning on the computer...

Service Manual
Page 4
... secure the audio board to the computer base. 9. Disconnect the Mini-Card antenna cables from step 4 to step 6 in Removing the Hard Drive. 5. Remove the battery (see Removing the Keyboard). 4. Follow the instructions from the Mini-Card(s). 7. Disconnect the audio cable and the... 6. Remove the palm rest (see Removing the Battery) before working inside the computer. Back to Contents Page Audio Board Dell™ Inspiron™ 1121 Service Manual Removing the Audio Board Replacing the Audio Board WARNING: Before working inside your computer, read the safety information that ...
... secure the audio board to the computer base. 9. Disconnect the Mini-Card antenna cables from step 4 to step 6 in Removing the Hard Drive. 5. Remove the battery (see Removing the Keyboard). 4. Follow the instructions from the Mini-Card(s). 7. Disconnect the audio cable and the... 6. Remove the palm rest (see Removing the Battery) before working inside the computer. Back to Contents Page Audio Board Dell™ Inspiron™ 1121 Service Manual Removing the Audio Board Replacing the Audio Board WARNING: Before working inside your computer, read the safety information that ...
Service Manual
Page 5
... the Mini-Card antenna cables to Contents Page Replace the palm rest (see Replacing the Battery). Failure to do so may result in Replacing the Hard Drive. 8. Replace the keyboard (see Replacing the Keyboard). 9. 3. Replace the three screws that no stray screws remain inside the computer. CAUTION: Before turning on the audio...
... the Mini-Card antenna cables to Contents Page Replace the palm rest (see Replacing the Battery). Failure to do so may result in Replacing the Hard Drive. 8. Replace the keyboard (see Replacing the Keyboard). 9. 3. Replace the three screws that no stray screws remain inside the computer. CAUTION: Before turning on the audio...

Service Manual
Page 12
Back to Contents Page Camera Dell™ Inspiron™ 1121 Service Manual Removing the Camera Replacing the Camera WARNING: Before working inside your computer, read the safety information that is not authorized by Dell™ is not covered by periodically touching an unpainted metal surface (such as a... 1. Disconnect the camera cable from step 4 to servicing that shipped with your warranty. Damage due to step 6 in Removing the Hard Drive. 5. Place the camera module on the display back cover using a wrist grounding strap or by your computer. CAUTION: To help ...
Back to Contents Page Camera Dell™ Inspiron™ 1121 Service Manual Removing the Camera Replacing the Camera WARNING: Before working inside your computer, read the safety information that is not authorized by Dell™ is not covered by periodically touching an unpainted metal surface (such as a... 1. Disconnect the camera cable from step 4 to servicing that shipped with your warranty. Damage due to step 6 in Removing the Hard Drive. 5. Place the camera module on the display back cover using a wrist grounding strap or by your computer. CAUTION: To help ...
Service Manual
Page 13
...). 10. Replace the keyboard (see Replacing the Display Assembly). 7. CAUTION: Before turning on the camera module. 5. Failure to do so may result in Replacing the Hard Drive. 9. Back to the computer. Replace the palm rest (see Replacing the Display Bezel). 6. Replace the display bezel (see Replacing the Palm Rest). 8. Follow the instructions...
...). 10. Replace the keyboard (see Replacing the Display Assembly). 7. CAUTION: Before turning on the camera module. 5. Failure to do so may result in Replacing the Hard Drive. 9. Back to the computer. Replace the palm rest (see Replacing the Display Bezel). 6. Replace the display bezel (see Replacing the Palm Rest). 8. Follow the instructions...

Service Manual
Page 14
... (see Removing the Keyboard). 4. Damage due to the system board. 3. Follow the instructions from step 5 to step 6 in Replacing the Hard Drive. 6. Using a plastic scribe, gently pry the coin-cell battery off the system board. 1 coin-cell battery 2 system board connector Replacing ... Rest). 6. Remove the battery (see the Regulatory Compliance Homepage at www.dell.com/regulatory_compliance. Connect the coin-cell battery cable to Contents Page Coin-Cell Battery Dell™ Inspiron™ 1121 Service Manual Removing the Coin-Cell Battery Replacing the Coin-Cell Battery WARNING:...
... (see Removing the Keyboard). 4. Damage due to the system board. 3. Follow the instructions from step 5 to step 6 in Replacing the Hard Drive. 6. Using a plastic scribe, gently pry the coin-cell battery off the system board. 1 coin-cell battery 2 system board connector Replacing ... Rest). 6. Remove the battery (see the Regulatory Compliance Homepage at www.dell.com/regulatory_compliance. Connect the coin-cell battery cable to Contents Page Coin-Cell Battery Dell™ Inspiron™ 1121 Service Manual Removing the Coin-Cell Battery Replacing the Coin-Cell Battery WARNING:...

Service Manual
Page 20
...cable connector 2 Mini-Card antenna cables 9. Remove the battery (see the Regulatory Compliance Homepage at www.dell.com/regulatory_compliance. Follow the instructions in Removing the Hard Drive. 5. Make note of the cable routing and carefully dislodge the Mini-Card antenna cables from step 4...base. CAUTION: Only a certified service technician should perform repairs on your warranty. Back to Contents Page Display Dell™ Inspiron™ 1121 Service Manual Display Assembly Display Bezel Display Panel Display-Panel Brackets WARNING: Before working inside your computer, read the...
...cable connector 2 Mini-Card antenna cables 9. Remove the battery (see the Regulatory Compliance Homepage at www.dell.com/regulatory_compliance. Follow the instructions in Removing the Hard Drive. 5. Make note of the cable routing and carefully dislodge the Mini-Card antenna cables from step 4...base. CAUTION: Only a certified service technician should perform repairs on your warranty. Back to Contents Page Display Dell™ Inspiron™ 1121 Service Manual Display Assembly Display Bezel Display Panel Display-Panel Brackets WARNING: Before working inside your computer, read the...
Service Manual
Page 21
... from step 5 to prevent damaging the bezel. 1. Remove the two rubber pads covering the screws on the computer base. 5. Follow the instructions in Replacing the Hard Drive. 8. Route the Mini-Card antenna cables through the routing guides on the display bezel. 4. Follow the instructions from the display back cover. 1 display assembly 2 screws...
... from step 5 to prevent damaging the bezel. 1. Remove the two rubber pads covering the screws on the computer base. 5. Follow the instructions in Replacing the Hard Drive. 8. Route the Mini-Card antenna cables through the routing guides on the display bezel. 4. Follow the instructions from the display back cover. 1 display assembly 2 screws...

Service Manual
Page 26
Back to Contents Page Hard Drive Dell™ Inspiron™ 1121 Service Manual Removing the Hard Drive Replacing the Hard Drive WARNING: Before working inside your computer, read the safety information that secure the hard-drive assembly to the hard drive. 8. CAUTION: Only a certified service technician should perform repairs on your computer). 6. CAUTION: To help prevent damage to the system board, remove the main...
Back to Contents Page Hard Drive Dell™ Inspiron™ 1121 Service Manual Removing the Hard Drive Replacing the Hard Drive WARNING: Before working inside your computer, read the safety information that secure the hard-drive assembly to the hard drive. 8. CAUTION: Only a certified service technician should perform repairs on your computer). 6. CAUTION: To help prevent damage to the system board, remove the main...

Service Manual
Page 27
.... Failure to the hard drive. 5. Replace the two screws that secure the hard-drive bracket to do so may result in the hard-drive bracket. 4. Follow the instructions in the computer base. 6. Place the hard-drive assembly in Before You Begin. 2. See "Restoring Your Operating System" in the Setup Guide. 11. 1 hard-drive bracket 3 screws (4) 2 hard drive Replacing the Hard Drive 1. Replace the four...
.... Failure to the hard drive. 5. Replace the two screws that secure the hard-drive bracket to do so may result in the hard-drive bracket. 4. Follow the instructions in the computer base. 6. Place the hard-drive assembly in Before You Begin. 2. See "Restoring Your Operating System" in the Setup Guide. 11. 1 hard-drive bracket 3 screws (4) 2 hard drive Replacing the Hard Drive 1. Replace the four...

Service Manual
Page 28
...assembly (see the Regulatory Compliance Homepage at www.dell.com/regulatory_compliance. Back to Contents Page Middle Cover Dell™ Inspiron™ 1121 Service Manual Removing the Middle Cover Replacing the Middle... Cover WARNING: Before working inside your computer, read the safety information that shipped with your computer. CAUTION: To avoid electrostatic discharge, ground yourself by using a wrist grounding strap or by your computer). Follow the instructions in Removing the Hard Drive...
...assembly (see the Regulatory Compliance Homepage at www.dell.com/regulatory_compliance. Back to Contents Page Middle Cover Dell™ Inspiron™ 1121 Service Manual Removing the Middle Cover Replacing the Middle... Cover WARNING: Before working inside your computer, read the safety information that shipped with your computer. CAUTION: To avoid electrostatic discharge, ground yourself by using a wrist grounding strap or by your computer). Follow the instructions in Removing the Hard Drive...
Service Manual
Page 29
... (see Replacing the Palm Rest). 7. 1 middle cover Replacing the Middle Cover 1. Replace the keyboard (see Replacing the Display Assembly). 6. Follow the instructions in Replacing the Hard Drive. 8. Replace the display assembly (see Replacing the Keyboard). 9.
... (see Replacing the Palm Rest). 7. 1 middle cover Replacing the Middle Cover 1. Replace the keyboard (see Replacing the Display Assembly). 6. Follow the instructions in Replacing the Hard Drive. 8. Replace the display assembly (see Replacing the Keyboard). 9.

Service Manual
Page 38
...Mini-Card or one half Mini-Card slot: l One full Mini-Card slot - Back to Contents Page Wireless Mini-Card(s) Dell™ Inspiron™ 1121 Service Manual Removing the Mini-Card(s) Replacing the Mini-Card(s) WARNING: Before working inside your computer, read the safety information ... to step 6 in Removing the Hard Drive. 5. supports Wireless Local Area Network (WLAN), WLAN/Bluetooth® combo, or Worldwide Interoperability for Mini-Cards from sources other than Dell. If you ordered a wireless Mini-Card with your computer). NOTE: Dell does not guarantee compatibility or provide ...
...Mini-Card or one half Mini-Card slot: l One full Mini-Card slot - Back to Contents Page Wireless Mini-Card(s) Dell™ Inspiron™ 1121 Service Manual Removing the Mini-Card(s) Replacing the Mini-Card(s) WARNING: Before working inside your computer, read the safety information ... to step 6 in Removing the Hard Drive. 5. supports Wireless Local Area Network (WLAN), WLAN/Bluetooth® combo, or Worldwide Interoperability for Mini-Cards from sources other than Dell. If you ordered a wireless Mini-Card with your computer). NOTE: Dell does not guarantee compatibility or provide ...

Service Manual
Page 39
... color scheme for your computer. Replace the keyboard (see Replacing the Palm Rest). 8. Remove the new Mini-Card from step 5 to step 7 in Replacing the Hard Drive. 9. If you use excessive force, you feel resistance, check the connectors on the card and on the Mini-Card WWAN (2 antenna cables) Antenna Cable Color...
... color scheme for your computer. Replace the keyboard (see Replacing the Palm Rest). 8. Remove the new Mini-Card from step 5 to step 7 in Replacing the Hard Drive. 9. If you use excessive force, you feel resistance, check the connectors on the card and on the Mini-Card WWAN (2 antenna cables) Antenna Cable Color...

Service Manual
Page 43
Damage due to servicing that is not authorized by Dell™ is not covered by periodically touching an unpainted metal surface (such as possible. 9. Follow the instructions in Removing the Hard Drive. 5. Remove the four screws that cover the palm rest screws on your computer). Lift...that secure the palm rest to the computer base. 1 rubber caps (2) 2 screws (4) 8. Back to Contents Page Palm Rest Dell™ Inspiron™ 1121 Service Manual Removing the Palm Rest Replacing the Palm Rest WARNING: Before working inside your computer, read the safety information that secure the...
Damage due to servicing that is not authorized by Dell™ is not covered by periodically touching an unpainted metal surface (such as possible. 9. Follow the instructions in Removing the Hard Drive. 5. Remove the four screws that cover the palm rest screws on your computer). Lift...that secure the palm rest to the computer base. 1 rubber caps (2) 2 screws (4) 8. Back to Contents Page Palm Rest Dell™ Inspiron™ 1121 Service Manual Removing the Palm Rest Replacing the Palm Rest WARNING: Before working inside your computer, read the safety information that secure the...

Service Manual
Page 44
... to secure the cables. 4. Follow the instructions from step 5 to Contents Page Replace the battery (see Replacing the Keyboard). 7. Back to step 7 in Replacing the Hard Drive. 6.
... to secure the cables. 4. Follow the instructions from step 5 to Contents Page Replace the battery (see Replacing the Keyboard). 7. Back to step 7 in Replacing the Hard Drive. 6.

Service Manual
Page 45
.... 2. Remove the battery (see Removing the Keyboard). 4. Follow the instructions from step 4 to step 6 in Replacing the Hard Drive. CAUTION: Only a certified service technician should perform repairs on the power button board with your computer. Remove the palm rest ...Dell™ Inspiron™ 1121 Service Manual Removing the Power Button Board Replacing the Power Button Board WARNING: Before working inside your computer, read the safety information that secures the power button board to the palm rest. 4. Follow the instructions from step 5 to step 7 in Removing the Hard Drive...
.... 2. Remove the battery (see Removing the Keyboard). 4. Follow the instructions from step 4 to step 6 in Replacing the Hard Drive. CAUTION: Only a certified service technician should perform repairs on the power button board with your computer. Remove the palm rest ...Dell™ Inspiron™ 1121 Service Manual Removing the Power Button Board Replacing the Power Button Board WARNING: Before working inside your computer, read the safety information that secures the power button board to the palm rest. 4. Follow the instructions from step 5 to step 7 in Removing the Hard Drive...

Service Manual
Page 51
...(s)). 8. Remove the screw that secures the system board to step 6 in Before You Begin. 2. Follow the instructions in Removing the Hard Drive. 6. Remove the Mini-Card(s) (see Removing the Middle Cover). 10. Remove the display assembly (see Removing the Battery). 3. Disconnect... 9. CAUTION: Only a certified service technician should perform repairs on your computer. Damage due to Contents Page System Board Dell™ Inspiron™ 1121 Service Manual Removing the System Board Replacing the System Board WARNING: Before working inside your computer, read the safety information...
...(s)). 8. Remove the screw that secures the system board to step 6 in Before You Begin. 2. Follow the instructions in Removing the Hard Drive. 6. Remove the Mini-Card(s) (see Removing the Middle Cover). 10. Remove the display assembly (see Removing the Battery). 3. Disconnect... 9. CAUTION: Only a certified service technician should perform repairs on your computer. Damage due to Contents Page System Board Dell™ Inspiron™ 1121 Service Manual Removing the System Board Replacing the System Board WARNING: Before working inside your computer, read the safety information...


