
Comprehensive Specifications
Page 4
... up to 2.11 inches) 405.89 mm (15.98 inches) 321.31 mm (12.65 inches) 5.3 kg (11.8 lb) NOTE: The weight of your laptop will vary depending on computers with 9-cell battery (starting at) 51.31 mm to 53.59 mm (2.02 inches to 1333 MHz Processor address bus...1067 MHz, 1333 MHz (dual-channel configurations) NOTE: DDR3 1333 MHz memory is supported only on the configuration ordered and the manufacturing variability. Computer Model Alienware M17x-R2 Dimensions Height (Front to Back) Width Depth Weight with an Intel Core i7 processor. 4 GB, 6 GB, and 8 GB 4 COMPREHENSIVE SPECIFICATIONS
... up to 2.11 inches) 405.89 mm (15.98 inches) 321.31 mm (12.65 inches) 5.3 kg (11.8 lb) NOTE: The weight of your laptop will vary depending on computers with 9-cell battery (starting at) 51.31 mm to 53.59 mm (2.02 inches to 1333 MHz Processor address bus...1067 MHz, 1333 MHz (dual-channel configurations) NOTE: DDR3 1333 MHz memory is supported only on the configuration ordered and the manufacturing variability. Computer Model Alienware M17x-R2 Dimensions Height (Front to Back) Width Depth Weight with an Intel Core i7 processor. 4 GB, 6 GB, and 8 GB 4 COMPREHENSIVE SPECIFICATIONS
Mobile Manual
Page 3
... 17 Computer Base and Keyboard Features 18 Status Lights 19 Touch Controls 19 Power Button 20 Function Keys 21 CHAPTER 3: USING YOUR LAPTOP 23 Connecting External Displays 24 Using Removable Media and Cards 25 Using the Optical Drive 25 Using the Integrated Camera 26 Using the ...Wireless Control 26 Battery Pack 26 Power Management 26 Alienware Command Center 27 Stealth Mode 27 Free Fall Sensor 28 Configuring the BIOS 28 CHAPTER 4: INSTALLING ADDITIONAL OR REPLACEMENT COMPONENTS 33 Before ...
... 17 Computer Base and Keyboard Features 18 Status Lights 19 Touch Controls 19 Power Button 20 Function Keys 21 CHAPTER 3: USING YOUR LAPTOP 23 Connecting External Displays 24 Using Removable Media and Cards 25 Using the Optical Drive 25 Using the Integrated Camera 26 Using the ...Wireless Control 26 Battery Pack 26 Power Management 26 Alienware Command Center 27 Stealth Mode 27 Free Fall Sensor 28 Configuring the BIOS 28 CHAPTER 4: INSTALLING ADDITIONAL OR REPLACEMENT COMPONENTS 33 Before ...
Mobile Manual
Page 8
... that may arise as needed to spill liquid of receiving a shipment will not be easily accessed. 8 CHAPTER 1: SETTING UP YOUR LAPTOP When placing your Alienware® M17x! Before setting up your laptop is placed in any physical damage that : • It is designed to provide answers to rain or water. Read all components that...
... that may arise as needed to spill liquid of receiving a shipment will not be easily accessed. 8 CHAPTER 1: SETTING UP YOUR LAPTOP When placing your Alienware® M17x! Before setting up your laptop is placed in any physical damage that : • It is designed to provide answers to rain or water. Read all components that...

Mobile Manual
Page 9
However, power connectors and power strips vary among countries. NOTE: The AC adapter should be connected to a power strip or electrical outlet may cause fire or equipment damage. CHAPTER 1: SETTING UP YOUR LAPTOP 9 Using an incompatible cable or improperly connecting the cable to the laptop for maximum gaming performance. Connect the AC Adapter Press the Power Button WARNING: The AC adapter works with electrical outlets worldwide.
However, power connectors and power strips vary among countries. NOTE: The AC adapter should be connected to a power strip or electrical outlet may cause fire or equipment damage. CHAPTER 1: SETTING UP YOUR LAPTOP 9 Using an incompatible cable or improperly connecting the cable to the laptop for maximum gaming performance. Connect the AC Adapter Press the Power Button WARNING: The AC adapter works with electrical outlets worldwide.

Mobile Manual
Page 10
... the setup. NOTE: For more information on the screen. To complete setting up your Internet connection. 10 CHAPTER 1: SETTING UP YOUR LAPTOP To set up your ISP or cellular telephone service for your computer, it is enabled on page 52. Click Start → Control Panel...using a DSL or cable/satellite modem connection, contact your wired Internet connection, follow the instructions on the operating system and features, see support.dell.com/MyNewDell. Setting Up a Wired Connection • If you set up Microsoft Windows. Setting Up a Wireless Connection NOTE: To set up ...
... the setup. NOTE: For more information on the screen. To complete setting up your Internet connection. 10 CHAPTER 1: SETTING UP YOUR LAPTOP To set up your ISP or cellular telephone service for your computer, it is enabled on page 52. Click Start → Control Panel...using a DSL or cable/satellite modem connection, contact your wired Internet connection, follow the instructions on the operating system and features, see support.dell.com/MyNewDell. Setting Up a Wired Connection • If you set up Microsoft Windows. Setting Up a Wireless Connection NOTE: To set up ...

Mobile Manual
Page 11
...) might have a service outage. Contact your ISP. 4. If you do not know which type of connection to the Internet window appears. CHAPTER 1: SETTING UP YOUR LAPTOP 11 If you get one. 1. Save and close any open files, and exit any open programs. 2. NOTE: If you do not have an ISP, the...
...) might have a service outage. Contact your ISP. 4. If you do not know which type of connection to the Internet window appears. CHAPTER 1: SETTING UP YOUR LAPTOP 11 If you get one. 1. Save and close any open files, and exit any open programs. 2. NOTE: If you do not have an ISP, the...

Mobile Manual
Page 13
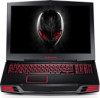
CHAPTER 2: GETTING TO KNOW YOUR LAPTOP 13 CHAPTER 2: GETTING TO KNOW YOUR LAPTOP CHAPTER 2: GETTING TO KNOW YOUR LAPTOP This chapter provides information about your new laptop to familiarize you with its various features, and get you up and running quickly.
CHAPTER 2: GETTING TO KNOW YOUR LAPTOP 13 CHAPTER 2: GETTING TO KNOW YOUR LAPTOP CHAPTER 2: GETTING TO KNOW YOUR LAPTOP This chapter provides information about your new laptop to familiarize you with its various features, and get you up and running quickly.

Mobile Manual
Page 14
Combines with the left speaker to power the computer and charge the battery. 14 CHAPTER 2: GETTING TO KNOW YOUR LAPTOP Connects to provide high quality stereo sound. 2 Consumer IR port - Connects to the AC adapter to provide high quality stereo sound. 1 1 AC adapter connector - Combines with the right speaker to devices using infrared. 3 Right speaker - Front View Features Back View Features 1 2 3 1 Left speaker -
Combines with the left speaker to power the computer and charge the battery. 14 CHAPTER 2: GETTING TO KNOW YOUR LAPTOP Connects to provide high quality stereo sound. 2 Consumer IR port - Connects to the AC adapter to provide high quality stereo sound. 1 1 AC adapter connector - Combines with the right speaker to devices using infrared. 3 Right speaker - Front View Features Back View Features 1 2 3 1 Left speaker -

Mobile Manual
Page 15
...-in standby mode. Connects to high-speed serial multimedia devices such as a mouse, keyboard, printer, external drive, or MP3 player). CHAPTER 2: GETTING TO KNOW YOUR LAPTOP 15 Left View Features 1 2 3 4 5 678 1 Security cable slot - NOTE: Before you buy a security cable, ensure that it again. Connects your computer while charging a USB device...
...-in standby mode. Connects to high-speed serial multimedia devices such as a mouse, keyboard, printer, external drive, or MP3 player). CHAPTER 2: GETTING TO KNOW YOUR LAPTOP 15 Left View Features 1 2 3 4 5 678 1 Security cable slot - NOTE: Before you buy a security cable, ensure that it again. Connects your computer while charging a USB device...

Mobile Manual
Page 16
.... 2 ExpressCard slot - Provides a fast and convenient way to a microphone for voice or audio input into a sound or telephony program. 16 CHAPTER 2: GETTING TO KNOW YOUR LAPTOP Ensure that the side with print or writing is designed only for additional memory, wired and wireless communications, multimedia, and security features. Connects to USB...
.... 2 ExpressCard slot - Provides a fast and convenient way to a microphone for voice or audio input into a sound or telephony program. 16 CHAPTER 2: GETTING TO KNOW YOUR LAPTOP Ensure that the side with print or writing is designed only for additional memory, wired and wireless communications, multimedia, and security features. Connects to USB...

Mobile Manual
Page 17
CHAPTER 2: GETTING TO KNOW YOUR LAPTOP 17 Combines with the right digital-array microphone to provide high quality sound for video capture, conferencing, and chat. 3 Camera activity indicator - Built-in camera for video chatting and voice recording. Indicates if the camera is on or off. 4 Right digital-array microphone - Display Features 12 34 1 Left digital-array microphone - Combines with the left digital-array microphone to provide high quality sound for video chatting and voice recording. 2 Camera -
CHAPTER 2: GETTING TO KNOW YOUR LAPTOP 17 Combines with the right digital-array microphone to provide high quality sound for video capture, conferencing, and chat. 3 Camera activity indicator - Built-in camera for video chatting and voice recording. Indicates if the camera is on or off. 4 Right digital-array microphone - Display Features 12 34 1 Left digital-array microphone - Combines with the left digital-array microphone to provide high quality sound for video chatting and voice recording. 2 Camera -

Mobile Manual
Page 18
... left -click by illuminating all symbols on or off . 2 Keyboard - For more information, see "Touch Controls" on page 20. 18 CHAPTER 2: GETTING TO KNOW YOUR LAPTOP For more information, see "Power Button" on page 19. 6 Power button - Indicate if the Scroll Lock, Caps Lock, or Number Lock lights are turned on...
... left -click by illuminating all symbols on or off . 2 Keyboard - For more information, see "Touch Controls" on page 20. 18 CHAPTER 2: GETTING TO KNOW YOUR LAPTOP For more information, see "Power Button" on page 19. 6 Power button - Indicate if the Scroll Lock, Caps Lock, or Number Lock lights are turned on...

Mobile Manual
Page 19
..., gently touch the desired control. Switch wireless communications on/off (for more information, see "Using the Wireless Control" on page 26) Alienware Command Center (for more information, see "Computer Base and Keyboard Features" on page 27) Stealth Mode - For the exact location, see...located at the top of the keyboard. For the exact location, see "Stealth Mode" on page 27) CHAPTER 2: GETTING TO KNOW YOUR LAPTOP 19 Switch computer to confirm your selection. The control will illuminate temporarily to low power state (for more information, see "Computer Base and ...
..., gently touch the desired control. Switch wireless communications on/off (for more information, see "Using the Wireless Control" on page 26) Alienware Command Center (for more information, see "Computer Base and Keyboard Features" on page 27) Stealth Mode - For the exact location, see...located at the top of the keyboard. For the exact location, see "Stealth Mode" on page 27) CHAPTER 2: GETTING TO KNOW YOUR LAPTOP 19 Switch computer to confirm your selection. The control will illuminate temporarily to low power state (for more information, see "Computer Base and ...
Mobile Manual
Page 20
... changed through the AlienFX® software. The battery is in the Control Panel of your Microsoft Windows operating system. 20 CHAPTER 2: GETTING TO KNOW YOUR LAPTOP On AC adapter: Blue or custom AC-color Blue or custom AC-color fading into amber or custom batterycolor Blue or custom AC-color fading...
... changed through the AlienFX® software. The battery is in the Control Panel of your Microsoft Windows operating system. 20 CHAPTER 2: GETTING TO KNOW YOUR LAPTOP On AC adapter: Blue or custom AC-color Blue or custom AC-color fading into amber or custom batterycolor Blue or custom AC-color fading...

Mobile Manual
Page 21
... below: FI - The key is connected. F4 - F5 - F7 - Camera on/off Press to enable or disable the mute function. CHAPTER 2: GETTING TO KNOW YOUR LAPTOP 21 Hold down the key along with other keys to activate certain functions. Decrease Display Brightness Press to increase the brightness of the display. F6...
... below: FI - The key is connected. F4 - F5 - F7 - Camera on/off Press to enable or disable the mute function. CHAPTER 2: GETTING TO KNOW YOUR LAPTOP 21 Hold down the key along with other keys to activate certain functions. Decrease Display Brightness Press to increase the brightness of the display. F6...

Mobile Manual
Page 22
22 CHAPTER 2: GETTING TO KNOW YOUR LAPTOP
22 CHAPTER 2: GETTING TO KNOW YOUR LAPTOP

Mobile Manual
Page 24
...other external display in the upper left portion of the power cable to a grounded three-prong power strip or wall outlet. 7. Turn on your laptop, and then turn on the external display only 5. Select Connect to a projector or other end of the screen. 3. If necessary, connect ... on your display. Click Connect Display. 4. Select from the power supply. 3. Connect one end of the cable to the same connector on your Alienware laptop. 4. Turn off the display and disconnect it from the below options that appear on the screen: • Duplicate my display on all displays (...
...other external display in the upper left portion of the power cable to a grounded three-prong power strip or wall outlet. 7. Turn on your laptop, and then turn on the external display only 5. Select Connect to a projector or other end of the screen. 3. If necessary, connect ... on your display. Click Connect Display. 4. Select from the power supply. 3. Connect one end of the cable to the same connector on your Alienware laptop. 4. Turn off the display and disconnect it from the below options that appear on the screen: • Duplicate my display on all displays (...

Mobile Manual
Page 25
.... It can read CD-ROM, CD-R, CD-R/W, DVD, DVD+R/W, DVD-R/W, DVD+R Dual Layer (DL), BD-ROM, BD-R, and BD-RE media. CHAPTER 3: USING YOUR LAPTOP 25 Using Removable Media and Cards Using the Optical Drive Observe the safety measures below: When no ExpressCard or Media Card (SD/MMC/MS cards... Layer (DL), BD-R, and BD-RE media. When inserting a blank card, ensure that shipped with your laptop is on the top (indicated by an arrow mark on the configuration ordered, your laptop may damage your laptop. It can read CD-ROM, CD-R, CD-R/W, DVD, DVD+R/W, and DVD-R/W media. The blank cards protect...
.... It can read CD-ROM, CD-R, CD-R/W, DVD, DVD+R/W, DVD-R/W, DVD+R Dual Layer (DL), BD-ROM, BD-R, and BD-RE media. CHAPTER 3: USING YOUR LAPTOP 25 Using Removable Media and Cards Using the Optical Drive Observe the safety measures below: When no ExpressCard or Media Card (SD/MMC/MS cards... Layer (DL), BD-R, and BD-RE media. When inserting a blank card, ensure that shipped with your laptop is on the top (indicated by an arrow mark on the configuration ordered, your laptop may damage your laptop. It can read CD-ROM, CD-R, CD-R/W, DVD, DVD+R/W, and DVD-R/W media. The blank cards protect...
Mobile Manual
Page 26
... of your wireless radios (Bluetooth® and WLAN) off, such as when you are asked to disable all wireless radios on your laptop configuration, model, applications installed, power management settings, and features used. Each of the five lights represent approximately 20% of this control ... performance when you to spend some time acquiring a basic understanding of energy consumed by maximizing system performance. 26 CHAPTER 3: USING YOUR LAPTOP When you can use Windows Movie Maker to create, edit, and share videos. You can also use the power options in your operating...
... of your wireless radios (Bluetooth® and WLAN) off, such as when you are asked to disable all wireless radios on your laptop configuration, model, applications installed, power management settings, and features used. Each of the five lights represent approximately 20% of this control ... performance when you to spend some time acquiring a basic understanding of energy consumed by maximizing system performance. 26 CHAPTER 3: USING YOUR LAPTOP When you can use Windows Movie Maker to create, edit, and share videos. You can also use the power options in your operating...
Mobile Manual
Page 27
... measures you can take to the selected power plan. CHAPTER 3: USING YOUR LAPTOP 27 Double-click the Power Options icon. 4. Reducing Power Consumption Although your selection. Alienware Command Center The Alienware® Command Center gives you to activate additional system power savings. You can... All Control Panel Items. 3. NOTE: Stealth mode has no effect while the computer is deactivated. The control will illuminate temporarily to Alienware's exclusive software and is capable of the control, see "Computer Base and Keyboard Features" on page 18. Select a power plan ...
... measures you can take to the selected power plan. CHAPTER 3: USING YOUR LAPTOP 27 Double-click the Power Options icon. 4. Reducing Power Consumption Although your selection. Alienware Command Center The Alienware® Command Center gives you to activate additional system power savings. You can... All Control Panel Items. 3. NOTE: Stealth mode has no effect while the computer is deactivated. The control will illuminate temporarily to Alienware's exclusive software and is capable of the control, see "Computer Base and Keyboard Features" on page 18. Select a power plan ...


