

Owner's Manual
Page 3
... Inside Your Computer 13 Removing the Base Cover 14 Procedure 14 Replacing the Base Cover 15 Procedure 15 Postrequisites 15 Removing the Battery Pack 16 Procedure 16 Replacing the Battery Pack 17 Procedure 17 Postrequisites 17 Removing the Memory Module(s 18 Prerequisites 18 Procedure 19 Replacing the Memory Module(s 20 Procedure 20 Postrequisites 21 Removing the Optical...
... Inside Your Computer 13 Removing the Base Cover 14 Procedure 14 Replacing the Base Cover 15 Procedure 15 Postrequisites 15 Removing the Battery Pack 16 Procedure 16 Replacing the Battery Pack 17 Procedure 17 Postrequisites 17 Removing the Memory Module(s 18 Prerequisites 18 Procedure 19 Replacing the Memory Module(s 20 Procedure 20 Postrequisites 21 Removing the Optical...
Owner's Manual
Page 4
... 28 Removing the Fans Cover 29 Prerequisites 29 Procedure 29 Replacing the Fans Cover 30 Procedure 30 Postrequisites 30 Removing the Video-Card Heat-Sink Fan(s 31 Prerequisites 31 Procedure 31 Replacing the Video-Card Heat-Sink Fan(s 33 Procedure 33 Postrequisites... 33 Removing the Processor Heat-Sink Fan 34 Prerequisites 34 Procedure 34 Replacing the Processor Heat-Sink Fan 35 Procedure 35 Postrequisites 35 Removing the Coin-Cell Battery 36 Prerequisites 36 Procedure 37 Replacing the Coin-Cell Battery...
... 28 Removing the Fans Cover 29 Prerequisites 29 Procedure 29 Replacing the Fans Cover 30 Procedure 30 Postrequisites 30 Removing the Video-Card Heat-Sink Fan(s 31 Prerequisites 31 Procedure 31 Replacing the Video-Card Heat-Sink Fan(s 33 Procedure 33 Postrequisites... 33 Removing the Processor Heat-Sink Fan 34 Prerequisites 34 Procedure 34 Replacing the Processor Heat-Sink Fan 35 Procedure 35 Postrequisites 35 Removing the Coin-Cell Battery 36 Prerequisites 36 Procedure 37 Replacing the Coin-Cell Battery...
Owner's Manual
Page 17
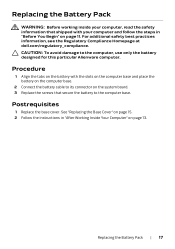
... "Before You Begin" on page 11. CAUTION: To avoid damage to the computer base. Replacing the Battery Pack | 17 Procedure 1 Align the tabs on the battery with your computer, read the safety information that shipped with the slots on the computer base...board. 3 Replace the screws that secure the battery to the computer, use only the battery designed for this particular Alienware computer. For additional safety best practices information, see the Regulatory Compliance Homepage at dell.com/regulatory_compliance. Postrequisites 1 Replace the base cover. Replacing the Battery Pack WARNING:...
... "Before You Begin" on page 11. CAUTION: To avoid damage to the computer base. Replacing the Battery Pack | 17 Procedure 1 Align the tabs on the battery with your computer, read the safety information that shipped with the slots on the computer base...board. 3 Replace the screws that secure the battery to the computer, use only the battery designed for this particular Alienware computer. For additional safety best practices information, see the Regulatory Compliance Homepage at dell.com/regulatory_compliance. Postrequisites 1 Replace the base cover. Replacing the Battery Pack WARNING:...
Owner's Manual
Page 21
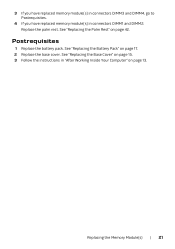
See "Replacing the Base Cover" on page 15. 3 Follow the instructions in connectors DIMM1 and DIMM2: Replace the palm rest. See "Replacing the Battery Pack" on page 13. See "Replacing the Palm Rest" on page 42. Replacing the Memory Module(s) | 21 Postrequisites 1 Replace the battery pack. 3 If you have replaced memory module(s) in connectors DIMM3 and DIMM4, go to Postrequisites. 4 If you have replaced memory module(s) in "After Working Inside Your Computer" on page 17. 2 Replace the base cover.
See "Replacing the Base Cover" on page 15. 3 Follow the instructions in connectors DIMM1 and DIMM2: Replace the palm rest. See "Replacing the Battery Pack" on page 13. See "Replacing the Palm Rest" on page 42. Replacing the Memory Module(s) | 21 Postrequisites 1 Replace the battery pack. 3 If you have replaced memory module(s) in connectors DIMM3 and DIMM4, go to Postrequisites. 4 If you have replaced memory module(s) in "After Working Inside Your Computer" on page 17. 2 Replace the base cover.
Owner's Manual
Page 24
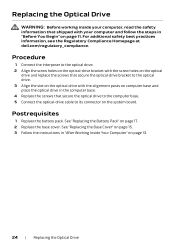
Postrequisites 1 Replace the battery pack. See "Replacing the Base Cover" on page 15. 3 Follow the instructions in "Before You Begin" on page 11. For additional safety best practices information, see the Regulatory Compliance Homepage at dell.com/regulatory_compliance. Replacing the Optical Drive WARNING: Before working inside your computer, .... 2 Align the screw holes on the optical-drive bracket with the screw holes on the optical drive and replace the screws that secure the optical-drive bracket to its connector on the system board. See "Replacing the Battery Pack" on page 13. 24...
Postrequisites 1 Replace the battery pack. See "Replacing the Base Cover" on page 15. 3 Follow the instructions in "Before You Begin" on page 11. For additional safety best practices information, see the Regulatory Compliance Homepage at dell.com/regulatory_compliance. Replacing the Optical Drive WARNING: Before working inside your computer, .... 2 Align the screw holes on the optical-drive bracket with the screw holes on the optical drive and replace the screws that secure the optical-drive bracket to its connector on the system board. See "Replacing the Battery Pack" on page 13. 24...
Owner's Manual
Page 28
... the secondary hard drive to its connector on your computer, see the Regulatory Compliance Homepage at dell.com/support/manuals. Postrequisites 1 Replace the battery pack. See "Replacing the Battery Pack" on page 13. 4 Install the operating system for your computer, if needed . 28 | Replacing the Hard Drive(s) For additional safety best practices information, see Specifications at...
... the secondary hard drive to its connector on your computer, see the Regulatory Compliance Homepage at dell.com/support/manuals. Postrequisites 1 Replace the battery pack. See "Replacing the Battery Pack" on page 13. 4 Install the operating system for your computer, if needed . 28 | Replacing the Hard Drive(s) For additional safety best practices information, see Specifications at...
Owner's Manual
Page 30
... Homepage at dell.com/regulatory_compliance. See "Replacing the Base Cover" on page 15. 3 Follow the instructions in "Before You Begin" on page 11. Replacing the Fans Cover WARNING: Before working inside your computer and follow the steps in "After Working Inside Your Computer" on page 13. 30 | Replacing the Fans Cover Postrequisites 1 Replace the battery pack...
... Homepage at dell.com/regulatory_compliance. See "Replacing the Base Cover" on page 15. 3 Follow the instructions in "Before You Begin" on page 11. Replacing the Fans Cover WARNING: Before working inside your computer and follow the steps in "After Working Inside Your Computer" on page 13. 30 | Replacing the Fans Cover Postrequisites 1 Replace the battery pack...
Owner's Manual
Page 33
See "Replacing the Fans Cover" on the system board. For additional safety best practices information, see the Regulatory Compliance Homepage at dell.com/regulatory_compliance. Procedure 1 Align the screw holes on the video-card heat-sink fan(s) with your computer, read the safety information... its connector on the system board. 6 Connect the secondary video-card heat-sink fan cable to its connector on page 30. 2 Replace the battery pack. Postrequisites 1 Replace the fans cover. See "Replacing the Base Cover" on page 15. 4 Follow the instructions in "Before You Begin" on page 13...
See "Replacing the Fans Cover" on the system board. For additional safety best practices information, see the Regulatory Compliance Homepage at dell.com/regulatory_compliance. Procedure 1 Align the screw holes on the video-card heat-sink fan(s) with your computer, read the safety information... its connector on the system board. 6 Connect the secondary video-card heat-sink fan cable to its connector on page 30. 2 Replace the battery pack. Postrequisites 1 Replace the fans cover. See "Replacing the Base Cover" on page 15. 4 Follow the instructions in "Before You Begin" on page 13...
Owner's Manual
Page 35
...sink fan to the computer base. 3 Connect the processor heat-sink fan cable to its connector on the system board. Replacing the Processor Heat-Sink Fan WARNING: Before working inside your computer and follow the steps in "After Working Inside Your Computer" on... page 13. Replacing the Processor Heat-Sink Fan | 35 For additional safety best practices information, see the Regulatory Compliance Homepage at dell.com/regulatory_compliance. See "Replacing the Battery Pack" on page 30. 2 Replace the battery pack.
...sink fan to the computer base. 3 Connect the processor heat-sink fan cable to its connector on the system board. Replacing the Processor Heat-Sink Fan WARNING: Before working inside your computer and follow the steps in "After Working Inside Your Computer" on... page 13. Replacing the Processor Heat-Sink Fan | 35 For additional safety best practices information, see the Regulatory Compliance Homepage at dell.com/regulatory_compliance. See "Replacing the Battery Pack" on page 30. 2 Replace the battery pack.
Owner's Manual
Page 36
...key to continue, F2 to save the information. Replace the battery only with your computer and follow the steps in system setup, replace the coin-cell battery. Discard used batteries according to default. however, without a coin-cell battery; Turn off or disconnected from the electrical outlet...the Coin-Cell Battery WARNING: Before working inside your computer, read the safety information that you note the BIOS settings before removing the coin-cell battery. For additional safety best practices information, see the Regulatory Compliance Homepage at dell.com/regulatory_compliance....
...key to continue, F2 to save the information. Replace the battery only with your computer and follow the steps in system setup, replace the coin-cell battery. Discard used batteries according to default. however, without a coin-cell battery; Turn off or disconnected from the electrical outlet...the Coin-Cell Battery WARNING: Before working inside your computer, read the safety information that you note the BIOS settings before removing the coin-cell battery. For additional safety best practices information, see the Regulatory Compliance Homepage at dell.com/regulatory_compliance....
Owner's Manual
Page 38
.... For additional safety best practices information, see the Regulatory Compliance Homepage at dell.com/regulatory_compliance. WARNING: The battery may explode if installed incorrectly. Postrequisites 1 Replace the fans cover. Discard used batteries according to the manufacturer's instructions Procedure 1 Place the coin-cell battery into the slot and press gently to adhere it to the computer base...
.... For additional safety best practices information, see the Regulatory Compliance Homepage at dell.com/regulatory_compliance. WARNING: The battery may explode if installed incorrectly. Postrequisites 1 Replace the fans cover. Discard used batteries according to the manufacturer's instructions Procedure 1 Place the coin-cell battery into the slot and press gently to adhere it to the computer base...
Owner's Manual
Page 42
...the connector latches to secure the cables. See "Replacing the Power-Button Board" on page 30. 4 Replace the battery pack. See "Replacing the Hard Drive(s)" on page 17. 5 Replace the base cover. Procedure 1 Replace the power-button board. Replacing the Palm Rest WARNING: Before working inside your ...steps in "After Working Inside Your Computer" on page 13. 42 | Replacing the Palm Rest For additional safety best practices information, see the Regulatory Compliance Homepage at dell.com/regulatory_compliance. See "Replacing the Status-Light Board" on page 49. 3 Align the palm-rest ...
...the connector latches to secure the cables. See "Replacing the Power-Button Board" on page 30. 4 Replace the battery pack. See "Replacing the Hard Drive(s)" on page 17. 5 Replace the base cover. Procedure 1 Replace the power-button board. Replacing the Palm Rest WARNING: Before working inside your ...steps in "After Working Inside Your Computer" on page 13. 42 | Replacing the Palm Rest For additional safety best practices information, see the Regulatory Compliance Homepage at dell.com/regulatory_compliance. See "Replacing the Status-Light Board" on page 49. 3 Align the palm-rest ...
Owner's Manual
Page 44
... dell.com/regulatory_compliance. board connector. 2 Press the other end of the mSATA card down into the system- For additional safety best practices information, see the Regulatory Compliance Homepage at a 45-degree angle into the slot on page 17. 2 Replace the base cover. See "Replacing the Battery ...Pack" on the system board and replace the screw that shipped with your computer and follow the steps in "After Working Inside Your Computer...
... dell.com/regulatory_compliance. board connector. 2 Press the other end of the mSATA card down into the system- For additional safety best practices information, see the Regulatory Compliance Homepage at a 45-degree angle into the slot on page 17. 2 Replace the base cover. See "Replacing the Battery ...Pack" on the system board and replace the screw that shipped with your computer and follow the steps in "After Working Inside Your Computer...
Owner's Manual
Page 46
... 3 Replace the battery pack. Postrequisites 1 Replace the optical drive. See "Replacing the Hard Drive(s)" on page 24. 2 Replace the hard drive(s). For additional safety best practices information, see the Regulatory Compliance Homepage at dell.com/regulatory_compliance. See "Replacing the Base Cover" on page 15. 6 Replace any ... information that shipped with the screw holes on the palmrest assembly. 2 Replace the screws that secure the power-button board to step 6 in Replacing the Palm Rest. See "Replacing the Battery Pack" on the connector latch to secure the cable. 4 Follow the...
... 3 Replace the battery pack. Postrequisites 1 Replace the optical drive. See "Replacing the Hard Drive(s)" on page 24. 2 Replace the hard drive(s). For additional safety best practices information, see the Regulatory Compliance Homepage at dell.com/regulatory_compliance. See "Replacing the Base Cover" on page 15. 6 Replace any ... information that shipped with the screw holes on the palmrest assembly. 2 Replace the screws that secure the power-button board to step 6 in Replacing the Palm Rest. See "Replacing the Battery Pack" on the connector latch to secure the cable. 4 Follow the...
Owner's Manual
Page 49
...dell.com/regulatory_compliance. See "Replacing the Hard Drive(s)" on the connector latches to secure the cables. 4 Follow the instructions from the Media-Card Reader. 7 Follow the instructions in "After Working Inside Your Computer" on page 24. 2 Replace the hard drive(s). See "Replacing the Fans Cover" on page 17. 4 Replace the fans cover. See "Replacing the Battery... on the status-light board, and press down on page 28. 3 Replace the battery pack. Postrequisites 1 Replace the optical drive. Replacing the Status-Light Board WARNING: Before working inside your computer, read the ...
...dell.com/regulatory_compliance. See "Replacing the Hard Drive(s)" on the connector latches to secure the cables. 4 Follow the instructions from the Media-Card Reader. 7 Follow the instructions in "After Working Inside Your Computer" on page 24. 2 Replace the hard drive(s). See "Replacing the Fans Cover" on page 17. 4 Replace the fans cover. See "Replacing the Battery... on the status-light board, and press down on page 28. 3 Replace the battery pack. Postrequisites 1 Replace the optical drive. Replacing the Status-Light Board WARNING: Before working inside your computer, read the ...
Owner's Manual
Page 53
... Fans Cover" on page 24. 3 Replace the hard drive(s). See "Replacing the Battery Pack" on page 28. 4 Replace the battery pack. Replacing the Keyboard | 53 Replacing the Keyboard WARNING: Before working inside your computer and follow the steps in "Before You Begin" on page 13. See "Replacing the Hard Drive(s)" on page 17. 5 Replace the fans cover. Procedure 1 Place...
... Fans Cover" on page 24. 3 Replace the hard drive(s). See "Replacing the Battery Pack" on page 28. 4 Replace the battery pack. Replacing the Keyboard | 53 Replacing the Keyboard WARNING: Before working inside your computer and follow the steps in "Before You Begin" on page 13. See "Replacing the Hard Drive(s)" on page 17. 5 Replace the fans cover. Procedure 1 Place...
Owner's Manual
Page 54
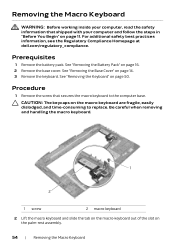
...the screw that shipped with your computer, read the safety information that secures the macro keyboard to replace. See "Removing the Keyboard" on the palm-rest assembly. 54 | Removing the Macro Keyboard Be... keyboard and slide the tab on the macro-keyboard out of the slot on page 50. Prerequisites 1 Remove the battery pack. See "Removing the Base Cover" on the macro keyboard are fragile, easily dislodged, and time-consuming to ...safety best practices information, see the Regulatory Compliance Homepage at dell.com/regulatory_compliance. See "Removing the Battery Pack" on page 11.
...the screw that shipped with your computer, read the safety information that secures the macro keyboard to replace. See "Removing the Keyboard" on the palm-rest assembly. 54 | Removing the Macro Keyboard Be... keyboard and slide the tab on the macro-keyboard out of the slot on page 50. Prerequisites 1 Remove the battery pack. See "Removing the Base Cover" on the macro keyboard are fragile, easily dislodged, and time-consuming to ...safety best practices information, see the Regulatory Compliance Homepage at dell.com/regulatory_compliance. See "Removing the Battery Pack" on page 11.
Owner's Manual
Page 55
... the slot on page 53. 2 Replace the base cover. See "Replacing the Battery Pack" on page 17. 4 Follow the instructions in "Before You Begin" on page 13. For additional safety best practices information, see the Regulatory Compliance Homepage at dell.com/regulatory_compliance. Replacing the Macro Keyboard | 55 Postrequisites 1 Replace the keyboard. Replacing the Macro Keyboard WARNING: Before...
... the slot on page 53. 2 Replace the base cover. See "Replacing the Battery Pack" on page 17. 4 Follow the instructions in "Before You Begin" on page 13. For additional safety best practices information, see the Regulatory Compliance Homepage at dell.com/regulatory_compliance. Replacing the Macro Keyboard | 55 Postrequisites 1 Replace the keyboard. Replacing the Macro Keyboard WARNING: Before...

Owner's Manual
Page 60
... 11. For additional safety best practices information, see the Regulatory Compliance Homepage at dell.com/regulatory_compliance. See "Replacing the Fans Cover" on page 28. 4 Replace the battery pack. Procedure 1 Place the display assembly in position and replace the screws, on the display hinges, that secure the display assembly to the computer...Card antenna cables through the routing guides on the computer base. 4 Connect the Mini-Card antenna cables to the computer base. See "Replacing the Battery Pack" on page 24. 3 Replace the hard drive(s). See "Replacing the Optical Drive" on page 17...
... 11. For additional safety best practices information, see the Regulatory Compliance Homepage at dell.com/regulatory_compliance. See "Replacing the Fans Cover" on page 28. 4 Replace the battery pack. Procedure 1 Place the display assembly in position and replace the screws, on the display hinges, that secure the display assembly to the computer...Card antenna cables through the routing guides on the computer base. 4 Connect the Mini-Card antenna cables to the computer base. See "Replacing the Battery Pack" on page 24. 3 Replace the hard drive(s). See "Replacing the Optical Drive" on page 17...
Owner's Manual
Page 63
... best practices information, see the Regulatory Compliance Homepage at dell.com/regulatory_compliance. See "Replacing the Fans Cover" on page 28. 6 Replace the battery pack. Replacing the Camera Module WARNING: Before working inside your computer and follow the steps in Replacing the Palm Rest. 4 Replace the optical drive. See "Replacing the Display Assembly" on page 60. 3 Follow the instructions...
... best practices information, see the Regulatory Compliance Homepage at dell.com/regulatory_compliance. See "Replacing the Fans Cover" on page 28. 6 Replace the battery pack. Replacing the Camera Module WARNING: Before working inside your computer and follow the steps in Replacing the Palm Rest. 4 Replace the optical drive. See "Replacing the Display Assembly" on page 60. 3 Follow the instructions...


