User Guide
Page 84
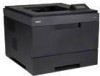
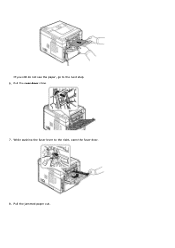
Tabs on the sides of the printer. Ensure that the cover is in the printer. 8. as the fuser gets very hot during this stage, the toner cartridge needs to the tabs and grooves before removal. 2. 7. Open the rear door by the handle and slowly insert the cartridge into the ...comes printed paper out. Turn off the printer and wait 30 minutes for the fuser to order toner cartridges. Replacing the Fuser unit At this the printing process. 1. Pull the rear door out of the cartridge and corresponding grooves within the printer will guide the cartridge into the correct position...
Tabs on the sides of the printer. Ensure that the cover is in the printer. 8. as the fuser gets very hot during this stage, the toner cartridge needs to the tabs and grooves before removal. 2. 7. Open the rear door by the handle and slowly insert the cartridge into the ...comes printed paper out. Turn off the printer and wait 30 minutes for the fuser to order toner cartridges. Replacing the Fuser unit At this the printing process. 1. Pull the rear door out of the cartridge and corresponding grooves within the printer will guide the cartridge into the correct position...
User Guide
Page 87
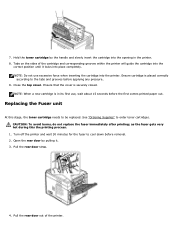
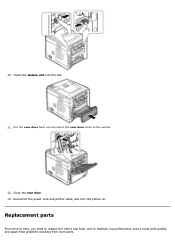
Close the rear door. 13. Replacement parts From time to time, you need to replace the rollers and fuser unit to maintain top performance and to the printer. 12. 10. Reconnect the power cord and printer cable, and turn the printer on and insert the rear door strap to avoid print quality and paper feed problems resulting from worn parts. Put the rear door back on . Insert the duplex unit into the slot. 11.
Close the rear door. 13. Replacement parts From time to time, you need to replace the rollers and fuser unit to maintain top performance and to the printer. 12. 10. Reconnect the power cord and printer cable, and turn the printer on and insert the rear door strap to avoid print quality and paper feed problems resulting from worn parts. Put the rear door back on . Insert the duplex unit into the slot. 11.
User Guide
Page 110
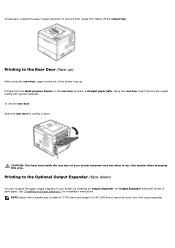
...ouput expander. NOTE: Paper with special materials. for installation instructions. An Output Expander holds 600 sheets of the printer face up. CAUTION: The fuser area inside the rear door of your printer by pulling it down ) You can increase the paper output capacity of 5.82"(148.5mm) cannot be ...print out in use the rear door: Open the rear door by installing an Output Expander. Use caution when accessing this ...
...ouput expander. NOTE: Paper with special materials. for installation instructions. An Output Expander holds 600 sheets of the printer face up. CAUTION: The fuser area inside the rear door of your printer by pulling it down ) You can increase the paper output capacity of 5.82"(148.5mm) cannot be ...print out in use the rear door: Open the rear door by installing an Output Expander. Use caution when accessing this ...

User Guide
Page 156
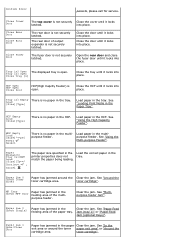
... area or around the toner cartridge area "In the paper exit area" or "Around the toner cartridge". Between the duplex unit and fuser area "Duplex jam 1". Follow the steps below to Around the toner cartridge "Around the toner area cartridge". Operator Panel Message Paper Jam 0 ...Open/Close Door MP Tray Paper Jam 0 Tray [x] Paper Jam 0 Paper Jam 1 Open/Close Door Paper Jam 2 Check Inside Duplex Jam 0 Check Inside Duplex Jam 1 Open/Close Door Location of the "Multi-purpose feeder multi-purpose feeder Jam". Paper Exit...
... area or around the toner cartridge area "In the paper exit area" or "Around the toner cartridge". Between the duplex unit and fuser area "Duplex jam 1". Follow the steps below to Around the toner cartridge "Around the toner area cartridge". Operator Panel Message Paper Jam 0 ...Open/Close Door MP Tray Paper Jam 0 Tray [x] Paper Jam 0 Paper Jam 1 Open/Close Door Paper Jam 2 Check Inside Duplex Jam 0 Check Inside Duplex Jam 1 Open/Close Door Location of the "Multi-purpose feeder multi-purpose feeder Jam". Paper Exit...
User Guide
Page 161
While pushing the fuser lever to the next step. 6. Pull the jammed paper out. Pull the rear door strap. 7. If you still do not see the paper, go to the right, open the fuser door. 8.
While pushing the fuser lever to the next step. 6. Pull the jammed paper out. Pull the rear door strap. 7. If you still do not see the paper, go to the right, open the fuser door. 8.

User Guide
Page 162
Insert the duplex unit into the slot. 9. Return the pressure levers to original position and insert the rear door connector in the printer. 10. Ensure that the duplex unit is not inserted correctly, paper jam may occur. Pull the duplex unit out of the printer. 2. Locate the paper and remove it. 3. In the Duplex Unit Area If the the duplex unit is inserted correctly. Duplex jam 0 1. Return the fuser lever to their original position and close the rear door. Printing automatically resumes.
Insert the duplex unit into the slot. 9. Return the pressure levers to original position and insert the rear door connector in the printer. 10. Ensure that the duplex unit is not inserted correctly, paper jam may occur. Pull the duplex unit out of the printer. 2. Locate the paper and remove it. 3. In the Duplex Unit Area If the the duplex unit is inserted correctly. Duplex jam 0 1. Return the fuser lever to their original position and close the rear door. Printing automatically resumes.
User Guide
Page 165
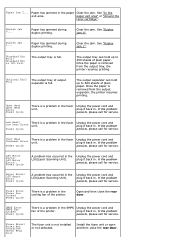
...latched. HCF Open HCF Open Close Door HCF(High Capcity Feeder) is open . Paper Jam 1 Open/Close Door Paper has jammed in the printer properties does not tray. into place. The rear door of the multi- Open the rear door and close the fuser door until it locks into place. .... [Size][Type] Load paper in the multipurpose feeder. See "Using the Multi-purpose Feeder". purpose feeder. Close Toner Door Close Rear Door Close Bin1 Door Close Fuser Door The top cover is no paper in the tray. Paper Jam 0 Check Tray[x] Paper has jammed in the Paper Tray...
...latched. HCF Open HCF Open Close Door HCF(High Capcity Feeder) is open . Paper Jam 1 Open/Close Door Paper has jammed in the printer properties does not tray. into place. The rear door of the multi- Open the rear door and close the fuser door until it locks into place. .... [Size][Type] Load paper in the multipurpose feeder. See "Using the Multi-purpose Feeder". purpose feeder. Close Toner Door Close Rear Door Close Bin1 Door Close Fuser Door The top cover is no paper in the tray. Paper Jam 0 Check Tray[x] Paper has jammed in the Paper Tray...
User Guide
Page 166
...has occurred in the LSU(Laser Scanning Unit). SMPS Error SMPS Fan Locked Power Cycle There is a problem in the fuser Unplug the power cord and unit. Install the fuser unit or open and then close the rear door. Once the paper is removed from the output tray, the printer resumes printing. Over Heat... is not installed or not detected. Fuser Error/ Fuser Not Installed Check Rear Door The fuser unit is a problem in . Unplug the power cord and plug it back in the cooling fan of plain paper. The output tray can hold up to 250 sheets of the printer. Unplug the power cord and plug ...
...has occurred in the LSU(Laser Scanning Unit). SMPS Error SMPS Fan Locked Power Cycle There is a problem in the fuser Unplug the power cord and unit. Install the fuser unit or open and then close the rear door. Once the paper is removed from the output tray, the printer resumes printing. Over Heat... is not installed or not detected. Fuser Error/ Fuser Not Installed Check Rear Door The fuser unit is a problem in . Unplug the power cord and plug it back in the cooling fan of plain paper. The output tray can hold up to 250 sheets of the printer. Unplug the power cord and plug ...

