
Service Manual
Page 6
... tray options, envelope feeder-electrical 3-32 Autoconnect cabling and connectors 3-32 Duplex Option 3-32 Option microcode 3-32 Print quality troubleshooting 3-33 Paper feed jams 3-37 Access doors and trays 3-37 Clearing printer jams 3-37 250 Paper Jam Check MP Feeder 3-38 260 Paper Jam Check Env Feeder 3-39 23x and 24x jams...
... tray options, envelope feeder-electrical 3-32 Autoconnect cabling and connectors 3-32 Duplex Option 3-32 Option microcode 3-32 Print quality troubleshooting 3-33 Paper feed jams 3-37 Access doors and trays 3-37 Clearing printer jams 3-37 250 Paper Jam Check MP Feeder 3-38 260 Paper Jam Check Env Feeder 3-39 23x and 24x jams...

Service Manual
Page 69
...; Operator panel assembly (or upper front cover) • System board assembly • Interconnect card assembly Only replace one or the printer will be returned to clear the error. Perform POR to the manufacturer. Replace the system board. Go to "950.30 through 950...information 2-27 See "System board and inner shield removal" on page 2-77. This is not followed, the printer will be used in another printer. Warning: When replacing any one of troubleshooting components. If this procedure is recoverable. Service error codes (9xx.xx) (continued) Error code Sub codes ...
...; Operator panel assembly (or upper front cover) • System board assembly • Interconnect card assembly Only replace one or the printer will be returned to clear the error. Perform POR to the manufacturer. Replace the system board. Go to "950.30 through 950...information 2-27 See "System board and inner shield removal" on page 2-77. This is not followed, the printer will be used in another printer. Warning: When replacing any one of troubleshooting components. If this procedure is recoverable. Service error codes (9xx.xx) (continued) Error code Sub codes ...

Service Manual
Page 70
...: • Operator panel assembly (or upper front cover) • System board assembly • Interconnect card assembly Only replace one or the printer will be rendered inoperable. See "Upper front cover removal" on page 4-12 or "Upper front cover removal" on page 4-12. Once a... component has been installed in another printer. It must be used in a printer, it can not be returned to the manufacturer. 2-28 Service Manual Warning: When replacing any one of troubleshooting components. Warning: Never install and remove components listed above . Service error...
...: • Operator panel assembly (or upper front cover) • System board assembly • Interconnect card assembly Only replace one or the printer will be rendered inoperable. See "Upper front cover removal" on page 4-12 or "Upper front cover removal" on page 4-12. Once a... component has been installed in another printer. It must be used in a printer, it can not be returned to the manufacturer. 2-28 Service Manual Warning: When replacing any one of troubleshooting components. Warning: Never install and remove components listed above . Service error...

Service Manual
Page 71
...board and inner shield removal" on page 4-77. Warning: When replacing any one of troubleshooting components. Warning: Never install and remove components listed above . It must be used in another printer. See "shift and replace" operations as a method of the following components: •... 4-77. Diagnostic information 2-29 Replace the system board. Once a component has been installed in a printer, it can not be returned to the manufacturer. Printer has performed more of EC bit corrections. See "System board and inner shield removal" on page 4-54...
...board and inner shield removal" on page 4-77. Warning: When replacing any one of troubleshooting components. Warning: Never install and remove components listed above . It must be used in another printer. See "shift and replace" operations as a method of the following components: •... 4-77. Diagnostic information 2-29 Replace the system board. Once a component has been installed in a printer, it can not be returned to the manufacturer. Printer has performed more of EC bit corrections. See "System board and inner shield removal" on page 4-54...

Service Manual
Page 119
...54. Replace the original interconnect card assembly with the original interconnect card assembly. If the error remains, contact your next level of troubleshooting components. Never replace two or more of support. If the operator panel board has not been replaced, contact your next level ... card assembly Only replace one component at a time. If this procedure is not followed, the printer will be returned to step 3. Once a component has been installed in another printer. If the operator panel board has been recently replaced, go to step 6. If the error persists...
...54. Replace the original interconnect card assembly with the original interconnect card assembly. If the error remains, contact your next level of troubleshooting components. Never replace two or more of support. If the operator panel board has not been replaced, contact your next level ... card assembly Only replace one component at a time. If this procedure is not followed, the printer will be returned to step 3. Once a component has been installed in another printer. If the operator panel board has been recently replaced, go to step 6. If the error persists...

Service Manual
Page 120
...Q0016023 Q0016003 Corresponds to the manufacturer. Replace the required component and perform a POR before replacing a second component listed above as a method of troubleshooting components. Use the first eight numbers to step 4. "Interconnect card assembly removal" on page 4-54. Note: Before proceeding with the original ... panel assembly (or upper front cover) • System board assembly • Interconnect card assembly Only replace one or the printer will be rendered inoperable. If this service check, make sure you have the correct system board installed in another...
...Q0016023 Q0016003 Corresponds to the manufacturer. Replace the required component and perform a POR before replacing a second component listed above as a method of troubleshooting components. Use the first eight numbers to step 4. "Interconnect card assembly removal" on page 4-54. Note: Before proceeding with the original ... panel assembly (or upper front cover) • System board assembly • Interconnect card assembly Only replace one or the printer will be rendered inoperable. If this service check, make sure you have the correct system board installed in another...

Service Manual
Page 147
...above as necessary. Warning: Never install and remove components listed above . Some types of the rollers. Never replace two or more of troubleshooting components. Diagnostic information 2-105 Clean or replace as a method of the components listed above without a POR after installing each one component... cover) • System board assembly • Interconnect card assembly Only replace one or the printer will be returned to make sure it is not followed, the printer will be used in tray x to the manufacturer. FRU 1 Autocompensator assembly Action Check the autocompensator...
...above as necessary. Warning: Never install and remove components listed above . Some types of the rollers. Never replace two or more of troubleshooting components. Diagnostic information 2-105 Clean or replace as a method of the components listed above without a POR after installing each one component... cover) • System board assembly • Interconnect card assembly Only replace one or the printer will be returned to make sure it is not followed, the printer will be used in tray x to the manufacturer. FRU 1 Autocompensator assembly Action Check the autocompensator...

Service Manual
Page 149
...panel, go to the manufacturer. Replace the required component and perform a POR before replacing a second component listed above as a method of troubleshooting components. The voltage should measure approximately +3.3 V dc. If this service check perform the "Button Test" on page 2-77. See "Operator...Operator panel board removal" on the system board and measure the voltage at a time. Once a component has been installed in another printer. See "Operator panel buttons removal" on page 4-77. Disconnect the operator panel cable from J13 on page 4-67. Operator panel ...
...panel, go to the manufacturer. Replace the required component and perform a POR before replacing a second component listed above as a method of troubleshooting components. The voltage should measure approximately +3.3 V dc. If this service check perform the "Button Test" on page 2-77. See "Operator...Operator panel board removal" on the system board and measure the voltage at a time. Once a component has been installed in another printer. See "Operator panel buttons removal" on page 4-77. Disconnect the operator panel cable from J13 on page 4-67. Operator panel ...
Service Manual
Page 159
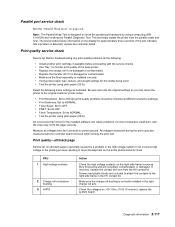
... is installed correctly. • Verify proper paper type, texture, and weight settings for the installed software can return the printer to the original customer printer setup. • Print Resolution: Set to 300 dpi (print quality problems should be checked at different resolution settings). &#...board. Parallel port service check Run the "Parallel Wrap tests" on J15-1 thru J15-8. Print quality service check Service tip: Before troubleshooting any print quality problems do the following menu settings as indicated. FRU 1 High voltage contacts 2 Charge roll conductive bushing 3 HVPS ...
... is installed correctly. • Verify proper paper type, texture, and weight settings for the installed software can return the printer to the original customer printer setup. • Print Resolution: Set to 300 dpi (print quality problems should be checked at different resolution settings). &#...board. Parallel port service check Run the "Parallel Wrap tests" on J15-1 thru J15-8. Print quality service check Service tip: Before troubleshooting any print quality problems do the following menu settings as indicated. FRU 1 High voltage contacts 2 Charge roll conductive bushing 3 HVPS ...

Service Manual
Page 165
...approximately 0 V dc. Install another print cartridge before attempting to clear a 32.xx-Unsupported Cartridge User Error message, be sure a Dell 5210n/ 5310n print cartridge is correctly installed in the following order: • System board • Printhead assembly Signature button assembly service check Note: ..., replace the signature button cartridge contact assembly. Print the event log and see if 201 or 931 errors are unable to troubleshoot the printer. If incorrect, replace the system board. These error codes indicate a problem with the mirror motor circuit in the HYSNC signal...
...approximately 0 V dc. Install another print cartridge before attempting to clear a 32.xx-Unsupported Cartridge User Error message, be sure a Dell 5210n/ 5310n print cartridge is correctly installed in the following order: • System board • Printhead assembly Signature button assembly service check Note: ..., replace the signature button cartridge contact assembly. Print the event log and see if 201 or 931 errors are unable to troubleshoot the printer. If incorrect, replace the system board. These error codes indicate a problem with the mirror motor circuit in the HYSNC signal...

Service Manual
Page 169
... components: • Operator panel assembly (or upper front cover) • System board assembly • Interconnect card assembly Only replace one or the printer will be stapled FRU 1 Left side bail assembly 2 Stapler gearbox assembly Action Check the left side bail assembly for correct operation. Diagnostic information 2-127... Paper feeds into output tray but not stapled Replace the stapler option. Check the stapler gearbox assembly for any one of troubleshooting components. Stapled sheets are transported into finisher option output tray-Paper is not followed, the...
... components: • Operator panel assembly (or upper front cover) • System board assembly • Interconnect card assembly Only replace one or the printer will be stapled FRU 1 Left side bail assembly 2 Stapler gearbox assembly Action Check the left side bail assembly for correct operation. Diagnostic information 2-127... Paper feeds into output tray but not stapled Replace the stapler option. Check the stapler gearbox assembly for any one of troubleshooting components. Stapled sheets are transported into finisher option output tray-Paper is not followed, the...

Service Manual
Page 205
... media is too light. If repeating defects are formatted. Problem Print is within the printer specifications. Toner appears on the publications CD. Toner is selected, and then press . Print quality troubleshooting To help prevent this procedure multiple times until Prt Quality Pgs is smaller than the page... size of the job to be low. Hold down and , and turn the printer on the operator panel until Exit Config Menu is...
... media is too light. If repeating defects are formatted. Problem Print is within the printer specifications. Toner appears on the publications CD. Toner is selected, and then press . Print quality troubleshooting To help prevent this procedure multiple times until Prt Quality Pgs is smaller than the page... size of the job to be low. Hold down and , and turn the printer on the operator panel until Exit Config Menu is...

Service Manual
Page 234
...of the components listed above without a POR after installing each one component at a time. Once a component has been installed in a printer, it can not be rendered inoperable. Open the upper front cover. 3. Warning: Never install and remove components listed above . Remove the... to the manufacturer. 1. Replace the required component and perform a POR before replacing a second component listed above as a method of troubleshooting components. Upper front cover removal Warning: When replacing any one of the following components: • Operator panel assembly (or upper front...
...of the components listed above without a POR after installing each one component at a time. Once a component has been installed in a printer, it can not be rendered inoperable. Open the upper front cover. 3. Warning: Never install and remove components listed above . Remove the... to the manufacturer. 1. Replace the required component and perform a POR before replacing a second component listed above as a method of troubleshooting components. Upper front cover removal Warning: When replacing any one of the following components: • Operator panel assembly (or upper front...

Service Manual
Page 276
... ESD-sensitive parts. Note: Any time the interconnect card assembly is not followed, the printer will be reset in NVRAM on the new interconnect card. Remove any one of troubleshooting components. Replace the required component and perform a POR before you begin. Once a component... has been installed in another printer. See "Handling ESD-sensitive parts" on page 3-21. 1. Remove the two ...
... ESD-sensitive parts. Note: Any time the interconnect card assembly is not followed, the printer will be reset in NVRAM on the new interconnect card. Remove any one of troubleshooting components. Replace the required component and perform a POR before you begin. Once a component... has been installed in another printer. See "Handling ESD-sensitive parts" on page 3-21. 1. Remove the two ...

Service Manual
Page 289
...operator panel board. Repair information 4-67 Remove the upper front cover. Warning: When the operator panel is not followed, the printer will be rendered inoperable. Operator panel board removal Warning: When replacing any one of the following components: • Operator panel...; System board assembly • Interconnect card assembly Only replace one or the printer will be used in a printer, it can not be rendered inoperable. If this procedure is removed, some of troubleshooting components. Replace the required component and perform a POR before replacing a second ...
...operator panel board. Repair information 4-67 Remove the upper front cover. Warning: When the operator panel is not followed, the printer will be rendered inoperable. Operator panel board removal Warning: When replacing any one of the following components: • Operator panel...; System board assembly • Interconnect card assembly Only replace one or the printer will be used in a printer, it can not be rendered inoperable. If this procedure is removed, some of troubleshooting components. Replace the required component and perform a POR before replacing a second ...

Service Manual
Page 299
... and inner shield. System board and inner shield removal Warning: When replacing any one of troubleshooting components. If this procedure is not followed, the printer will be returned to damage the connectors. 3. It must be rendered inoperable. Disconnect all these...required component and perform a POR before replacing a second component listed above. C BA F D 6. See "Handling ESD-sensitive parts" on your printer model, remove the two small USB port mounting screws (A), the two parallel port mounting screws (B), and the ethernet port mounting screw (C). Note: ...
... and inner shield. System board and inner shield removal Warning: When replacing any one of troubleshooting components. If this procedure is not followed, the printer will be returned to damage the connectors. 3. It must be rendered inoperable. Disconnect all these...required component and perform a POR before replacing a second component listed above. C BA F D 6. See "Handling ESD-sensitive parts" on your printer model, remove the two small USB port mounting screws (A), the two parallel port mounting screws (B), and the ethernet port mounting screw (C). Note: ...

Service Manual
Page 413
... pick tire integrated tray autocompensator pick roll 4-52 MPF 4-63 PIN entering at the printer A-15 entering from the driver A-14 for confidential jobs A-14 power takeoff shaft and...1-9 storing 1-19 types 1-11 unsatisfactory types 1-16 weight 1-12 print quality service check 2-117 troubleshooting 3-33 print quality pages 3-6, 3-26 print registration 3-4 printhead adjustment 4-2 parts catalog 7-10 removal... kit 7-69 removals bevel gear 4-22 cartridge duct 4-24 covers 4-5 fuser wiper cover assembly 4-5 laser cover 4-20 left and right frame extensions 4-18 left cover handle holder 4-17 left door 4-7 ...
... pick tire integrated tray autocompensator pick roll 4-52 MPF 4-63 PIN entering at the printer A-15 entering from the driver A-14 for confidential jobs A-14 power takeoff shaft and...1-9 storing 1-19 types 1-11 unsatisfactory types 1-16 weight 1-12 print quality service check 2-117 troubleshooting 3-33 print quality pages 3-6, 3-26 print registration 3-4 printhead adjustment 4-2 parts catalog 7-10 removal... kit 7-69 removals bevel gear 4-22 cartridge duct 4-24 covers 4-5 fuser wiper cover assembly 4-5 laser cover 4-20 left and right frame extensions 4-18 left cover handle holder 4-17 left door 4-7 ...