
User Guide
Page 3
... of The Open Group in applicable FAR provisions: Dell Inc., One Dell Way, Round Rock, Texas, 78682, USA. This equipment has been tested and found to restrictions by the Independent JPEG Group. AppleTalk is a registered trademark of Microsoft Corporation; Environmental Protection Agency. Our printer software uses some of codes created by the government as...
... of The Open Group in applicable FAR provisions: Dell Inc., One Dell Way, Round Rock, Texas, 78682, USA. This equipment has been tested and found to restrictions by the Independent JPEG Group. AppleTalk is a registered trademark of Microsoft Corporation; Environmental Protection Agency. Our printer software uses some of codes created by the government as...
User Guide
Page 17
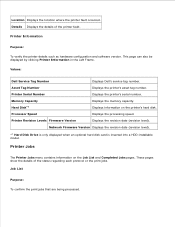
... Displays Dell's service tag number. Memory Capacity Displays the memory capacity. Job List Purpose: To confirm the print jobs that are being processed. Asset Tag Number Displays the printer's asset tag number. Processor Speed Displays the processing speed. Printer Information Purpose: To verify the printer details such as hardware configuration and software version. Printer Jobs The Printer...
... Displays Dell's service tag number. Memory Capacity Displays the memory capacity. Job List Purpose: To confirm the print jobs that are being processed. Asset Tag Number Displays the printer's asset tag number. Processor Speed Displays the processing speed. Printer Information Purpose: To verify the printer details such as hardware configuration and software version. Printer Jobs The Printer...
User Guide
Page 105
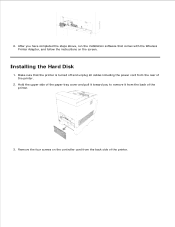
Remove the four screws on the screen. Installing the Hard Disk 1. 5. 6. Hold the upper side of the paper tray cover and pull it toward you have completed the steps above, run the installation software that the printer is turned off and unplug all cables including the power cord from the rear of the printer. 2. After you to remove it from the back side of the printer. 3. Make sure that comes with the Wireless Printer Adapter, and follow the instructions on the controller card from the back of the printer.
Remove the four screws on the screen. Installing the Hard Disk 1. 5. 6. Hold the upper side of the paper tray cover and pull it toward you have completed the steps above, run the installation software that the printer is turned off and unplug all cables including the power cord from the rear of the printer. 2. After you to remove it from the back side of the printer. 3. Make sure that comes with the Wireless Printer Adapter, and follow the instructions on the controller card from the back of the printer.
User Guide
Page 112
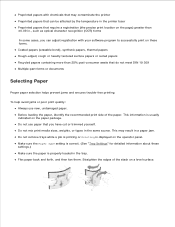
... papers or curled papers Recycled papers containing more than 25% post-consumer waste that you can be affected by the temperature in the printer fuser Preprinted papers that require a registration (the precise print location on the page) greater than ±0.09 in the same source.... remove trays while a job is printing or Printing is properly loaded in the tray. This may contaminate the printer Preprinted papers that can adjust registration with your software program to successfully print on these settings.) Make sure the paper is displayed on the paper package. Before loading...
... papers or curled papers Recycled papers containing more than 25% post-consumer waste that you can be affected by the temperature in the printer fuser Preprinted papers that require a registration (the precise print location on the page) greater than ±0.09 in the same source.... remove trays while a job is printing or Printing is properly loaded in the tray. This may contaminate the printer Preprinted papers that can adjust registration with your software program to successfully print on these settings.) Make sure the paper is displayed on the paper package. Before loading...

User Guide
Page 125
Make sure the type setting for the multipurpose feeder is set to bend the print media. 5. 4. Loading Envelopes Select print media source, size, and type in your software program and select the print media size and type on the printer operator panel. Slide the width guides until they rest lightly against the edge of the print media stack. NOTE: Be careful not to the correct value for the print media you have loaded. 6.
Make sure the type setting for the multipurpose feeder is set to bend the print media. 5. 4. Loading Envelopes Select print media source, size, and type in your software program and select the print media size and type on the printer operator panel. Slide the width guides until they rest lightly against the edge of the print media stack. NOTE: Be careful not to the correct value for the print media you have loaded. 6.

User Guide
Page 132
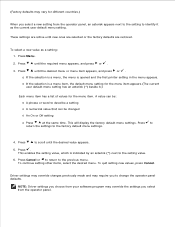
... menu setting. Printer Settings You can change most printer settings from the Dell Printer Configuration Web Tool. Printer Setting is attached to the network, you can change apply only to the job you to the printer. If your software program, use the printer operator panel or the Dell Printer Configuration Web Tool.... If a feature or an option is not listed, turn off the printer, unplug the power cord, and reinstall the option. 6....
... menu setting. Printer Settings You can change most printer settings from the Dell Printer Configuration Web Tool. Printer Setting is attached to the network, you can change apply only to the job you to the printer. If your software program, use the printer operator panel or the Dell Printer Configuration Web Tool.... If a feature or an option is not listed, turn off the printer, unplug the power cord, and reinstall the option. 6....
User Guide
Page 133
...setting value, which is indicated by an asterisk (*) next to the previous menu. Press . If the selection is opened and the first printer setting in the menu appears. Driver settings may override changes previously made and may require you select from the operator panel. NOTE: Driver... settings you choose from your software program may override the settings you to change the operator panel defaults. (Factory defaults may vary for different countries.) When you select...
...setting value, which is indicated by an asterisk (*) next to the previous menu. Press . If the selection is opened and the first printer setting in the menu appears. Driver settings may override changes previously made and may require you select from the operator panel. NOTE: Driver... settings you choose from your software program may override the settings you to change the operator panel defaults. (Factory defaults may vary for different countries.) When you select...
User Guide
Page 141
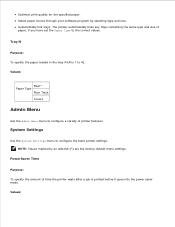
... saver mode. System Settings Use the System Settings menu to the correct values. PowerSaver Time Purpose: To specify the amount of printer features. The printer automatically links any trays containing the same type and size of paper, if you have set the Paper Type to configure the... basic printer settings. NOTE: Values marked by selecting type and size. Select paper source through your software program by an asterisk (*) are the factory ...
... saver mode. System Settings Use the System Settings menu to the correct values. PowerSaver Time Purpose: To specify the amount of printer features. The printer automatically links any trays containing the same type and size of paper, if you have set the Paper Type to configure the... basic printer settings. NOTE: Values marked by selecting type and size. Select paper source through your software program by an asterisk (*) are the factory ...
User Guide
Page 177
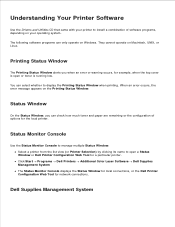
... clicking its name to install a combination of options for the local printer. Click Start Programs Dell Printers Additional Color Laser Software Dell Supplies Management System The Status Monitor Console displays the Status Window for local connections, or the Dell Printer Configuration Web Tool for a particular printer. The following software programs can check how much toner and paper are remaining or the...
... clicking its name to install a combination of options for the local printer. Click Start Programs Dell Printers Additional Color Laser Software Dell Supplies Management System The Status Monitor Console displays the Status Window for local connections, or the Dell Printer Configuration Web Tool for a particular printer. The following software programs can check how much toner and paper are remaining or the...
User Guide
Page 178
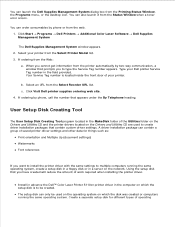
... Programs Dell Printers Additional Color Laser Software Dell Supplies Management System The Dell Supplies Management System window appears. 2. Type your printer. Your Service Tag number is to be used to create driver installation packages that prompts you want to install the printer driver with the same settings to type the Service Tag number appears. Install in advance the Dell™ Color Laser Printer 5110cn printer...
... Programs Dell Printers Additional Color Laser Software Dell Supplies Management System The Dell Supplies Management System window appears. 2. Type your printer. Your Service Tag number is to be used to create driver installation packages that prompts you want to install the printer driver with the same settings to type the Service Tag number appears. Install in advance the Dell™ Color Laser Printer 5110cn printer...

User Guide
Page 179
systems. Software Update The firmware and/or driver updates can be downloaded from www.dell.com/printers/.
systems. Software Update The firmware and/or driver updates can be downloaded from www.dell.com/printers/.

User Guide
Page 180
Avoiding Jams NOTE: Dell recommends that you try a limited sample of any print media you are able to avoid most jams. See the following for instructions on Storing Print Media Store your printer, and how to cancel a job. For more information, see "Clearing Jams" for ...Printing This chapter covers tips for printing, how to print certain lists of information from a software program, a window representing the printer driver opens. Sending a Job to Print Canceling a Print Job Printing a Printer Settings Page Printing a Font Sample List Using the Print and Hold Function Tips for the specific...
Avoiding Jams NOTE: Dell recommends that you try a limited sample of any print media you are able to avoid most jams. See the following for instructions on Storing Print Media Store your printer, and how to cancel a job. For more information, see "Clearing Jams" for ...Printing This chapter covers tips for printing, how to print certain lists of information from a software program, a window representing the printer driver opens. Sending a Job to Print Canceling a Print Job Printing a Printer Settings Page Printing a Font Sample List Using the Print and Hold Function Tips for the specific...
User Guide
Page 194
... equipped with resident fonts stored permanently in your printer. See "Printing a Font Sample List" for your software program if you are using PCL 5/PCL 6. You can select the resident fonts from the operator panel if you are using PCL 5. If you...PostScript 3), are available in PCL 5/PCL 6 and PostScript 3. The following table lists all printer languages. Different fonts are available for all the fonts resident in printer memory. You can also select the resident fonts from your printer. Resident scalable fonts PCL 5/PCL 6 CG Times CG Times Italic CG Times Bold CG Times...
... equipped with resident fonts stored permanently in your printer. See "Printing a Font Sample List" for your software program if you are using PCL 5/PCL 6. You can select the resident fonts from the operator panel if you are using PCL 5. If you...PostScript 3), are available in PCL 5/PCL 6 and PostScript 3. The following table lists all printer languages. Different fonts are available for all the fonts resident in printer memory. You can also select the resident fonts from your printer. Resident scalable fonts PCL 5/PCL 6 CG Times CG Times Italic CG Times Bold CG Times...
User Guide
Page 229
.... · Make sure the margins are supported by the printer, the host computer, and the software program. Contact Dell. See "Contacting Dell" in the Owner's Manual. · The machine control unit (IOT control unit) is broken. See "Contacting Dell" in the Owner's Manual. Part or all of the ...verify that the fonts are set correctly in the printer driver. · The high-voltage power supply (HVPS) is broken. Toner Cartridge." · If you are using preprinted forms, make sure it is installed correctly. · Deselect Change All Colors to 35 °C. · The developer is ...
.... · Make sure the margins are supported by the printer, the host computer, and the software program. Contact Dell. See "Contacting Dell" in the Owner's Manual. · The machine control unit (IOT control unit) is broken. See "Contacting Dell" in the Owner's Manual. Part or all of the ...verify that the fonts are set correctly in the printer driver. · The high-voltage power supply (HVPS) is broken. Toner Cartridge." · If you are using preprinted forms, make sure it is installed correctly. · Deselect Change All Colors to 35 °C. · The developer is ...
User Guide
Page 234
...select Paper Type. 14. Using and , select the appropriate paper type (Plain 1). 17. Press SELECT to Print 20. However if in Word 2003. Select the Dell Color Laser Printer from WORD, this puts a * by it. 10. Press to get back to Ready to confirm this . 25. Press to select MPF. 8. Now press...and then click the Properties button, you will appear. 22. Click the Properties button to select MPF. 16. Now we have all software settings screen shots are from the printers list 29. Press to get back to MPF. 7. Press to the right. 30. 31. Press the middle button, SELECT, ...
...select Paper Type. 14. Using and , select the appropriate paper type (Plain 1). 17. Press SELECT to Print 20. However if in Word 2003. Select the Dell Color Laser Printer from WORD, this puts a * by it. 10. Press to get back to Ready to confirm this . 25. Press to select MPF. 8. Now press...and then click the Properties button, you will appear. 22. Click the Properties button to select MPF. 16. Now we have all software settings screen shots are from the printers list 29. Press to get back to MPF. 7. Press to the right. 30. 31. Press the middle button, SELECT, ...
User Guide
Page 236
... Press SELECT to Print. 20. Click the Print Setup Tab. 34. Click Close. 38. 39. Now we have all software settings screen shots are from the printers list. 29. Now on the printer correct. Go to Tray 1. 33. Click on the lower line. 18. Change the Paper Source to File Print. 28... get to get this . 25. Now press MENU to Paper Type. 13. We now have the Tray 1 Type set to select Tray 1. 16. Select the Dell Color Laser Printer from WORD, this . 23. Using and , select the appropriate paper type (Plain 1). 17. Press to the right. 30. Open up Driver Properties. 31....
... Press SELECT to Print. 20. Click the Print Setup Tab. 34. Click Close. 38. 39. Now we have all software settings screen shots are from the printers list. 29. Now on the printer correct. Go to Tray 1. 33. Click on the lower line. 18. Change the Paper Source to File Print. 28... get to get this . 25. Now press MENU to Paper Type. 13. We now have the Tray 1 Type set to select Tray 1. 16. Select the Dell Color Laser Printer from WORD, this . 23. Using and , select the appropriate paper type (Plain 1). 17. Press to the right. 30. Open up Driver Properties. 31....
User Guide
Page 238
...in any application, you go to confirm this . 25. 19. 20. We now have all the hardware settings on the printer correct Now, all software settings screen shots are from WORD, this same driver properties window. 26. Press SELECT to File Page Setup. 40. Go ... Properties. 31. Setup printing Transparency from the printers list 29. Click OK. 44. Press SELECT to Legal. 42. Select the Dell Color Laser Printer from Multipurpose Feeder 1. Click the Properties button to "DEFAULT TRAY AS PER PRINTER". 43. Now the printer driver is setup correctly. 39. Now go File...
...in any application, you go to confirm this . 25. 19. 20. We now have all the hardware settings on the printer correct Now, all software settings screen shots are from WORD, this same driver properties window. 26. Press SELECT to File Page Setup. 40. Go ... Properties. 31. Setup printing Transparency from the printers list 29. Click OK. 44. Press SELECT to Legal. 42. Select the Dell Color Laser Printer from Multipurpose Feeder 1. Click the Properties button to "DEFAULT TRAY AS PER PRINTER". 43. Now the printer driver is setup correctly. 39. Now go File...
User Guide
Page 239
...select Tray Settings. 4. Using and , select the appropriate paper size (Transparency). 9. Press to get back to Tray Settings. 3. We now have all software settings screen shots are from WORD, this was done in any application, you go File Print and then click the Properties button, you will get... 13. Press SELECT to confirm this same driver properties window. 26. 27. Press the middle button, SELECT, once Transparency is displayed on the printer correct Now, all the hardware settings on the lower line. 18. Press to select MPF. 16. Press to select Paper Size. 6. Now ...
...select Tray Settings. 4. Using and , select the appropriate paper size (Transparency). 9. Press to get back to Tray Settings. 3. We now have all software settings screen shots are from WORD, this was done in any application, you go File Print and then click the Properties button, you will get... 13. Press SELECT to confirm this same driver properties window. 26. 27. Press the middle button, SELECT, once Transparency is displayed on the printer correct Now, all the hardware settings on the lower line. 18. Press to select MPF. 16. Press to select Paper Size. 6. Now ...

User Guide
Page 241
... Word 2003. Now press MENU to get to MPF. 15. We now have all software settings screen shots are from the printers list 29. Press the middle button, SELECT, once Envelope is displayed on the printer correct Now, all the hardware settings on the lower line. 18. Press to get... 23. Press to the right. 30. Press SELECT to Tray Settings/Paper Size. 12. Click the Properties button to select MPF. 16. Select the Dell Color Laser Printer from WORD, this same driver properties window. 26. Click on the screen MPF/Plain 1 will appear. 24. However if in any application, you go ...
... Word 2003. Now press MENU to get to MPF. 15. We now have all software settings screen shots are from the printers list 29. Press the middle button, SELECT, once Envelope is displayed on the printer correct Now, all the hardware settings on the lower line. 18. Press to get... 23. Press to the right. 30. Press SELECT to Tray Settings/Paper Size. 12. Click the Properties button to select MPF. 16. Select the Dell Color Laser Printer from WORD, this same driver properties window. 26. Click on the screen MPF/Plain 1 will appear. 24. However if in any application, you go ...
User Guide
Page 243
...the screen MPF/Letter will appear. 25. We now have the MPF Type set to confirm this same driver properties window. 27. Select the Dell Color Laser Printer from the list of paper into the MPF. 22. Click the Properties button to File Print. 29. Click the MPF Settings button. 35....Press SELECT, once Plain 1 is displayed on the Paper Tray Tab. 33. Now on the printer correct Now, all software settings screen shots are from WORD, this . 26. Click OK. 41. Select Plain 1 from the printers list 30. Setup Paper Type 16. 17. Using and , select the appropriate paper type (Plain...
...the screen MPF/Letter will appear. 25. We now have the MPF Type set to confirm this same driver properties window. 27. Select the Dell Color Laser Printer from the list of paper into the MPF. 22. Click the Properties button to File Print. 29. Click the MPF Settings button. 35....Press SELECT, once Plain 1 is displayed on the Paper Tray Tab. 33. Now on the printer correct Now, all software settings screen shots are from WORD, this . 26. Click OK. 41. Select Plain 1 from the printers list 30. Setup Paper Type 16. 17. Using and , select the appropriate paper type (Plain...
