Owner's Manual
Page 6
www.dell.com/supplies | support.dell.com 5 Using Your Printer 33 Changing Printer Settings 34 Initializing NVRAM ...35 Setting of Panel Lock 35 Adjusting the Language 36 Printing a Job ...36 Canceling a Job From the Printer Operator Panel 36 ...Dell Supplies Management System 38 User Setup Disk Creating Tool 38 Software Update ...38 6 Maintenance 39 Replacing the Imaging Drum 40 Removing the Used Imaging Drum 40 Installing the New Imaging Drum 41 Replacing the Toner Cartridge 43 Removing the Used Toner Cartridge 43 Installing the New Toner Cartridge 44 Replacing the Transfer Roller...
www.dell.com/supplies | support.dell.com 5 Using Your Printer 33 Changing Printer Settings 34 Initializing NVRAM ...35 Setting of Panel Lock 35 Adjusting the Language 36 Printing a Job ...36 Canceling a Job From the Printer Operator Panel 36 ...Dell Supplies Management System 38 User Setup Disk Creating Tool 38 Software Update ...38 6 Maintenance 39 Replacing the Imaging Drum 40 Removing the Used Imaging Drum 40 Installing the New Imaging Drum 41 Replacing the Toner Cartridge 43 Removing the Used Toner Cartridge 43 Installing the New Toner Cartridge 44 Replacing the Transfer Roller...

Owner's Manual
Page 39
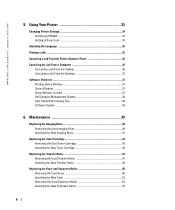
Section 6 Maintenance Replacing the Imaging Drum Replacing the Toner Cartridge Replacing the Transfer Roller Replacing the Fuser and Separator Roller Cleaning the Automatic Density Control (ADC) Sensor 6 Maintenance
Section 6 Maintenance Replacing the Imaging Drum Replacing the Toner Cartridge Replacing the Transfer Roller Replacing the Fuser and Separator Roller Cleaning the Automatic Density Control (ADC) Sensor 6 Maintenance

Owner's Manual
Page 47
... front latch up and fully open the front cover. 2. NOTE: Remove any of the printer. Maintenance 47 Dell transfer roller are available only through Dell. Grip the tabs at both ends of the transfer roller and gently lift it is sharp. Replacing the Transfer Roller CAUTION: Before performing any print jobs from the center output tray, and close the multipurpose...
... front latch up and fully open the front cover. 2. NOTE: Remove any of the printer. Maintenance 47 Dell transfer roller are available only through Dell. Grip the tabs at both ends of the transfer roller and gently lift it is sharp. Replacing the Transfer Roller CAUTION: Before performing any print jobs from the center output tray, and close the multipurpose...
Owner's Manual
Page 57
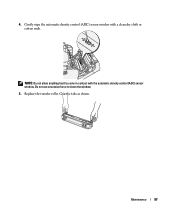
NOTE: Do not allow anything hard to clean the window. 5. Replace the transfer roller. Grip the tabs as shown. Do not use excessive force to come in contact with a clean dry cloth or cotton swab. Gently wipe the automatic density control (ADC) sensor window with the automatic density control (ADC) sensor window. 4. Maintenance 57
NOTE: Do not allow anything hard to clean the window. 5. Replace the transfer roller. Grip the tabs as shown. Do not use excessive force to come in contact with a clean dry cloth or cotton swab. Gently wipe the automatic density control (ADC) sensor window with the automatic density control (ADC) sensor window. 4. Maintenance 57


