Owner's Manual
Page 2
... 7486 0860 102 591 902 120 385 08 587 705 81 0848 335 599 Contact your distributor. Order Printer Supplies Dell™ Printer Supplies are available only through Dell. You can order Printer Supplies online at www.dell.com/supplies or by phone. US Algeria Argentina Australia Austria Belgium Canada Caribbean Islands Chile Colombia Czech Republic...
... 7486 0860 102 591 902 120 385 08 587 705 81 0848 335 599 Contact your distributor. Order Printer Supplies Dell™ Printer Supplies are available only through Dell. You can order Printer Supplies online at www.dell.com/supplies or by phone. US Algeria Argentina Australia Austria Belgium Canada Caribbean Islands Chile Colombia Czech Republic...
Owner's Manual
Page 3
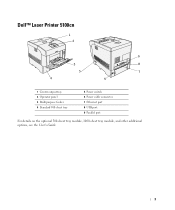
Dell™ Laser Printer 5100cn 1 2 9 3 8 5 7 4 6 1 Center output tray 2 Operator panel 3 Multipurpose feeder 4 Standard 500-sheet tray 5 Power switch 6 Power cable connector 7 Ethernet port 8 USB port 9 Parallel port For details on the optional 500-sheet tray module, 1000-sheet tray module, and other additional options, see the User's Guide. 3
Dell™ Laser Printer 5100cn 1 2 9 3 8 5 7 4 6 1 Center output tray 2 Operator panel 3 Multipurpose feeder 4 Standard 500-sheet tray 5 Power switch 6 Power cable connector 7 Ethernet port 8 USB port 9 Parallel port For details on the optional 500-sheet tray module, 1000-sheet tray module, and other additional options, see the User's Guide. 3
Owner's Manual
Page 4
...used in the United States and other than its own. Other trademarks and trade names may be used in applicable FAR provisions: Dell Inc., One Dell Way, Round Rock, Texas, 78682, USA. PCL is subject to restrictions as set forth in subparagraph (c)(1)(ii) of the ...the problem. disclaims any manner whatsoever without notice. © 2004 Dell Inc. www.dell.com/supplies | support.dell.com Notes, Notices, and Cautions NOTE: A NOTE indicates important information that helps you make better use of your printer NOTICE: A NOTICE indicates either the entities claiming the marks and names...
...used in the United States and other than its own. Other trademarks and trade names may be used in applicable FAR provisions: Dell Inc., One Dell Way, Round Rock, Texas, 78682, USA. PCL is subject to restrictions as set forth in subparagraph (c)(1)(ii) of the ...the problem. disclaims any manner whatsoever without notice. © 2004 Dell Inc. www.dell.com/supplies | support.dell.com Notes, Notices, and Cautions NOTE: A NOTE indicates important information that helps you make better use of your printer NOTICE: A NOTICE indicates either the entities claiming the marks and names...
Owner's Manual
Page 5
Contents Dell™ Laser Printer 5100cn 3 1 Loading Paper 11 Loading the Standard Tray 12 Loading the Multipurpose Feeder 15 Loading Envelopes ...17 2 Setting Up for Local Printing 19 Installing Printer Drivers 20 Connecting the Printer to the Computer Before Inserting the Drivers and Utilities CD ...20 3 Setting Up for Network Printing 23 Network Set-Up ...24...
Contents Dell™ Laser Printer 5100cn 3 1 Loading Paper 11 Loading the Standard Tray 12 Loading the Multipurpose Feeder 15 Loading Envelopes ...17 2 Setting Up for Local Printing 19 Installing Printer Drivers 20 Connecting the Printer to the Computer Before Inserting the Drivers and Utilities CD ...20 3 Setting Up for Network Printing 23 Network Set-Up ...24...
Owner's Manual
Page 6
www.dell.com/supplies | support.dell.com 5 Using Your Printer 33 Changing Printer Settings 34 Initializing NVRAM ...35 Setting of Panel Lock 35 Adjusting the Language 36 Printing a Job ...36 Canceling a Job From the Printer Operator Panel 36 Canceling the Job From a Computer 36 Canceling a Job From the ...Taskbar 36 Canceling a Job From the Desktop 37 Software Overview ...37 Printing Status Window 37 Status Window ...37 Status Monitor Console 37 Dell Supplies Management System 38 ...
www.dell.com/supplies | support.dell.com 5 Using Your Printer 33 Changing Printer Settings 34 Initializing NVRAM ...35 Setting of Panel Lock 35 Adjusting the Language 36 Printing a Job ...36 Canceling a Job From the Printer Operator Panel 36 Canceling the Job From a Computer 36 Canceling a Job From the ...Taskbar 36 Canceling a Job From the Desktop 37 Software Overview ...37 Printing Status Window 37 Status Window ...37 Status Monitor Console 37 Dell Supplies Management System 38 ...
Owner's Manual
Page 9
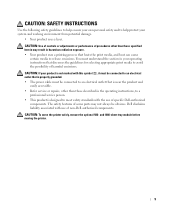
...optional 500- and 1000-sheet tray module before moving the printer. 9 The safety features of non-Dell-authorized components. CAUTION: If your system and working environment from potential damage. • Your product uses a laser. Dell disclaims liability associated with the use of some parts may ...operating instructions, to a professional service person. • This product is designed to meet safety standards with use of specific Dell-authorized components. CAUTION: SAFETY INSTRUCTIONS Use the following safety guidelines to help ensure your own personal safety and to help ...
...optional 500- and 1000-sheet tray module before moving the printer. 9 The safety features of non-Dell-authorized components. CAUTION: If your system and working environment from potential damage. • Your product uses a laser. Dell disclaims liability associated with the use of some parts may ...operating instructions, to a professional service person. • This product is designed to meet safety standards with use of specific Dell-authorized components. CAUTION: SAFETY INSTRUCTIONS Use the following safety guidelines to help ensure your own personal safety and to help ...

Owner's Manual
Page 12
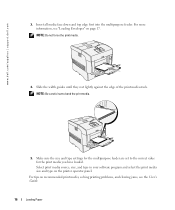
www.dell.com/supplies | support.dell.com Loading the Standard Tray Load the print media used for the majority of the tray. Slide the width guides to the A4 position. 12 Loading Paper NOTE: For A4 paper, push the lever to the edge of your print jobs in the standard 500-sheet tray. 1. Hold the tray with both hands, lift the front slightly, and remove it stops. The width guides should be fully extended. Pull the tray out of the printer until it from the printer. 2.
www.dell.com/supplies | support.dell.com Loading the Standard Tray Load the print media used for the majority of the tray. Slide the width guides to the A4 position. 12 Loading Paper NOTE: For A4 paper, push the lever to the edge of your print jobs in the standard 500-sheet tray. 1. Hold the tray with both hands, lift the front slightly, and remove it stops. The width guides should be fully extended. Pull the tray out of the printer until it from the printer. 2.

Owner's Manual
Page 14
If you load any print media into the printer, and push until they rest lightly against the edge of the print media stack. 7. Insert the tray into the tray, configure the Paper Type settings for that tray according to the message on the operator panel. 14 Loading Paper www.dell.com/supplies | support.dell.com 6. Slide the width guides and length guide until it stops. 8.
If you load any print media into the printer, and push until they rest lightly against the edge of the print media stack. 7. Insert the tray into the tray, configure the Paper Type settings for that tray according to the message on the operator panel. 14 Loading Paper www.dell.com/supplies | support.dell.com 6. Slide the width guides and length guide until it stops. 8.
Owner's Manual
Page 16
... force the print media. 4. Select print media source, size, and type in your software program and select the print media size and type on the printer operator panel. www.dell.com/supplies | support...
... force the print media. 4. Select print media source, size, and type in your software program and select the print media size and type on the printer operator panel. www.dell.com/supplies | support...

Owner's Manual
Page 17
... open and at one time. NOTICE: Never use envelopes with windows, coated linings, or self-stick adhesives. You can load envelopes up to the printer. Loading Paper 17 After loading envelopes, make sure the size and type setting for the multipurpose feeder is set to the correct value for the... must be facing down. Select print media source, size, and type in your software program and select the print media size and type on the printer operator panel. Loading Envelopes To load envelopes that are under 8.66 inches (220 mm) in width in the multipurpose feeder, insert the envelopes either ...
... open and at one time. NOTICE: Never use envelopes with windows, coated linings, or self-stick adhesives. You can load envelopes up to the printer. Loading Paper 17 After loading envelopes, make sure the size and type setting for the multipurpose feeder is set to the correct value for the... must be facing down. Select print media source, size, and type in your software program and select the print media size and type on the printer operator panel. Loading Envelopes To load envelopes that are under 8.66 inches (220 mm) in width in the multipurpose feeder, insert the envelopes either ...

Owner's Manual
Page 19
2 Section 2 Setting Up for Local Printing Installing Printer Drivers Setting Up for Local Printing
2 Section 2 Setting Up for Local Printing Installing Printer Drivers Setting Up for Local Printing

Owner's Manual
Page 20
... attached to a network and not your computer, see "Setting Up for Local Printing Click Finish. 11. www.dell.com/supplies | support.dell.com A local printer is a printer attached to your computer or a print server using Windows 98 or Me, the Adobe License Agreement appears, click to accept the agreement and then click ...
... attached to a network and not your computer, see "Setting Up for Local Printing Click Finish. 11. www.dell.com/supplies | support.dell.com A local printer is a printer attached to your computer or a print server using Windows 98 or Me, the Adobe License Agreement appears, click to accept the agreement and then click ...
Owner's Manual
Page 21
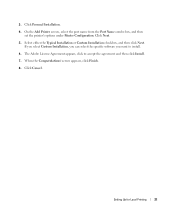
.... 8. Select either the Typical Installation or Custom Installation checkbox, and then click Next. On the Add Printer screen, select the port name from the Port Name combo box, and then set the printer's options under Printer Configuration. When the Congratulations! If you select Custom Installation, you can select the specific software you want...
.... 8. Select either the Typical Installation or Custom Installation checkbox, and then click Next. On the Add Printer screen, select the port name from the Port Name combo box, and then set the printer's options under Printer Configuration. When the Congratulations! If you select Custom Installation, you can select the specific software you want...

Owner's Manual
Page 24
...set-up configurations, refer to Print appears in the LCD, press Menu. b. Print and Check the Printer Settings Page 1. Printer Settings is printed. 2. www.dell.com/supplies | support.dell.com Network Set-Up NOTE: To use this situation, disable the Windows XP firewall before you install the... Dell printer software. To prevent this printer in a UNIX or Linux environment, you install the printer software. If the IP address is enabled, you cannot view your networked printer(s) when you install the printer software does not limit the use of...
...set-up configurations, refer to Print appears in the LCD, press Menu. b. Print and Check the Printer Settings Page 1. Printer Settings is printed. 2. www.dell.com/supplies | support.dell.com Network Set-Up NOTE: To use this situation, disable the Windows XP firewall before you install the... Dell printer software. To prevent this printer in a UNIX or Linux environment, you install the printer software. If the IP address is enabled, you cannot view your networked printer(s) when you install the printer software does not limit the use of...
Owner's Manual
Page 25
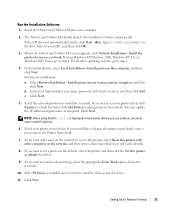
...software automatically. When the Drivers and Utilities CD screen appears, click Network Installation - For all other operating systems, go to change the printer name listed, enter a new name in the installer. If you would like to step 4. Enter the password. 10. Click Next... color printing, select the appropriate Color Track option. Select your printer listed, click Update to refresh the list or click Add Printer to add a printer to access this printer, select Share this point. Run the Installation Software 1. Install the printer for Network Printing 25 Install printer on...
...software automatically. When the Drivers and Utilities CD screen appears, click Network Installation - For all other operating systems, go to change the printer name listed, enter a new name in the installer. If you would like to step 4. Enter the password. 10. Click Next... color printing, select the appropriate Color Track option. Select your printer listed, click Update to refresh the list or click Add Printer to add a printer to access this printer, select Share this point. Run the Installation Software 1. Install the printer for Network Printing 25 Install printer on...

Owner's Manual
Page 26
...screen appears, select whether or not to install. Click E-Mail Alert link. 3. For PostScript Driver Installation Only- You can set up the Dell Printer Configuration Web Tool to send you want to restart your Web browser. NOTE: The SMTP server will display Connection in the email list box... the Primary SMTP Gateway, the Reply Address, and enter your desk. Use the Dell Printer Configuration Web Tool to accept the agreement and then click Install. 15. www.dell.com/supplies | support.dell.com 12. If the Adobe License Agreement appears, click to monitor the status of...
...screen appears, select whether or not to install. Click E-Mail Alert link. 3. For PostScript Driver Installation Only- You can set up the Dell Printer Configuration Web Tool to send you want to restart your Web browser. NOTE: The SMTP server will display Connection in the email list box... the Primary SMTP Gateway, the Reply Address, and enter your desk. Use the Dell Printer Configuration Web Tool to accept the agreement and then click Install. 15. www.dell.com/supplies | support.dell.com 12. If the Adobe License Agreement appears, click to monitor the status of...

Owner's Manual
Page 27
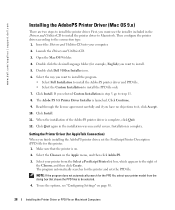
4 Section4 Installing the Printer Driver or PPD File on Macintosh Computers Installing the AdobePS Printer Driver (Mac OS 9.x) Installing the PPD File (Mac OS X) Installing the Printer Driver or PPD File on Macintosh Computers
4 Section4 Installing the Printer Driver or PPD File on Macintosh Computers Installing the AdobePS Printer Driver (Mac OS 9.x) Installing the PPD File (Mac OS X) Installing the Printer Driver or PPD File on Macintosh Computers
Owner's Manual
Page 28
... the Chooser on Macintosh Computers The program automatically searches for this printer. 1. Click Continue. 9. Select your computer. 2. Double click Dell 5100cn Installer icon. 6. To use the installer included in the installation was successful screen. www.dell.com/supplies | support.dell.com Installing the AdobePS Printer Driver (Mac OS 9.x) There are two steps to the connection...
... the Chooser on Macintosh Computers The program automatically searches for this printer. 1. Click Continue. 9. Select your computer. 2. Double click Dell 5100cn Installer icon. 6. To use the installer included in the installation was successful screen. www.dell.com/supplies | support.dell.com Installing the AdobePS Printer Driver (Mac OS 9.x) There are two steps to the connection...
Owner's Manual
Page 29
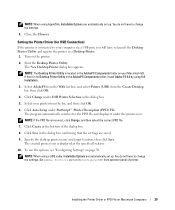
...: When using Full Installation. 3. Set Adobe Protocol as a Desktop Printer. 1. Select AdobePS from the With list box, and select Printer (USB) from operator panel of the dialog box. 8. Click Auto Setup under PostScript™ Printer Description (PPD) File. To use the options, see "Configuring Settings... Select your computer via a USB port, you will have to launch the Desktop Printer Utility and register the printer as RAW in the dialog box. 5. If there is no Desktop Printer Utility in the dialog box confirming that the settings are automatically set up . Start ...
...: When using Full Installation. 3. Set Adobe Protocol as a Desktop Printer. 1. Select AdobePS from the With list box, and select Printer (USB) from operator panel of the dialog box. 8. Click Auto Setup under PostScript™ Printer Description (PPD) File. To use the options, see "Configuring Settings... Select your computer via a USB port, you will have to launch the Desktop Printer Utility and register the printer as RAW in the dialog box. 5. If there is no Desktop Printer Utility in the dialog box confirming that the settings are automatically set up . Start ...
Owner's Manual
Page 30
www.dell.com/supplies | support.dell.com Setting the Printer Driver (for the printer being used in the dialog box confirming that the settings are saved. 9. Turn on page 30. Click Change under LPR Printer Selection in the AdobePS Components folder, install Adobe PS 8.8 by using Full Installation. 3. The created printer icon is displayed at the bottom...
www.dell.com/supplies | support.dell.com Setting the Printer Driver (for the printer being used in the dialog box confirming that the settings are saved. 9. Turn on page 30. Click Change under LPR Printer Selection in the AdobePS Components folder, install Adobe PS 8.8 by using Full Installation. 3. The created printer icon is displayed at the bottom...


