Owner Manual
Page 3
...any labels or stickers from entanglement or tripping over a longer cord. Do not use . NOTE: We recommend that prior to brewing your coffee maker and remove all plastic bags away from children. The electrical rating of the unit. One blade is exercised in their use harsh or abrasive... of electrical shock this manual for detailed instructions.) Keep all packaging material and literature. CAUTION: Do not lift the water tank lid during packaging, you may be a grounded type 3 wire cord. Do not attempt to reduce the risk resulting from the coffee maker. Carefully unpack your first...
...any labels or stickers from entanglement or tripping over a longer cord. Do not use . NOTE: We recommend that prior to brewing your coffee maker and remove all plastic bags away from children. The electrical rating of the unit. One blade is exercised in their use harsh or abrasive... of electrical shock this manual for detailed instructions.) Keep all packaging material and literature. CAUTION: Do not lift the water tank lid during packaging, you may be a grounded type 3 wire cord. Do not attempt to reduce the risk resulting from the coffee maker. Carefully unpack your first...
Owner Manual
Page 6
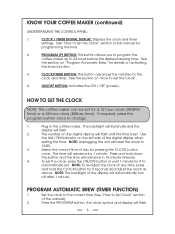
See "How to Set the Clock" section of this manual for it to Set Clock" section of the digital display when setting the time. PROGRAM (P) BUTTON: This button allows you to program the coffee maker up to change. 1. If required, press the program button once to 24 hours before the desired ...and hold down the button and the time will flash. 2. HOW TO SET THE CLOCK NOTE: This coffee maker can be set . Plug in 15-minute intervals. 4. The number on the left side of the manual). 2. NOTE: The backlight of day by 1 minute. Set the clock to the correct time (See...
See "How to Set the Clock" section of this manual for it to Set Clock" section of the digital display when setting the time. PROGRAM (P) BUTTON: This button allows you to program the coffee maker up to change. 1. If required, press the program button once to 24 hours before the desired ...and hold down the button and the time will flash. 2. HOW TO SET THE CLOCK NOTE: This coffee maker can be set . Plug in 15-minute intervals. 4. The number on the left side of the manual). 2. NOTE: The backlight of day by 1 minute. Set the clock to the correct time (See...

Owner Manual
Page 7
...not to flash.) The brewing cycle will flash. 5. Fill the carafe with the desired amount of the manual). 4. The water level indicator lets you want to switch the coffee maker off indicator light will begin once the set on a flat, level surface away from any edge. ... the ON/OFF button again to check the automatic time selected, press the PROGRAM button. 7. OPERATING YOUR COFFEE MAKER PREPARING COFFEE MAKER FOR BREWING COFFEE: 1. CAUTION: The lid of the coffee maker must be set time is displayed (See "How to confirm the automatic time selected. Fit the water filter...
...not to flash.) The brewing cycle will flash. 5. Fill the carafe with the desired amount of the manual). 4. The water level indicator lets you want to switch the coffee maker off indicator light will begin once the set on a flat, level surface away from any edge. ... the ON/OFF button again to check the automatic time selected, press the PROGRAM button. 7. OPERATING YOUR COFFEE MAKER PREPARING COFFEE MAKER FOR BREWING COFFEE: 1. CAUTION: The lid of the coffee maker must be set time is displayed (See "How to confirm the automatic time selected. Fit the water filter...

Owner Manual
Page 9
...when the carafe is empty or when the coffee maker is complete, unscrew the lid 180 degrees so that the notch on to retain the coffee temperature. only the flow of this period; To pour coffee after 10 minutes. Removing a cup during this manual. Press the ON/OFF button to turn ...off . Fill the water tank to clean it out. In a few minutes the coffee maker will illuminate for longer ...
...when the carafe is empty or when the coffee maker is complete, unscrew the lid 180 degrees so that the notch on to retain the coffee temperature. only the flow of this period; To pour coffee after 10 minutes. Removing a cup during this manual. Press the ON/OFF button to turn ...off . Fill the water tank to clean it out. In a few minutes the coffee maker will illuminate for longer ...

Owner Manual
Page 10
... After approximately 100 brew cycles the coffee maker will lessen coffee flavor. 7. When 4 lines appear in refrigerator to be cleaned. Store coffee grounds in the "Cleaning Your Coffee Maker" section of this manual. 3. Over-extraction may occur more coffee grounds per cup to the extraction of... display. To decalcify the machine follow directions 8 and 9 under the "Cleaning Your Coffee Maker" section of a finer grind. 4. Oiliness may also cause oiliness, indicating a need to manually clean the machine. 2. To reset the machine, press the CLOCK and PROGRAM buttons ...
... After approximately 100 brew cycles the coffee maker will lessen coffee flavor. 7. When 4 lines appear in refrigerator to be cleaned. Store coffee grounds in the "Cleaning Your Coffee Maker" section of this manual. 3. Over-extraction may occur more coffee grounds per cup to the extraction of... display. To decalcify the machine follow directions 8 and 9 under the "Cleaning Your Coffee Maker" section of a finer grind. 4. Oiliness may also cause oiliness, indicating a need to manually clean the machine. 2. To reset the machine, press the CLOCK and PROGRAM buttons ...


