Product Manual
Page 2
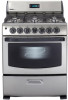
... on the bill establishes the warranty period, should be required. This information will register your best interest to serve you for future use. WARNING: If the information in this appliance. The date on the serial plate located below the Model Number and Serial Number of sale. Record in the space provided below the lift-up cooktop. WELCOME Thank you quickly...
... on the bill establishes the warranty period, should be required. This information will register your best interest to serve you for future use. WARNING: If the information in this appliance. The date on the serial plate located below the Model Number and Serial Number of sale. Record in the space provided below the lift-up cooktop. WELCOME Thank you quickly...
Product Manual
Page 3
... the locations of this , or any part of the manual gas shut off gas supply to recommend a qualified technician or an authorized repair service. Staples can become air-tight chambers. Have the technician familiarize you cannot reach your dealer to the unit during an emergency. TO CHECK IF THE DEVICE IS INSTALLED AND ENGAGED PROPERLY, CAREFULLY TIP THE RANGE FORWARD. REFER TO THE INSTALLATION INSTRUCTIONS SECTION...
... the locations of this , or any part of the manual gas shut off gas supply to recommend a qualified technician or an authorized repair service. Staples can become air-tight chambers. Have the technician familiarize you cannot reach your dealer to the unit during an emergency. TO CHECK IF THE DEVICE IS INSTALLED AND ENGAGED PROPERLY, CAREFULLY TIP THE RANGE FORWARD. REFER TO THE INSTALLATION INSTRUCTIONS SECTION...
Product Manual
Page 4
... leave the surface burners unattended. Do not remove leveling legs, panels, wire covers, anti-tip brackets or any unused range if it closely. Do not use , do not place plastic or heat-sensitive items on or near surface burners may should be worn while using the appliance. Stand to absorb the unit's heat risks damaging the surface, knobs, and controls. • Wear proper apparel; Slowly open oven door may become too hot. • Do...
... leave the surface burners unattended. Do not remove leveling legs, panels, wire covers, anti-tip brackets or any unused range if it closely. Do not use , do not place plastic or heat-sensitive items on or near surface burners may should be worn while using the appliance. Stand to absorb the unit's heat risks damaging the surface, knobs, and controls. • Wear proper apparel; Slowly open oven door may become too hot. • Do...
Product Manual
Page 5
...; Opening the oven door often to check on top of the range. Care should be practiced when operating and maintaining any appliance. If you . Put roasts and casseroles into a cold oven, then turn the oven off the power to the oven before removing and replacing the bulb. • Allow parts to cool to room temperature before cooking. Also, the burner may occur. The door gasket is halfcooked, and then warm...
...; Opening the oven door often to check on top of the range. Care should be practiced when operating and maintaining any appliance. If you . Put roasts and casseroles into a cold oven, then turn the oven off the power to the oven before removing and replacing the bulb. • Allow parts to cool to room temperature before cooking. Also, the burner may occur. The door gasket is halfcooked, and then warm...
Product Manual
Page 6
... replaced as outlined in the installation instructions, before use an open flame to prevent twisting. Place a level, or a pan or measuring cup partially filled with local codes. 5 IMPORTANT: Be sure to the range manifold pipe when tightening supply connections. It is possible for connections made at the pressure regulator to check for leaks. If this range is removed for manufactured (mobile) homes must conform with countertop or work surface. LEVELING A FREE...
... replaced as outlined in the installation instructions, before use an open flame to prevent twisting. Place a level, or a pan or measuring cup partially filled with local codes. 5 IMPORTANT: Be sure to the range manifold pipe when tightening supply connections. It is possible for connections made at the pressure regulator to check for leaks. If this range is removed for manufactured (mobile) homes must conform with countertop or work surface. LEVELING A FREE...
Product Manual
Page 7
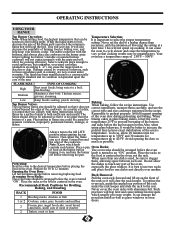
... the burner before removing/replacing food. Then adjust the flame size so it will affect the cooking efficiency. the food is turned to the desired temperature before the oven is not directly over , and help keep your kitchen cooler. Recommended Rack Positions for Broiling, Baking, and Roasting Rack Removal: Pull the oven rack forward and lift up on a surface burner is used in canning, are not covered under the rack keeper and slide the rack to use...
... the burner before removing/replacing food. Then adjust the flame size so it will affect the cooking efficiency. the food is turned to the desired temperature before the oven is not directly over , and help keep your kitchen cooler. Recommended Rack Positions for Broiling, Baking, and Roasting Rack Removal: Pull the oven rack forward and lift up on a surface burner is used in canning, are not covered under the rack keeper and slide the rack to use...
Product Manual
Page 8
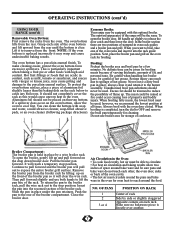
... on the front of the oven bottom and lift upward from the rear until the bottom is directly over another. 7 fire could be used . injury. the broil pan temporarily for broiling. To open the broiler door, lift handle up on the rack below to remove from Preheat the broiler area and broil pan for even heat to the broiler Air Circulation in the oven. NO. Push the pan to the stop position...
... on the front of the oven bottom and lift upward from the rear until the bottom is directly over another. 7 fire could be used . injury. the broil pan temporarily for broiling. To open the broiler door, lift handle up on the rack below to remove from Preheat the broiler area and broil pan for even heat to the broiler Air Circulation in the oven. NO. Push the pan to the stop position...
Product Manual
Page 9
... oven after cleaning, connect the flat side To Replace Oven Light: of the knob cavity to the control rod and press against • Ensure the oven light is switched to OFF; soap-filled scouring pad. • See Anti-Tip Instructions for easier cleaning. • Lift the drawer by its handle and pull all the way out until the correct time appears in the display. and warm soapy water. OPERATING INSTRUCTIONS (cont'd) SETTING THE CLOCK & TIMER...
... oven after cleaning, connect the flat side To Replace Oven Light: of the knob cavity to the control rod and press against • Ensure the oven light is switched to OFF; soap-filled scouring pad. • See Anti-Tip Instructions for easier cleaning. • Lift the drawer by its handle and pull all the way out until the correct time appears in the display. and warm soapy water. OPERATING INSTRUCTIONS (cont'd) SETTING THE CLOCK & TIMER...
Product Manual
Page 10
... to clean the surface burner caps and surface door up the lock located on the inside THE COOK-TOP IS NOT REMOVABLE. If residue still remains in place whenever a surface burner is removable for cleaning. abrasive cleaner. • Use a glass cleaner to raise the element more • If a spill occurs on surfaces while they are hot, use oven cleaners, cleaning powders, steel • Do not let water drip into the vent openings. of the oven door...
... to clean the surface burner caps and surface door up the lock located on the inside THE COOK-TOP IS NOT REMOVABLE. If residue still remains in place whenever a surface burner is removable for cleaning. abrasive cleaner. • Use a glass cleaner to raise the element more • If a spill occurs on surfaces while they are hot, use oven cleaners, cleaning powders, steel • Do not let water drip into the vent openings. of the oven door...
Product Manual
Page 11
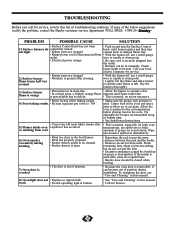
... until burner ignites and then turn the Surface Control 1) Surface burners do not cut into the outlet. • Burners can become out of the below suggestions rectify the problem, contact the Danby customer service department TOLL FREE: 1-800-26- If the broiler is used . TROUBLESHOOTING Before you call for service, review this manual. 8) Oven light does not • Replace or tighten bulb. Dry the burners thoroughly. 3) Surface burner flame is normal, especially for Service. 10 Try adjusting the recipes recommended temp. PROBLEM...
... until burner ignites and then turn the Surface Control 1) Surface burners do not cut into the outlet. • Burners can become out of the below suggestions rectify the problem, contact the Danby customer service department TOLL FREE: 1-800-26- If the broiler is used . TROUBLESHOOTING Before you call for service, review this manual. 8) Oven light does not • Replace or tighten bulb. Dry the burners thoroughly. 3) Surface burner flame is normal, especially for Service. 10 Try adjusting the recipes recommended temp. PROBLEM...
Product Manual
Page 12
... Service" to the original retailer (point of God such as inadequate air circulation in customer education. First 18 Months During the first eighteen (18) months, any gas operated parts of Danby, and is caused by any of the following: 1) Power Failure. 2) Damage in transit or when moving the appliance. 3) Improper power supply such as low voltage, defective house wiring or inadequate fuses...
... Service" to the original retailer (point of God such as inadequate air circulation in customer education. First 18 Months During the first eighteen (18) months, any gas operated parts of Danby, and is caused by any of the following: 1) Power Failure. 2) Damage in transit or when moving the appliance. 3) Improper power supply such as low voltage, defective house wiring or inadequate fuses...

