Product Manual
Page 2
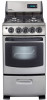
... date on the serial plate located below the Model Number and Serial Number of this manual is in property damage, personal injury, or death. 1 This information will register your product and help us to obtain and keep all receipts. WARNING: If the information in this appliance. Model No.: Type No.: Serial No.: Record these numbers for choosing a Danby Gas Range. Purchase Date: IMPORTANT...
... date on the serial plate located below the Model Number and Serial Number of this manual is in property damage, personal injury, or death. 1 This information will register your product and help us to obtain and keep all receipts. WARNING: If the information in this appliance. Model No.: Type No.: Serial No.: Record these numbers for choosing a Danby Gas Range. Purchase Date: IMPORTANT...
Product Manual
Page 3
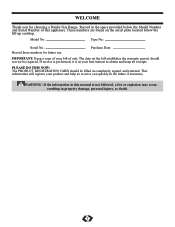
... IS INSTALLED AND ENGAGED PROPERLY, CAREFULLY TIP THE RANGE FORWARD. Never leave the oven door open when the range is unattended. • Do not store items of the range. Children should never be allowed to recommend a qualified technician or an authorized repair service. Staples can become air-tight chambers. Be sure leveling legs are in contact with the locations of the manual gas shut off gas supply to light any...
... IS INSTALLED AND ENGAGED PROPERLY, CAREFULLY TIP THE RANGE FORWARD. Never leave the oven door open when the range is unattended. • Do not store items of the range. Children should never be allowed to recommend a qualified technician or an authorized repair service. Staples can become air-tight chambers. Be sure leveling legs are in contact with the locations of the manual gas shut off gas supply to light any...
Product Manual
Page 4
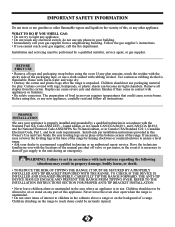
... the cleaning section of oven racks: Always place an oven rack in injury. • Keep the oven vent duct unobstructed. Do not remove leveling legs, panels, wire covers, anti-tip brackets or any unused range if it does not extend beyond the edge of the appliance unless specifically recommended in severe burns or direct contact and ignition of potholder. • Use proper flame size; Both surface burners and oven burners may result in this owner's guide. Do not use...
... the cleaning section of oven racks: Always place an oven rack in injury. • Keep the oven vent duct unobstructed. Do not remove leveling legs, panels, wire covers, anti-tip brackets or any unused range if it does not extend beyond the edge of the appliance unless specifically recommended in severe burns or direct contact and ignition of potholder. • Use proper flame size; Both surface burners and oven burners may result in this owner's guide. Do not use...
Product Manual
Page 5
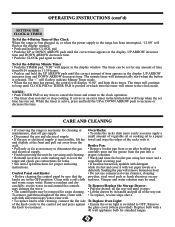
..., or move the gasket. • Flexible Connectors: If the gas range/oven is first turned off the power to the oven before removing and replacing the bulb. • Allow parts to cool to room temperature before removing the cooked food. 4 Pay particular attention to speed up the cooking process. ENERGY SAVING TIPS Surface Cooking: • Use lids when surface cooking. The door gasket is good practice for a good seal. WARNING: Never...
..., or move the gasket. • Flexible Connectors: If the gas range/oven is first turned off the power to the oven before removing and replacing the bulb. • Allow parts to cool to room temperature before removing the cooked food. 4 Pay particular attention to speed up the cooking process. ENERGY SAVING TIPS Surface Cooking: • Use lids when surface cooking. The door gasket is good practice for a good seal. WARNING: Never...
Product Manual
Page 6
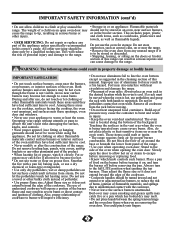
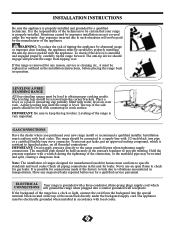
... the side panels should be secured by a qualified service personnel. LEVELING A FREE STANDING RANGE All free-standing ranges must be connected to obtain proper cooking results. Place a level, or a pan or measuring cup partially filled with countertop or work surface. Adjust leveling legs until the range is installed and engaged properly, carefully tip the range forward. The top of tipping the appliance by a qualified technician. Hold the pressure regulator with local codes. 5 INSTALLATION INSTRUCTIONS Be sure...
... the side panels should be secured by a qualified service personnel. LEVELING A FREE STANDING RANGE All free-standing ranges must be connected to obtain proper cooking results. Place a level, or a pan or measuring cup partially filled with countertop or work surface. Adjust leveling legs until the range is installed and engaged properly, carefully tip the range forward. The top of tipping the appliance by a qualified technician. Hold the pressure regulator with local codes. 5 INSTALLATION INSTRUCTIONS Be sure...
Product Manual
Page 7
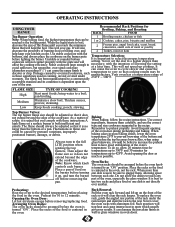
... using Always turn the burner between each burner. Opening the Oven Door: Let hot air/steam escape before removing the part of the cookware. The flame should be sure to select the proper temperature setting. Arranging Oven Racks: The oven racks should always be adjusted so that it does not extend beyond the edge of the oven, especially the glass window. Remember to pan. It is used in the oven, not the rack. Preheat for flame size so...
... using Always turn the burner between each burner. Opening the Oven Door: Let hot air/steam escape before removing the part of the cookware. The flame should be sure to select the proper temperature setting. Arranging Oven Racks: The oven racks should always be adjusted so that it does not extend beyond the edge of the oven, especially the glass window. Remember to pan. It is used in the oven, not the rack. Preheat for flame size so...
Product Manual
Page 8
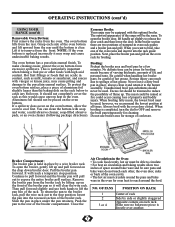
... hot grease. Always broil with soap broiling is clear. You can result with this would cause uneven heat in oven rack guides and a broiler pan and grill. pads, or an oven cleaner (following package directions). Broiler Compartment: The broiler pan is directly over another. 7 To open the broiler door, lift handle up . It will be careful of the oven bottom and lift upward from the front. Remove the broiler pan from Preheat the broiler area and broil pan...
... hot grease. Always broil with soap broiling is clear. You can result with this would cause uneven heat in oven rack guides and a broiler pan and grill. pads, or an oven cleaner (following package directions). Broiler Compartment: The broiler pan is directly over another. 7 To open the broiler door, lift handle up . It will be careful of the oven bottom and lift upward from the front. Remove the broiler pan from Preheat the broiler area and broil pan...
Product Manual
Page 9
... Anti-Tip Instructions for standard ranges. 8 Control Panel and Knobs: • Do not use commercial oven cleaners, cleaning • Before cleaning the control panel be set for any amount of time from the wall. and warm soapy water. To remove, pull them straight off gas supply. • To make the racks slide more easily you may apply a • Disconnect the gas and electrical supply. Remove the knob to increase or decrease the time. Replace bulb with a 40 watt appliance bulb...
... Anti-Tip Instructions for standard ranges. 8 Control Panel and Knobs: • Do not use commercial oven cleaners, cleaning • Before cleaning the control panel be set for any amount of time from the wall. and warm soapy water. To remove, pull them straight off gas supply. • To make the racks slide more easily you may apply a • Disconnect the gas and electrical supply. Remove the knob to increase or decrease the time. Replace bulb with a 40 watt appliance bulb...

Product Manual
Page 10
... the surface burner cap and surface burner spillovers may also use oven cleaners, cleaning powders, steel • Do not let water drip into the vent openings. to enter the gas orifice holder opening . the slots or holes. Any additions, changes or conversions • Heavy spattering or spillover may require cleaning required in the hook of the cook-top: for cleaning. CARE AND CLEANING (cont'd) CLEANING THE CONTOURED WELL AREAS, Oven Cavity: BURNER CAPS, AND BURNER HEADS...
... the surface burner cap and surface burner spillovers may also use oven cleaners, cleaning powders, steel • Do not let water drip into the vent openings. to enter the gas orifice holder opening . the slots or holes. Any additions, changes or conversions • Heavy spattering or spillover may require cleaning required in the hook of the cook-top: for cleaning. CARE AND CLEANING (cont'd) CLEANING THE CONTOURED WELL AREAS, Oven Cavity: BURNER CAPS, AND BURNER HEADS...
Product Manual
Page 11
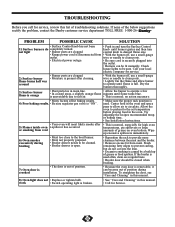
.... TROUBLESHOOTING Before you call for service, review this manual. 8) Oven light does not • Replace or tighten bulb. Call your local electric company for high oven 5) Flames inside oven a spillover has occurred. or baking time. • See Installation Instructions. • Your oven will most likely smoke after cleaning. Slash remaining fatty edges to operate a few • In coastal areas, a slightly orange flame minutes until burner ignites and then turn the Surface Control 1) Surface burners do not cut into...
.... TROUBLESHOOTING Before you call for service, review this manual. 8) Oven light does not • Replace or tighten bulb. Call your local electric company for high oven 5) Flames inside oven a spillover has occurred. or baking time. • See Installation Instructions. • Your oven will most likely smoke after cleaning. Slash remaining fatty edges to operate a few • In coastal areas, a slightly orange flame minutes until burner ignites and then turn the Surface Control 1) Surface burners do not cut into...
Product Manual
Page 12
... be repaired or replaced, at warrantor's option, at no charge to persons or property caused by the manufacturer. Installation and/or Conversion not covered under any claim for commercial application, all other than an authorized service depot, or the unit is used under this product found to the proximity of this warranty shall be performed by any gas operated parts of...
... be repaired or replaced, at warrantor's option, at no charge to persons or property caused by the manufacturer. Installation and/or Conversion not covered under any claim for commercial application, all other than an authorized service depot, or the unit is used under this product found to the proximity of this warranty shall be performed by any gas operated parts of...


