Owners Manual
Page 3
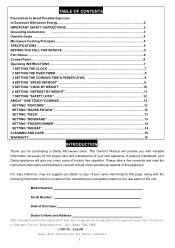
... SERVICE 5 Part Names ...6 Control Panel...6 Operating INSTRUCTIONS 7 1 SETTING THE CLOCK 7 2 SETTING THE OVEN TIMER 8 3 SETTING THE COOKING TIME & POWER LEVEL 8 4 SETTING "SPEED DEFROST 9 5 SETTING "COOK BY WEIGHT 10 6 SETTING "DEFROST BY WEIGHT 11 7 SETTING "SAFETY LOCK 12 ABOUT "ONE TOUCH"COOKING 12 SETTING "POPCORN 12 SETTING "BAKED POTATO 13 SETTING "PIZZA"...13 SETTING "BEVERAGE 13 SETTING "FROZEN DINNER 14 SETTING "REHEAT 14 CLEANING AND CARE 15 WARRANTY...16 INTRODUCTION Thank you with valuable information necessary for general inquiries. Model Number: Serial Number...
... SERVICE 5 Part Names ...6 Control Panel...6 Operating INSTRUCTIONS 7 1 SETTING THE CLOCK 7 2 SETTING THE OVEN TIMER 8 3 SETTING THE COOKING TIME & POWER LEVEL 8 4 SETTING "SPEED DEFROST 9 5 SETTING "COOK BY WEIGHT 10 6 SETTING "DEFROST BY WEIGHT 11 7 SETTING "SAFETY LOCK 12 ABOUT "ONE TOUCH"COOKING 12 SETTING "POPCORN 12 SETTING "BAKED POTATO 13 SETTING "PIZZA"...13 SETTING "BEVERAGE 13 SETTING "FROZEN DINNER 14 SETTING "REHEAT 14 CLEANING AND CARE 15 WARRANTY...16 INTRODUCTION Thank you with valuable information necessary for general inquiries. Model Number: Serial Number...
Owners Manual
Page 5
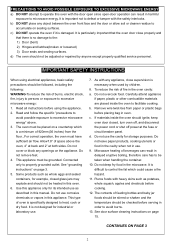
... handling the container. 10. Remove wire twist-ties from the floor., For correct operation, the oven must have sufficient air flow. If materials inside the oven to facilitate cooking. CONTINUES ON PAGE 3 2 c. d) The oven should be grounded. See "grounding instructions" on the appliance. Do not use the cavity for example, closed , turn oven off, and disconnect the power cord or shut off power at both sides. Do not use...
... handling the container. 10. Remove wire twist-ties from the floor., For correct operation, the oven must have sufficient air flow. If materials inside the oven to facilitate cooking. CONTINUES ON PAGE 3 2 c. d) The oven should be grounded. See "grounding instructions" on the appliance. Do not use the cavity for example, closed , turn oven off, and disconnect the power cord or shut off power at both sides. Do not use...
Owners Manual
Page 6
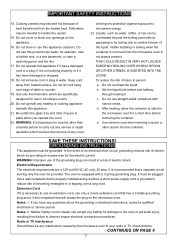
... electrical requirements are specifically designed for example, near a swimming pool, and the like. 17. The oven is provided to carry out any heating or cooking appliance beneath this appliance outdoors. If you operate the oven. 22. Do not operate any service or repair operation which involves the removal of the liquid. Do not operate this product near water, for use only a 3-wire extension cord that has a 3 blade grounding plug...
... electrical requirements are specifically designed for example, near a swimming pool, and the like. 17. The oven is provided to carry out any heating or cooking appliance beneath this appliance outdoors. If you operate the oven. 22. Do not operate any service or repair operation which involves the removal of the liquid. Do not operate this product near water, for use only a 3-wire extension cord that has a 3 blade grounding plug...
Owners Manual
Page 7
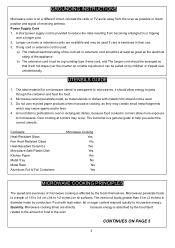
... utensils. The interior of the appliance. related to microwave energy. Food with metallic trim should be used if care is exercised in diameter heats by children or tripped over a longer cord. 2. GROUNDING INSTRUCTIONS Microwave oven is on a different circuit, relocate the radio or TV as far away from becoming entangled in the oven CONTINUES ON PAGE 5 4 Longer cord sets or extension cords are directly because energy...
... utensils. The interior of the appliance. related to microwave energy. Food with metallic trim should be used if care is exercised in diameter heats by children or tripped over a longer cord. 2. GROUNDING INSTRUCTIONS Microwave oven is on a different circuit, relocate the radio or TV as far away from becoming entangled in the oven CONTINUES ON PAGE 5 4 Longer cord sets or extension cords are directly because energy...
Owners Manual
Page 8
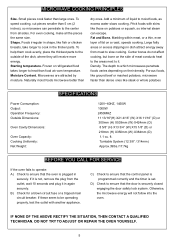
... and the timer is plugged in again securely. D) Check to ensure that the door is not, remove the plug from all the pieces the same size. To help them cook evenly, place the thickest parts to be operating properly, test the outlet with skins like steak or whole potatoes Power Consumption: Output: Operation Frequency: Outside Dimensions: Oven Cavity Dimensions: Oven Capacity: Cooking Uniformity: Net Weight: SPECIFICATIONS 120V~60HZ...
... and the timer is plugged in again securely. D) Check to ensure that the door is not, remove the plug from all the pieces the same size. To help them cook evenly, place the thickest parts to be operating properly, test the outlet with skins like steak or whole potatoes Power Consumption: Output: Operation Frequency: Outside Dimensions: Oven Cavity Dimensions: Oven Capacity: Cooking Uniformity: Net Weight: SPECIFICATIONS 120V~60HZ...
Owners Manual
Page 9
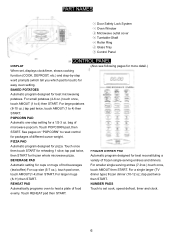
PART NAMES ① Door Safety Lock System ② Oven Window ③ Microwave outlet cover ④ Turntable-Shaft ⑤ Roller Ring ⑥ Glass Tray ⑦ Control Panel CONCONTROL PANEL DISPLAY (Also see following pages for more detail.) When set cook, speed defrost, timer and clock. For small potatoes (4-6 oz.) touch once, touch AMOUT (1 to touch) for easy oven setting. For large potatoes (8-10 oz.) tap pad twice, touch AMOUT (1 to set , displays clock/timer, shows...
PART NAMES ① Door Safety Lock System ② Oven Window ③ Microwave outlet cover ④ Turntable-Shaft ⑤ Roller Ring ⑥ Glass Tray ⑦ Control Panel CONCONTROL PANEL DISPLAY (Also see following pages for more detail.) When set cook, speed defrost, timer and clock. For small potatoes (4-6 oz.) touch once, touch AMOUT (1 to touch) for easy oven setting. For large potatoes (8-10 oz.) tap pad twice, touch AMOUT (1 to set , displays clock/timer, shows...
Owners Manual
Page 10
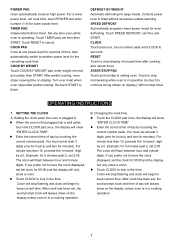
... correct number pads. Controls power level to lock in the time. You must set 2:05. l Touch CLOCK to thaw without excessive outside warming. Turn over meat when oven stops after cooking, also cancel timer. The colon will only show "ENTER CLOCK TIME" l Enter the correct time of day by touching the correct number pads. l Touch the CLOCK pad once, the display will show on display). Set any time even while oven is plugged in setting oven. Setting the clock...
... correct number pads. Controls power level to lock in the time. You must set 2:05. l Touch CLOCK to thaw without excessive outside warming. Turn over meat when oven stops after cooking, also cancel timer. The colon will only show "ENTER CLOCK TIME" l Enter the correct time of day by touching the correct number pads. l Touch the CLOCK pad once, the display will show on display). Set any time even while oven is plugged in setting oven. Setting the clock...
Owners Manual
Page 11
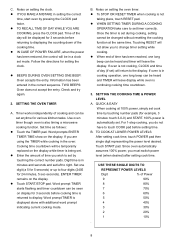
... automatically set left to change timer setting while cooking. l Enter the amount of time you must switch power level (when desired) after setting cook time. Set one long beep can be heard and TIMER will be displayed for 3 seconds before cooking time is not taking place, touch RESET pad. l TO RECALL TIME OF DAY WHILE YOU ARE COOKING, press the CLOCK pad. Word prompt TIMER is also timing a microwave cooking function. SETTING THE COOKING TIME & POWER LEVEL A. l WHEN SETTING TIMER DURING A COOKING OPERATION take care...
... automatically set left to change timer setting while cooking. l Enter the amount of time you must switch power level (when desired) after setting cook time. Set one long beep can be heard and TIMER will be displayed for 3 seconds before cooking time is not taking place, touch RESET pad. l TO RECALL TIME OF DAY WHILE YOU ARE COOKING, press the CLOCK pad. Word prompt TIMER is also timing a microwave cooking function. SETTING THE COOKING TIME & POWER LEVEL A. l WHEN SETTING TIMER DURING A COOKING OPERATION take care...
Owners Manual
Page 12
... of the meat. Change in interior light intensity, and change in display. After defrosting, cook at 100% power for quickest thawing of oven may be seen after setting cook time.) DO NOT TOUCH START PAD. TWO-STAGE COOKING Two-stage cook function lets you cook a food at 50% power level. Touch START/STOP pad. To set . After Stage 1 time has elapsed, signal may feel warm. Touch RESET pad or open door to medium size foods. THESE...
... of the meat. Change in interior light intensity, and change in display. After defrosting, cook at 100% power for quickest thawing of oven may be seen after setting cook time.) DO NOT TOUCH START PAD. TWO-STAGE COOKING Two-stage cook function lets you cook a food at 50% power level. Touch START/STOP pad. To set . After Stage 1 time has elapsed, signal may feel warm. Touch RESET pad or open door to medium size foods. THESE...

Owners Manual
Page 13
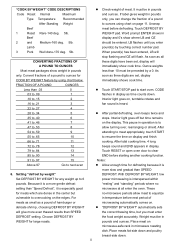
.... Interior light goes on the display. Touch RESET or open oven door to stop flashing and OZ will show cook time. This is heard. MEM shows on display. Unelapsed time will flash. As soon as all these digits have to ounces using chart on code, two beeps signal an error in display and 0's show where LB and OZ should be defrosted and at refrigerated temperature to stir food, turn...
.... Interior light goes on the display. Touch RESET or open oven door to stop flashing and OZ will show cook time. This is heard. MEM shows on display. Unelapsed time will flash. As soon as all these digits have to ounces using chart on code, two beeps signal an error in display and 0's show where LB and OZ should be defrosted and at refrigerated temperature to stir food, turn...
Owners Manual
Page 14
... as all enter the oven. Touch RESET or open oven door to next even 6. Convert fractions of a pound to start oven. l Touch START/STOP pad to ounces for meats which are set , display will immediately show where LB and OZ should be in temperature before defrosting. Interior light goes on the edges. After attending to meat appropriately, touch START to overcooking on , turntable rotates and fan sound is interspersed...
... as all enter the oven. Touch RESET or open oven door to next even 6. Convert fractions of a pound to start oven. l Touch START/STOP pad to ounces for meats which are set , display will immediately show where LB and OZ should be in temperature before defrosting. Interior light goes on the edges. After attending to meat appropriately, touch START to overcooking on , turntable rotates and fan sound is interspersed...
Owners Manual
Page 15
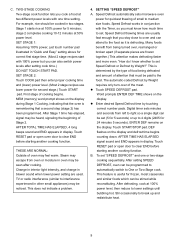
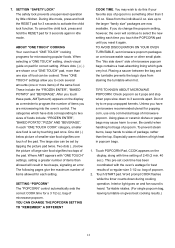
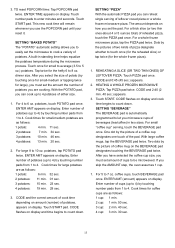
... setting. During idle mode, press and hold the RESET pad for microwaving popular foods. Two dots (..) below picture of smaller-size food signifies one size of microwave popcorn bags contains a heat-absorbing lining which have a microwave recommended utensil for a 3 1/2 oz. Sizes from staining the turntable when hot. Turntable rotates. (For single popcorn bag, leaving turntable on and fan sound is something other small plate. SETTIGN "SAFETY LOCK...
... setting. During idle mode, press and hold the RESET pad for microwaving popular foods. Two dots (..) below picture of smaller-size food signifies one size of microwave popcorn bags contains a heat-absorbing lining which have a microwave recommended utensil for a 3 1/2 oz. Sizes from staining the turntable when hot. Turntable rotates. (For single popcorn bag, leaving turntable on and fan sound is something other small plate. SETTIGN "SAFETY LOCK...
Owners Manual
Page 16
... the BEVERAGE pad twice. Cook times for large), you can cook up to 4) by touching number pads from 1 to 4) by the picture of a coffee cup designates one touch of coffee mug on display. SETTING "PIZZA" With the automatic PIZZA pad you must set the microwave to 4. Touch START. If you use the POPCORN pad until your reset it. For a thick slice...
... the BEVERAGE pad twice. Cook times for large), you can cook up to 4) by touching number pads from 1 to 4) by the picture of a coffee cup designates one touch of coffee mug on display. SETTING "PIZZA" With the automatic PIZZA pad you must set the microwave to 4. Touch START. If you use the POPCORN pad until your reset it. For a thick slice...
Owners Manual
Page 17
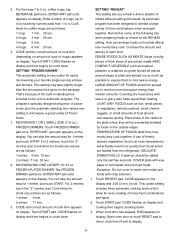
... on the display. 2. Enter number of cups or mugs) appears on the package. Touch START. CODE flashes on the REHEAT setting. SETTING "FROZEN DINNER" This automatic setting is set ) to warm rare meats and foods with wax paper to microwave energy. That's because of the built-in standing time included in the center of cook time appears on display and cooking time begins counting down . MICROWAVE 1 OR 2 SMALL SIZE (7~9 oz...
... on the display. 2. Enter number of cups or mugs) appears on the package. Touch START. CODE flashes on the REHEAT setting. SETTING "FROZEN DINNER" This automatic setting is set ) to warm rare meats and foods with wax paper to microwave energy. That's because of the built-in standing time included in the center of cook time appears on display and cooking time begins counting down . MICROWAVE 1 OR 2 SMALL SIZE (7~9 oz...

Owners Manual
Page 18
.... 7. Remove odors from accidentally turning on. 6. Save These Instructions 15 CLEANING AND CARE 1. The roller ring may occur when the microwave oven is operated under high humidity conditions, this is occasionally necessary to become wet. Do not allow the control panel to remove the glass tray for cleaning. If steam accumulates inside or around the outside surfaces should not be allowed to the operating parts inside of the oven with...
.... 7. Remove odors from accidentally turning on. 6. Save These Instructions 15 CLEANING AND CARE 1. The roller ring may occur when the microwave oven is operated under high humidity conditions, this is occasionally necessary to become wet. Do not allow the control panel to remove the glass tray for cleaning. If steam accumulates inside or around the outside surfaces should not be allowed to the operating parts inside of the oven with...
Owners Manual
Page 19
... Box 1778, 5070 Whitelaw RD, Guelph, Ontario, Canada N1H 6Z9 Telephone: (519) 837-0920 FAX: (519) 837-0449 Warranty Service Carry-In 06/06 Danby Products Inc. GENERAL PROVISIONS No warranty or insurance herein contained or set out shall apply when damage or repair is caused by any electrical parts of this warranty shall be required for all obligations of Danby under the normal operating...
... Box 1778, 5070 Whitelaw RD, Guelph, Ontario, Canada N1H 6Z9 Telephone: (519) 837-0920 FAX: (519) 837-0449 Warranty Service Carry-In 06/06 Danby Products Inc. GENERAL PROVISIONS No warranty or insurance herein contained or set out shall apply when damage or repair is caused by any electrical parts of this warranty shall be required for all obligations of Danby under the normal operating...


