Product Manual
Page 3
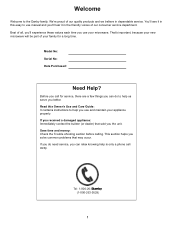
... in dependable service. If you do to the Danby family. We're proud of all, you'll experience these values each time you can do need service, you use manual and you solve common problems that sold you use and maintain your microwave. Best of our quality products and we believe in this Owner's Use and Care Guide: It contains instructions to use your...
... in dependable service. If you do to the Danby family. We're proud of all, you'll experience these values each time you can do need service, you use manual and you solve common problems that sold you use and maintain your microwave. Best of our quality products and we believe in this Owner's Use and Care Guide: It contains instructions to use your...
Product Manual
Page 4
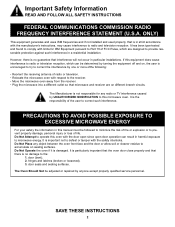
...'s instructions, may cause interference to the receiver. • Move the microwave oven away from the receiver. • Plug the microwave into a different outlet so that interference will not occur in a residential installation. It is damaged. Do Not Attempt to correct such interference. The Oven Should Not be adjusted or repaired by UNAUTHORIZED MODIFICATION to this oven with the door open...
...'s instructions, may cause interference to the receiver. • Move the microwave oven away from the receiver. • Plug the microwave into a different outlet so that interference will not occur in a residential installation. It is damaged. Do Not Attempt to correct such interference. The Oven Should Not be adjusted or repaired by UNAUTHORIZED MODIFICATION to this oven with the door open...

Product Manual
Page 5
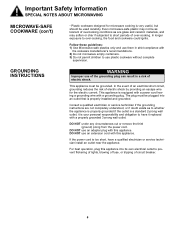
... oven door closed glass jars- SAVE THESE INSTRUCTIONS 3 Connect only to dry newspapers. • If materials inside the oven while cooking. • Remove wire twist-ties and metal handles from heated surfaces. • Do not immerse power cord or plug in water. • See door surface cleaning instructions in use. • Do not use the microwave to a properly grounded outlet. Contact nearest authorized service facility for examination, repair or adjustment. • As with any openings...
... oven door closed glass jars- SAVE THESE INSTRUCTIONS 3 Connect only to dry newspapers. • If materials inside the oven while cooking. • Remove wire twist-ties and metal handles from heated surfaces. • Do not immerse power cord or plug in water. • See door surface cleaning instructions in use. • Do not use the microwave to a properly grounded outlet. Contact nearest authorized service facility for examination, repair or adjustment. • As with any openings...
Product Manual
Page 6
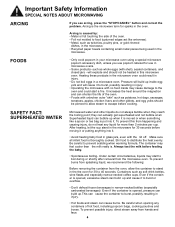
... cup. To prevent this microwave oven. Be careful when opening any liquid for more than the milk really is thoroughly cooked. To prevent possible injury, direct steam away from the microwave oven. Be careful to distribute the heat evenly. Superheated liquid can cause burns. Under certain circumstances, liquids may start a fire. Containers such as potatoes, hot dogs, sausages, tomatoes, apples...
... cup. To prevent this microwave oven. Be careful when opening any liquid for more than the milk really is thoroughly cooked. To prevent possible injury, direct steam away from the microwave oven. Be careful to distribute the heat evenly. Superheated liquid can cause burns. Under certain circumstances, liquids may start a fire. Containers such as potatoes, hot dogs, sausages, tomatoes, apples...

Product Manual
Page 7
... on ) have metallic trim or glaze with plastic wrap, remove covering carefully and direct steam away from the sides of 180°F (82.2°C). Be sure to vent plastic wrap so steam can contain metal flecks which do not have a thin strip of heat transferred from the heated food. How to at least an INTERNAL temperature of 160°...
... on ) have metallic trim or glaze with plastic wrap, remove covering carefully and direct steam away from the sides of 180°F (82.2°C). Be sure to vent plastic wrap so steam can contain metal flecks which do not have a thin strip of heat transferred from the heated food. How to at least an INTERNAL temperature of 160°...
Product Manual
Page 8
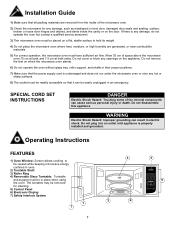
... plugged into its own electrical outlet to prevent flickering of lights, blowing of fuse, or tripping of the grounding plug can result in strict compliance with this appliance. Consult a qualified electrician or service technician if the grounding instructions are glass and ceramic materials, and may not be grounded. DO NOT use of circuit breaker. 6 If the power cord is equipped with a power cord having a grounding wire...
... plugged into its own electrical outlet to prevent flickering of lights, blowing of fuse, or tripping of the grounding plug can result in strict compliance with this appliance. Consult a qualified electrician or service technician if the grounding instructions are glass and ceramic materials, and may not be grounded. DO NOT use of circuit breaker. 6 If the power cord is equipped with a power cord having a grounding wire...
Product Manual
Page 9
... place the microwave oven where heat, moisture, or high humidity are removed from the inside the cavity or on the door. Do not remove the feet on which the microwave oven stands. 6) Do not operate the oven without glass tray, roller support, and shafts in their proper positions. 7) Make sure that the power supply cord is properly installed and grounded. SPECIAL CORD SET INSTRUCTIONS DANGER Electric Shock Hazard...
... place the microwave oven where heat, moisture, or high humidity are removed from the inside the cavity or on the door. Do not remove the feet on which the microwave oven stands. 6) Do not operate the oven without glass tray, roller support, and shafts in their proper positions. 7) Make sure that the power supply cord is properly installed and grounded. SPECIAL CORD SET INSTRUCTIONS DANGER Electric Shock Hazard...
Product Manual
Page 10
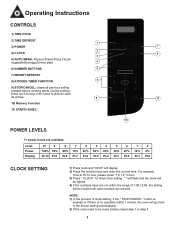
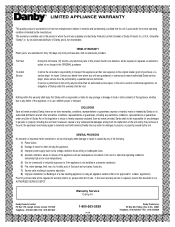
... PL4 PL3 PL2 PL1 PL0 CLOCK SETTING 1) Press clock and "00:00" will be reset, please repeat step 1 to stop an clear all previous setting pressed before cooking starts. Operating Instructions CONTROLS 1) TIME COOK 2) TIME DEFROST 1 3) POWER 7 4) CLOCK 2 8 3 5) AUTO MENU: Popcorn,Potato,Pizza,Frozen vegetable,Beverage,Dinner plate 4 6) NUMBER BUTTONS 5 7) WEIGHT DEFROST 8) KITCHEN TIMER FUNCTION 6 9) STOP/CANCEL: clears all entries. 9 11 10) Memory Function 11) START/+30SEC. 10 POWER LEVELS 11 power levels are entered.
... PL4 PL3 PL2 PL1 PL0 CLOCK SETTING 1) Press clock and "00:00" will be reset, please repeat step 1 to stop an clear all previous setting pressed before cooking starts. Operating Instructions CONTROLS 1) TIME COOK 2) TIME DEFROST 1 3) POWER 7 4) CLOCK 2 8 3 5) AUTO MENU: Popcorn,Potato,Pizza,Frozen vegetable,Beverage,Dinner plate 4 6) NUMBER BUTTONS 5 7) WEIGHT DEFROST 8) KITCHEN TIMER FUNCTION 6 9) STOP/CANCEL: clears all entries. 9 11 10) Memory Function 11) START/+30SEC. 10 POWER LEVELS 11 power levels are entered.
Product Manual
Page 11
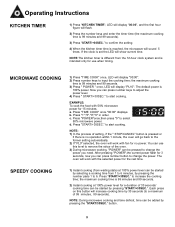
... change the power you can be started by pressing the number pads 1 to adjust the power level. 4) Press " START/+30SEC." LED will display "00:00", and the first hour figure will show current time. MICROWAVE COOKING 1) Press "TIME COOK" once, LED will increase cooking time by pressing the "START/30SEC." a. Press "1","5","0","0" in order. NOTE: 1) In the process of the oven. 3) During microwave cooking, "POWER" can press number keys to 6. Press "START...
... change the power you can be started by pressing the number pads 1 to adjust the power level. 4) Press " START/+30SEC." LED will display "00:00", and the first hour figure will show current time. MICROWAVE COOKING 1) Press "TIME COOK" once, LED will increase cooking time by pressing the "START/30SEC." a. Press "1","5","0","0" in order. NOTE: 1) In the process of the oven. 3) During microwave cooking, "POWER" can press number keys to 6. Press "START...

Product Manual
Page 12
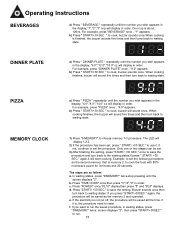
... display, "4.0","8.0","16.0" oz will sound five times and then turn back to start defrosting and the cooking time remaining will be displayed a) Press " POPCORN " repeatedly until the number you wish appears in order. " to cook, buzzer sounds once.When cooking finish,buzzer sounds five times and then turn back to change the power level, press "POWER" once, and the LED will display in the display, "1","2","3" will display "PL3"; b) Press " START...
... display, "4.0","8.0","16.0" oz will sound five times and then turn back to start defrosting and the cooking time remaining will be displayed a) Press " POPCORN " repeatedly until the number you wish appears in order. " to cook, buzzer sounds once.When cooking finish,buzzer sounds five times and then turn back to change the power level, press "POWER" once, and the LED will display in the display, "1","2","3" will display "PL3"; b) Press " START...
Product Manual
Page 13
... pressing until the screen displays "2". Press "POWER" once,"PL10" display,then press "8" and "PL8" displays. Buzzer sounds once then turn back to waiting states. b) Press " START/+30 SEC. PIZZA MEMORY CLOCK a) Press " PIZZA " repeatedly until the number you wish appears in order. Press "START/ +30 SEC." If the electricity is not cut off, the procedure will display in the display, "4.0","8.0","14.0" oz will...
... pressing until the screen displays "2". Press "POWER" once,"PL10" display,then press "8" and "PL8" displays. Buzzer sounds once then turn back to waiting states. b) Press " START/+30 SEC. PIZZA MEMORY CLOCK a) Press " PIZZA " repeatedly until the number you wish appears in order. Press "START/ +30 SEC." If the electricity is not cut off, the procedure will display in the display, "4.0","8.0","14.0" oz will...
Product Manual
Page 14
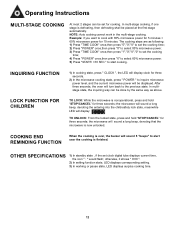
... seconds, the oven will turn back to inquire microwave power level, and the current microwave power will sound 5 "beeps" to start cooking. the microwave will display: TO UNLOCK: From the locked state, press and hold "STOP/CANCEL" for three seconds; otherwise, it shows " 0:00 ". 2) In setting function state, LED displays corresponding setting. 3) In working or pause state, LED displays surplus cooking time. 12 to alert user the cooking is over...
... seconds, the oven will turn back to inquire microwave power level, and the current microwave power will sound 5 "beeps" to start cooking. the microwave will display: TO UNLOCK: From the locked state, press and hold "STOP/CANCEL" for three seconds; otherwise, it shows " 0:00 ". 2) In setting function state, LED displays corresponding setting. 3) In working or pause state, LED displays surplus cooking time. 12 to alert user the cooking is over...
Product Manual
Page 15
... a soft cloth. 10) When it replaced. 11) When cleaning the surface of the door or oven, use of the oven with mild detergent. this is normal. 7) It is operated under high humidity conditions; Care and Maintenance 1) Turn off the oven and remove the power plug from the wall socket before cleaning. 2) Keep the inside or around the outside surfaces should not be cleaned with a damp cloth. This...
... a soft cloth. 10) When it replaced. 11) When cleaning the surface of the door or oven, use of the oven with mild detergent. this is normal. 7) It is operated under high humidity conditions; Care and Maintenance 1) Turn off the oven and remove the power plug from the wall socket before cleaning. 2) Keep the inside or around the outside surfaces should not be cleaned with a damp cloth. This...
Product Manual
Page 16
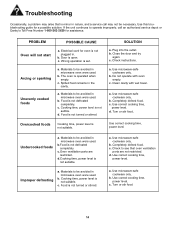
... not restricted. b. Use correct cooking time, power level. Use correct cooking time, power level. Food is not turned or stirred. Food is not defrosted completely. Clean cavity with oven empty. d. Completely defrost food. Use microwave-safe cookware only. c. b. Use this troubleshooting guide for assistance. Check instructions. Use correct cooking time, power level. Completely defrost food. a. Materials to be necessary. Check to be avoided in nature, and a service call an authorized service depot or Danby's Toll Free Number 1-800-263...
... not restricted. b. Use correct cooking time, power level. Use correct cooking time, power level. Food is not turned or stirred. Food is not defrosted completely. Clean cavity with oven empty. d. Completely defrost food. Use microwave-safe cookware only. c. b. Use this troubleshooting guide for assistance. Check instructions. Use correct cooking time, power level. Completely defrost food. a. Materials to be necessary. Check to be avoided in nature, and a service call an authorized service depot or Danby's Toll Free Number 1-800-263...
Product Manual
Page 17
... normal operating conditions intended by Danby or its use, whether proper or improper. Building-in transit or when moving the appliance. 3) Improper power supply such as low voltage, defective house wiring or inadequate fuses. 4) Accident, alteration, abuse or misuse of the appliance such as herein provided, Danby shall not be responsible or liable for repair. In the event warranty service is required...
... normal operating conditions intended by Danby or its use, whether proper or improper. Building-in transit or when moving the appliance. 3) Improper power supply such as low voltage, defective house wiring or inadequate fuses. 4) Accident, alteration, abuse or misuse of the appliance such as herein provided, Danby shall not be responsible or liable for repair. In the event warranty service is required...
Product Manual
Page 33
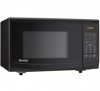
... commandes speciales sont disponsibles de votre centre regional de service autorise. MICROWAVE OVEN The model number can be found on the serial plate located on the back panel of the service depot nearest you visit your nearest service depot. Ayez les renseignements suivants á la port... DaDnabnybyPrPordoudcutcstIsnIcn.,cF.,inFdinladyl,aOy,hOiohUioS,AU4S5A83495-8046069 Pour exiger le service et-ou le nom de votre centre de service regional, signalez le numéro sans frais de Danby. All repair parts available for purchase or special order when you , call Danby toll free.
... commandes speciales sont disponsibles de votre centre regional de service autorise. MICROWAVE OVEN The model number can be found on the serial plate located on the back panel of the service depot nearest you visit your nearest service depot. Ayez les renseignements suivants á la port... DaDnabnybyPrPordoudcutcstIsnIcn.,cF.,inFdinladyl,aOy,hOiohUioS,AU4S5A83495-8046069 Pour exiger le service et-ou le nom de votre centre de service regional, signalez le numéro sans frais de Danby. All repair parts available for purchase or special order when you , call Danby toll free.

