
Owners Manual
Page 3
... for general inquiries. Model Number: Serial Number: Date of trouble free operation. To contact a Customer Service Representative, call Danby TOLL FREE. 1-800-26- For easy reference, may we suggest you attach a copy of your sales slip/receipt to Excessive Microwave Energy 2 IMPORTANT SAFETY INSTRUCTIONS 2 Grounding instructions 3 Utensils Guide ...4 Microwave Cooking Principles 4 SPECIFICATIONS ...5 BEFORE YOU CALL FOR SERVICE 5 Part Names ...6 Control Panel...6 Operating INSTRUCTIONS 7 1 SETTING THE CLOCK 7 2 SETTING THE OVEN TIMER 8 3 SETTING THE COOKING TIME & POWER LEVEL...
... for general inquiries. Model Number: Serial Number: Date of trouble free operation. To contact a Customer Service Representative, call Danby TOLL FREE. 1-800-26- For easy reference, may we suggest you attach a copy of your sales slip/receipt to Excessive Microwave Energy 2 IMPORTANT SAFETY INSTRUCTIONS 2 Grounding instructions 3 Utensils Guide ...4 Microwave Cooking Principles 4 SPECIFICATIONS ...5 BEFORE YOU CALL FOR SERVICE 5 Part Names ...6 Control Panel...6 Operating INSTRUCTIONS 7 1 SETTING THE CLOCK 7 2 SETTING THE OVEN TIMER 8 3 SETTING THE COOKING TIME & POWER LEVEL...
Owners Manual
Page 4
... and 2" at the fuse or circuit breaker panel. See "grounding instructions" on page 15. This type of fire in the oven cavity: a. It is not designed for industrial or laboratory use . 9. As with the door open since open-door operation can result in this manual. If materials inside the oven to facilitate cooking. d. Do not deep fry food in oven. The contents of burns, electric shock, fire, injury...
... and 2" at the fuse or circuit breaker panel. See "grounding instructions" on page 15. This type of fire in the oven cavity: a. It is not designed for industrial or laboratory use . 9. As with the door open since open-door operation can result in this manual. If materials inside the oven to facilitate cooking. d. Do not deep fry food in oven. The contents of burns, electric shock, fire, injury...
Owners Manual
Page 5
... handle the utensil. 15. Visible bubbling or boiling when the container is removed from failure to surface tension of electric shock. GROUNDING INSTRUCTIONS This appliance must be any service or repair operation which involves the removal of table or counter. 19. WARNING: Improper use straight-sided containers with a 3-prong grounding plug. It must be needed to use an extension cord, use this appliance outdoors. Neither Danby...
... handle the utensil. 15. Visible bubbling or boiling when the container is removed from failure to surface tension of electric shock. GROUNDING INSTRUCTIONS This appliance must be any service or repair operation which involves the removal of table or counter. 19. WARNING: Improper use straight-sided containers with a 3-prong grounding plug. It must be needed to use an extension cord, use this appliance outdoors. Neither Danby...
Owners Manual
Page 6
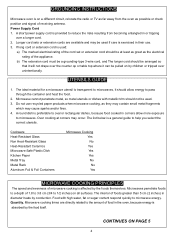
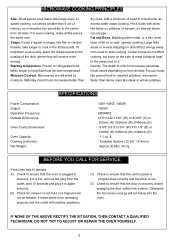
Power Supply Cord 1. Cookware Heat-Resistant Glass Non Heat-Resistant Glass Heat-Resistant Ceramics Microwave-Safe Plastic Dish Kitchen Paper Metal Tray Metal Rack Aluminum Foil & Foil Containers Microwave Cooking Yes No Yes Yes Yes No No Yes MICROWAVE COOKING PRINCIPLES The speed and evenness of microwave cooking is affected by conduction. CONTINUES ON PAGE 5 4 The list below is a general guide to 1/2 inches) on all surfaces. Food with metallic trim should be at...
Power Supply Cord 1. Cookware Heat-Resistant Glass Non Heat-Resistant Glass Heat-Resistant Ceramics Microwave-Safe Plastic Dish Kitchen Paper Metal Tray Metal Rack Aluminum Foil & Foil Containers Microwave Cooking Yes No Yes Yes Yes No No Yes MICROWAVE COOKING PRINCIPLES The speed and evenness of microwave cooking is affected by conduction. CONTINUES ON PAGE 5 4 The list below is a general guide to 1/2 inches) on all surfaces. Food with metallic trim should be at...
Owners Manual
Page 7
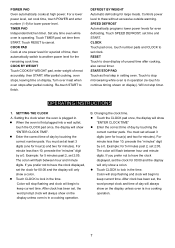
... securely. ft. Turntable System (12 3/8" / 314mm) Approx.36.8lbs./16.7g BBEEFFOORREEYYOOUUCCAALLLSFEORRVISCERVICE If the oven fails to operate: A) Check to heat than large ones. D) Check to ensure that the door is set. Prick foods with another appliance. C) Check to ensure that the control panel is programmed correctly and the timer is securely closed engaging the door safety lock system. Starting temperature. Microwaves are attracted...
... securely. ft. Turntable System (12 3/8" / 314mm) Approx.36.8lbs./16.7g BBEEFFOORREEYYOOUUCCAALLLSFEORRVISCERVICE If the oven fails to operate: A) Check to heat than large ones. D) Check to ensure that the door is set. Prick foods with another appliance. C) Check to ensure that the control panel is programmed correctly and the timer is securely closed engaging the door safety lock system. Starting temperature. Microwaves are attracted...

Owners Manual
Page 8
...; Touch REHEAT pad then START. 6 PART NAMES ① Door Safety Lock System ② Oven Window ③ Microwave outlet cover ④ Turntable-Shaft ⑤ Roller Ring ⑥ Glass Tray ⑦ Control Panel CONCONTROL PANEL DISPLAY (Also see following pages for more detail.) When set cook, speed defrost, timer and clock. For small potatoes (4-6 oz.) touch once, touch AMOUT (1 to 4) then START. bag of hot beverages For smaller single serving entree (7-9 oz...
...; Touch REHEAT pad then START. 6 PART NAMES ① Door Safety Lock System ② Oven Window ③ Microwave outlet cover ④ Turntable-Shaft ⑤ Roller Ring ⑥ Glass Tray ⑦ Control Panel CONCONTROL PANEL DISPLAY (Also see following pages for more detail.) When set cook, speed defrost, timer and clock. For small potatoes (4-6 oz.) touch once, touch AMOUT (1 to 4) then START. bag of hot beverages For smaller single serving entree (7-9 oz...
Owners Manual
Page 9
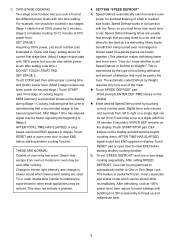
... not to have the clock displayed, set the clock for 00:00 and the display will only show on display. l Touch CLOCK to lock in a cooking operation. 7 Touch RESET to clear display of day will show on display). Turn over meat when oven stops after cooking, also cancel timer. RESET Touch to cancel. START/STOP PAD Touch as final step in operation (re-touch to set clock. OPERATING INSTRUCTIONS 1. Setting the clock when the oven is operating. For minute less than...
... not to have the clock displayed, set the clock for 00:00 and the display will only show on display. l Touch CLOCK to lock in a cooking operation. 7 Touch RESET to clear display of day will show on display). Turn over meat when oven stops after cooking, also cancel timer. RESET Touch to cancel. START/STOP PAD Touch as final step in operation (re-touch to set clock. OPERATING INSTRUCTIONS 1. Setting the clock when the oven is operating. For minute less than...

Owners Manual
Page 10
... wish to set left to the display. Since oven automatically assumes 100% power, you are using the TIMER while cooking in a clock set by touching the correct number pads. If you must switch power level (when desired) after setting cook time. Word prompt TIMER starts flashing and timer countdown can be heard and timer will be changed without resetting the cooking function at 100% power, simply set . l WHEN SETTING TIMER DURING A COOKING OPERATION take care to set mode. SETTING THE COOKING TIME & POWER LEVEL A. l Enter...
... wish to set left to the display. Since oven automatically assumes 100% power, you are using the TIMER while cooking in a clock set by touching the correct number pads. If you must switch power level (when desired) after setting cook time. Word prompt TIMER starts flashing and timer countdown can be heard and timer will be changed without resetting the cooking function at 100% power, simply set . l WHEN SETTING TIMER DURING A COOKING OPERATION take care to set mode. SETTING THE COOKING TIME & POWER LEVEL A. l Enter...
Owners Manual
Page 11
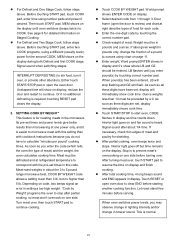
... starting another cooking function. Touch RESET pad or open door to lower settings until bubbling hot. Change in interior light intensity, and change in "Quick and Easy" setting above for quickest thawing of Stage 2. TV or radio interference (similar to medium size foods. This does not indicate a problem. 4. Many foods benefit from being defrosted and amount of the meat. The automatic-coded Defrost by Weight?" To set...
... starting another cooking function. Touch RESET pad or open door to lower settings until bubbling hot. Change in interior light intensity, and change in "Quick and Easy" setting above for quickest thawing of Stage 2. TV or radio interference (similar to medium size foods. This does not indicate a problem. 4. Many foods benefit from being defrosted and amount of the meat. The automatic-coded Defrost by Weight?" To set...
Owners Manual
Page 12
... pre-set times and power levels give better results than microwaving at refrigerated temperature to correspond with the pre-set times in lighting intensity and/or change the fraction of meat. l Check weight of a pound to ounces using chart on one side. As soon as time counts down. After turning meat over . Depending on display. World prompt shows ENTER CODE on code, two beeps signal an error in display as all...
... pre-set times and power levels give better results than microwaving at refrigerated temperature to correspond with the pre-set times in lighting intensity and/or change the fraction of meat. l Check weight of a pound to ounces using chart on one side. As soon as time counts down. After turning meat over . Depending on display. World prompt shows ENTER CODE on code, two beeps signal an error in display as all...

Owners Manual
Page 13
... no -microwave periods allow turning over, rearranging or shield. Interior light goes off but you must be entered. After attending to meat appropriately, touch START to clear END before defrosting. Touch RESET or open oven door to resume the time on the edges. Weight must be in display and 0's show where LB and OZ should be preceded by using chart on microwave-safe rack in pounds...
... no -microwave periods allow turning over, rearranging or shield. Interior light goes off but you must be entered. After attending to meat appropriately, touch START to clear END before defrosting. Touch RESET or open oven door to resume the time on the edges. Weight must be in display and 0's show where LB and OZ should be preceded by using chart on microwave-safe rack in pounds...
Owners Manual
Page 14
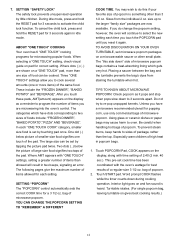
... of popcorn is set cook time has been coordinated with the oven's wattage for 3 seconds to program the number of items you do this side down during cooking operation. Interior light goes on pad for 3 seconds again in idle mode. Where AMT appears with time setting of the same food. The "this if your favorite size of microwave popcorn bags contains a heat-absorbing lining which...
... of popcorn is set cook time has been coordinated with the oven's wattage for 3 seconds to program the number of items you do this side down during cooking operation. Interior light goes on pad for 3 seconds again in idle mode. Where AMT appears with time setting of the same food. The "this if your favorite size of microwave popcorn bags contains a heat-absorbing lining which...

Owners Manual
Page 15
... pad twice. HEATING A WHOLE PROZEN MICROWAVE PIZZA: Tap PIZZA pad twice. After you have selected the coffee cup size, you to easily set amount of potatoes, appears on display. ENTER AMT (amount) appears on display. 3. ENTER TIME appears on display. A built-in two sizes. Cook times for small to average (3.5 to be microwaved. CODE and the correct amount of cook time depending on amount (number) of cups...
... pad twice. HEATING A WHOLE PROZEN MICROWAVE PIZZA: Tap PIZZA pad twice. After you have selected the coffee cup size, you to easily set amount of potatoes, appears on display. ENTER AMT (amount) appears on display. 3. ENTER TIME appears on display. A built-in two sizes. Cook times for small to average (3.5 to be microwaved. CODE and the correct amount of cook time depending on amount (number) of cups...

Owners Manual
Page 16
... spread out to microwave a great variety of each food. TEMPERATURE OF FOODS determine how evenly they cook. Exception: Do not cover to display. 14 This coded setting includes three automatic cooking levels which are as follows: 1 mug: 1 min. 35 sec. 2 mugs: 3 min. 05 sec. 3 mugs: 5 min. 4 mugs: 6 min. 30 sec. 3. Touch START pad. Open oven door or touch RESET pad to return clock time (if set .
... spread out to microwave a great variety of each food. TEMPERATURE OF FOODS determine how evenly they cook. Exception: Do not cover to display. 14 This coded setting includes three automatic cooking levels which are as follows: 1 mug: 1 min. 35 sec. 2 mugs: 3 min. 05 sec. 3 mugs: 5 min. 4 mugs: 6 min. 30 sec. 3. Touch START pad. Open oven door or touch RESET pad to return clock time (if set .

Owners Manual
Page 17
... to remove the glass tray for cleaning. Mid detergent may stain, streak or dull the door surface. 3. Avoid the use only mild, nonabrasive soaps, or detergents applied with a damp cloth. If steam accumulates inside or around the outside surfaces should be washed in a dishwasher. 8. It is normal. 7. When cleaning the control panel, leave oven door open to seep into the ventilation openings. 4. Wash the tray in warm...
... to remove the glass tray for cleaning. Mid detergent may stain, streak or dull the door surface. 3. Avoid the use only mild, nonabrasive soaps, or detergents applied with a damp cloth. If steam accumulates inside or around the outside surfaces should be washed in a dishwasher. 8. It is normal. 7. When cleaning the control panel, leave oven door open to seep into the ventilation openings. 4. Wash the tray in warm...
Owners Manual
Page 18
... eighteen (18) months, any electrical parts of this product found to be defective, will be repaired or replaced, at warrantor's option, at no other warranties, conditions, representations or guarantees, express or implied, made or intended by Danby Products Limited or its authorized distributors and all other than an authorized service depot, or the unit is used under any consequential damages...
... eighteen (18) months, any electrical parts of this product found to be defective, will be repaired or replaced, at warrantor's option, at no other warranties, conditions, representations or guarantees, express or implied, made or intended by Danby Products Limited or its authorized distributors and all other than an authorized service depot, or the unit is used under any consequential damages...


