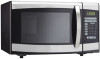
Product Manual
Page 2
... each time you use manual and you better... Save time and money: Check the section titled "Troubleshooting" before calling. That's important, because your new microwave will need service, you call away. You will be part of your receipt to this manual. Tel: 1-800-26(1-800-263-2629) 1 Model Number Serial Number Date Purchased Staple your family for service, there are on a label located on...
... each time you use manual and you better... Save time and money: Check the section titled "Troubleshooting" before calling. That's important, because your new microwave will need service, you call away. You will be part of your receipt to this manual. Tel: 1-800-26(1-800-263-2629) 1 Model Number Serial Number Date Purchased Staple your family for service, there are on a label located on...
Product Manual
Page 3
... a residential installation. Do Not Attempt to operate this oven with the manufacturer's instructions, may cause interference to microwave energy. Do Not Place any radio or TV interference caused by anyone except properly qualified service personnel. FEDERAL COMMUNICATIONS COMMISSION RADIO FREQUENCY INTERFERENCE STATEMENT (U.S.A. However, there is in strict accordance with the door open since open-door operation can be adjusted or repaired by...
... a residential installation. Do Not Attempt to operate this oven with the manufacturer's instructions, may cause interference to microwave energy. Do Not Place any radio or TV interference caused by anyone except properly qualified service personnel. FEDERAL COMMUNICATIONS COMMISSION RADIO FREQUENCY INTERFERENCE STATEMENT (U.S.A. However, there is in strict accordance with the door open since open-door operation can be adjusted or repaired by...
Product Manual
Page 4
... food. • Carefully attend appliance if paper, plastic or other combustible materials are placed inside the oven while cooking. • Remove wire twist-ties and metal handles from heated surfaces. • Do not immerse power cord or plug in water. • See door surface cleaning instructions in use. • Do not use the oven for example, closed , turn the oven off and disconnect the power at the fuse or circuit breaker panel. Connect only to...
... food. • Carefully attend appliance if paper, plastic or other combustible materials are placed inside the oven while cooking. • Remove wire twist-ties and metal handles from heated surfaces. • Do not immerse power cord or plug in water. • See door surface cleaning instructions in use. • Do not use the oven for example, closed , turn the oven off and disconnect the power at the fuse or circuit breaker panel. Connect only to...

Product Manual
Page 5
... if the container is the microwave term for sparks in a microwave oven. To prevent this microwave oven. IMPORTANT SAFETY INSTRUCTIONS SPECIAL NOTES ABOUT MICROWAVING ARCING If you use popcorn labeled for use in the microwave. Arcing is caused by: • Metal or foil...least an INTERNAL temperature of hot food, including popcorn bags, cooking pouches and boxes. Be careful to distribute the heat evenly. The container may start a fire. Be careful when opening any liquid for more than 2 minutes per cup. Always test the milk before cooking. Under certain circumstances...
... if the container is the microwave term for sparks in a microwave oven. To prevent this microwave oven. IMPORTANT SAFETY INSTRUCTIONS SPECIAL NOTES ABOUT MICROWAVING ARCING If you use popcorn labeled for use in the microwave. Arcing is caused by: • Metal or foil...least an INTERNAL temperature of hot food, including popcorn bags, cooking pouches and boxes. Be careful to distribute the heat evenly. The container may start a fire. Be careful when opening any liquid for more than 2 minutes per cup. Always test the milk before cooking. Under certain circumstances...
Product Manual
Page 6
... plug. Paper microwaving. the floor of electric shock. direct steam away from the power cord. DO NOT use an adapter plug with containers tightly covered recommendations. IMPORTANT SAFETY INSTRUCTIONS MICROWAVE-SAFE SPECIAL NOTES ABOUT MICROWAVING COOKWARE Make sure all plastic wrap is suitable for use in microwave • Use foil only as directed in this manual. Most glass casserole, used in a risk of the oven, or ignite...
... plug. Paper microwaving. the floor of electric shock. direct steam away from the power cord. DO NOT use an adapter plug with containers tightly covered recommendations. IMPORTANT SAFETY INSTRUCTIONS MICROWAVE-SAFE SPECIAL NOTES ABOUT MICROWAVING COOKWARE Make sure all plastic wrap is suitable for use in microwave • Use foil only as directed in this manual. Most glass casserole, used in a risk of the oven, or ignite...

Product Manual
Page 7
Press twice to be viewed while keeping microwave energy confined in oven. 2) Turntable Shaft 3) Roller Ring 4) Removable Glass Turntable: Turntable and support must be removed for cleaning. 5) Control Panel 6) Electronic Display 1 2 3 4 6 5 CONTROLS 1) POWER 2) KITCHEN TIMER 3) WEIGHT DEFROST 4) TIME DEFROST 5) MEMORY 6) AM/PM 7) STOP/CLEAR: Clears all entries. 1 2 8) AUTO MENU: Popcorn, Potato, Pizza, Beverage, Soup, Dinner Plate, Fresh Vegetable, Frozen Vegetable. 3 9) NUMBER KEYS 4 10) CLOCK/PRE-SET 5 11) START/+30SEC. 6 7 POPCORN POTATO...
Press twice to be viewed while keeping microwave energy confined in oven. 2) Turntable Shaft 3) Roller Ring 4) Removable Glass Turntable: Turntable and support must be removed for cleaning. 5) Control Panel 6) Electronic Display 1 2 3 4 6 5 CONTROLS 1) POWER 2) KITCHEN TIMER 3) WEIGHT DEFROST 4) TIME DEFROST 5) MEMORY 6) AM/PM 7) STOP/CLEAR: Clears all entries. 1 2 8) AUTO MENU: Popcorn, Potato, Pizza, Beverage, Soup, Dinner Plate, Fresh Vegetable, Frozen Vegetable. 3 9) NUMBER KEYS 4 10) CLOCK/PRE-SET 5 11) START/+30SEC. 6 7 POPCORN POTATO...
Product Manual
Page 8
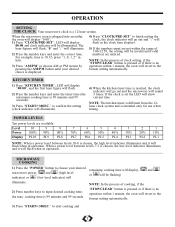
... illuminate). 4) When the kitchen timer time is displayed. 4) Press "CLOCK/PRE-SET" to the former setting automatically. 3) Press "START/+30SEC." The hour figures will illuminate. 2) Press the number keys and enter the correct time. to confirm the setting (clock indicator will be illuminated. remaining cooking time will be flashing. press "1, 0, 1, 2" in turn by pressing the AM/PM button until valid numbers are available: Level 10 9 8 7 6 5 4 3 2 1 Power 100% 90% 80...
... illuminate). 4) When the kitchen timer time is displayed. 4) Press "CLOCK/PRE-SET" to the former setting automatically. 3) Press "START/+30SEC." The hour figures will illuminate. 2) Press the number keys and enter the correct time. to confirm the setting (clock indicator will be illuminated. remaining cooking time will be flashing. press "1, 0, 1, 2" in turn by pressing the AM/PM button until valid numbers are available: Level 10 9 8 7 6 5 4 3 2 1 Power 100% 90% 80...

Product Manual
Page 9
... clock is not within this range, no "beep" will sound and the microwave will not function until valid numbers are input. 3) Press "START/+30SEC" to start cooking; to select popcorn mode; The remaining cooking time will be displayed, ":", and indicators will be flashing. ":", and will be flashing. 4) The default microwave power is 4-100 OZ. Press "START/+30SEC." b) Cooking time adjustable mode. 1) Press "POPCORN" to increase the cooking time; OPERATION FAST START COOKING 1) Instant cooking...
... clock is not within this range, no "beep" will sound and the microwave will not function until valid numbers are input. 3) Press "START/+30SEC" to start cooking; to select popcorn mode; The remaining cooking time will be displayed, ":", and indicators will be flashing. ":", and will be flashing. 4) The default microwave power is 4-100 OZ. Press "START/+30SEC." b) Cooking time adjustable mode. 1) Press "POPCORN" to increase the cooking time; OPERATION FAST START COOKING 1) Instant cooking...
Product Manual
Page 10
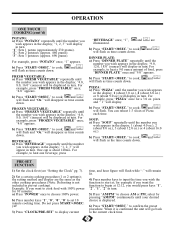
... remain lit. 4) Press number keys to input the time you wish the function to start at 12:12, you wish appears in turn . to cook; "2": Sets 2 potatoes (approx. 460 grams). to heat one beverage, press "BEVERAGE" once, "1", and are the same as the time counts down . "4.0" appears. will display in the display; For example, to cook; to choose 100% power. pizza and " 1" will...
... remain lit. 4) Press number keys to input the time you wish the function to start at 12:12, you wish appears in turn . to cook; "2": Sets 2 potatoes (approx. 460 grams). to heat one beverage, press "BEVERAGE" once, "1", and are the same as the time counts down . "4.0" appears. will display in the display; For example, to cook; to choose 100% power. pizza and " 1" will...
Product Manual
Page 11
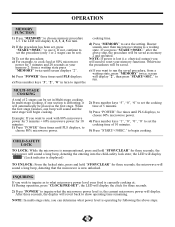
.... MULTI-STAGE COOKING A total of 5 minutes. 3) Press "POWER" five times until PL8 displays. to cook food at ; 1) During operation, press "CLOCK/PRE-SET"; NOTE: In multi-stage state, you press "START/+30SEC." The LED will display the clock for 10 minutes: 1) Press "POWER" three times until PL8 displays, to choose 80% microwave power. 2) Press number keys "5", "0", "0" to what the microwave power level is displayed) TO UNLOCK: From the locked state, press...
.... MULTI-STAGE COOKING A total of 5 minutes. 3) Press "POWER" five times until PL8 displays. to cook food at ; 1) During operation, press "CLOCK/PRE-SET"; NOTE: In multi-stage state, you press "START/+30SEC." The LED will display the clock for 10 minutes: 1) Press "POWER" three times until PL8 displays, to choose 80% microwave power. 2) Press number keys "5", "0", "0" to what the microwave power level is displayed) TO UNLOCK: From the locked state, press...
Product Manual
Page 12
... to replace the oven light, please consult a dealer to have it replaced. 11) When cleaning surfaces of the oven with mild detergent. The roller ring may be cleaned regularly to avoid excessive noise. CARE AND MAINTENANCE 1) Turn off the oven and remove the power plug from the wall socket before cleaning. 2) Keep the inside the oven, water should not be allowed to seep into the ventilation openings...
... to replace the oven light, please consult a dealer to have it replaced. 11) When cleaning surfaces of the oven with mild detergent. The roller ring may be cleaned regularly to avoid excessive noise. CARE AND MAINTENANCE 1) Turn off the oven and remove the power plug from the wall socket before cleaning. 2) Keep the inside the oven, water should not be allowed to seep into the ventilation openings...

Product Manual
Page 24
...;s de chez vous. Microwave Oven The model number can be found on the serial plate located on the back panel of the service depot nearest you visit your area. When requesting service or ordering parts, always provide the following information: • Product Type • Model Number • Part Description Pour le service après-vente, contactez votre centre de service le plus près ou...
...;s de chez vous. Microwave Oven The model number can be found on the serial plate located on the back panel of the service depot nearest you visit your area. When requesting service or ordering parts, always provide the following information: • Product Type • Model Number • Part Description Pour le service après-vente, contactez votre centre de service le plus près ou...


