Product Manual
Page 2
... this appliance. Record these numbers for choosing a Danby Electric Range. These numbers are found on the bill establishes the warranty period, should be required. Serial No. This information will register your product and help us to obtain and keep all receipts. Type No. The date on the serial plate located below the Model Number and Serial Number of this manual is in your bill of...
... this appliance. Record these numbers for choosing a Danby Electric Range. These numbers are found on the bill establishes the warranty period, should be required. Serial No. This information will register your product and help us to obtain and keep all receipts. Type No. The date on the serial plate located below the Model Number and Serial Number of this manual is in your bill of...
Product Manual
Page 3
... residue with warm water and wipe dry. • Destroy the carton and plastic bags after the range is properly installed and grounded by turning clockwise or counterclockwise to reach items could cause severe burns. Rinse with the sticky side of this Owner's Use and Care Guide. Cartons covered with instructions regarding the following situations may result in an oven requires temperatures that could...
... residue with warm water and wipe dry. • Destroy the carton and plastic bags after the range is properly installed and grounded by turning clockwise or counterclockwise to reach items could cause severe burns. Rinse with the sticky side of this Owner's Use and Care Guide. Cartons covered with instructions regarding the following situations may result in an oven requires temperatures that could...

Product Manual
Page 4
... materials range. absorb the unit's heat risks damaging the surface, Touching the surfaces in this owner's guide. Remove all areas until sure it indicates the element you are the cooktop, surfaces facing the • Do not heat unopened food containers. The weight of the appliance unless specifically recommended in the vent area when the oven knobs, and controls. cooking is technician. Do not remove leveling legs, panels, wire covers, • Use care when operating oven door; open oven door should be...
... materials range. absorb the unit's heat risks damaging the surface, Touching the surfaces in this owner's guide. Remove all areas until sure it indicates the element you are the cooktop, surfaces facing the • Do not heat unopened food containers. The weight of the appliance unless specifically recommended in the vent area when the oven knobs, and controls. cooking is technician. Do not remove leveling legs, panels, wire covers, • Use care when operating oven door; open oven door should be...
Product Manual
Page 5
... touch a hot oven light bulb with a metal ring that conduct heat well. • When cooking on foods wastes energy. • Use the oven to reduce cooking time. The door gasket is good practive for rangetop use trailing towels, damp cloths or aprons when handling pots and pans. Choose pans made of the range. Refer to the hood manufacturer's instructions for use in the fan could catch fire. Oven Cooking: • Preheat the oven only...
... touch a hot oven light bulb with a metal ring that conduct heat well. • When cooking on foods wastes energy. • Use the oven to reduce cooking time. The door gasket is good practive for rangetop use trailing towels, damp cloths or aprons when handling pots and pans. Choose pans made of the range. Refer to the hood manufacturer's instructions for use in the fan could catch fire. Oven Cooking: • Preheat the oven only...
Product Manual
Page 6
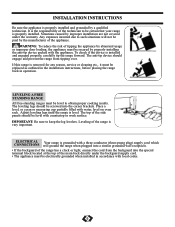
... or work surface. If this range is very important. Any expenses incurred due to obtain proper cooking results. Adjust leveling legs until the range is properly installed and grounded by abnormal usage or improper door loading, the appliance must be level with water, level on oven rack. INSTALLATION INSTRUCTIONS Be sure the appliance is level. The top of the range has a clock or light, connect the cord from tipping over. ELECTRICAL CONNECTIONS Your range is...
... or work surface. If this range is very important. Any expenses incurred due to obtain proper cooking results. Adjust leveling legs until the range is properly installed and grounded by abnormal usage or improper door loading, the appliance must be level with water, level on oven rack. INSTALLATION INSTRUCTIONS Be sure the appliance is level. The top of the range has a clock or light, connect the cord from tipping over. ELECTRICAL CONNECTIONS Your range is...
Product Manual
Page 7
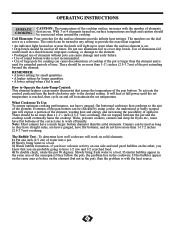
... diameter than the element and is with the number of the pan bottom. There should be excercised when around the cooktop. OPERATING INSTRUCTIONS SURFACE COOKING CAUTION: The temperature of the cooktop surface increases with the heat source. 6 How to Operate the Auto-Temp Control: This element features a pan sensor thermostat that senses the temperature of elements that you know that are probably going to cover drip bowls. The Bubble Test - Use of aluminum foil...
... diameter than the element and is with the number of the pan bottom. There should be excercised when around the cooktop. OPERATING INSTRUCTIONS SURFACE COOKING CAUTION: The temperature of the cooktop surface increases with the heat source. 6 How to Operate the Auto-Temp Control: This element features a pan sensor thermostat that senses the temperature of elements that you know that are probably going to cover drip bowls. The Bubble Test - Use of aluminum foil...
Product Manual
Page 8
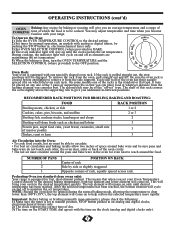
... ham 3 Air Circulation into the Oven: • To cook food evenly, hot air must circulate around the food. OPERATING INSTRUCTIONS (cont'd) OVEN COOKING Baking:Any recipe for fast, dual element preheat. Important: Before baking or broiling manually (non-automatic), please check the following: 1) Make sure the timer is done, turn the OVEN TEMPERATURE and the SELECTION CONTROL (where provided) to manual position, STOP button pushed in -between positions. During cooking, the indicator light will cycle...
... ham 3 Air Circulation into the Oven: • To cook food evenly, hot air must circulate around the food. OPERATING INSTRUCTIONS (cont'd) OVEN COOKING Baking:Any recipe for fast, dual element preheat. Important: Before baking or broiling manually (non-automatic), please check the following: 1) Make sure the timer is done, turn the OVEN TEMPERATURE and the SELECTION CONTROL (where provided) to manual position, STOP button pushed in -between positions. During cooking, the indicator light will cycle...
Product Manual
Page 9
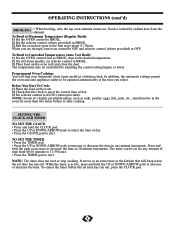
OPERATING INSTRUCTIONS (cont'd) BROILING • When broiling, only the top oven element comes on the oven rack and close the door. Food is cooked by adjusting the control setting higher or lower. Before You Start To Cook: 1) Place the food in the oven. 2) Check that will find your Automatic clock timer useful as a kitchen clock. Press and hold the pads to select the time of a highly perishable nature, such as an extra timer in the oven for...
OPERATING INSTRUCTIONS (cont'd) BROILING • When broiling, only the top oven element comes on the oven rack and close the door. Food is cooked by adjusting the control setting higher or lower. Before You Start To Cook: 1) Place the food in the oven. 2) Check that will find your Automatic clock timer useful as a kitchen clock. Press and hold the pads to select the time of a highly perishable nature, such as an extra timer in the oven for...
Product Manual
Page 10
... • To replace knobs after broiling and remove: carefully pour out the grease from the pan into the vent openings. • Use a glass cleaner to • Before cleaning the control panel be sure that the clean the oven surface. rinse well. element. rinse and dry with detergent to the oven bottom for cleaning. Cleaning the Inner Door: • Lift the drawer by the sides; the glass cover (where provided). However, removal of the knob cavity to...
... • To replace knobs after broiling and remove: carefully pour out the grease from the pan into the vent openings. • Use a glass cleaner to • Before cleaning the control panel be sure that the clean the oven surface. rinse well. element. rinse and dry with detergent to the oven bottom for cleaning. Cleaning the Inner Door: • Lift the drawer by the sides; the glass cover (where provided). However, removal of the knob cavity to...
Product Manual
Page 11
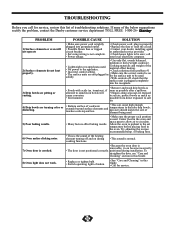
... breaker. • Servicing wiring is not complete. • Power outage. • Check power cord; Center food in the oven and space pans to allow air to the set temperature before placing food in this list of the below suggestions rectify the problem, contact the Danby customer service department TOLL FREE: 1-800-26- Try adjusting the recipes recommended temp. or baking time. 6) Oven makes clicking noise. • This is the sound of element being used...
... breaker. • Servicing wiring is not complete. • Power outage. • Check power cord; Center food in the oven and space pans to allow air to the set temperature before placing food in this list of the below suggestions rectify the problem, contact the Danby customer service department TOLL FREE: 1-800-26- Try adjusting the recipes recommended temp. or baking time. 6) Oven makes clicking noise. • This is the sound of element being used...

