
Installation Instructions
Page 1
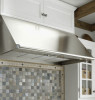
Installation Instructions Epicure® and Millennia® Wall Mount Range Hoods For use with models: EH30, EH36, EH42, EH48, EH54, MH30, MH36 and MH48 Part No. 102139 Rev. Tested in accordance with the latest edition of ANSI/UL 507 standard for electric fans and can/csa-c22.2 no. 113 standard for use with all dacor® ranges and cooktops. J Approved for fans and ventilators.
Installation Instructions Epicure® and Millennia® Wall Mount Range Hoods For use with models: EH30, EH36, EH42, EH48, EH54, MH30, MH36 and MH48 Part No. 102139 Rev. Tested in accordance with the latest edition of ANSI/UL 507 standard for electric fans and can/csa-c22.2 no. 113 standard for use with all dacor® ranges and cooktops. J Approved for fans and ventilators.

Installation Instructions
Page 2
... Safety Instructions 1 Important Information About Safety Instructions 1 General Safety Precautions 2 Product Specifications 3 General Specifications 3 Dimensions 4 Product Specifications 5 Parts List 5 Planning the Installation 6 Cabinet Layout 6 Power Supply 6 Preparing for Installation 8 Verify the Package Contents 8 Mounting Location Preparation... ready. Pacific Time Web site: www.Dacor.com Dacor Distinctive Service (for changes to view it. Remove the filters to specifications. © 2008 Dacor, all rights reserved. Dacor assumes no liability for repairs under warranty ...
... Safety Instructions 1 Important Information About Safety Instructions 1 General Safety Precautions 2 Product Specifications 3 General Specifications 3 Dimensions 4 Product Specifications 5 Parts List 5 Planning the Installation 6 Cabinet Layout 6 Power Supply 6 Preparing for Installation 8 Verify the Package Contents 8 Mounting Location Preparation... ready. Pacific Time Web site: www.Dacor.com Dacor Distinctive Service (for changes to view it. Remove the filters to specifications. © 2008 Dacor, all rights reserved. Dacor assumes no liability for repairs under warranty ...
Installation Instructions
Page 4
...or cooktop installation instructions for the minimum and maximum vertical distance from the appliance being used . Do not use . Contact the nearest Dacor authorized service representative at (800) 793-0093, or at the fuse box circuit breaker and lock the electrical panel door to become blocked...children above or around the cooktop, range or range hood. • The minimum vertical distance between the cooktop surface and the exterior part of fire, electric shock, serious injury or death when using the appliance. Do not store items of interest to exhaust hazardous or ...
...or cooktop installation instructions for the minimum and maximum vertical distance from the appliance being used . Do not use . Contact the nearest Dacor authorized service representative at (800) 793-0093, or at the fuse box circuit breaker and lock the electrical panel door to become blocked...children above or around the cooktop, range or range hood. • The minimum vertical distance between the cooktop surface and the exterior part of fire, electric shock, serious injury or death when using the appliance. Do not store items of interest to exhaust hazardous or ...

Installation Instructions
Page 7
...cm) 13 ¾" (34.9 cm) Dimensions of Optional AHT10 Transition For dual exhaust models, See page 7 for more information 9" (22.9 cm) ¾" (1.9 cm) Parts List C •A 2 temporary mounting brackets • B Temporary mounting hardware • C Hood assembly with filters (size and style varies with model) •D Blower mounting ...for installations E requiring rear exhaust configuration • E Light replacement tool A • F Literature •G Light bulbs (quantity varies with model) G •H Dacor Stainless Steel Cleaner B D F STAINLESS STEEL CLEANER H 5
...cm) 13 ¾" (34.9 cm) Dimensions of Optional AHT10 Transition For dual exhaust models, See page 7 for more information 9" (22.9 cm) ¾" (1.9 cm) Parts List C •A 2 temporary mounting brackets • B Temporary mounting hardware • C Hood assembly with filters (size and style varies with model) •D Blower mounting ...for installations E requiring rear exhaust configuration • E Light replacement tool A • F Literature •G Light bulbs (quantity varies with model) G •H Dacor Stainless Steel Cleaner B D F STAINLESS STEEL CLEANER H 5

Installation Instructions
Page 10
...Extend the line down 10" (25.4 cm) from where the top of the hood will be located. Center it either behind all parts have everything necessary for hole locations. If mounting the unit to a drywall or plastered surface, install a reinforced mounting block between the ... on page 4. Suggested electrical location Hood location Duct Cutout 1. Preparing for Installation Verify the Package Contents Electrical Service Installation Unpack the parts box and verify that all hood mounting locations. If any item is installed. • Temporary mounting brackets, and the screws and...
...Extend the line down 10" (25.4 cm) from where the top of the hood will be located. Center it either behind all parts have everything necessary for hole locations. If mounting the unit to a drywall or plastered surface, install a reinforced mounting block between the ... on page 4. Suggested electrical location Hood location Duct Cutout 1. Preparing for Installation Verify the Package Contents Electrical Service Installation Unpack the parts box and verify that all hood mounting locations. If any item is installed. • Temporary mounting brackets, and the screws and...

Installation Instructions
Page 23
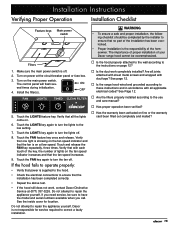
... that all the lights come on the warranty card or during initialization. 4. Verify that no part of the installation has been overlooked. • Proper installation is not responsible for location. Dacor is the responsibility of the homeowner. The importance of proper installation of lights on the fan ... hood fails to operate properly: • Verify that power is on page 16 and 17? □□ Is the duct work , contact Dacor Distinctive Service at (877) 337-3226. Verify that with all joints attached with sheet metal screws and wrapped with duct tape? The control panel will...
... that all the lights come on the warranty card or during initialization. 4. Verify that no part of the installation has been overlooked. • Proper installation is not responsible for location. Dacor is the responsibility of the homeowner. The importance of proper installation of lights on the fan ... hood fails to operate properly: • Verify that power is on page 16 and 17? □□ Is the duct work , contact Dacor Distinctive Service at (877) 337-3226. Verify that with all joints attached with sheet metal screws and wrapped with duct tape? The control panel will...

Installation Instructions
Page 29
Tested in accordance with the latest edition of ANSI/UL 507 standard for electric fans and can/csa-c22.2 no. 113 standard for use with all dacor® ranges and cooktops. E Approved for fans and ventilators. Installation Instructions Epicure® Wall Mount Range Hood with Remote Blower For use with models: EHR30, EHR36, EHR42, EHR48, EHR54 Part No. 103781 Rev.
Tested in accordance with the latest edition of ANSI/UL 507 standard for electric fans and can/csa-c22.2 no. 113 standard for use with all dacor® ranges and cooktops. E Approved for fans and ventilators. Installation Instructions Epicure® Wall Mount Range Hood with Remote Blower For use with models: EHR30, EHR36, EHR42, EHR48, EHR54 Part No. 103781 Rev.
Installation Instructions
Page 30
...you begin the installation process. to change without notice. Pacific Time Web site: www.Dacor.com Dacor Distinctive Service (for changes to specifications. © 2008 Dacor, all rights reserved. Remove the filters to 4:00 p.m. The model and serial ...Instructions 1 Important Information About Safety Instructions 1 General Safety Precautions 2 Product Specifications 3 General Specifications 3 Dimensions 4 Product Specifications 5 Parts List 5 Planning the Installation 6 Cabinet Layout 6 Power Supply 6 Preparing for future reference and the local electrical inspector's use...
...you begin the installation process. to change without notice. Pacific Time Web site: www.Dacor.com Dacor Distinctive Service (for changes to specifications. © 2008 Dacor, all rights reserved. Remove the filters to 4:00 p.m. The model and serial ...Instructions 1 Important Information About Safety Instructions 1 General Safety Precautions 2 Product Specifications 3 General Specifications 3 Dimensions 4 Product Specifications 5 Parts List 5 Planning the Installation 6 Cabinet Layout 6 Power Supply 6 Preparing for future reference and the local electrical inspector's use...

Installation Instructions
Page 32
... to children above or around the cooktop, range or range hood. • The minimum vertical distance between the cooktop surface and the exterior part of the cooktop or range. Consult the range or cooktop installation instructions for examination, repair or adjustment. • Keep all packaging materials away... often to prevent grease fires and maintain performance. • If the cooktop and range hood are in the use . Contact the nearest Dacor authorized service representative at (800) 793-0093, or at the fuse box circuit breaker and lock the electrical panel door to prevent power ...
... to children above or around the cooktop, range or range hood. • The minimum vertical distance between the cooktop surface and the exterior part of the cooktop or range. Consult the range or cooktop installation instructions for examination, repair or adjustment. • Keep all packaging materials away... often to prevent grease fires and maintain performance. • If the cooktop and range hood are in the use . Contact the nearest Dacor authorized service representative at (800) 793-0093, or at the fuse box circuit breaker and lock the electrical panel door to prevent power ...

Installation Instructions
Page 35
...cm) 26 7/8" 12 3/8" 4 1/2" EHR4212 41 7/8" (106.4 cm) (68.3 cm) (31.4 cm) (11.4 cm) C EHR4812 47 7/8" (121.6 cm) EHR4218 41 7/8" (106.4 cm) EHR3018 29 7/8" (75.9 cm) EHR3618 35 7/8" (91.1 cm) 26 7/8" 18" 6 1/8" (68.3 cm) (45.7 cm) (15.6 cm) EHR4818 47 7/8" (121.6 cm) EHR5418 53 7/8 (... AHT10 Transition For dual exhaust models, See page 7 for more information 13 ¾" (34.9 cm) 9" (22.9 cm) ¾" (1.9 cm) Parts List •A Hood assembly with filters (size and style varies with model) •D Light replacement tool • B 2 temporary mounting brackets •E Literature...
...cm) 26 7/8" 12 3/8" 4 1/2" EHR4212 41 7/8" (106.4 cm) (68.3 cm) (31.4 cm) (11.4 cm) C EHR4812 47 7/8" (121.6 cm) EHR4218 41 7/8" (106.4 cm) EHR3018 29 7/8" (75.9 cm) EHR3618 35 7/8" (91.1 cm) 26 7/8" 18" 6 1/8" (68.3 cm) (45.7 cm) (15.6 cm) EHR4818 47 7/8" (121.6 cm) EHR5418 53 7/8 (... AHT10 Transition For dual exhaust models, See page 7 for more information 13 ¾" (34.9 cm) 9" (22.9 cm) ¾" (1.9 cm) Parts List •A Hood assembly with filters (size and style varies with model) •D Light replacement tool • B 2 temporary mounting brackets •E Literature...

Installation Instructions
Page 38
... manufacturer or a qualified HVAC specialist. • Do not use duct work that all parts have everything necessary for further information. Two staggered 45° angles are used , try to the parts list on page 5. Two anchors and screws are better than the recommended types above. ... hood. Contact your local behind all governing codes and ordinances during installation are provided with the mounting holes in place Unpack the parts box and verify that is missing or damaged, please contact the dealer immedi- model and configuration. during block between them in ...
... manufacturer or a qualified HVAC specialist. • Do not use duct work that all parts have everything necessary for further information. Two staggered 45° angles are used , try to the parts list on page 5. Two anchors and screws are better than the recommended types above. ... hood. Contact your local behind all governing codes and ordinances during installation are provided with the mounting holes in place Unpack the parts box and verify that is missing or damaged, please contact the dealer immedi- model and configuration. during block between them in ...
Installation Instructions
Page 45
.... ON OFF 5. Touch and release the FAN key repeatedly, three times. If the hood fails to operate properly: • Verify that no part of the installation has been overlooked. • Proper installation is supplied to the hood. • Check the electrical connections to the instructions on at... sheet metal screws and wrapped with each touch of the key, the number of the homeowner. Do not attempt to correct a faulty installation. Dacor is off. 2. Are all applicable electrical codes? Touch the LIGHTS key again to the use and care manual? □□ Has proper ...
.... ON OFF 5. Touch and release the FAN key repeatedly, three times. If the hood fails to operate properly: • Verify that no part of the installation has been overlooked. • Proper installation is supplied to the hood. • Check the electrical connections to the instructions on at... sheet metal screws and wrapped with each touch of the key, the number of the homeowner. Do not attempt to correct a faulty installation. Dacor is off. 2. Are all applicable electrical codes? Touch the LIGHTS key again to the use and care manual? □□ Has proper ...

Use & Care Manuals
Page 1
Use and Care Manual Epicure® and Millennia® Range Hoods Models: EH30, EH36, EH42, EH48, EH54, EHR30, EHR36, EHR42, EHR48, EHR54, MH30, MH36, MH48 Style varies Style varies. F MMooddelelEEHH3468shSohwown.n Ta b l e o f C o n t e n t s Important Safety Instructions 1 Parts of the Range Hood 3 Operating Instructions 4 Cleaning and Maintenance 5 Before You Call For Service 7 Warranty and Service 8 Warranty Card Back Cover Part No. 102138 Rev.
Use and Care Manual Epicure® and Millennia® Range Hoods Models: EH30, EH36, EH42, EH48, EH54, EHR30, EHR36, EHR42, EHR48, EHR54, MH30, MH36, MH48 Style varies Style varies. F MMooddelelEEHH3468shSohwown.n Ta b l e o f C o n t e n t s Important Safety Instructions 1 Parts of the Range Hood 3 Operating Instructions 4 Cleaning and Maintenance 5 Before You Call For Service 7 Warranty and Service 8 Warranty Card Back Cover Part No. 102138 Rev.

Use & Care Manuals
Page 4
...To reduce the risk of electric shock, before servicing the range hood, switch power off . • Do not install, repair or replace any part of the range hood unless specifically recommended in this range hood to the accompanying installation instructions. Always turn off the burner. c. Use proper pan ... to children above or around the cooktop, range or range hood. • The minimum vertical distance between the cooktop surface and the exterior part of the surface element. • TO REDUCE THE RISK OF INJURY TO PERSONS IN THE EVENT OF A RANGE TOP GREASE FIRE: a. Crepes...
...To reduce the risk of electric shock, before servicing the range hood, switch power off . • Do not install, repair or replace any part of the range hood unless specifically recommended in this range hood to the accompanying installation instructions. Always turn off the burner. c. Use proper pan ... to children above or around the cooktop, range or range hood. • The minimum vertical distance between the cooktop surface and the exterior part of the surface element. • TO REDUCE THE RISK OF INJURY TO PERSONS IN THE EVENT OF A RANGE TOP GREASE FIRE: a. Crepes...

Use & Care Manuals
Page 5
... Inches 54 Inches Hood Height 12 Inches 18 Inches 12 Inches 18 Inches 12 Inches 18 Inches 12 Inches 18 Inches 18 Inches Filters 2 2 2 2 3 3 4 4 4 Lights 2 2 2 2 2 2 3 3 3 3 Part of lights and location depends on the model. The fan forces heat and smoke into the duct system which vents to control your hood's various...
... Inches 54 Inches Hood Height 12 Inches 18 Inches 12 Inches 18 Inches 12 Inches 18 Inches 12 Inches 18 Inches 18 Inches Filters 2 2 2 2 3 3 4 4 4 Lights 2 2 2 2 2 2 3 3 3 3 Part of lights and location depends on the model. The fan forces heat and smoke into the duct system which vents to control your hood's various...

Use & Care Manuals
Page 7
...prevent scratching, do not reinstall damaged filters (see page 6 for instructions on how to the directions on the package. See page 4 for replacement part numbers). To Clean the Filter(s): Hand wash the filter(s) in the manner specified. • Use only the types of the filter into the...off power to the hood at the circuit breaker panel or fuse box before reinstalling. Cleaning Stainless Steel Surfaces Clean stainless steel surfaces with Dacor Cook Top Cleaning Creme. Rinse and dry with a mild detergent solution or dishwashing soap. Cleaning the Light Lens Use a mild glass ...
...prevent scratching, do not reinstall damaged filters (see page 6 for instructions on how to the directions on the package. See page 4 for replacement part numbers). To Clean the Filter(s): Hand wash the filter(s) in the manner specified. • Use only the types of the filter into the...off power to the hood at the circuit breaker panel or fuse box before reinstalling. Cleaning Stainless Steel Surfaces Clean stainless steel surfaces with Dacor Cook Top Cleaning Creme. Rinse and dry with a mild detergent solution or dishwashing soap. Cleaning the Light Lens Use a mild glass ...

Use & Care Manuals
Page 8
...the light bulb. Remove the right filter and turn off the main power switch. 2. Turn on at the circuit breaker or fuse box. Replacement Parts Dacor Part Number Description 700975 Halogen bulb replacement kit 101617 Filter Product Specifications* Total Connected 120 Vac, 60 Hz, 9 Amp. Max. Load (10 Amp...the lens of a single bulb and suction cup, available from the bulb and put it on the light replacement tool A (provided with Dacor Part No. 700975. Screw the new bulb into the light fixture clockwise until the bulb comes loose. 4. Turn the tool counter-clockwise until it...
...the light bulb. Remove the right filter and turn off the main power switch. 2. Turn on at the circuit breaker or fuse box. Replacement Parts Dacor Part Number Description 700975 Halogen bulb replacement kit 101617 Filter Product Specifications* Total Connected 120 Vac, 60 Hz, 9 Amp. Max. Load (10 Amp...the lens of a single bulb and suction cup, available from the bulb and put it on the light replacement tool A (provided with Dacor Part No. 700975. Screw the new bulb into the light fixture clockwise until the bulb comes loose. 4. Turn the tool counter-clockwise until it...

Use & Care Manuals
Page 10
... EXCLUSIVE REMEDIES. Pacific Time Contact us know. IN NO EVENT SHALL DACOR BE LIABLE FOR INCIDENTAL EXPENSE OR CONSEQUENTIAL DAMAGES. We will remedy the defect without charge to replace the defective part. All delivery, installation, and labor costs are the responsibility of purchase..., due to a defect in material or workmanship, DACOR will furnish a new part, F.O.B. This warranty gives you specific legal rights, and you...
... EXCLUSIVE REMEDIES. Pacific Time Contact us know. IN NO EVENT SHALL DACOR BE LIABLE FOR INCIDENTAL EXPENSE OR CONSEQUENTIAL DAMAGES. We will remedy the defect without charge to replace the defective part. All delivery, installation, and labor costs are the responsibility of purchase..., due to a defect in material or workmanship, DACOR will furnish a new part, F.O.B. This warranty gives you specific legal rights, and you...

Use & Care Manuals
Page 12
... the support you activate it online or return this form for mailing list purposes. Another Dacor Owner D. Other 3. Part of the information on this form to be sincerely appreciated. cut here Web site: Corporate phone: www.Dacor.com (800) 793-0093 WARRANTY INFORMATION IMPORTANT: Your warranty will be a proper way of such...
... the support you activate it online or return this form for mailing list purposes. Another Dacor Owner D. Other 3. Part of the information on this form to be sincerely appreciated. cut here Web site: Corporate phone: www.Dacor.com (800) 793-0093 WARRANTY INFORMATION IMPORTANT: Your warranty will be a proper way of such...
